
1. Overview
Magento 2 Store Credit extension is a useful tool that can help fasten the refund process and increase customer loyalty. Accordingly, you can refund by store credit right into Customer Account. Customers can spend the credit on later purchases.
Besides refund, you can adjust the store credit wallet as wished - It is all based on your marketing purposes.

2. How Does It Work?
2.1 General configs
Please go to Store ⇒ Configuration ⇒ BSSCommerce ⇒ Store Credit.
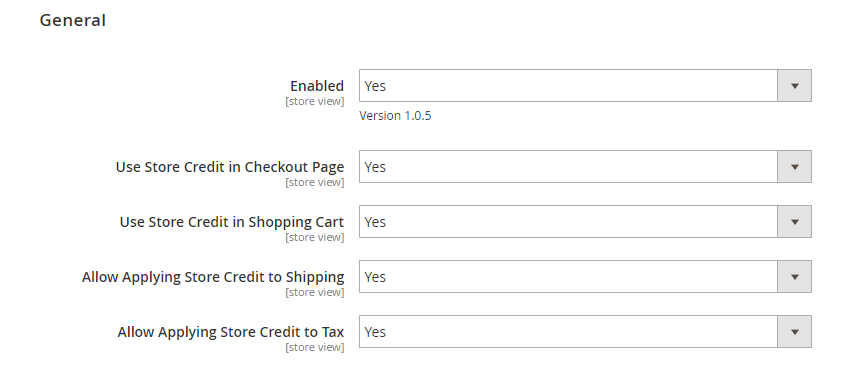
In Enabled: choose Yes to enable the extension.
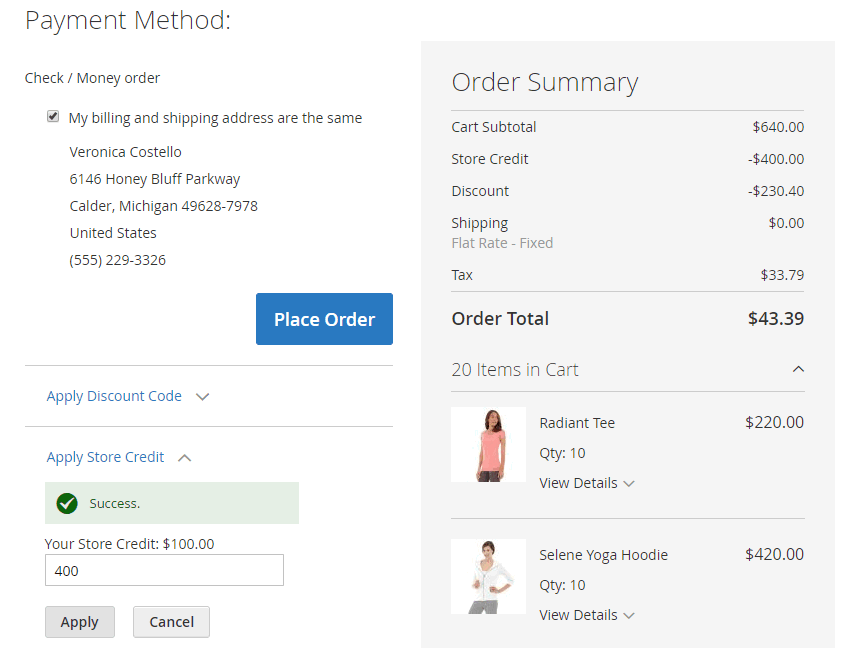
In Use Store Credit in Checkout Page: choose Yes to allow customers to apply store credit to pay for the order on the checkout page, or No to not allow.
In Use Store Credit in Shopping Cart: choose Yes to allow customers to apply store credit to pay for order on the shopping cart page, or No to not allow.
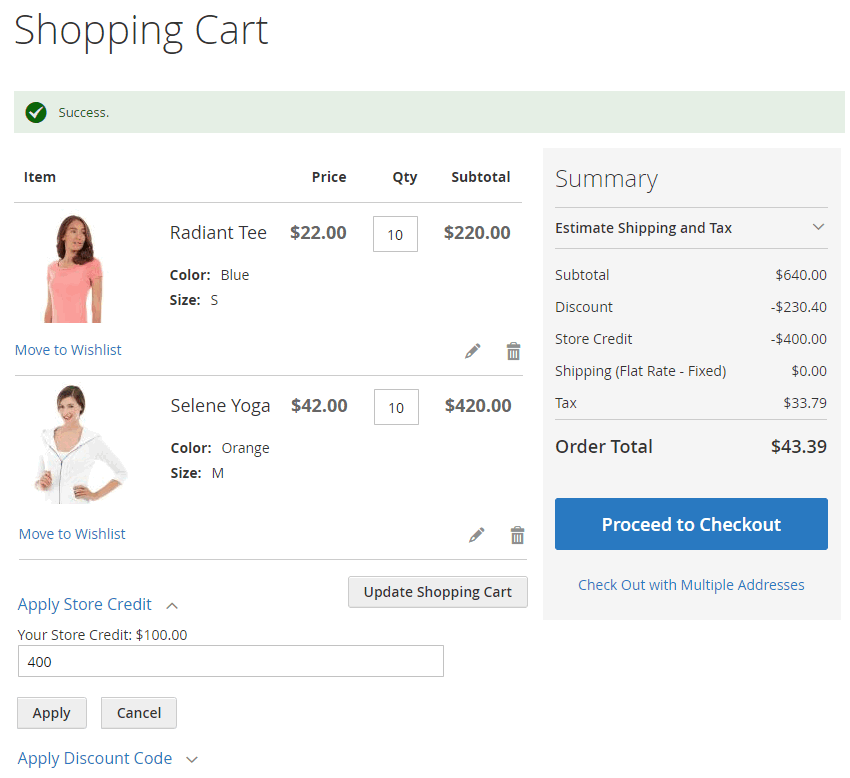
*Note: In the formulas below, store credit, discount, subtotal, shipping fee, tax have a positive value. In Order Summary, store credit and discount are displayed with a minus symbol (-) before its positive value.
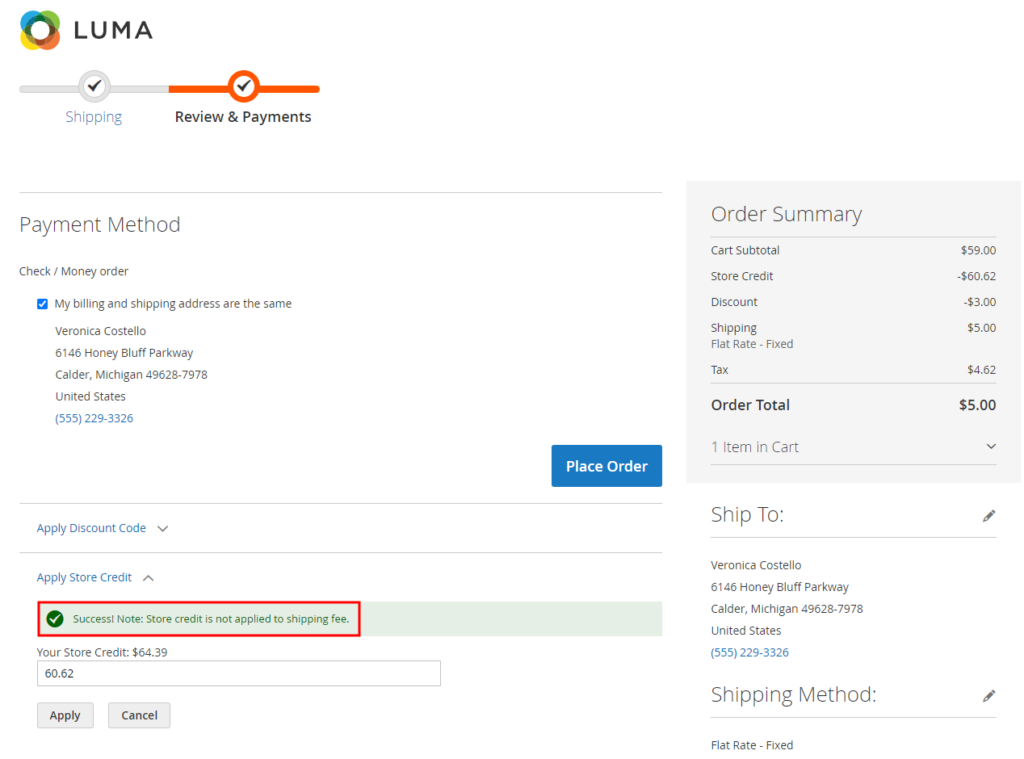
In Allow Applying Store Credit to Shipping:
- If you choose Yes, customers can use the store credit to pay for the shipping fee: store credit = subtotal + tax - discount.
- If you choose No, customers can't use the store credit to pay for the shipping fee even if they apply a store credit value more than the amount: subtotal + tax - discount.
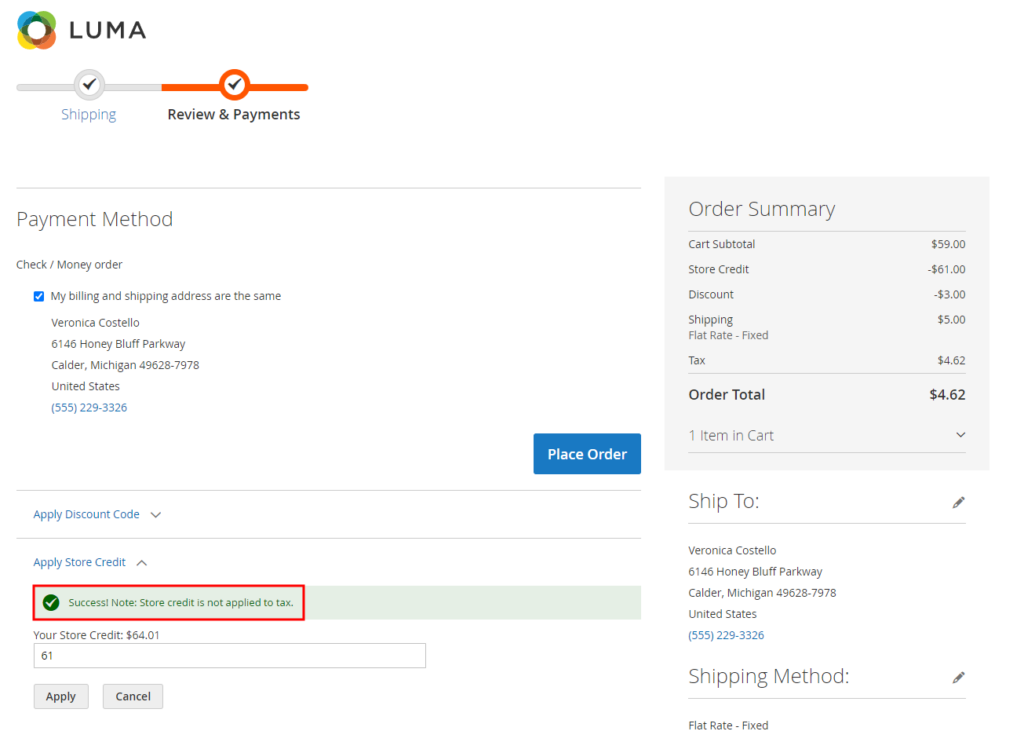
In Allow Applying Store Credit to Tax:
- If you choose Yes, customers can use the store credit to pay the tax fee: store credit = subtotal + shipping fee - discount.
- If you choose No for Allow Applying Store Credit to Tax, customers can't use the store credit to pay for the tax even if they applies a store credit value more than the amount: subtotal + shipping fee - discount.
In case you choose No for both Allow Applying Store Credit to Tax & Allow Applying Store Credit to Shipping, customers can't use the store credit to pay for both the shipping fee and the tax even if they applies a store credit value more than the amount: subtotal - discount.

*Notes:
+ If you disable both “Use Store Credit in Checkout Page” and “Use Store Credit in Shopping Cart”, there aren’t fields to enter store credit value, shipping fee can’t be paid by store credit even if you enable or disable this config.
+ To display Store Credit in the Shopping cart and the Checkout page, refunds on the credit card (2.3) or updated credit in the backend (2.5) are required first.
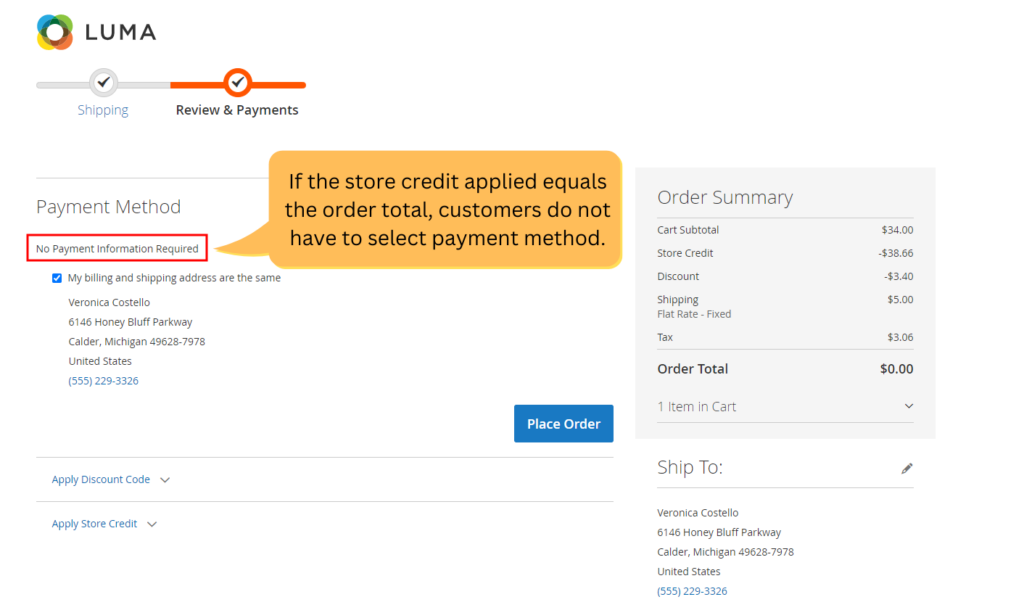
+ If the value entered in Apply Store Credit box equals the order total in the shopping cart or checkout page, the payment method options will be hidden.
+ If you choose checkout with another currency (not base currency), the Order Summary is displayed with this currency.

2.2 Email configs
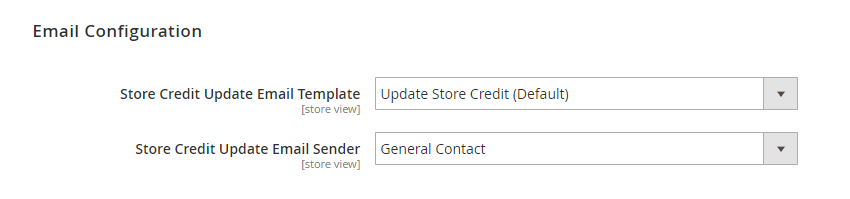
In Store Credit Update Email Template: select an email template to send customers information about store credit update.
You can go to Marketing ⇒ Email Templates to edit or add a new email template as you want.
In Store Credit Update Email Sender: select an available email sender of your website.
Remember to Save config.
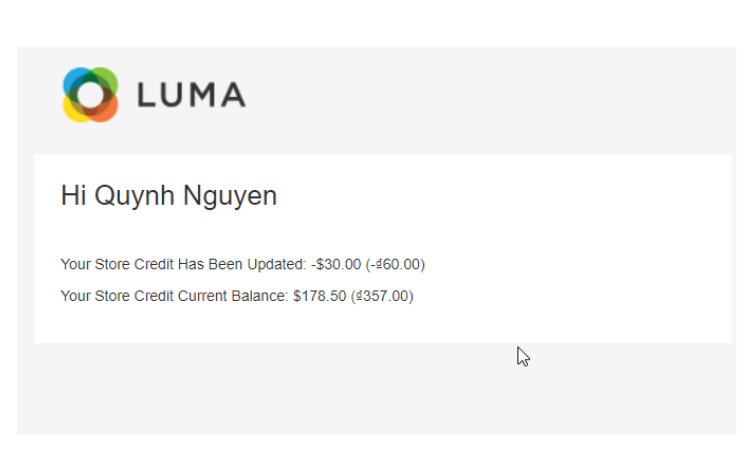
*Note: The email update store credit will show 2 currencies if you checkout without base currency.
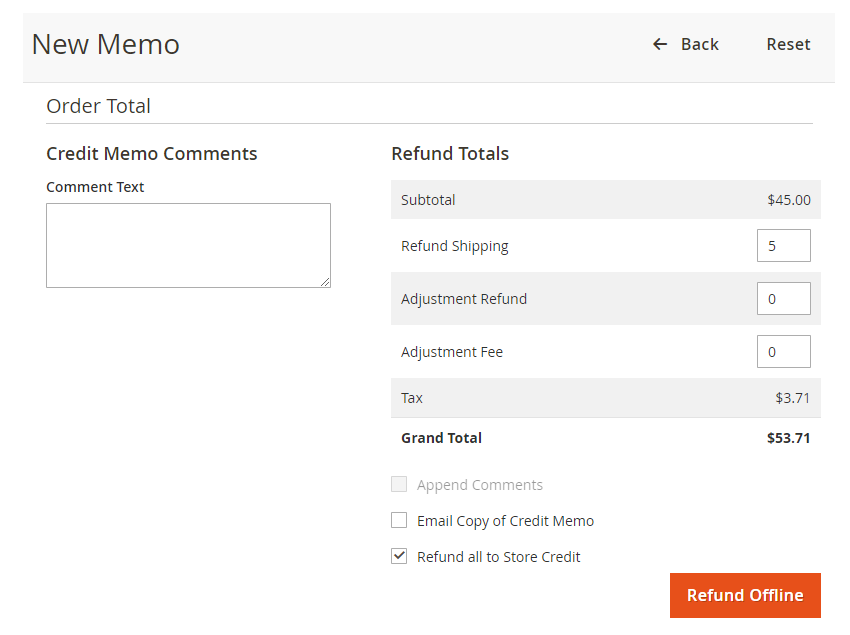
2.3 Refund to Store Credit
When creating credit memos, you can choose Refund to Store Credit option to transfer the refund to customer store credit.
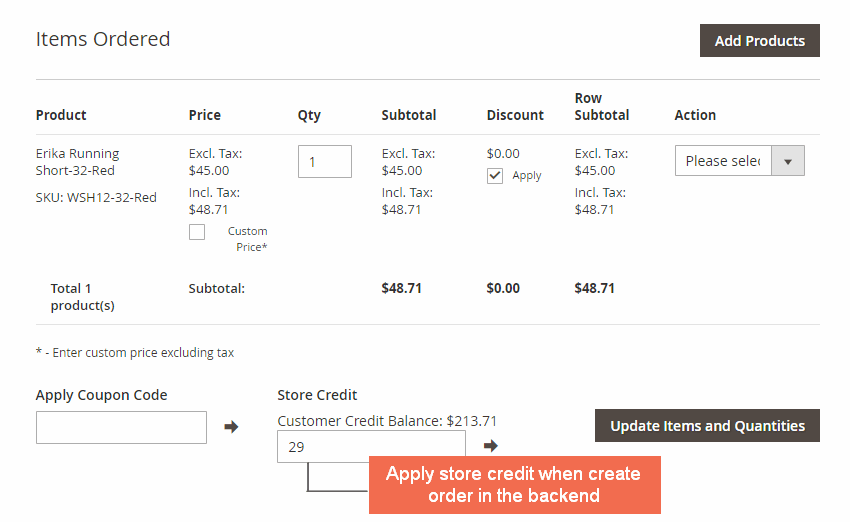
2.4 Apply Store Credit for backend orders
When creating orders from the backend, you can also apply for the Store Credit.
2.5 Manage Store Credit balances
Choose a specific account under Customers and open Store Credit under that account.
In Statistic, you can update track and update the value of store credit and notify customers to come back soon to spend the credit.
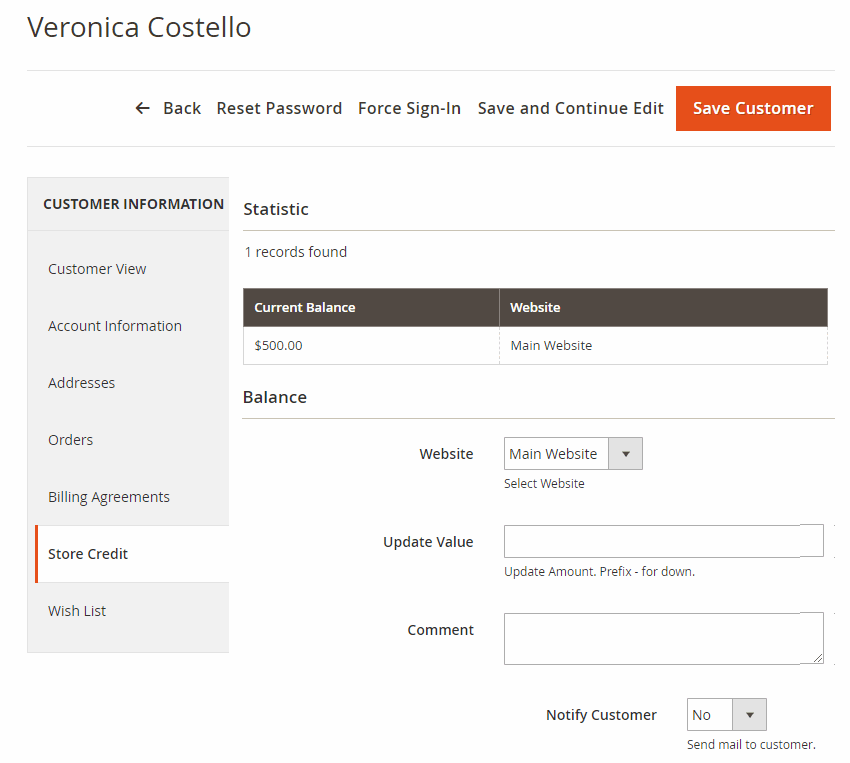
- In Balance section, you can update the store credit balance of the customer.
- Website: select a website to update store credit on this website. Please make sure that you Shared Customer Accounts globally to associate the account to all websites. (go to Store ⇒ Configuration ⇒ Customers ⇒ Customer Configuration ⇒ Account Sharing Options, in Share Customer Accounts, select Global option)
- Update Value: enter a number to update store credit amount, add – in the number prefix to subtract the store credit balance.
- Comment: add a comment about store credit update
- Notify Customer: choose Yes to send customer notification email about store credit update, or No to not send.
In History, you can view store credit transaction history of the customer in a grid. This grid includes:
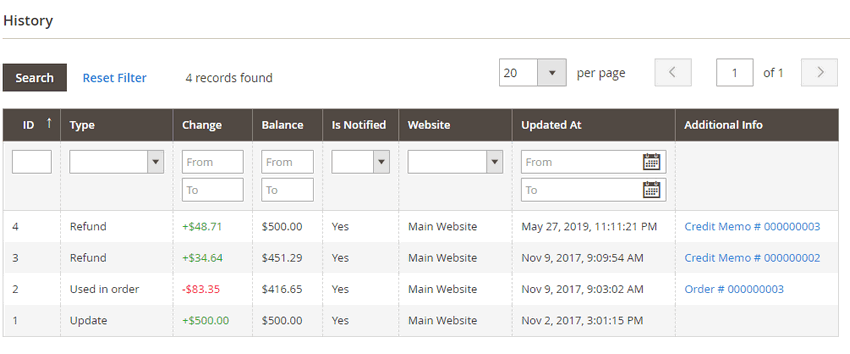
*Notes: The Statistic and History section are also displayed in the customer information page in the frontend for the customer.
2.6 Track Store Credit transactions
2.6.1 Store Credit Transaction
Please go to Admin Panel ⇒ BSS STORE CREDIT ⇒ Transactions to view information of all store credit transactions in your site.
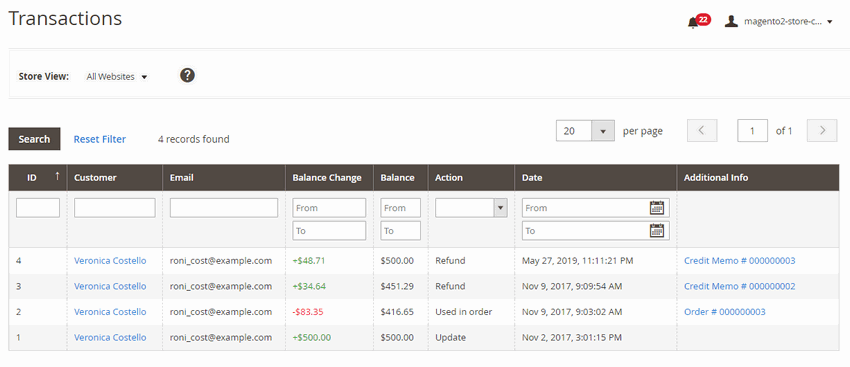
- Transaction ID column: number of transaction.
- Customer column: customer name linked to customer information page in the backend.
- Email column: email of the omer.
- Balance Change column: the amount of store credit was added or subtracted.
- Balance column: store credit balance after the transaction took place
- In Action column: the action makes store credit balance change
- Date column: the specific time and date that the transaction happened.
- Additional Info column: more information about the transaction, you can click on links to view orders or credit memos.
2.6.2 Summary Store Credit Transaction Chart Report
Open Report under BSS STORE CREDIT.

The chart displays the summary store credit increment and decrements on your site, you can set the duration time and select to view the report of store credit by day, month or year.
This module works well with multiple websites, you can see the detailed report of each website by selecting one in the website config.
Press the Refresh button to view the chart exported from your settings.