
1. Overview
Add Multiple Products To Cart for Magento 2 allows adding multiple products right in the product lists (category pages and search result pages.) Custom options are available to choose in the popup.
This extension is strongly recommended for B2B/wholesale customers who have no time to go to the product page by product page.
Note: This module does not support the Internet Explorer browser.

2. How Does It Work?
Please go to Stores ⇒ Configuration ⇒ BSSCOMMERCE ⇒ Ajax Add Multiple Products Cart.
2.1 General Configs
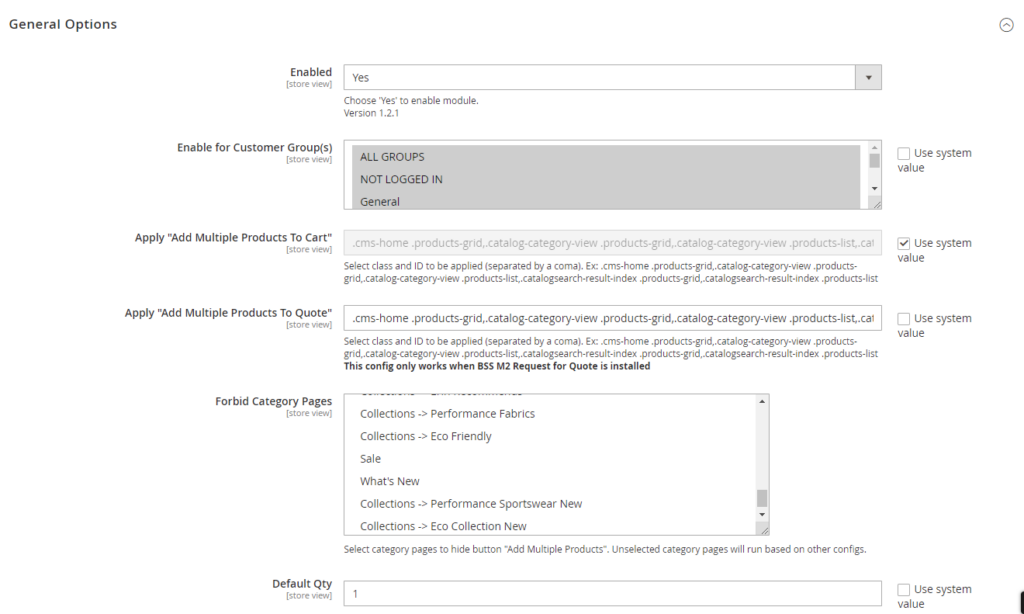
In Enabled: Choose Yes to enable the module or choose No to disable it.
In Enable for Customer Group(s): Only chosen groups are allowed to add multiple products to cart.
In Apply “Add Multiple Products To Cart”: Select class and ID to be applied to the module (separated by a comma).
For example: .cms-home .products-grid,.catalog-category-view .productsgrid,.catalogcategory-view .products-list
In Apply “Add Multiple Products To Quote”: Similar to "Add Multiple Products To Cart". However, this config is available only if you install this module with BSS M2 Request for Quote.
In Forbid Category Pages: Choose to exclude categories that you don't want to show 'Add all products to Quote" button & "Add all products to Cart" button. If leave blanks, then the rules will be appiled accordingly to other configurations.
In Default Qty: Select default quantity displaying in quantity box.
*Note:
- The “Add Multiple Products” configuration only works with the product list having a similar structure to the product list page on the default category page or default widget.
- If you want to apply the functions to other customized pages, you need to fix the HTML structure.
- Config Apply "Add Multiple Products To Quote" only works when BSS M2 Request for Quote is also installed.
- The extension works well with all product types, except for products having the type of custom options to be File.
2.2 Button, Checkbox, Qty Box
![]()
- In Position of “Add all products” button: Choose where to display the Add all to cart button, as long as it is convenient for your customers: Top, Bottom, Both (Top and Bottom) or Right (Scroll)
Here is an example of the button in the Top position.
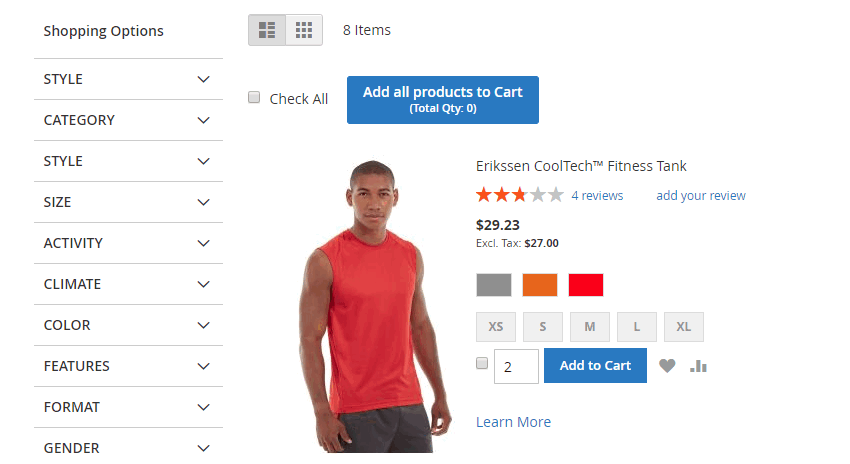
- In Display Total Product or Total Qty: Choose to display the total number of selected products in the Add all to cart button.
- In Show Product checkbox: Choose Yes to show checkbox next to each product.
- In Show Selected Icon: Choose Yes to show an icon to mark selected product.
- In Selected Icon Image: Upload the icon you want to display. The recommended dimension is 30x30px.
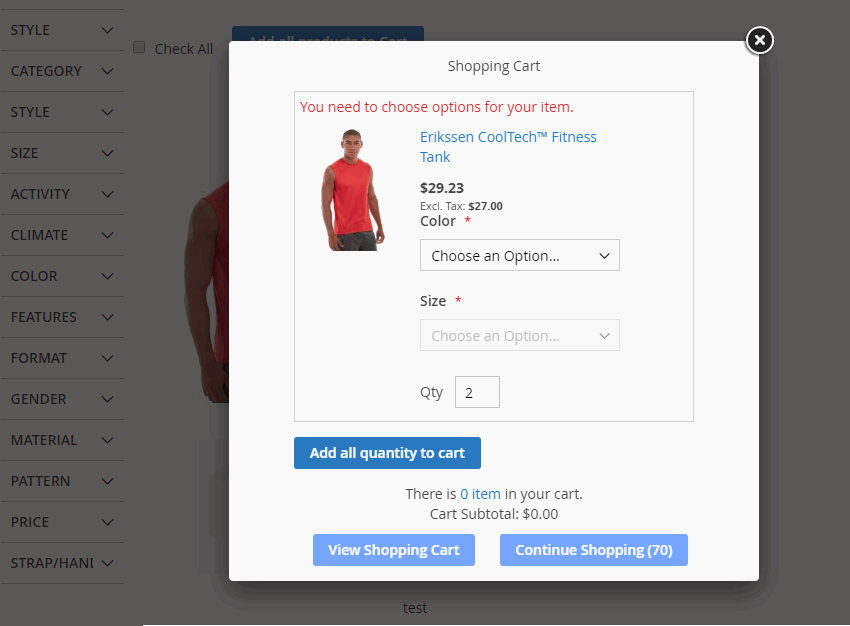
2.3 Popup Setting
Please define:
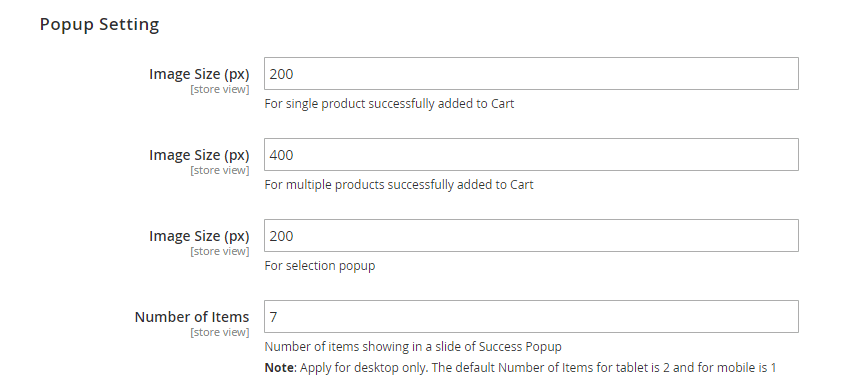
- Image size (px) – For single product successfully added to Cart, shown in the success pop-up in case of adding only one product to cart.
- Image size (px) – For multiple products successfully added to Cart, shown in the success pop-up in case of adding multiple products to cart.
- Image size (px) – For selection popup: Choose the image size of the product in the popup shown to specify options and quantity
- Number of Items displayed in one success popup for desktop screens. The default Number of Items for the tablet is 2 and for mobile is 1.)
Also, choose the effect of slide in popup:

- Slide Speed: choose the transition duration of the slide in a millisecond.
- Auto Slide: choose Yes for the slide in the success pop-up to be moved automatically.
- Show Product Price: choose Yes show product price when adding only one product to cart.
- Show Product Image: choose Yes to show the products’ images in the success popup.
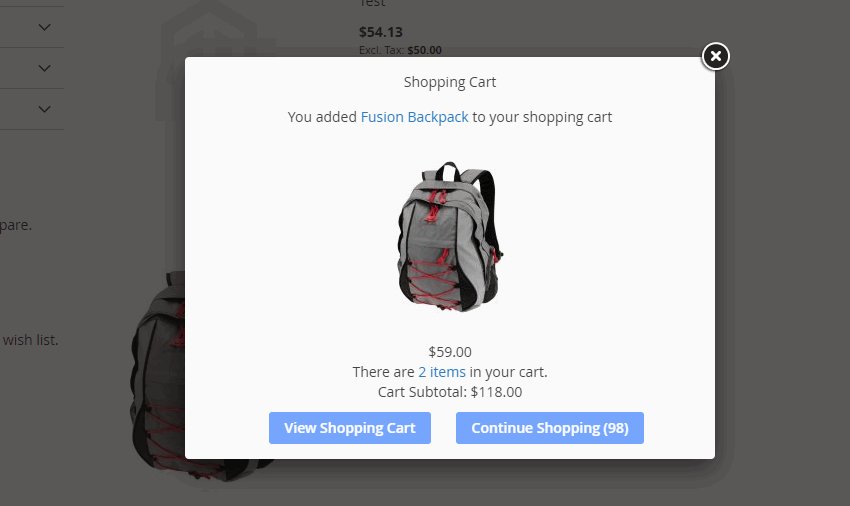
- Show “Continue” Button: choose Yes to show the continue shopping button at the success popup.
- Countdown Time on Button: choose either View cart Button or Continue Button to show the countdown time. Choose No if you do not want to display the countdown time.
- Countdown Time: …(s): Choose the period of time to countdown until redirecting to either View cart or Continue shopping.
- Show Mini Cart: choose Yes to display the mini cart on the success pop-up.
- Checkout Link in Mini Cart: choose Yes to show checkout link in the mini cart.
2.4 Popup Design
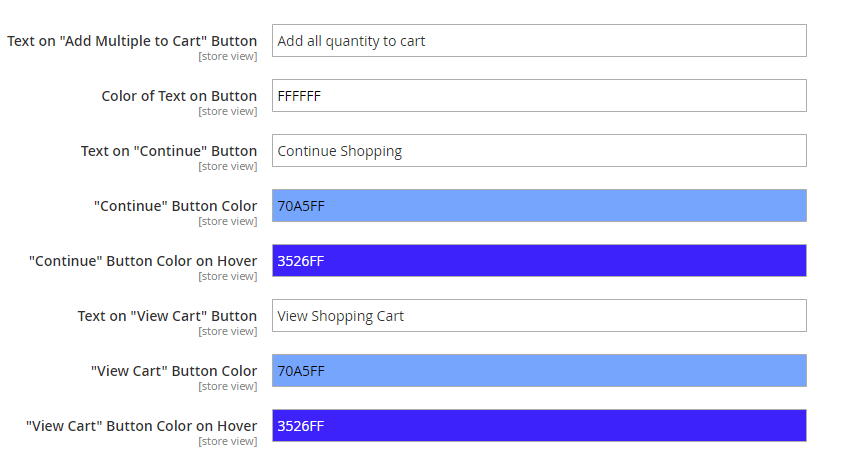
- In Text on “Add Multiple to Cart” Button: Enter the content of the button
- In Color of Text on Button: Pick the color of text in buttons.
- In Text on “Continue” Button: Enter the content of “Continue” button.
- In “Continue” Button Color: Pick the color of “Continue” button.
- In “Continue” Button Color on Hover: Pick the color of “Continue” button when hovering.
- In Text on “View Cart” Button: Enter the content of “View Cart” button.
- In “View Cart” Button Color: Pick the color of “View Cart” button.
- In “View Cart” Button Color on Hover: Pick the color of “View Cart” button when hovering.