
1. Overview
Magento 2 B2B Extensions covers the needs of B2B/wholesale customers and sellers from the very login to the reordering process by bundling many extensions at your fingertips.
BSS Commerce is providing 4 pricing plans for the B2B extension package, including Basic, Professional, Premium, and Customized plans.
In this guide, we will present the user guide based on the Premium plan to provide the most detailed information for you. For the 4th plan, you can select picked modules from this guide to make configuration.
Premium Plan
|
+ Custom Shipping Method + Customer Approval + Product Attachment + Force Login + Add Multiple Products to Cart + Configurable Product Grid Table View + Multiple Wishlists + Minimum Order Amount for Customer Group + Store Credit + Reorder Product List + Sales Rep |
+ B2B Company Credit + Catalog Permission + B2B Registration + Customer Attributes + Company Account + Request for Quote + Price Per Customer + Quick Order + Shipping & Payment Method per Customer Group + Hide Price |
The Premium B2B Plan covers every module in the Basic and Pro Plan plus additional extensions. Please configure modules in the Basic plan and Pro plan first, then configure other modules in this Premium plan.
2. Custom Shipping Method
2.1 In the backend
2.1.1 General Configuration
Go to Store ⇒ Configuration ⇒ Sales ⇒ Shipping Methods ⇒ Custom Shipping Carriers 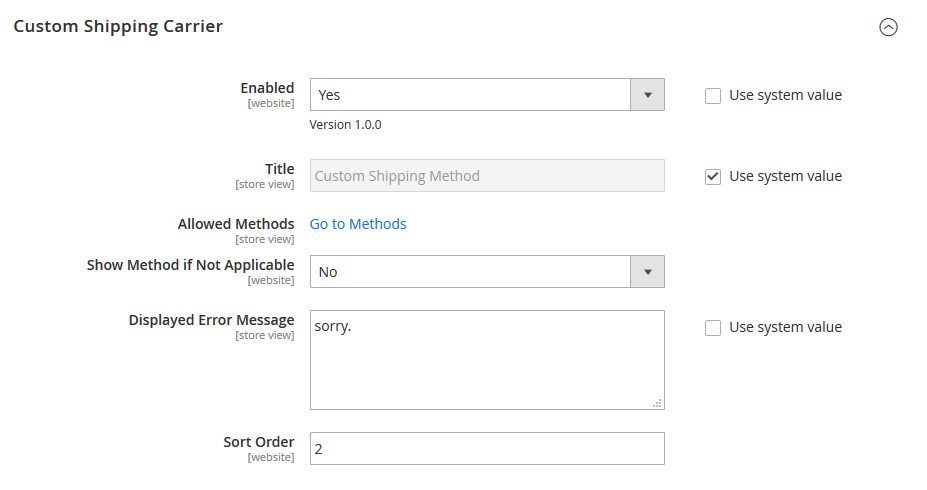
- Enable: choose Yes to use this extension
- Title: type the general title for all custom shipping methods
- Allowed Methods: click on “Go to Methods” you will be directed to the Custom Shipping Method managerial grid table
- Show Method if Not Applicable: choose to show the method when it’s not available for the shipping address or not
- Display Errors Message: type the message to notify your customers when there is a shipping method not available with their shipping address
- Sort Order: choose the order of the custom shipping carrier amongst a list of shipping methods
2.1.2 Custom Method managerial grid table
To open this table, there are two ways: Way 1: Go to Sales => Custom Shipping Method Way 2: Go to Stores => Configuration => Sales => Shipping Methods => Shipping Carriers => Custom Shipping Carrier => Allowed Methods => Go to Methods 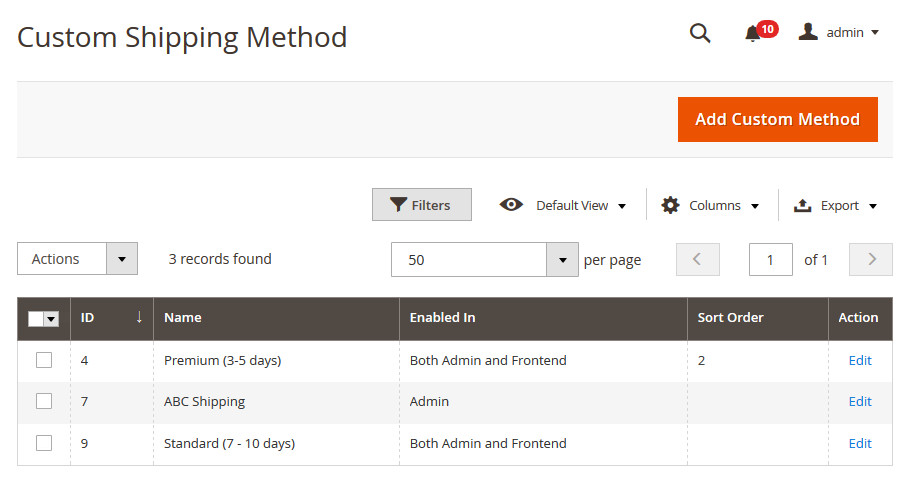 Then click on Create New Shipping Method
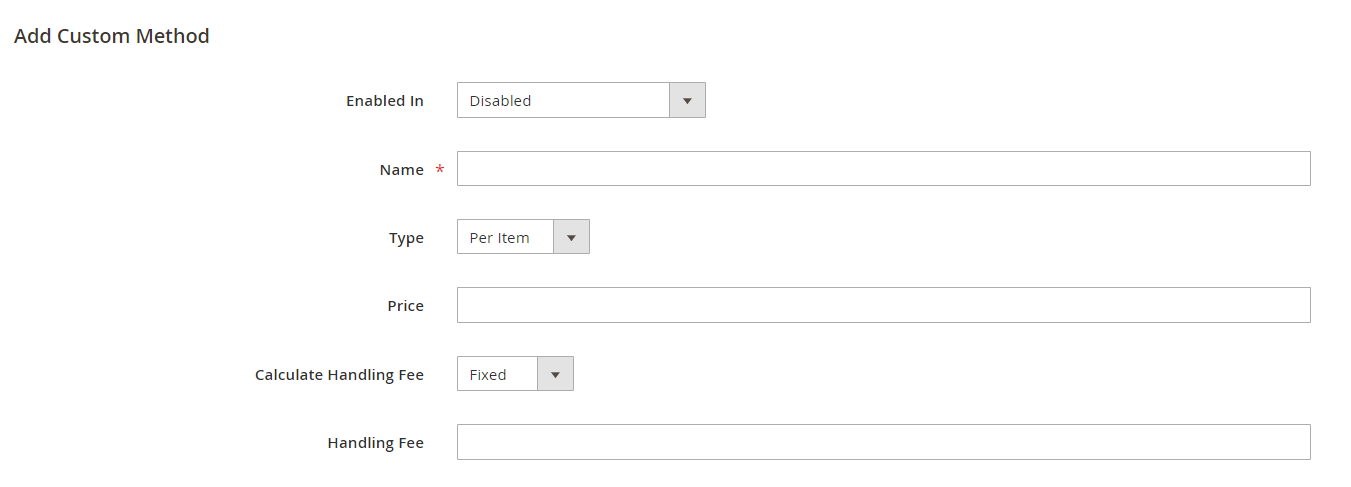
- Enabled In: choose to display the custom method in admin/ frontend/ both admin and frontend or disable it when needed
*Note: You can test the custom shipping method shown only on the admin page in the Sales section. Visit Sales -> Order -> Create New Order. Then click to one user name, and choose the store view that you have configured in your custom shipping method.
- Name: type the name of the custom method
- Type: choose between “per item” and “per order”. This configuration will decide your customer will be charged per item or per order with the shipping price which is on the below configuration
- Price: type the price (note this price is not the final price of the shipping method which can be higher with the handling fee
- Calculate Handling Fee: choose to calculate the handling fee by a fixed price or by a percentage of the Price
- Handling Fee: set the number to apply the handling fee with the calculating method above
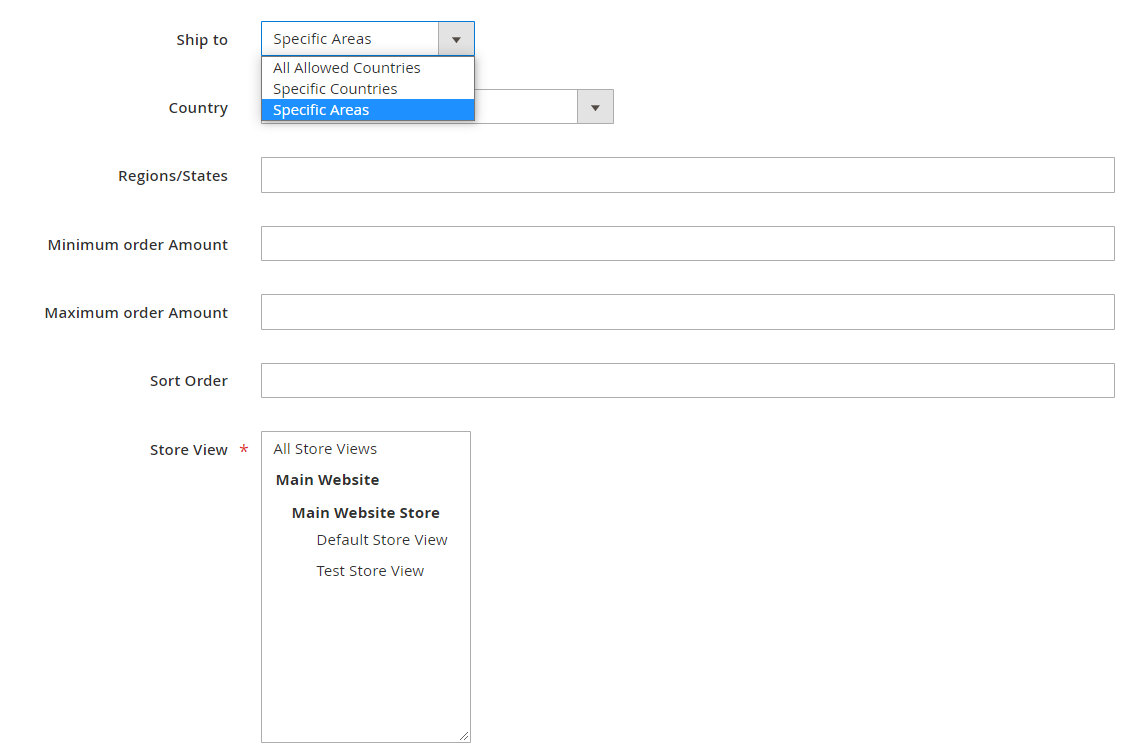
- Ship to Applicable Countries: choose the country/countries to which customer can use the shipping method to deliver
- Minimum Order Amount: set the maximum amount of the order with which customers could use the shipping method
- Maximum Order Amount: set the maximum amount of the order with which customers could use the shipping method
- Sort Order: choose the position in which the shipping method is displayed at the checkout page
- Store View: choose the store view for the shipping method
2.2 In the frontend
At the checkout page, the custom shipping method will appear in this way. 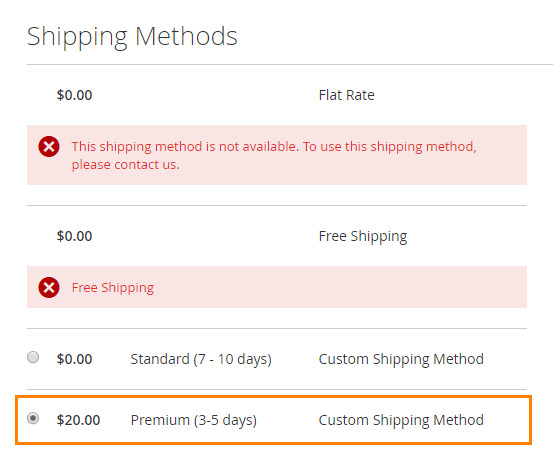
3. Customer Approval
3.1 In the frontend
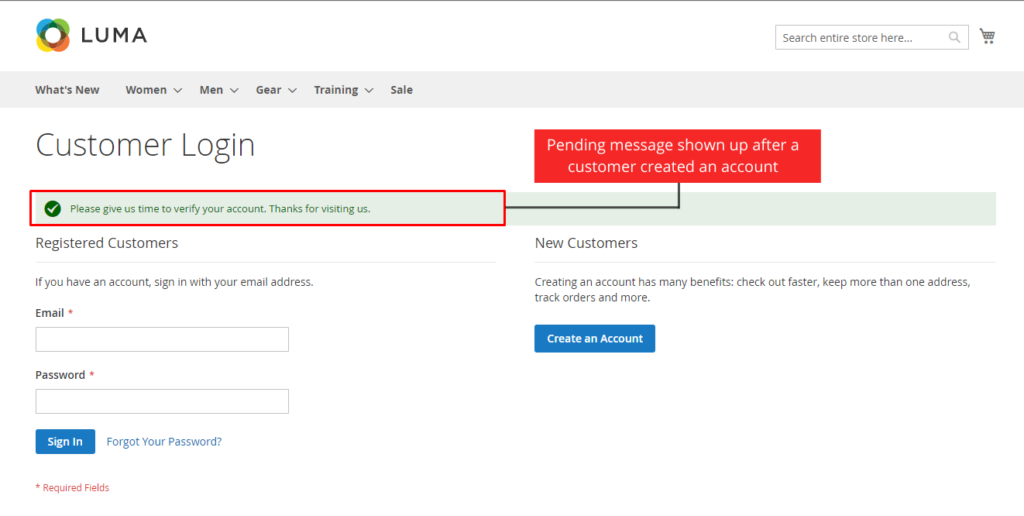
After a customer creates an account, there will be a Pending message shown up:
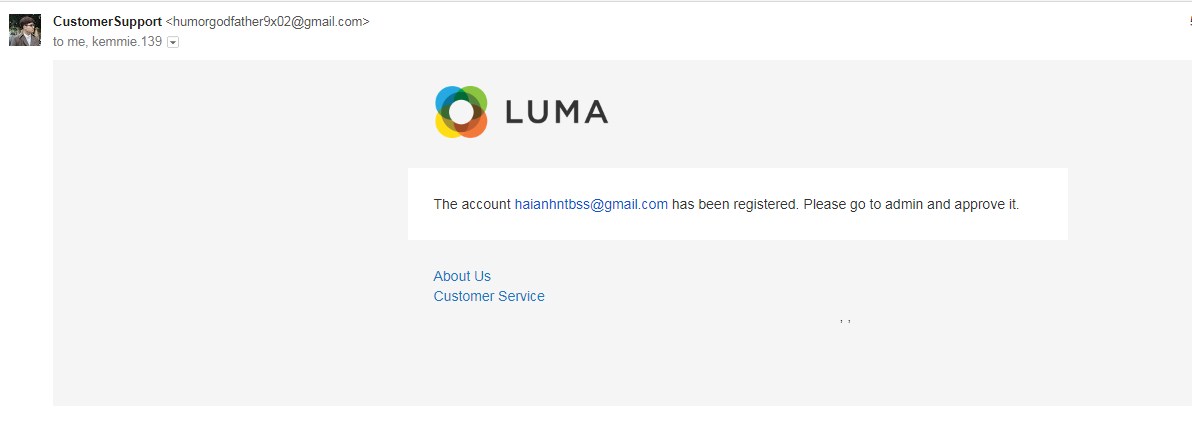
Next, a notification email will be sent to admin:
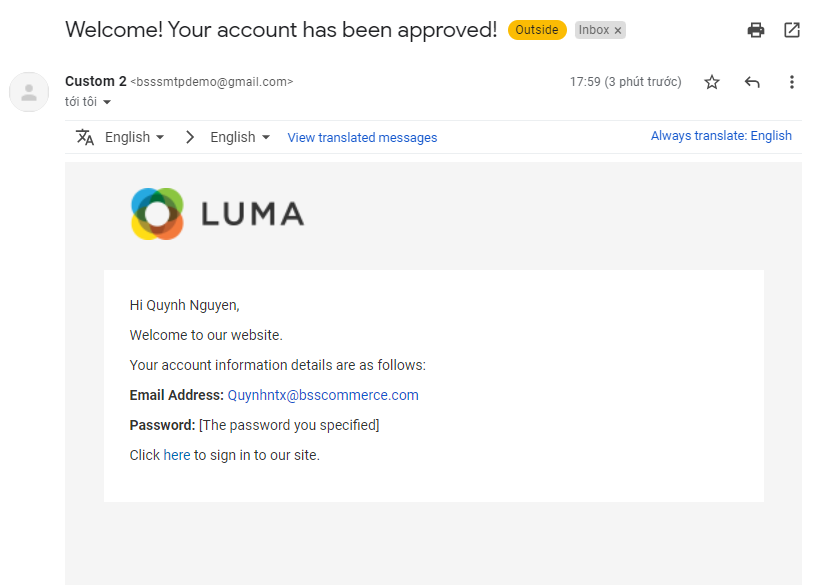
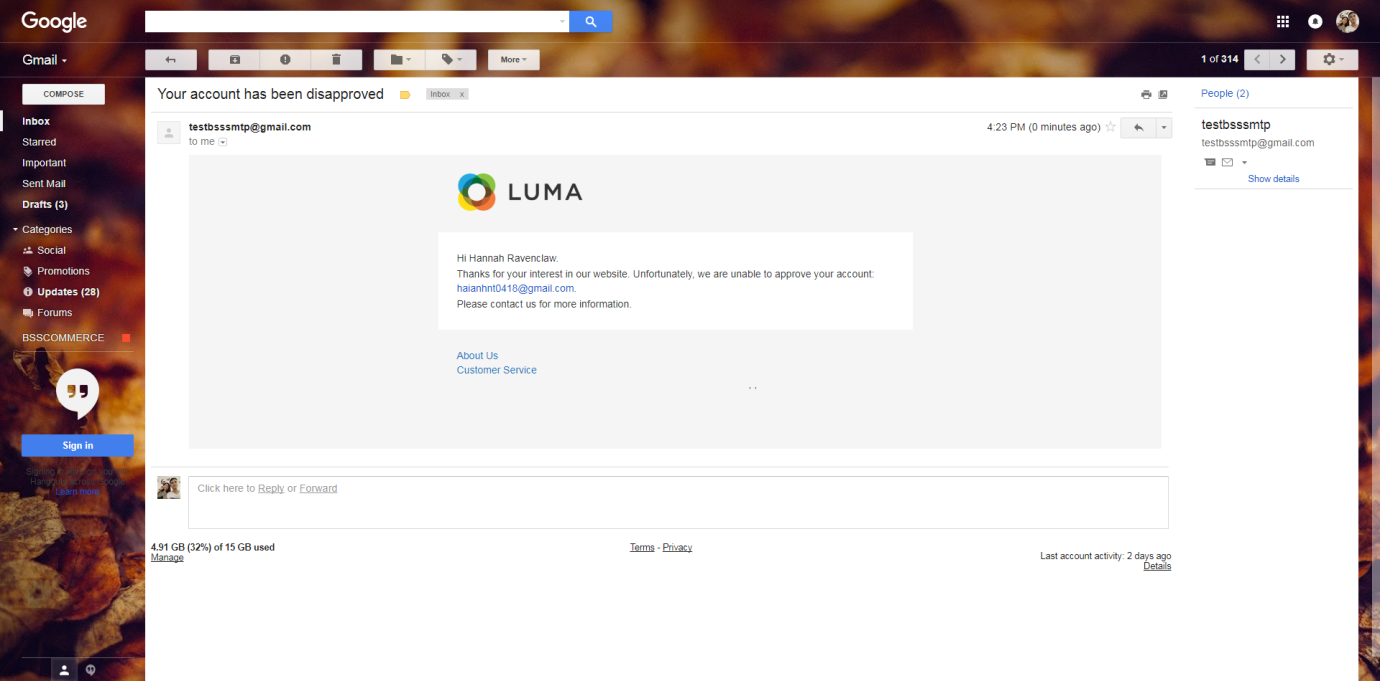
Then admin accepts or declines new accounts, there will be Approval or Disapproval emails sent to customers.
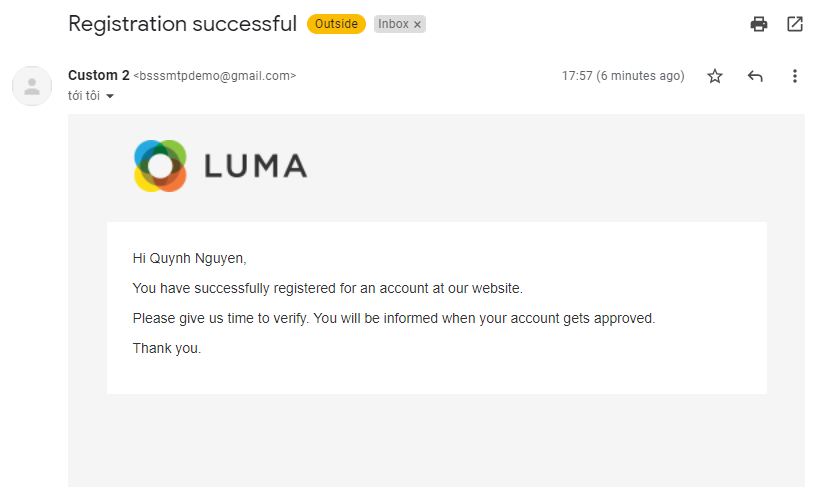
Here is a Successful Registration email:
Here is an Approval email:
Here is a Disapproval email:
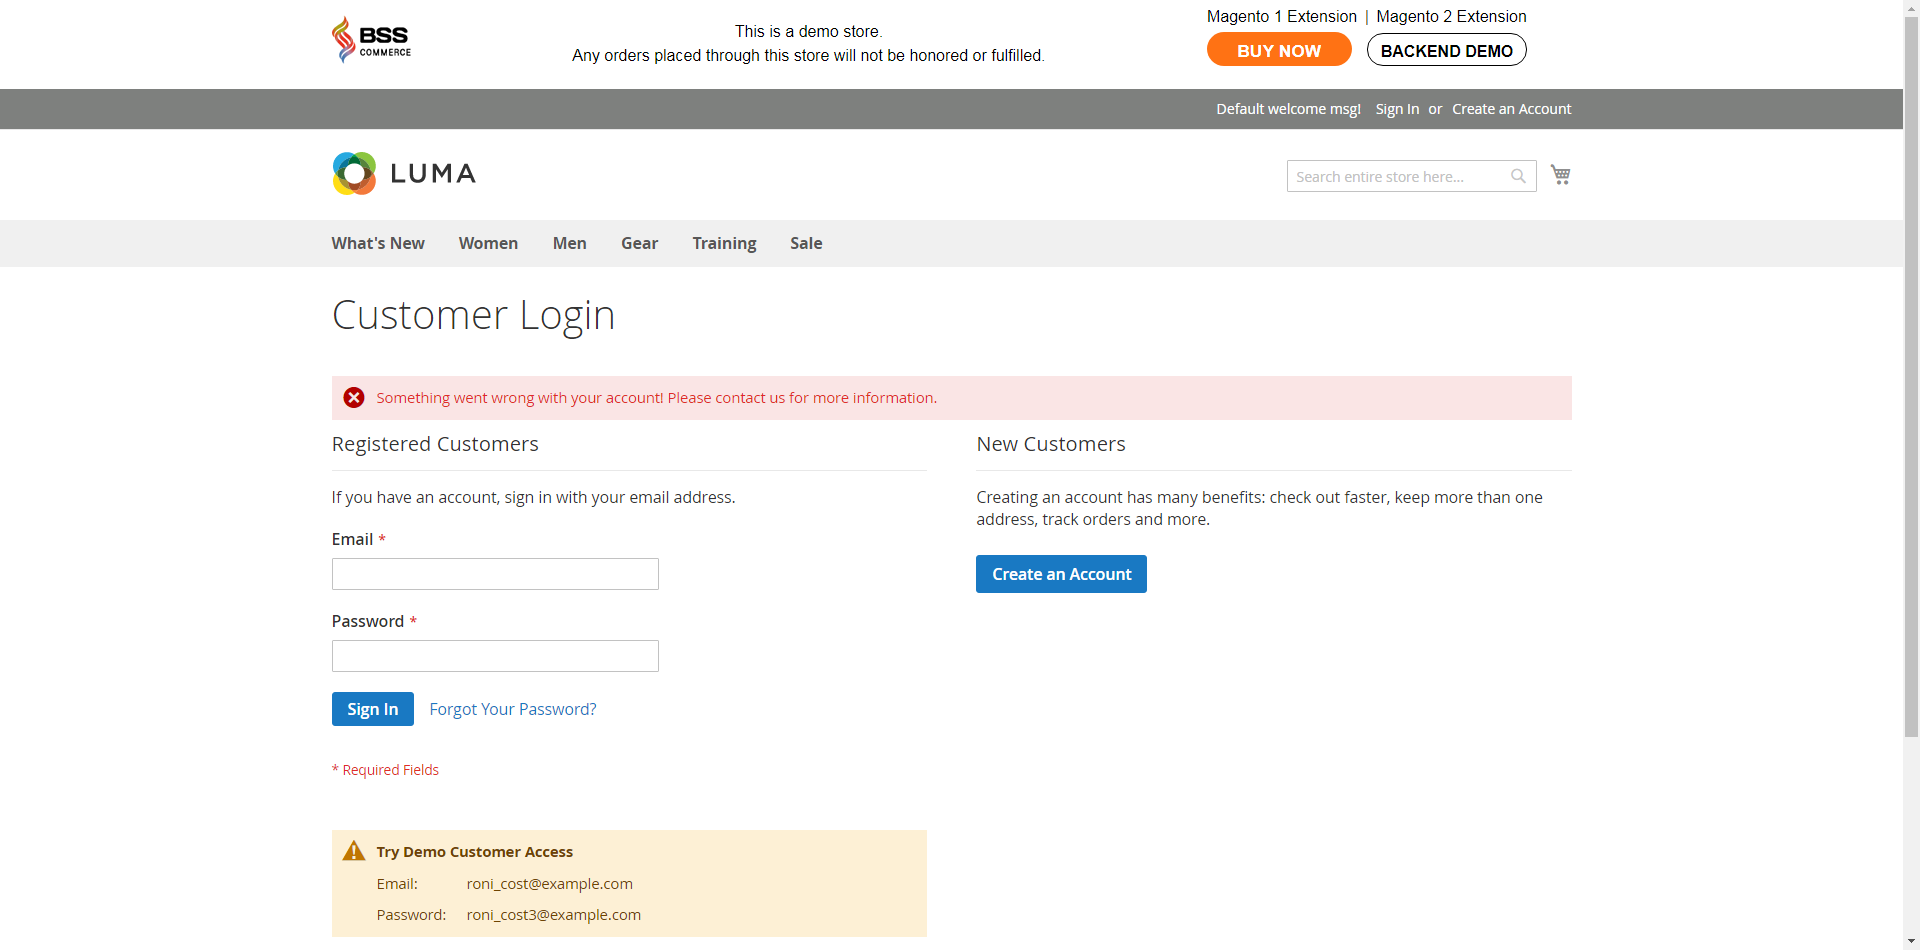
When this customer signs in, if his account is still pending, then the Pending message will be displayed. In case his account is disapproved, there will be a Disapproved message:
3.2 In the backend
3.2.1 General configuration
Go through Stores ⇒ Setting ⇒ Configuration⇒ BSS Commerce Customer Approval
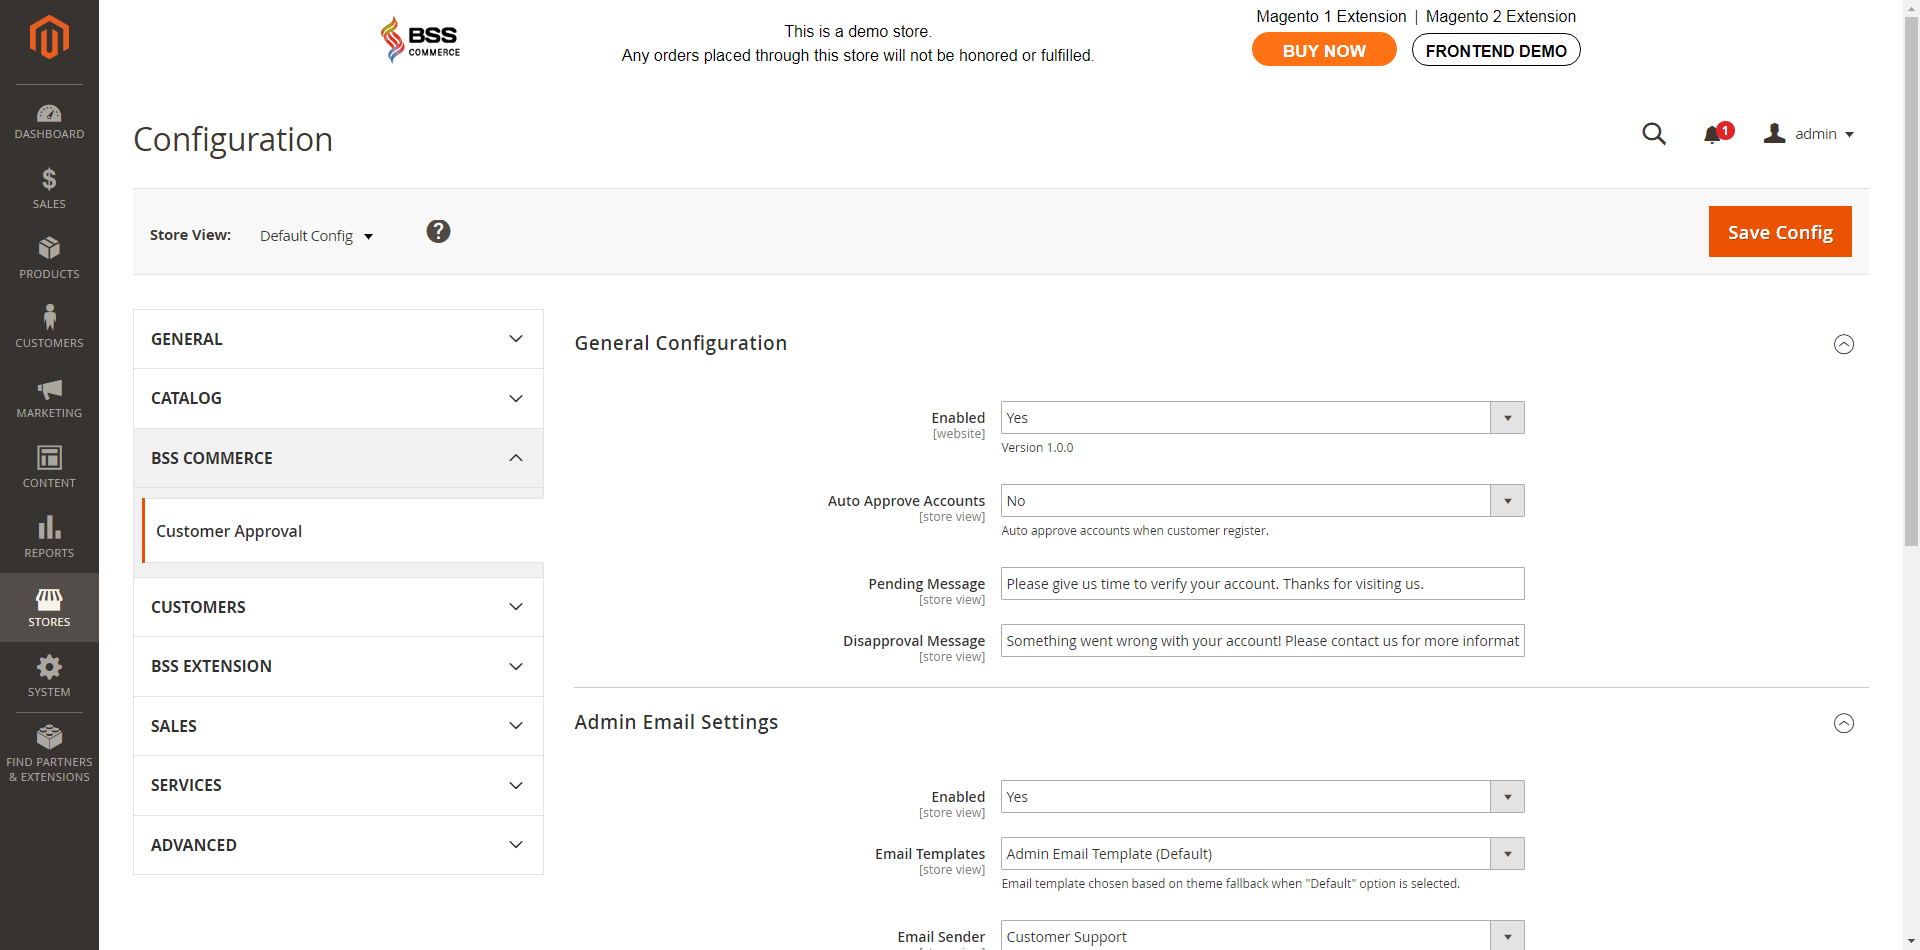
In General Configuration:
- Enabled: choose Yes to enable the module.
- Auto Approve Accounts:
- Choose Yes if you want to accept new accounts automatically.
NOTE: The difference between this Auto Approve Accounts function and the default is that you still can change customer account status in the backend, whereas the default cannot.
- Choose No if you want to approve accounts manually.
In Admin Emails Settings:
- Enabled: choose Yes to enable configurations below.
- Email Templates: choose one of the available email templates of websites. This selected template will be used to send notifications about new accounts created for admin.
- Email Sender: choose a name and email sender from Store Email Address of the default.
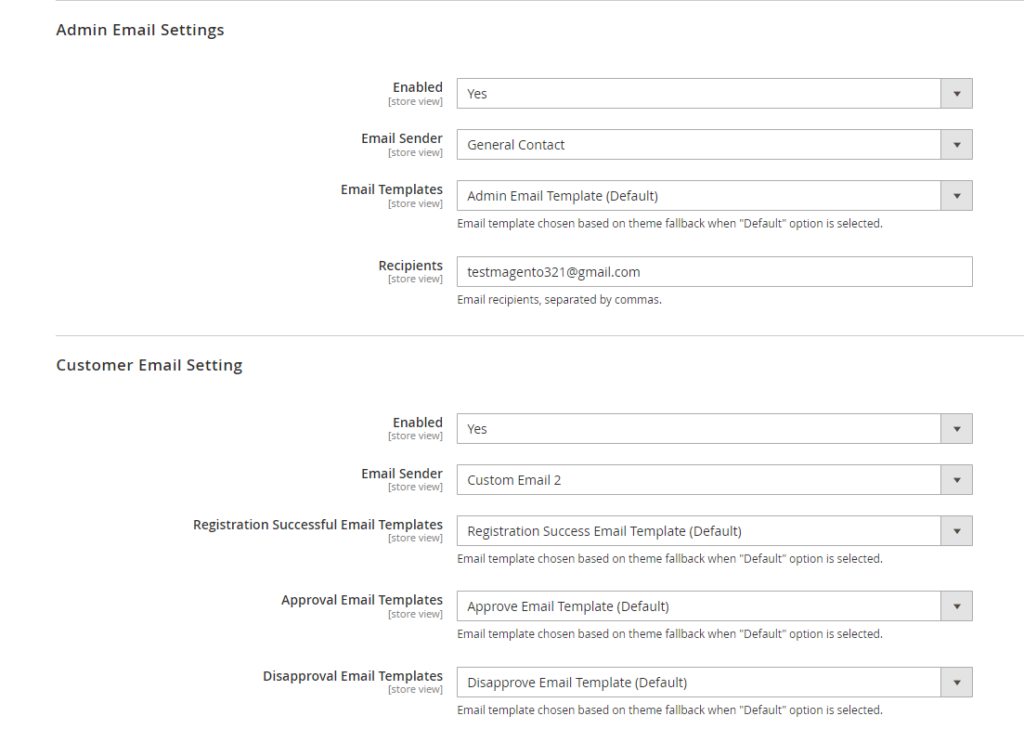
In Customer Email Settings:
- Enabled: choose Yes so that all configurations below can work.
- Email Sender: choose name and email of the sender from Store Email Address of the default.
- Registration Successful Email Template: select one of the available email templates for your site. This template will be send after the customer registered an account. Customer does not receive this email if the config Auto Approve Accounts is Yes.
- Approval Email Templates: select one of the available email templates for your site. This template will be used if admin changes account status to Approved.
- Disapproval Email Templates: select one of the available email templates for your site. This template will be used if admin changes account status to Disapproved.
NOTE in Email sender (for both Admin and Customer Email Settings):
- If you use SMTP to send mails then it just allows you to register the sender’s name. This Email Sender function gets email only in email configuration of the SMTP module. Please go to Stores ⇒ Configuration ⇒ Advanced ⇒ System ⇒ Gmail/Google Apps SMTP Pro in order to change email sender as you want.
- If your server is not registered via SMTP to send emails then this configuration will get both name and email of the sender.
3.2.2 Customer Attributes in the backend
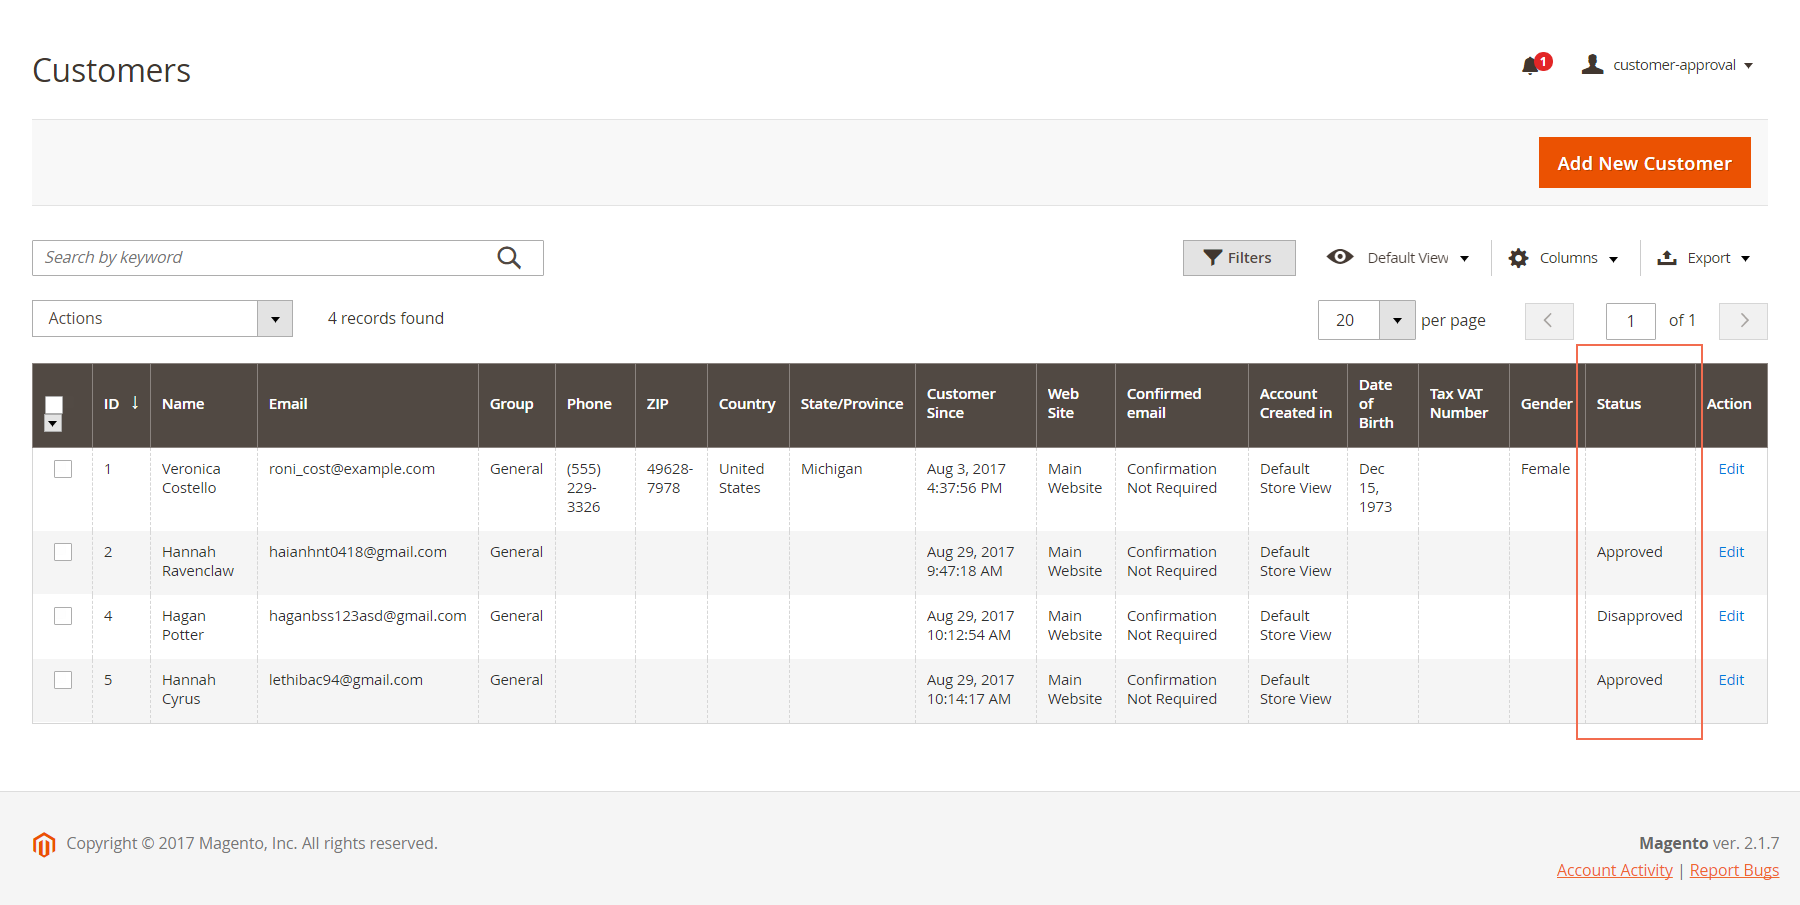
In Customer Grid:
- After installing Customer Approval for Magento 2 extension, there is a Status column in Customer Grid in the backend:
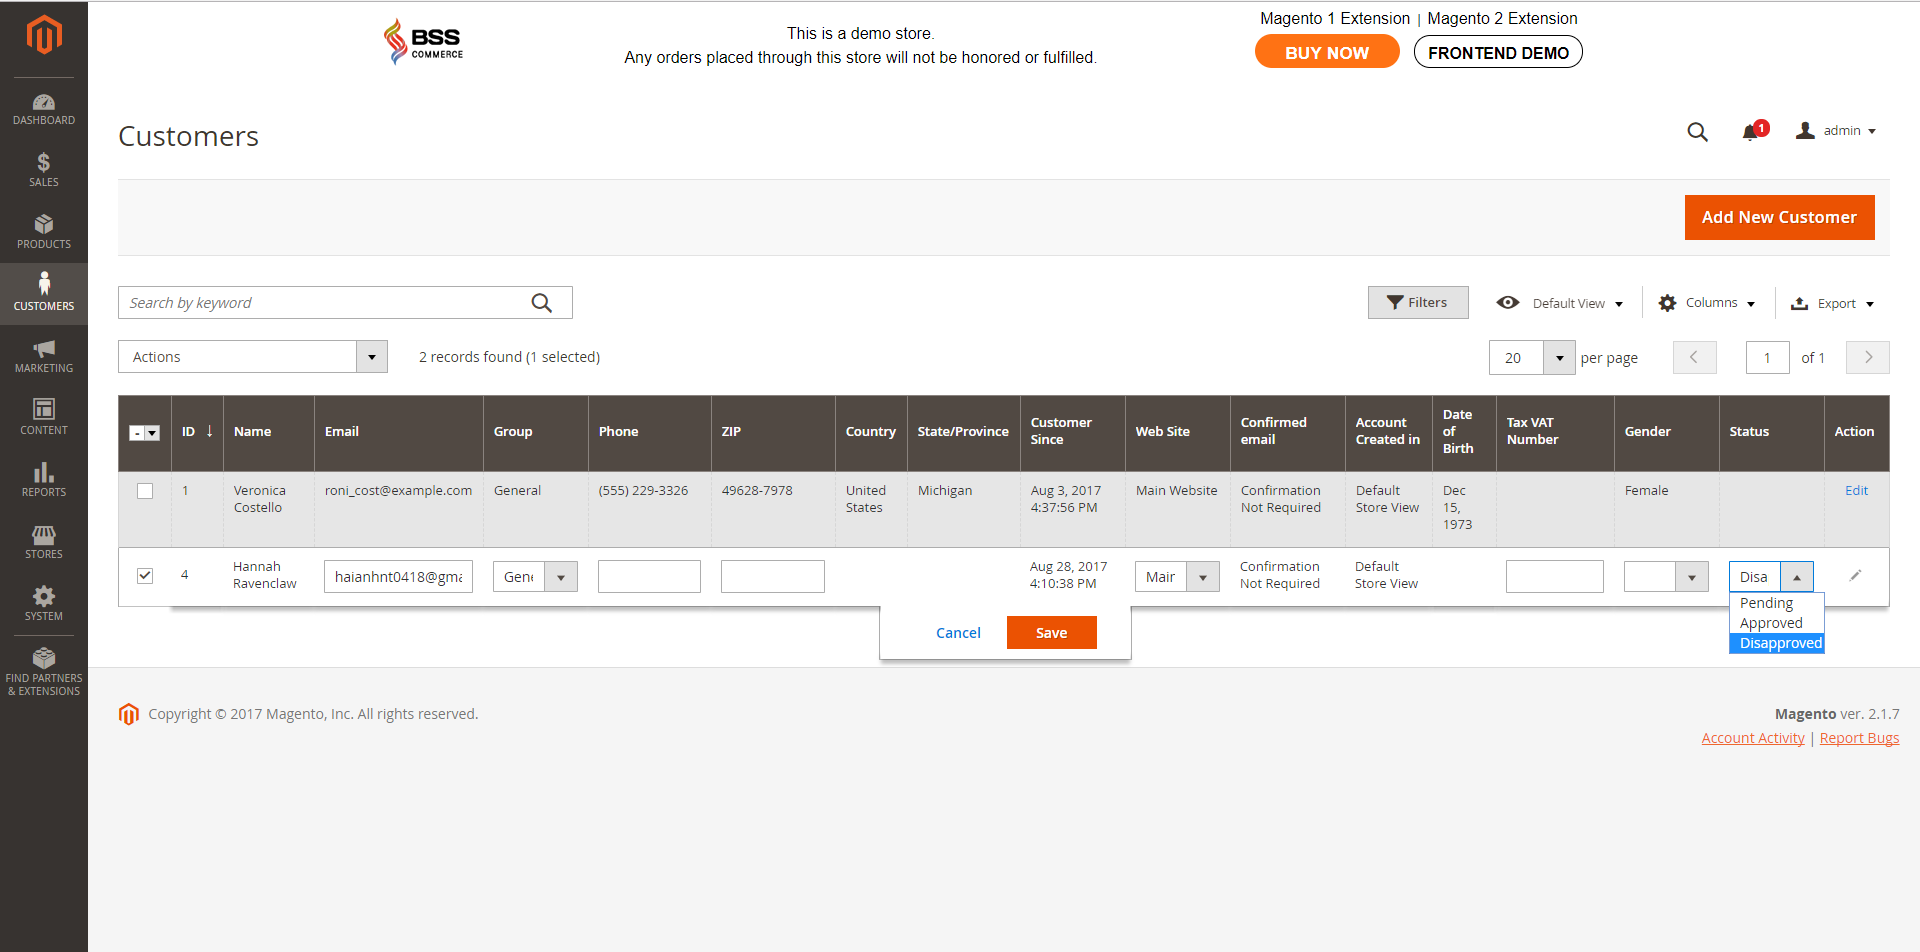
- In addition, admin can edit this status conveniently right in Customer Grid:
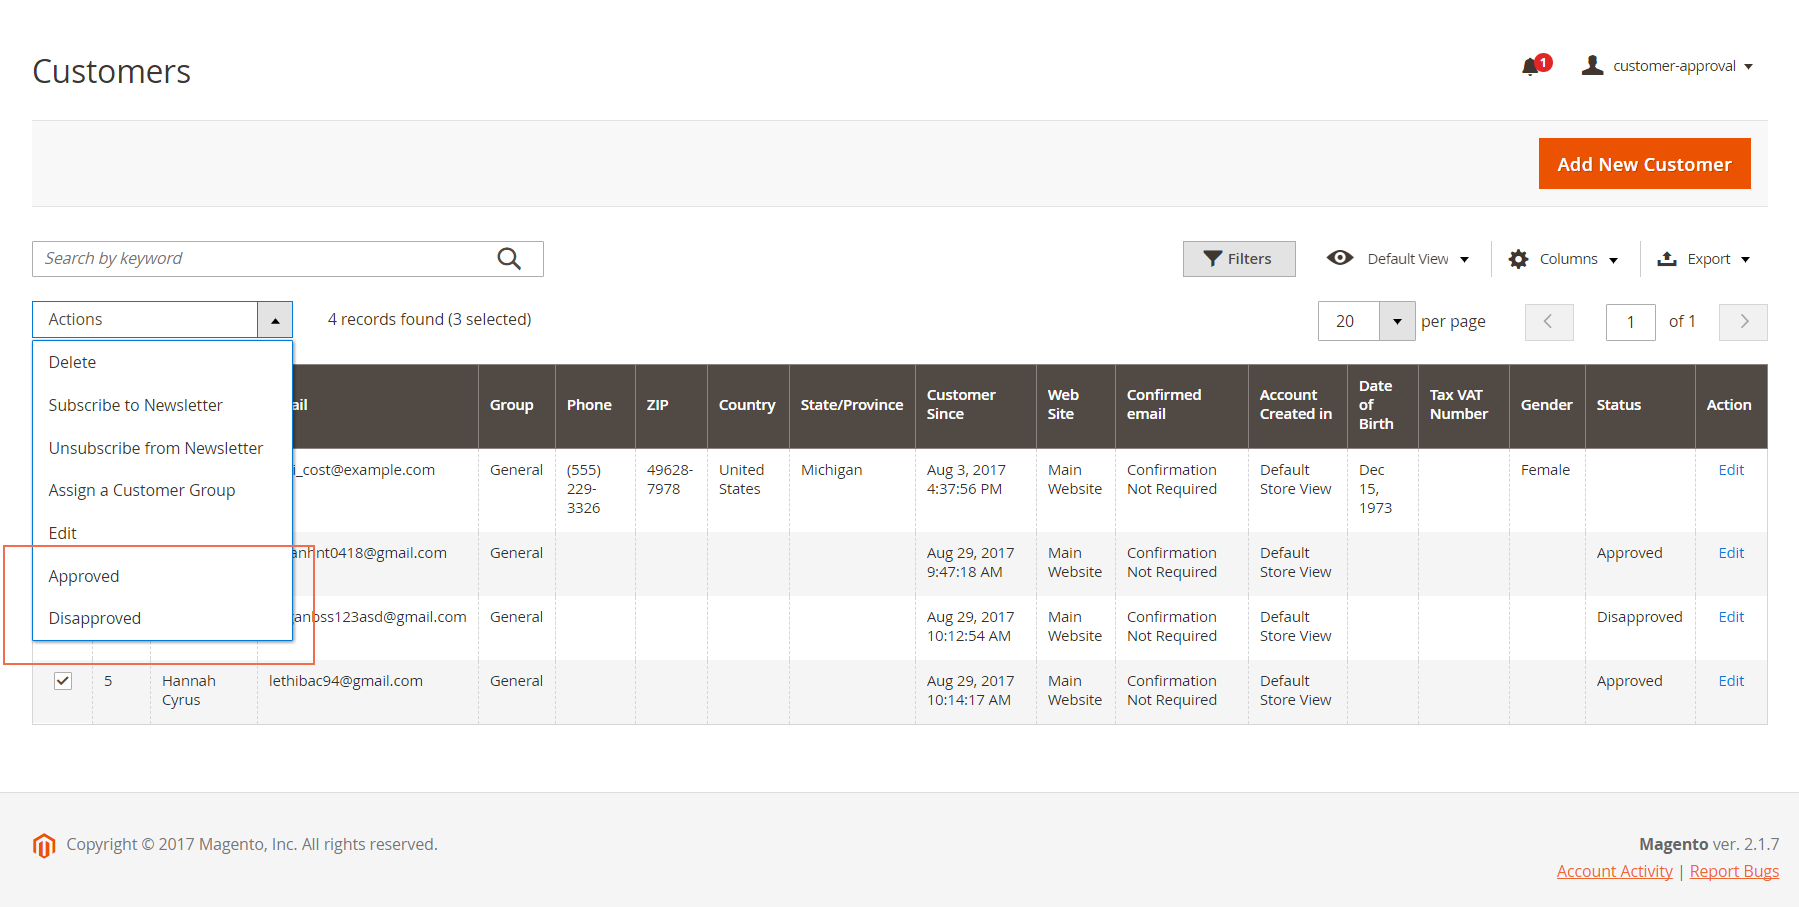
- Moreover, admin can have mass action: choose multiple customer accounts to approve or disapprove them at once:
In Customer Information:
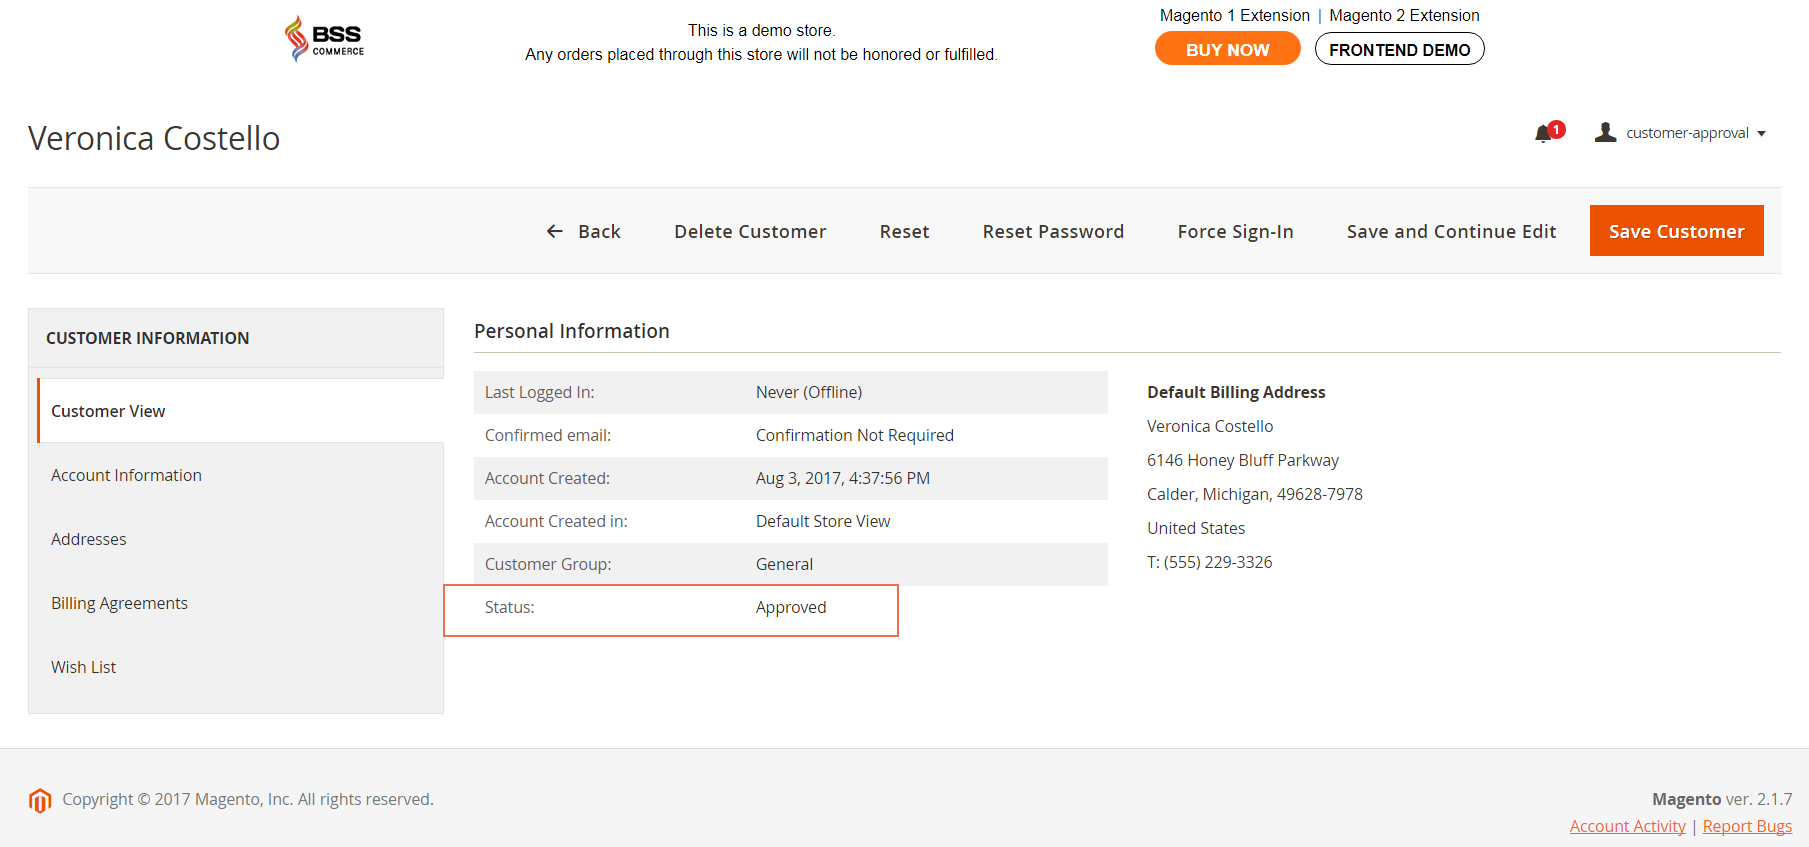
- Status information is included in Customer View:
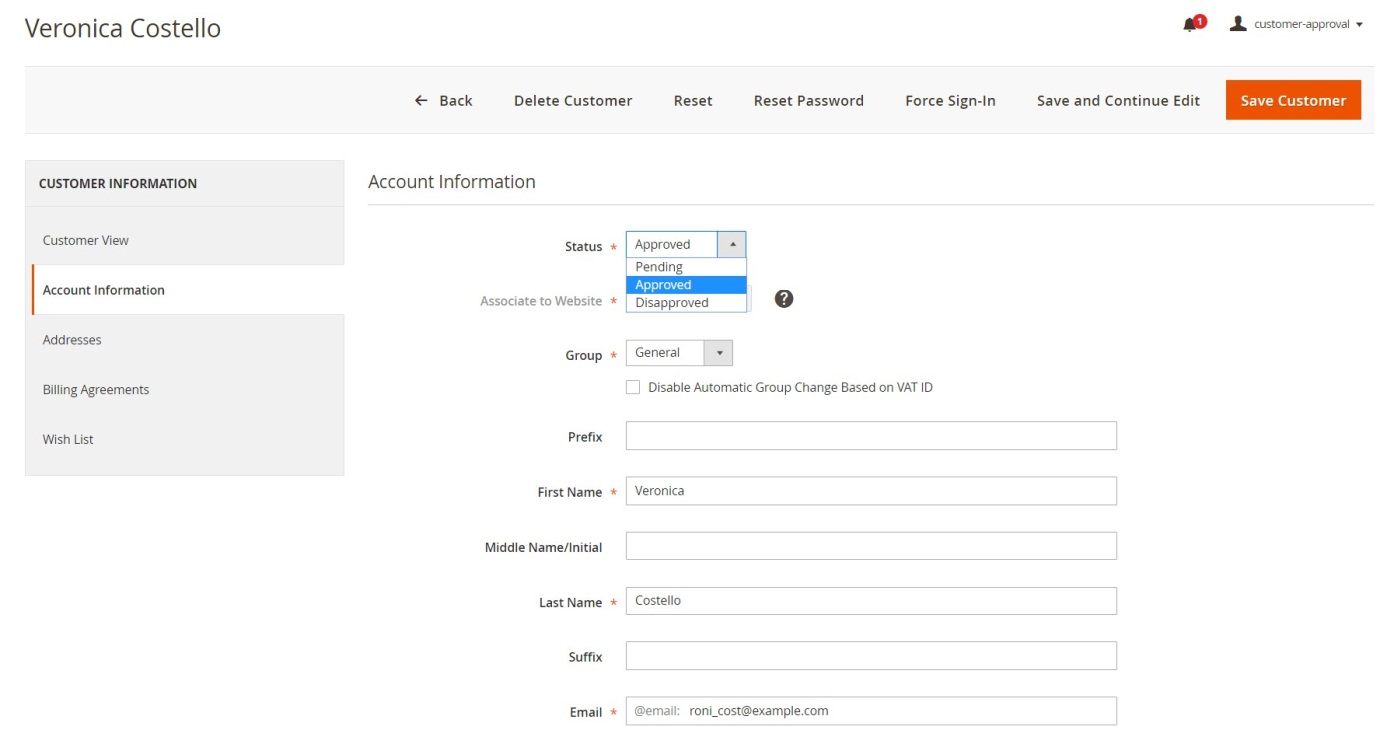
- Admin can change an account status as wish in Account Information:
3.2.3. Required Email Confirmation
After installing this extension, in case admin sets Yes in Require Emails Confirmation, then when a customer creates an account, he cannot use his account and will be redirected to login page. A confirmation email will be sent to this customer so as to confirm his email and admin will also receive a notification about new accounts at the same time.
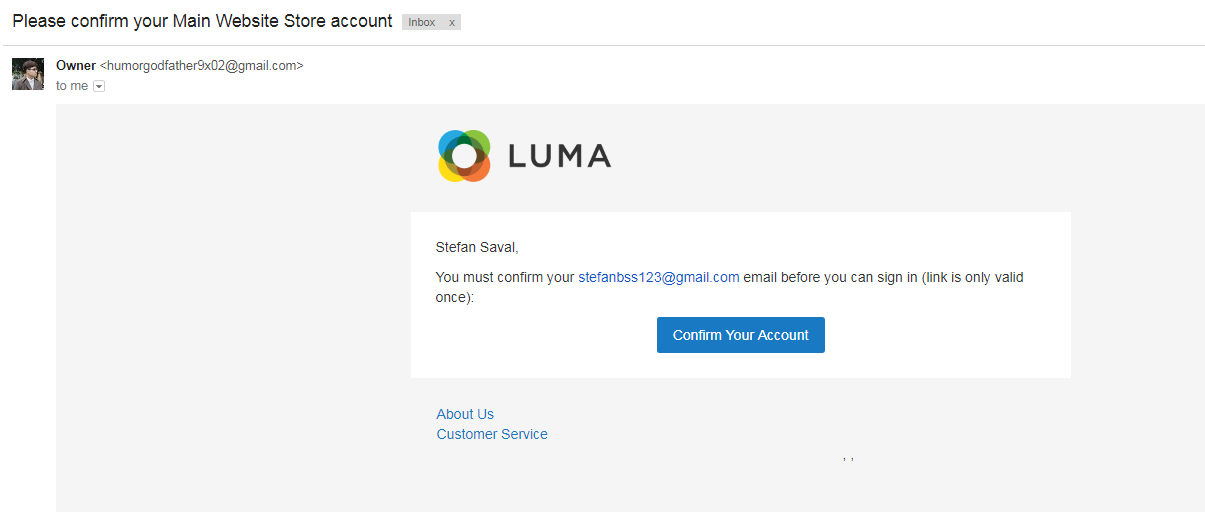
Next, this customer confirms his email then he will redirect to the login page. Pending message will be shown and still cannot use his account until the admin changes its status into Approved.
4. Product Attachment
4.1 General Configs
Please go to Store ⇒ Configuration ⇒ BSSCommerce ⇒ Product Attachment 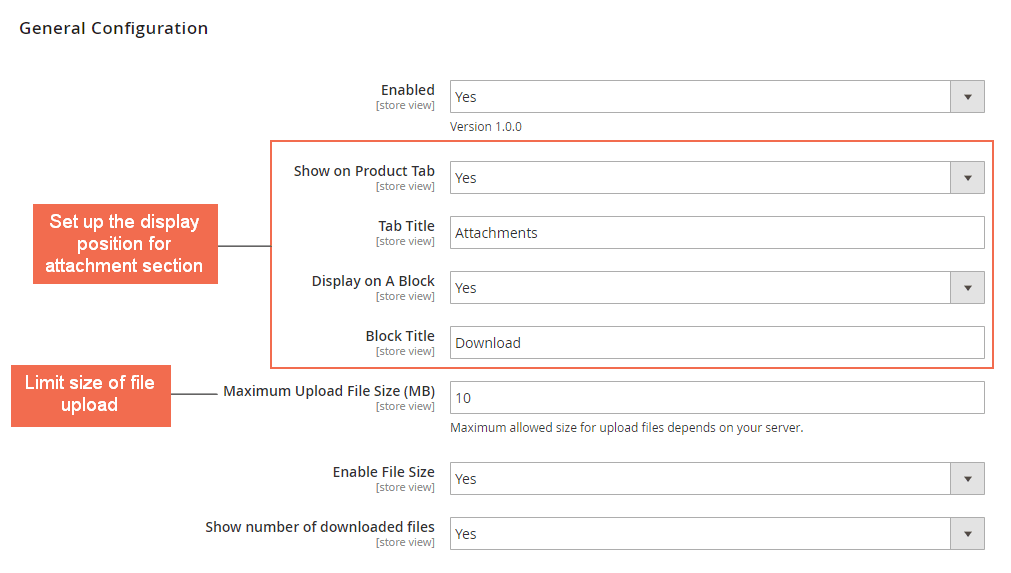
-
- In Enabled: choose Yes to enable the module, or No to disable it.
-
- In Show on Product Tab: choose Yes to display the file attachments on a new tab in the product page, or No to not display in this position.
-
- In Tab Title: edit the title of the attachment tab.
-
- In Display on A Block: choose Yes to display file attachments on a separate block, or No to not display in this position.
-
- In Block Title: edit title for the attachment block.
-
- In Maximum Upload File Size (MB): enter a number to set the max allowed size for upload files. This value also depends on your server.
-
- In Enable File Size: choose Yes to enable file size along to file name in the frontend, or No to disable the file size.
- In Show Number of Downloaded Files: choose Yes to enable the number of downloaded files along to files in the frontend, or No to disable it.
Note:
-
- Because the scope of configs is store view, you can customize for each store view.
- After setting, you need to save your configuration, then flush cache to make these settings come into effect.
4.2 File Attachments Management
Please go to Catalog (Product Attachment by Bss Commerce) ⇒ Product Attachments Management 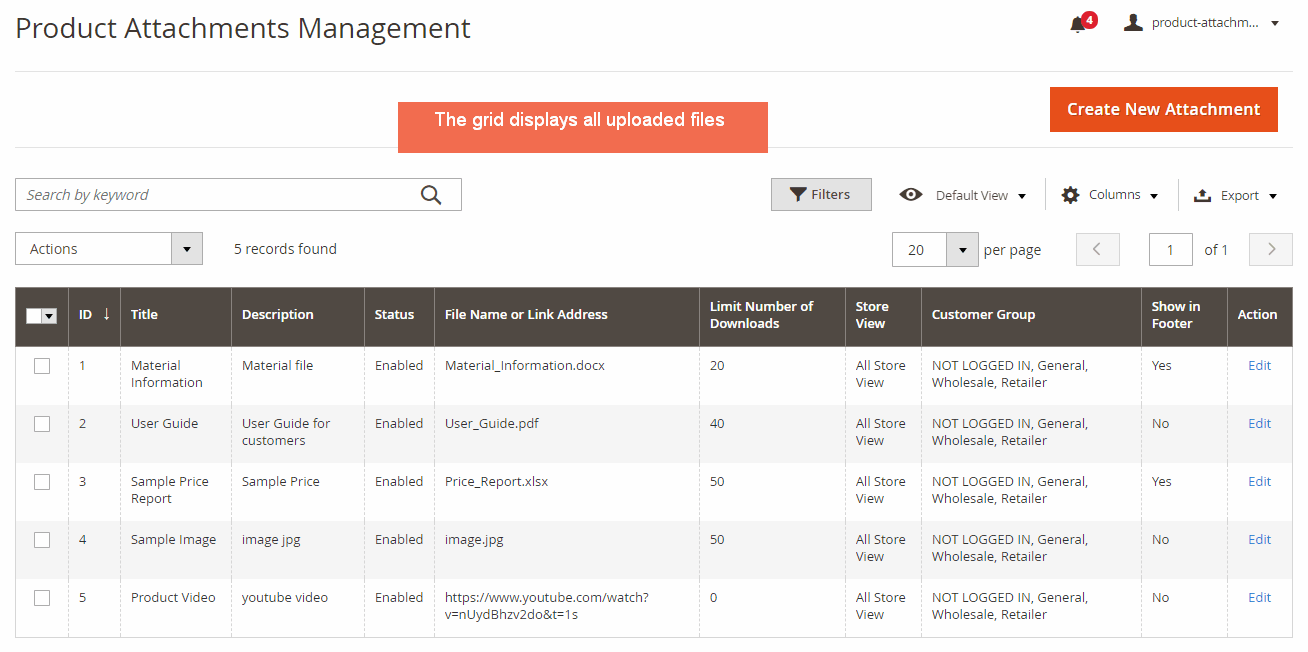 A grid listing all uploaded files will appear, you can edit the setting of uploaded files by clicking on Edit link in the Action column. Press “Create New Attachment” button to upload and set up a new file.
4.2.1 Attachment edit page
Please press the “General” tab. 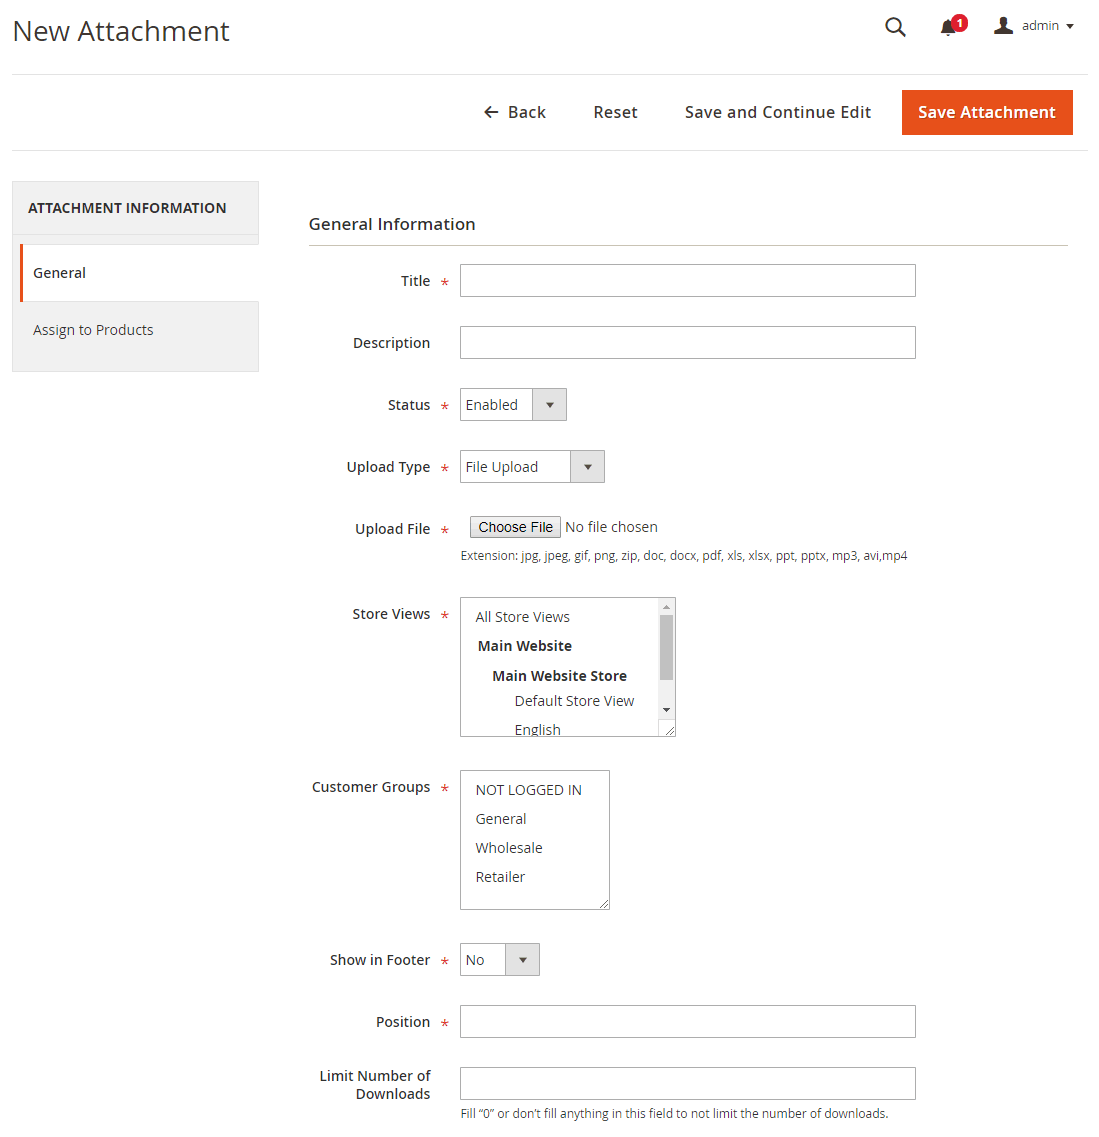
-
- In Title: edit the title of file to be shown in the frontend.
-
- In Description: edit description of this file (this text is only shown on the attachment grid in the backend, not in the frontend for customers).
- In Status: choose Enabled or Disable the file.
In Upload Type:
- Choose File Upload to upload a file from your computer. If you select this option, the Upload File button will be enabled for you to click and upload a file from your computer. This file will be shown on the frontend for customers to directly download.
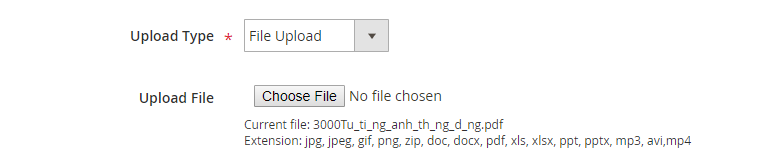
- Choose Link Download to add a URL and display this link to the frontend, customers need to click on this link to view pages or download files.

-
- In URL: enter a URL
-
- In Store Views: choose store views that you want to enable the file.
-
- In Customer Groups: choose customer groups that you want to enable the file.
-
- In Show in Footer: choose Yes to show the file in the footer of your site, or No to hide it.
-
- In Position: enter a number to set sort order for the file attachments. If a product is assigned multiple file attachments, the file with smaller number will have higher position.
- In Limit Number of Downloads: enter a number (>0) to specify the maximum number of downloaded files. If this field is blank or filled “0”, the number of downloads will not be limited.
4.2.2 Assign an attachment to multiple products
In Attachment edit page, please press “Assign to Products” tab 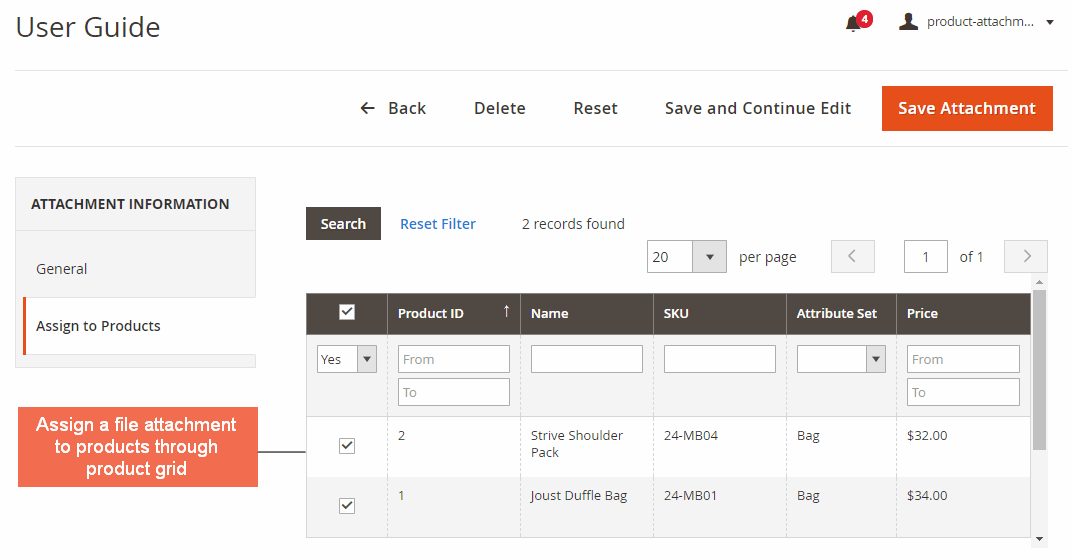 In the product grid, you can sort by selected/ unselected products, Product ID/ Name/ SKU, Attribute Set and Price then assign the attachment to products that you want. After settings, you need to press “Save Attachment” button to save your settings.
4.2.3 Add many attachments to a product
Please go to Catalog ⇒ Products, then select a product in the grid to go to product edit page. The “File Attachment” attribute is added to product edit page of each product. 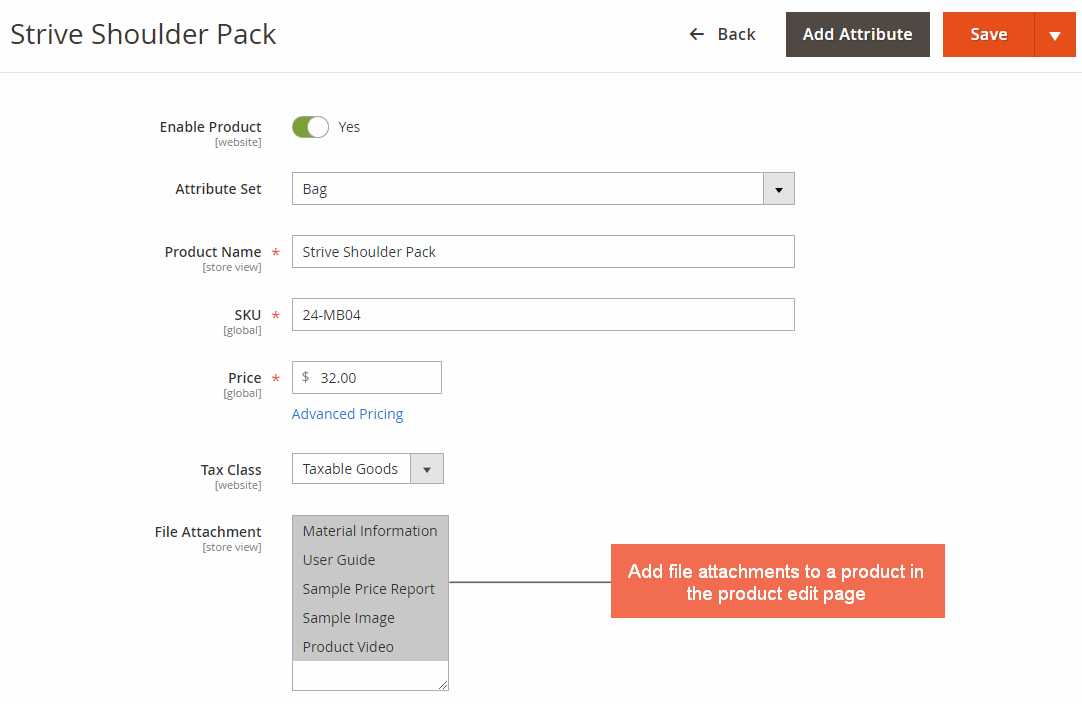
- In File Attachment: select attachments that you want to assign to product then press Save button.