
1. Overview
Keep improving your Magento 2 product pages to leverage customer experience and convince them into sales.
Our Improved Configurable Products for Magento 2 extension when it comes to configurable products.
What to expect?
2. How Does It Work?
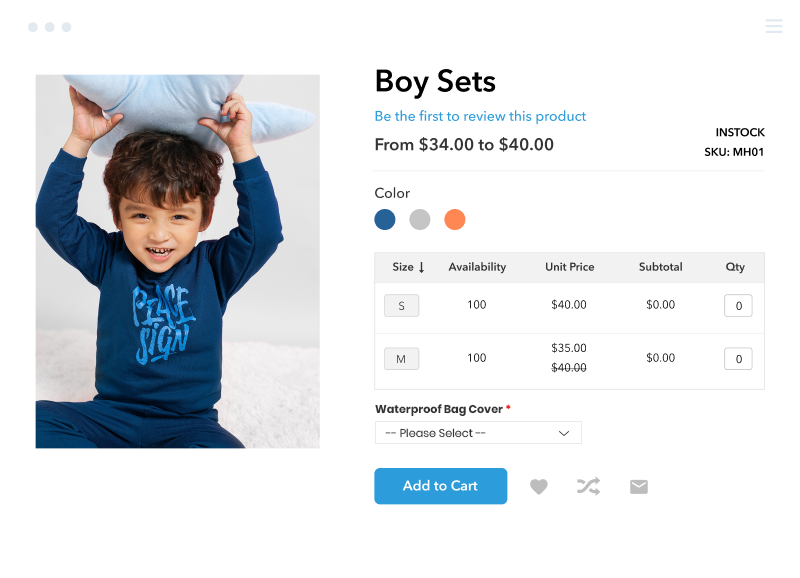
2.1. Magento 2 Configurable Product Wholesale Display
2.1.1 In the frontend
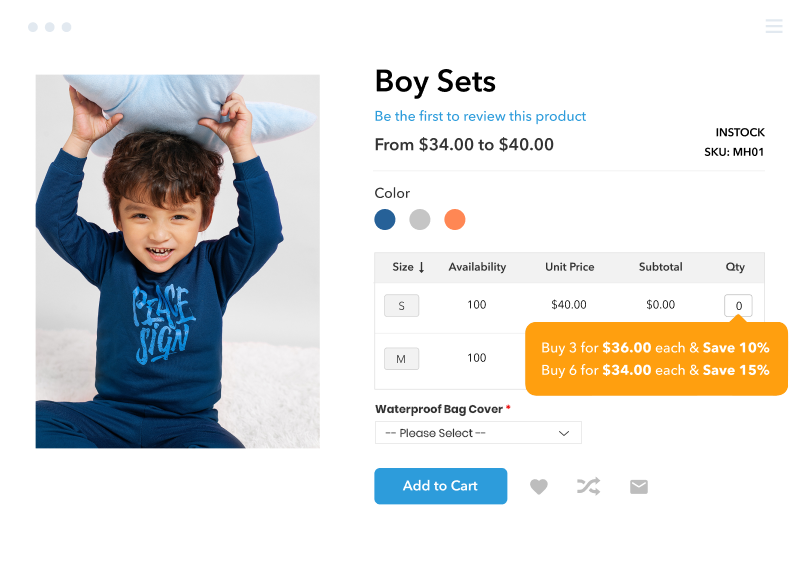
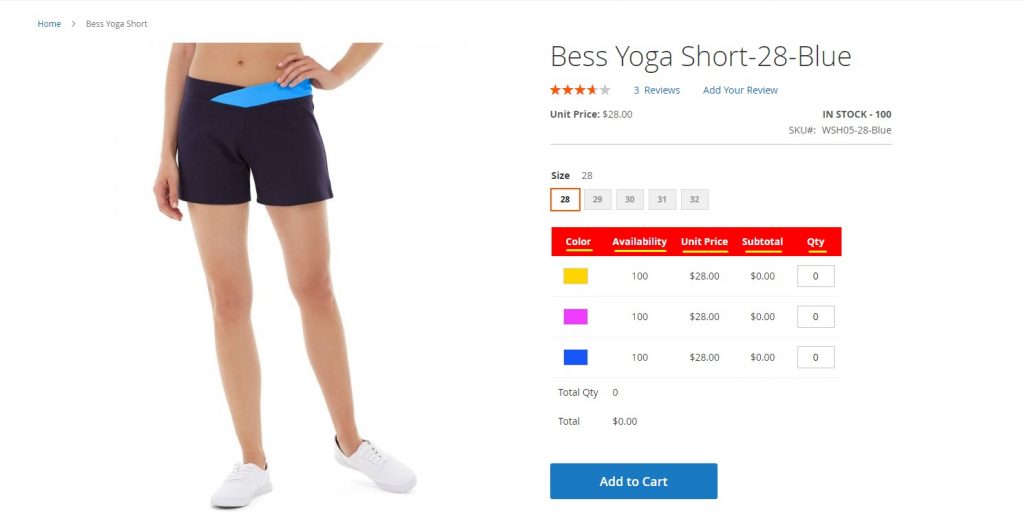
- Show Price Range for configurable products.
- Show associated products in a grid table with custom options, for example, color and size
- Show SKU, Availability, Unit Price, Tier Price, and Subtotal in this grid table. Especially, Tier Price is shown in tooltips when hovering.
- Work well with the Color swatch function of Magento default with clickable options.
- Support all types of custom options.
- Allow sorting the Wholesale Display table by click on the attribute
- Enable/disable the Wholesale Display table for each product
2.1.2 In the backend
Go through Stores ⇒ Configuration ⇒ BSSCommerce ⇒ Configurable Product Wholesale Display.
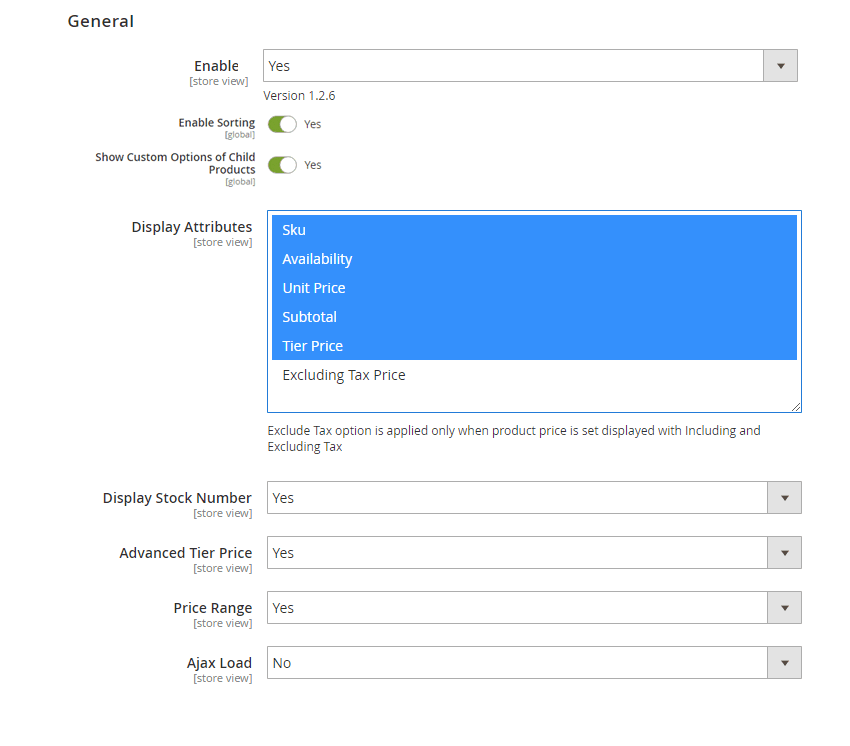
- Enable: choose Yes to enable the extension.
- Enable Sorting: choose Yes to allow sorting attributes in the column of the wholesale display grid
- Enable Custom Options of the Child Product: choose Yes to display custom options of the child product based on the selected options.
- Display Attributes: choose attributes to show in the grid table as wished.
- Display StockNumber: choose Yes to show the number of stock in the grid table. Choose No, it will show stock status: In stock or Out of stock.
- Advanced TierPrice:
+ Choose Yes then the total amount is based on tier price of the total quantity of children products added to cart.
This feature is only applied if all added children products having the same tier prices.
For example, the tier price of buying 1-9 Black-S shirt, 1-9 Gray-S shirt is similarly $45. Tier price of buying 10-more for every children product is $40. If you buy 3 Black-S shirts and 7 Black-XL shirts, tier price is now $40/shirt. The total amount is now $400.
+ Choose No: total quantity will take the default tier price. The total amount is calculated by tier prices of each children product multiply to the total quantity of each chosen children product.
For the above example, when using Magento default tier price calculation, the total amount is determined as $450 because it is calculated based on each tier price of each children product (Tier price is equal to $45/shirt)
- PriceRange: choose Yes if you want to display Price Range for the configurable product above the table.
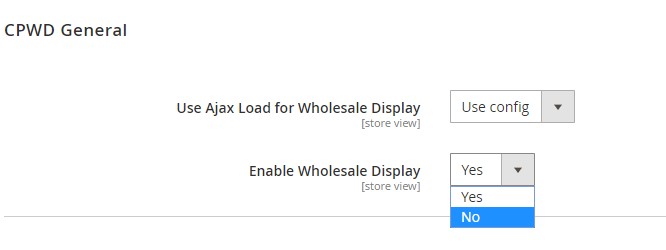
- Ajax Load: choose Yes to load wholesale display table by using Ajax
*Note:
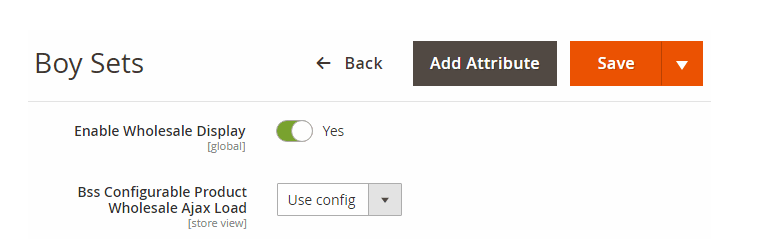
- Set Enable Wholesale Display to Yes or No to enable or disable the wholesale display per specific configurable product.
- In BSS Configurable Product Wholesale Ajax Load, the extension takes priority to the configuration for each product over the general setting.
Also, choose groups to enable Configurable Product Wholesale Display
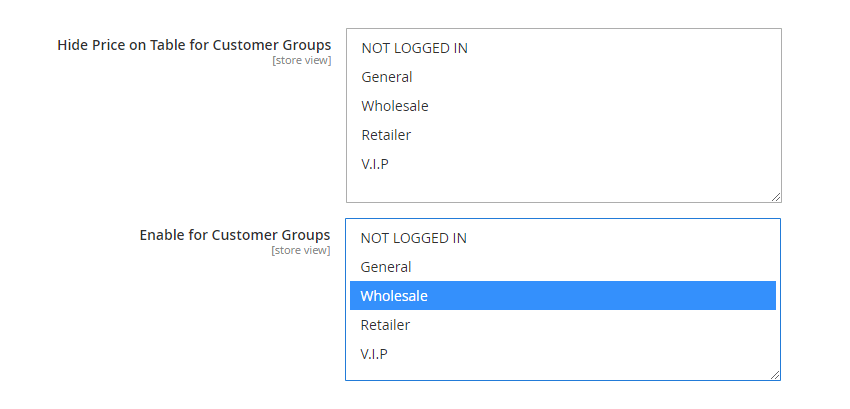
- Hide Price on Table for Customer Groups: choose which customer groups you want to hide price.
- Enable for Customer Groups: choose which customer groups to show this wholesale display.
You can also custom the design of the table (for responsive purposes)
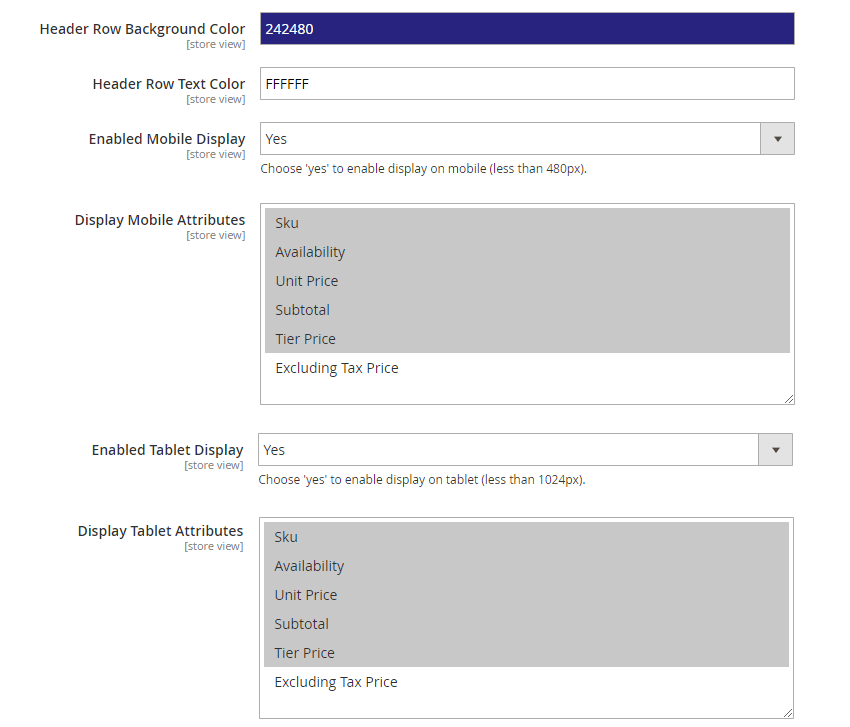
- Header Row Background Color: pick one color that suits your page’s design
- Header Row Text Color: pick the color of the text
- Enabled Mobile Display: choose Yes to make the table responsive on mobiles
- Display Mobile Attributes: choose attributes to show in the grid table view for mobiles
- Enabled Tablet Display: choose Yes to make the table responsive on tablets.
- Display Tablet Attributes: choose attributes you want to show in the grid table on tablets.
- Sorting the Wholesale Display table: by clicking on the attribute of the table.
- Enable/disable the Wholesale Display table per Product: in the product edit page, scroll down to CPWD General. Choose Yes to enable the table and No to disable the display.
2.1.3. Choose the order of attributes
The order of custom attributes shown in configurable product wholesale display is based on the order of selected attributes when you create the configurable product.
For example, you create the Hero Hoodie with two custom options: size and color. Here you see the size is arranged above the color:
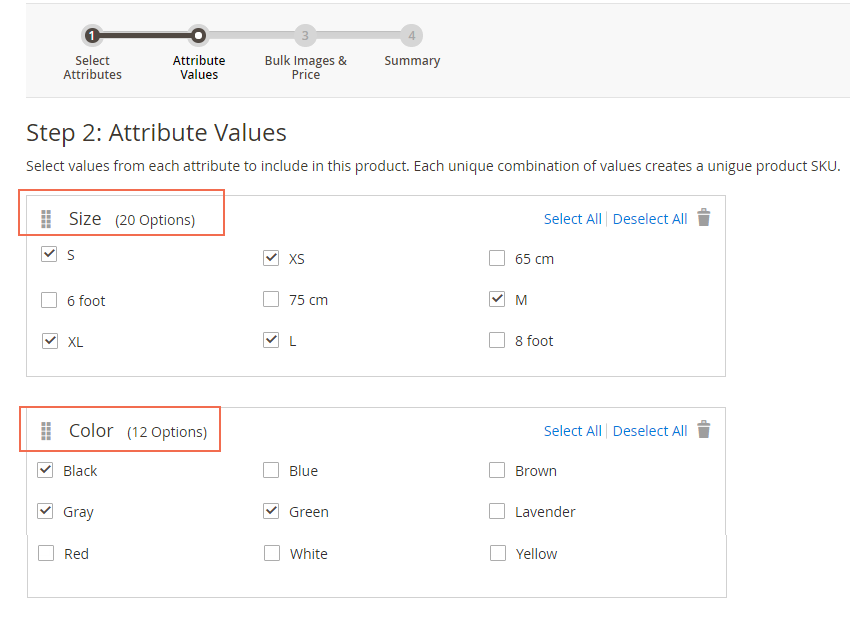
Hence, in the product page, size options are above the color options.
If you want to change this order, just move the color to above the size to below. Remember to Save changes.
2.2. Simple Details on Configurable Product
2.2.1 In the frontend
This is how Simple Details on Configurable Product is displayed in the frontend:
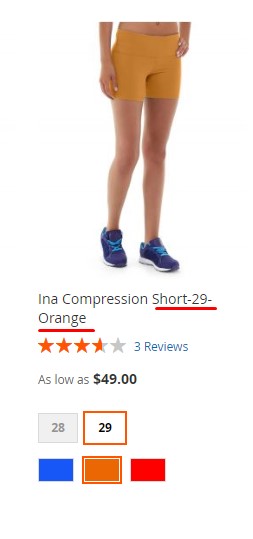
- Show child product names at Dynamic Category/Product Listing Update & show review swatch accordingly.
- Set Custome options for child products
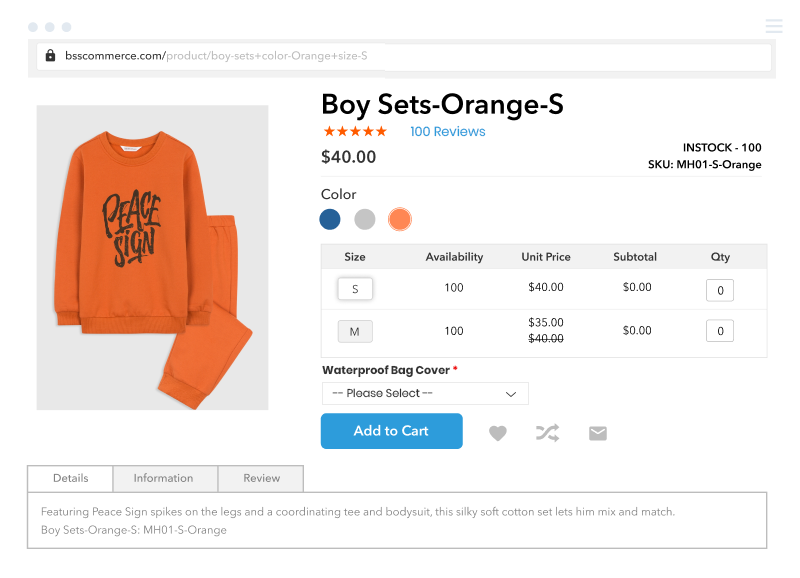
- Show details of children items of the configurable product, such as name, SKU, tier price, stock status, stock number, reviews, description, additional information and metadata.
- Get URL for each child product with pre-selected options.
- URL: URL will change as chosen options. If customers access to the URL, options are also selected on the product page. Besides, you can get URL included category path as wish
- Custom URL has a form: …/Product-Name+attr1-Value1+attr2-Value2 (For instance: …/hero-hoodie+color-Black+size-S), it changes when choosing attributes of product.
- Support minimum quantity for product separately added to cart instead of the default of Magento 2, which only allows for configurable products.
- Support quantity increment for children products. This function outweighs the default with the ability to set increment for each associated product of the configurable product. For example, if you set 5 for quantity increment for a skirt-red-L, then your customers cannot buy this item with quantity 1-2-3 or 6-7-8, they only choose this product with 5-10-15 etc in quantity box.
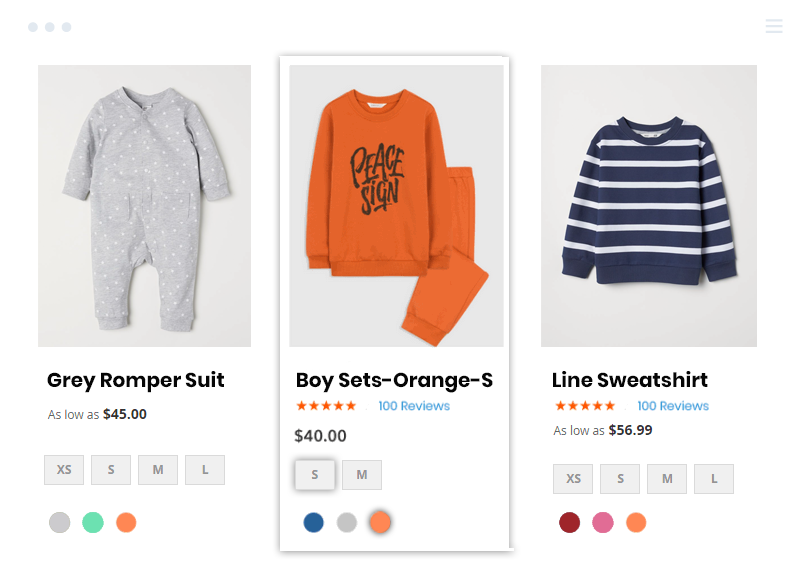
Even better, customers can check simple details right on categories and product listing.
2.2.2 In the backend
2.2.2.1 GENERAL CONFIGS
Go through Stores ⇒ Settings ⇒ Configuration⇒ BSS Commerce ⇒ Simple Details on Configurable Product.

In General:
- Enabled: choose Yes to enable the module.
NOTE:
- You can also enable/disable this module for a particular configurable product in SDCP General in the product edit page easily.
- In case, in General configuration you set No, and in the SDCP General you still choose Yes, the module won’t be enabled.
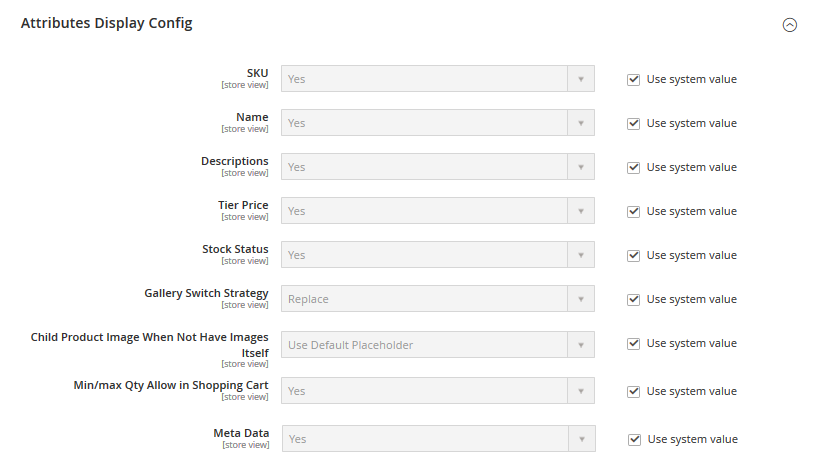
In Attributes Display Config: choose Yes to show the attributes you want in the frontend:
- SKU
- Name
- Description
- Tier Price
- Stock Status
- Gallery Switch Strategy:
- Replace: replace all parent product’s images by child product’s images
- Prepend: add child product’s images at the beginning of parent product’s images
- Disable: display only parent product’s images even when customers select the child product option
- Child Product Image When Not Have Images Itself (from v1.1.7):
- Use Parent Product Image: display parent product’s images
- Use Default Placeholder: display default placeholder of Magento
- Additional Info: show swatch additional information in the More Information tab when customers choose all options of the parent product.
- Meta Data: auto-create meta data (meta description, title, meta keyword) of child products when choosing all options of the parent product.
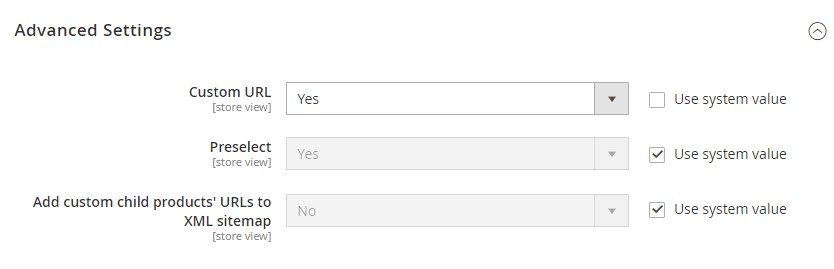
In Advanced Settings:
- Custom URL: choose Yes to enable the child product’s URL to change when the option is selected. The format of this URL is: …/Product-Name+attr1-Value1+attr2-Value2 (For instance: …/hero-hoodie+color-Black+size-S). Note: you should not include characters such as “-“, “~” or “+” in the attribute labels since it might hard to read the URL
- Add custom child products’ URLs to XML sitemap: If choose Yes, custom child products’ URLs will be added to XML sitemap and Google can index/follow these custom URLs
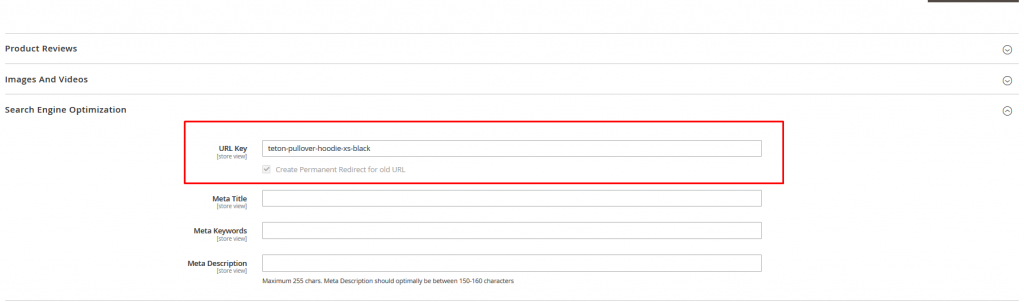
NOTE: we have fix this child product’s URL format so you cannot change it even in Product Page Details ⇒Search Engine Optimization ⇒ URL Key
2.2.2.2 DETAILED CONFIGURATION
Go to Catalog > Products > {configurable-product} details page in the backend.
- In Visibility, there is one new option - Only display product page: This option will hide this configurable product on the frontend category page and search page but you can still enter the product page by direct URL.
*Note: This option doesn’t work with mass action. This option can be used when you want to hide the configurable product, but still show all the children products individually, then redirect customer to the configurable product page when they click on a child product.

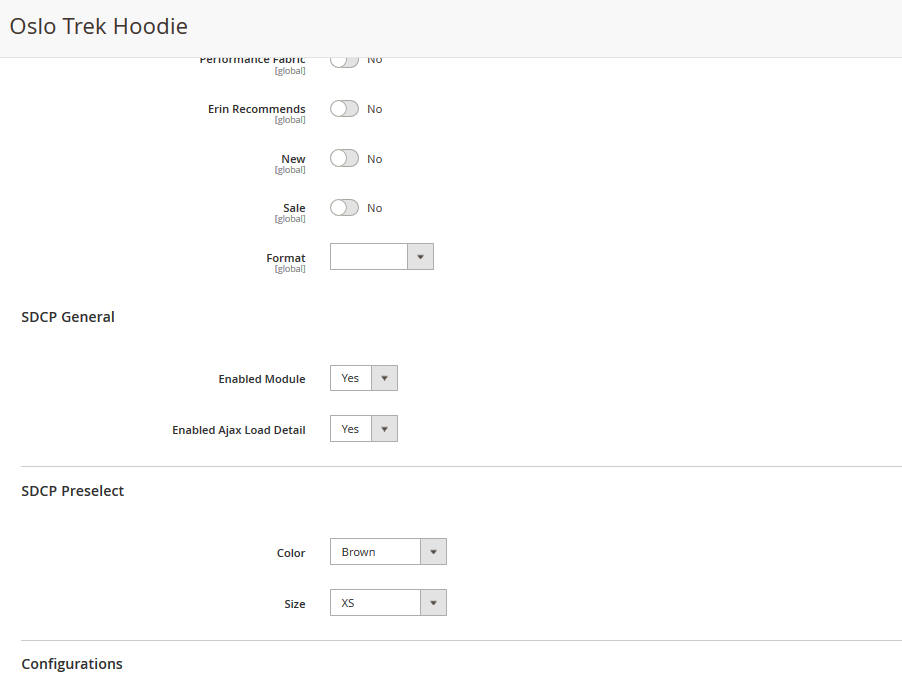
- In SDCP General tab
- Pre-select: the attributes are pre-selected in the product detail page in the backend.
- Enacle Module: enable the module on this product
- Enabled Ajax Load Detail
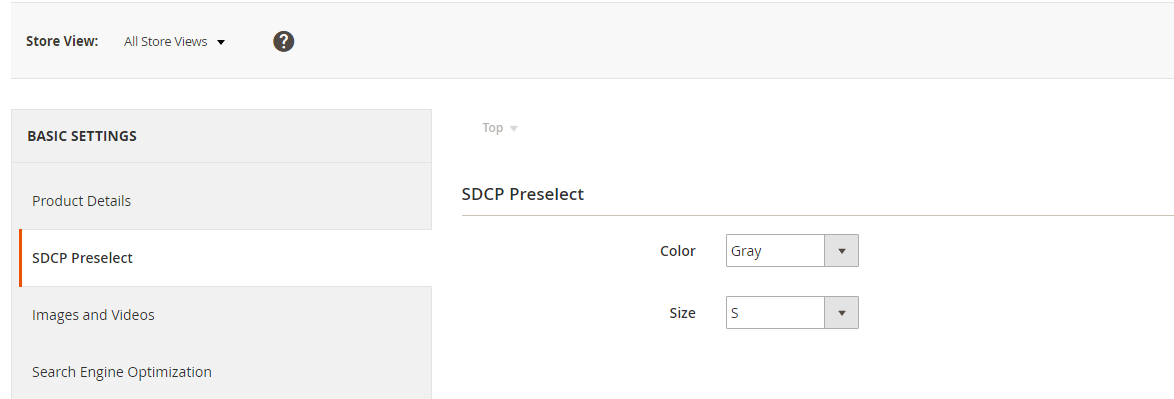
- In SDCP Preselect tab: display the pre-selected attributes
NOTE: in Magento 2.0.x version, there will be a separate Pre-select tab in product detail page:
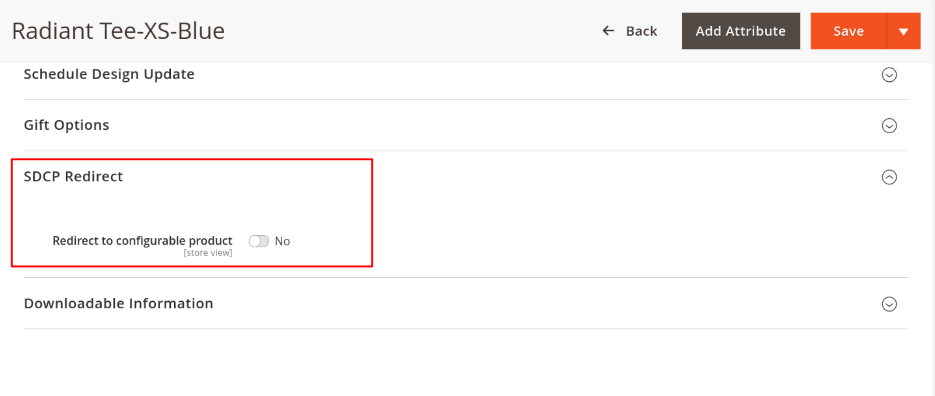
Next, go to Catalog > Products > {child-product} details page in the backend.
In SDCP Redirect (on the bottom page), you will see Redirect to configurable product configuration. You can choose:
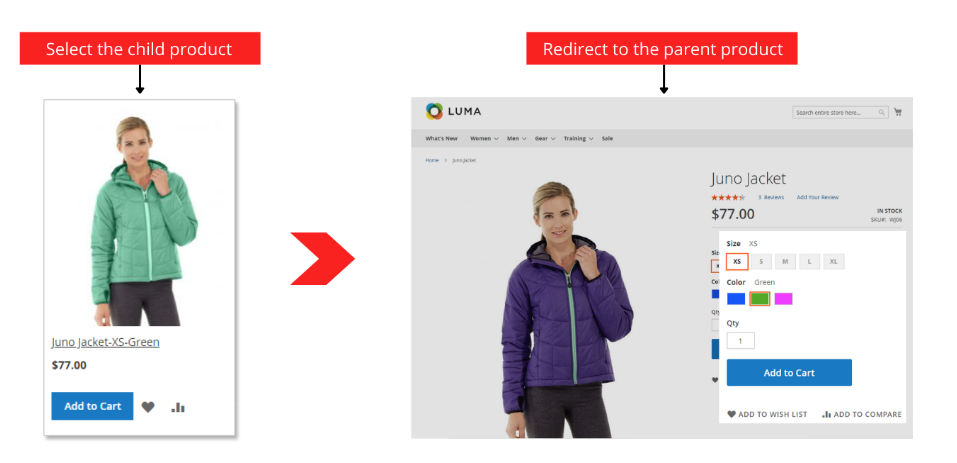
- Yes: If visibility of the child product is category/search, you will be redirected to the parent configurable product page when selecting the child product at the frontend.
- No: Work as default Magento - redirect to the child product page when selecting this one.
*Note: This config works with mass action.
Frontend result:
2.2.2.3 IMPORT PRE-SELECT
Go to System ⇒ Data Transfer ⇒ Import SDCP Preselect
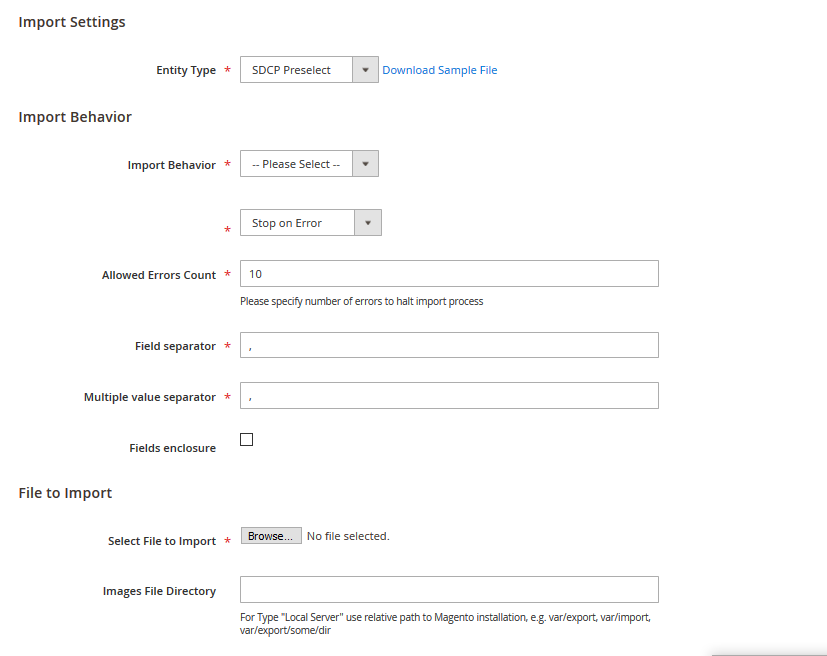
- In Import Settings, select SDCP Pre-select in the drop-down list of Entity Type
- In Import Behavior:
- Add/Update: This option allows administrators to add new pre-selected attributes the website. In addition, it also updates attributes if their pre-selected attributes exist.
- Replace: This option allows administrators to add new pre-selected attributes into the website. In case pre-selected attributes in the import data match with pre-selected attributes of existing attributes, these attributes are deleted and new records are created using the CSV data.
- Delete: This option allows administrators to remove pre-selected attributes in case their pre-selected attributes exist.
Next, you select one option from the drop-down list to determine how the system operates when there are errors in the import process.
- Stop on Error: the system stops importing when there are errors
- Skip error entries: the system skips errors and continues to import
- Allowed Errors Count: This setting allows you to choose the allowed maximum number of errors when importing. If the number of errors happening in the import process exceeds that maximum number you fill in this field, the system will stop importing
- Filed separator: Choose a character to separate two field column (sku & preselect). In our CSV sample file, the comma (,) is set up as default value
- Multiple value separator: Choose a character to separate multiple attributes in a field column. In our CSV sample file, the comma (,) is set up as default value
- CVS file preparation
Before you import product attributes via a CSV file, you need to prepare the CSV file with enough necessary information. You can download this CSV sample file by clicking “Download Sample File”. Then you open this file and fill in fields:
- In “sku” column: enter the SKU of the configurable products
- In “preselect” column: enter the attributes with their value
2.2.2.4 SET CUSTOM OPTIONS FOR CHILD PRODUCTS
In the product edit page of the associated product of choice, scroll down to Customizable Options.
Click on Import Options to use the custom option you previously set.
Choose Add Option button to create a new custom option of your choice.

- Option Title: Name of the option.
- Option Type: The type of the custom option. You have 10 types under 4 categories to choose from.
- Required: Tick to mark as a requirement, customer can not add the product to cart without specifying the custom option.