
1. Overview
Customer Approval for Magento 2 extension outweighs the default of Magento 2 by allowing admins to approve or disapprove new accounts as they want. This definitely helps store owners to manage new customer accounts.
VISIT our Magento 2 B2B Extension list to grab more essential features for your online business.
2. How Does It Work?
2.1 In the frontend
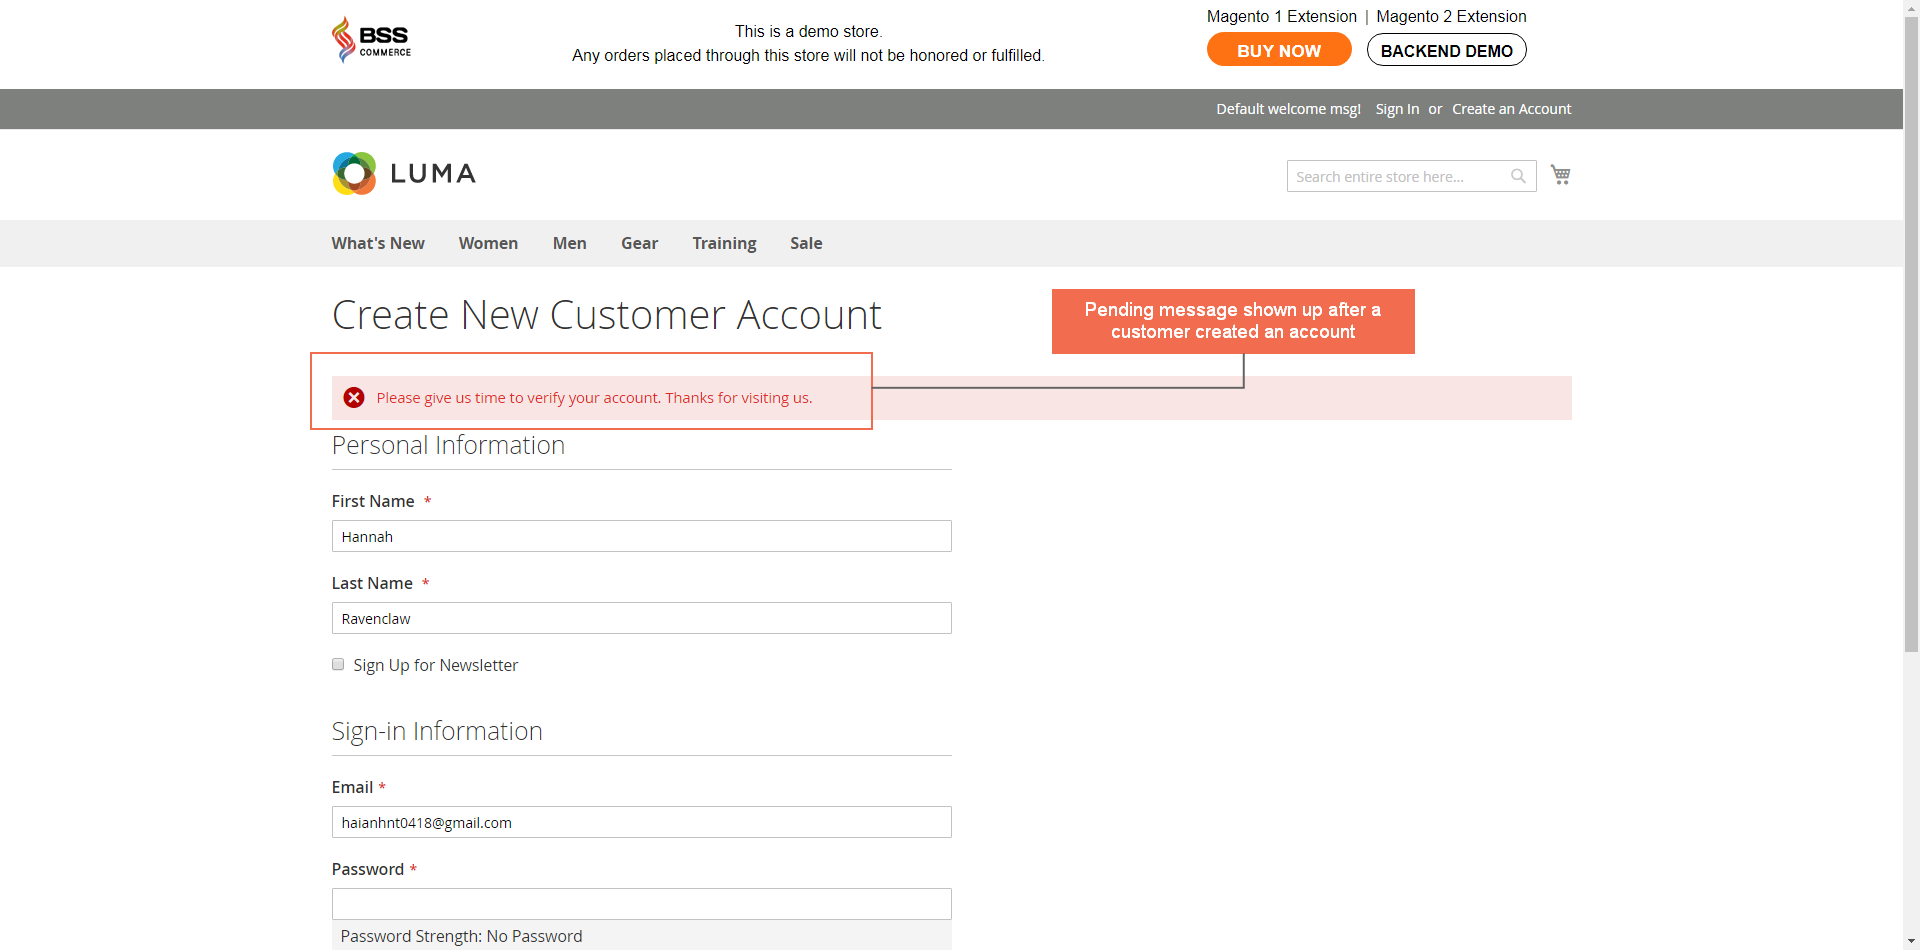
After a customer creates an account, there will be a Pending message shown up:
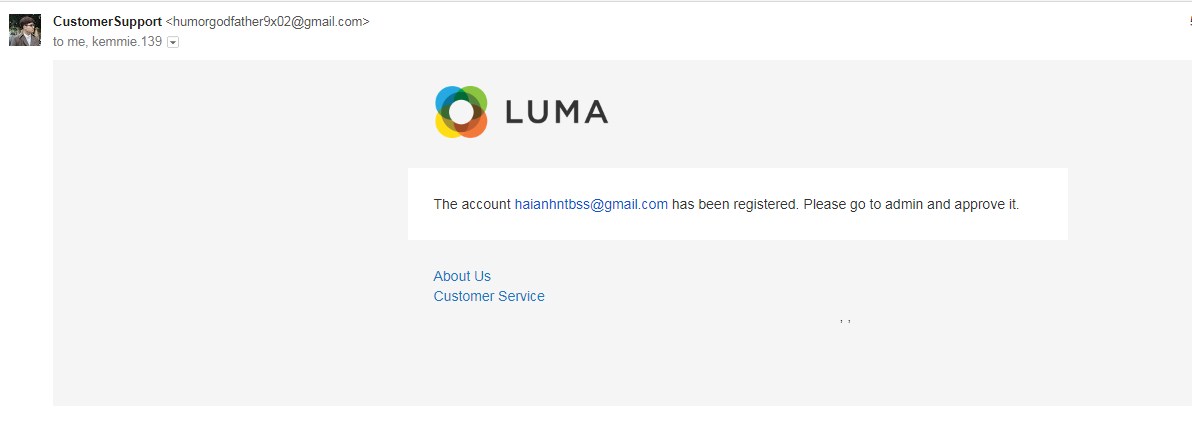
Next, a notification email will be sent to admin:
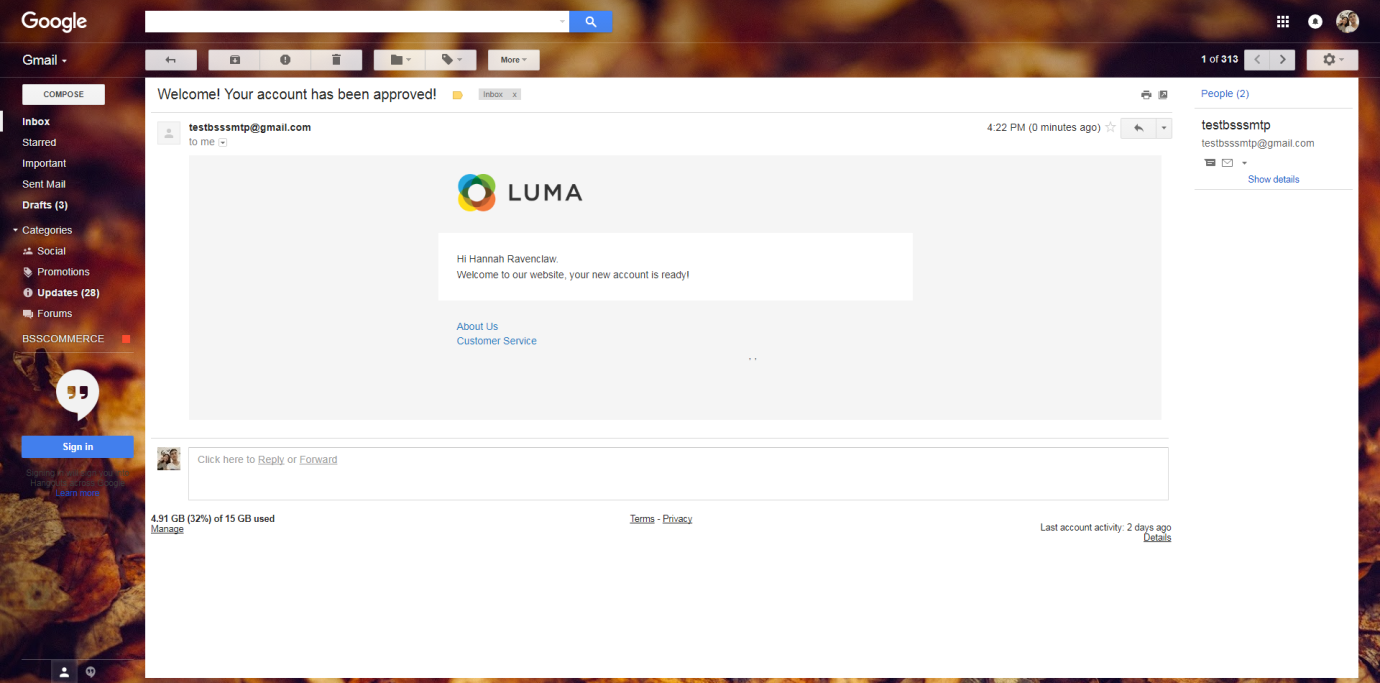
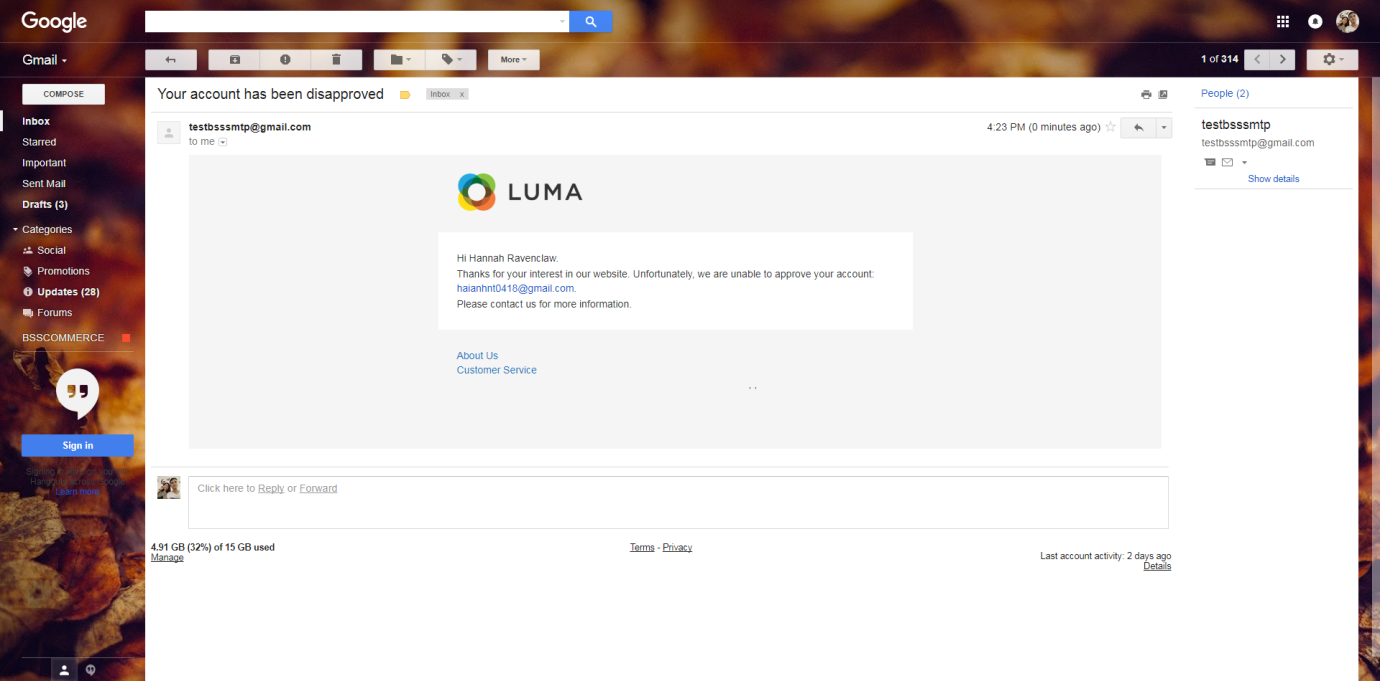
Then admin accepts or declines new accounts, there will be Approval or Disapproval emails sent to customers.
Here is an Approval email:
Here is a Disapproval email:
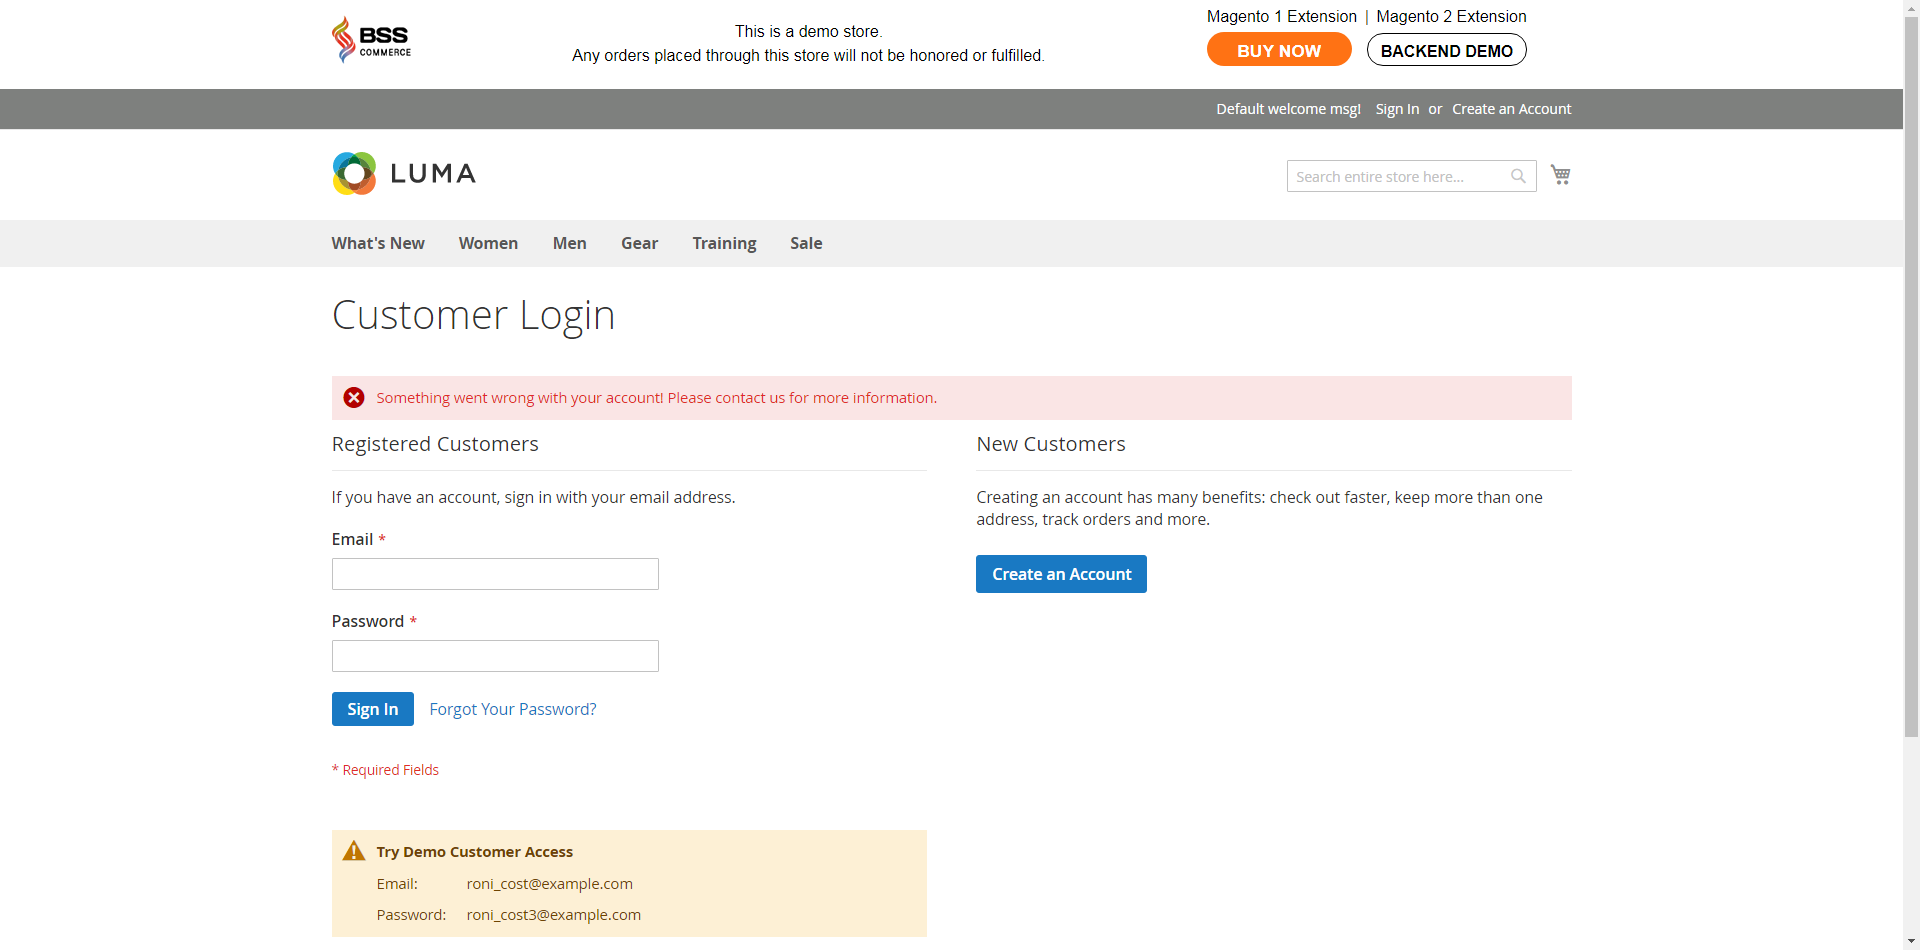
When this customer signs in, if his account is still pending, then the Pending message will be displayed. In case his account is disapproved, there will be a Disapproved message:
2.2 In the backend
2.2.1 General configuration
Go through Stores ⇒ Setting ⇒ Configuration⇒ BSS Commerce Customer Approval
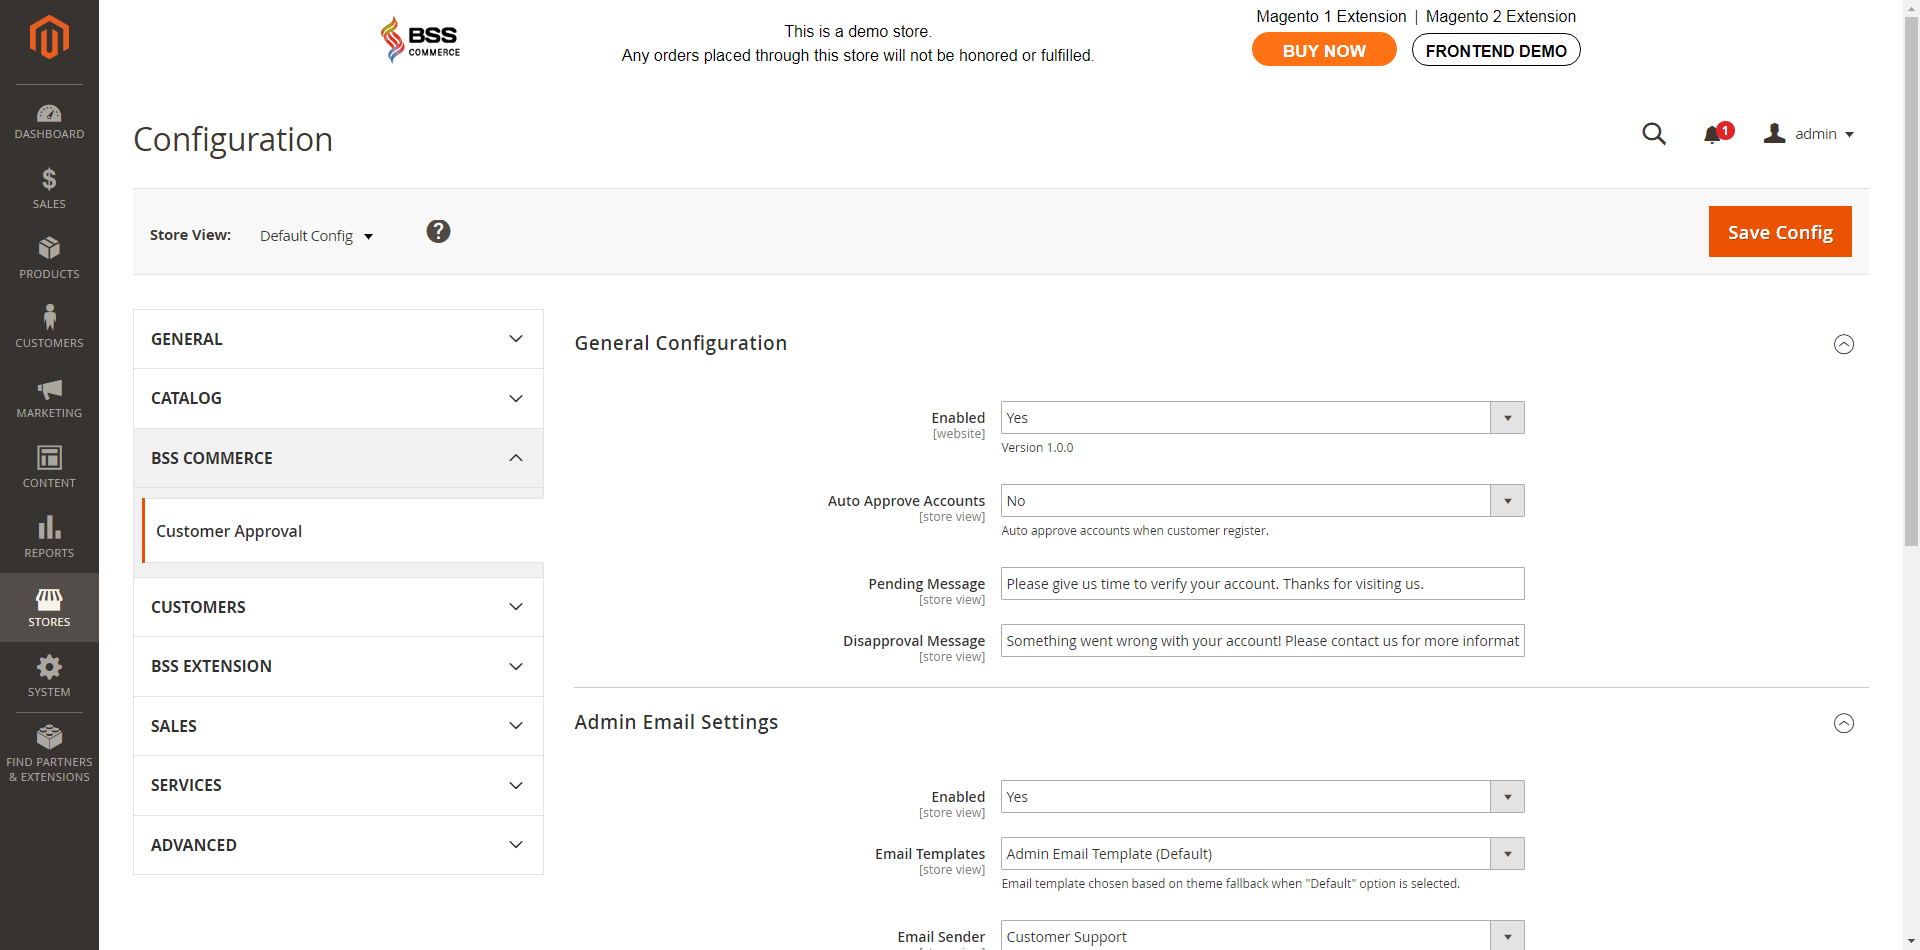
In General Configuration:
- Enabled: choose Yes to enable the module.
- Auto Approve Accounts:
- Choose Yes if you want to accept new accounts automatically.
NOTE: The difference between this Auto Approve Accounts function and the default is that you still can change customer account status in the backend, whereas the default cannot.
-
- Choose No if you want to approve accounts manually.
- Pending Message: you can edit text for the Pending message.
- Disapproval Message: you can edit text for the Disapproval message.
In Admin Emails Settings:
- Enabled: choose Yes to enable configurations below.
- Email Templates: choose one of the available email templates of websites. This selected template will be used to send notifications about new accounts created for admin.
- Email Sender: choose a name and email sender from Store Email Address of the default.
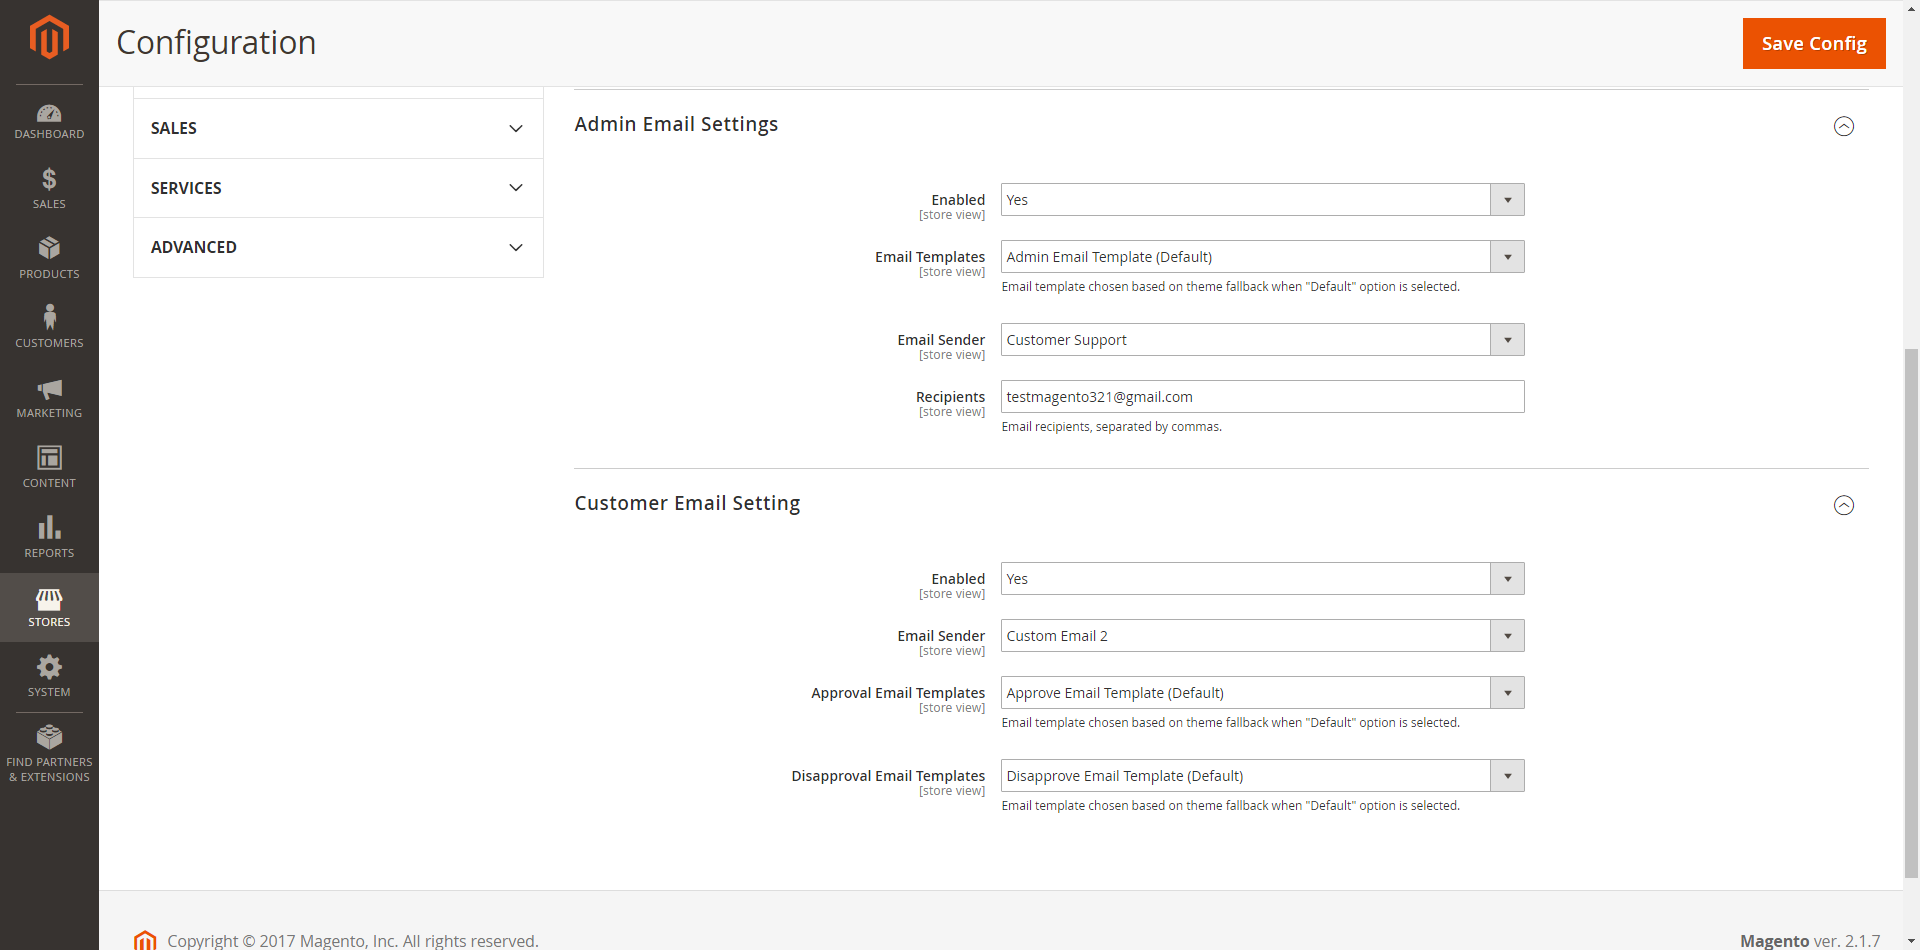
In Customer Email Settings:
- Enabled: choose Yes so that all configurations below can work.
- Email Sender: choose name and email of the sender from Store Email Address of the default.
- Approval Email Templates: select one of the available email templates of your site. This template will be used if admin change account status into Approved.
- Disapproval Email Templates: select one of the available email templates of your site. This template will be used if admin change account status into Disapproved.
NOTE in Email sender (for both Admin and Customer Email Settings):
- If you use SMTP in order to send mails then it just allows you to register the sender’s name. This Email Sender function gets email only in email configuration of the SMTP module. Please go to Stores ⇒ Configuration ⇒ Advanced ⇒ System ⇒ Gmail/Google Apps SMTP Pro in order to change email sender as you want.
- If your server is not registered via SMTP to send emails then this configuration will get both name and email of the sender.
2.2.2 Customer Attributes in the backend
In Customer Grid:
- After installing Customer Approval for Magento 2 extension, there is a Status column in Customer Grid in the backend:
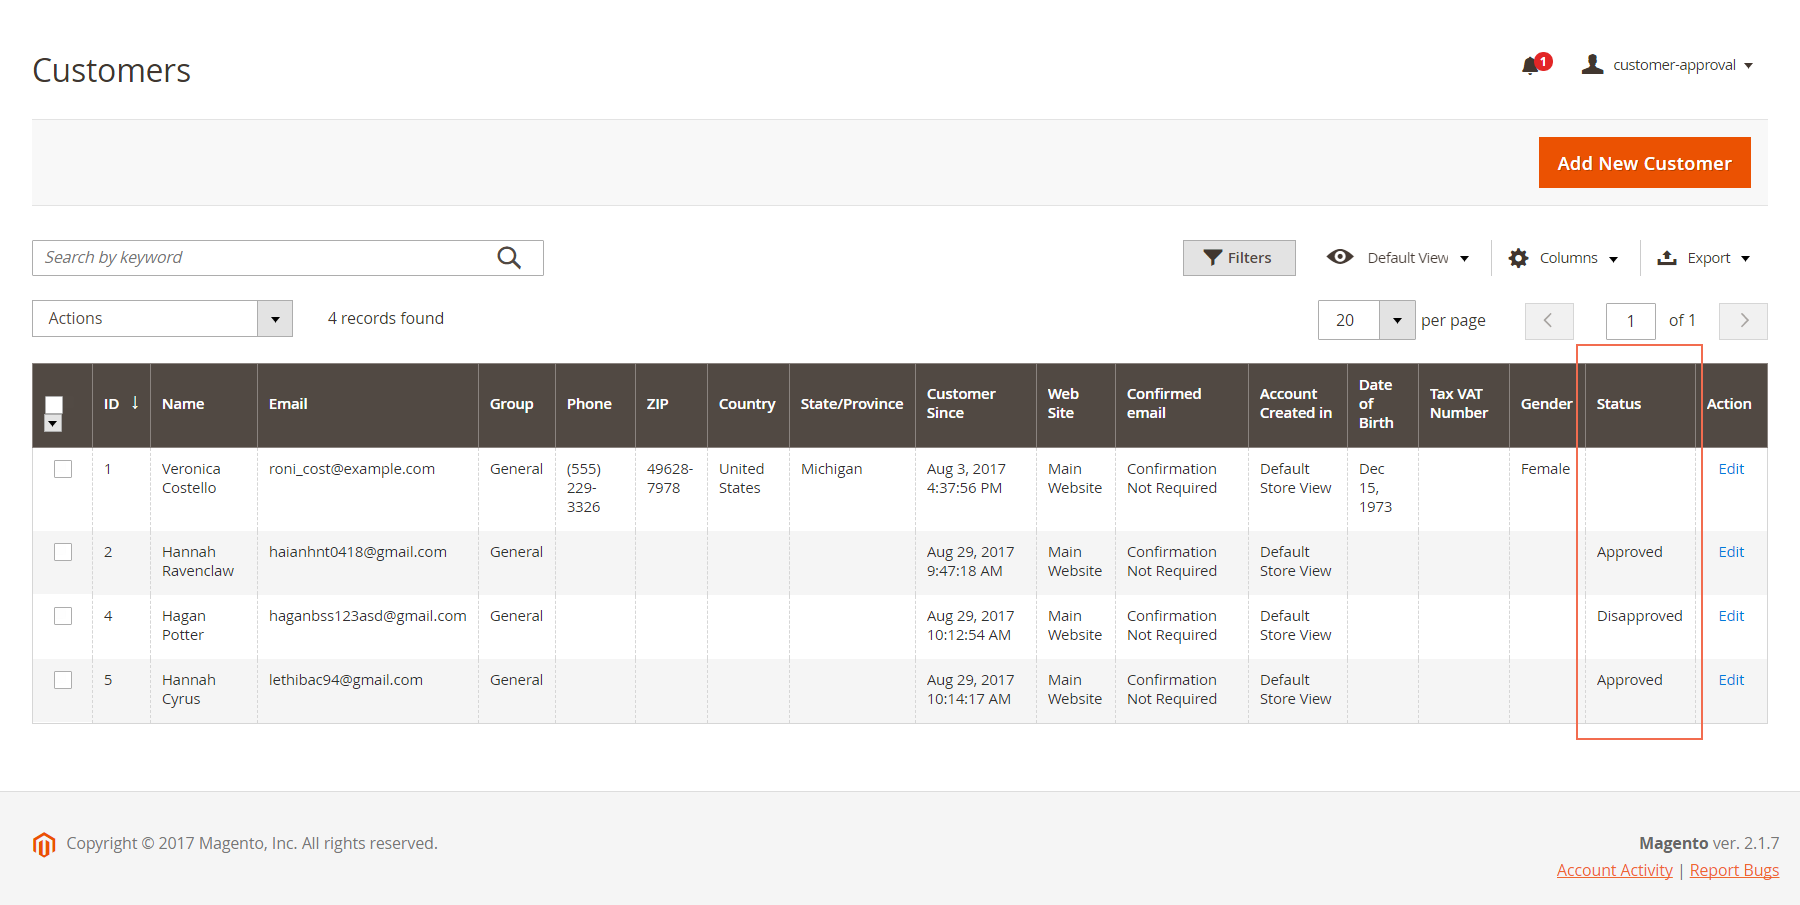
- In addition, admin can edit this status conveniently right in Customer Grid:
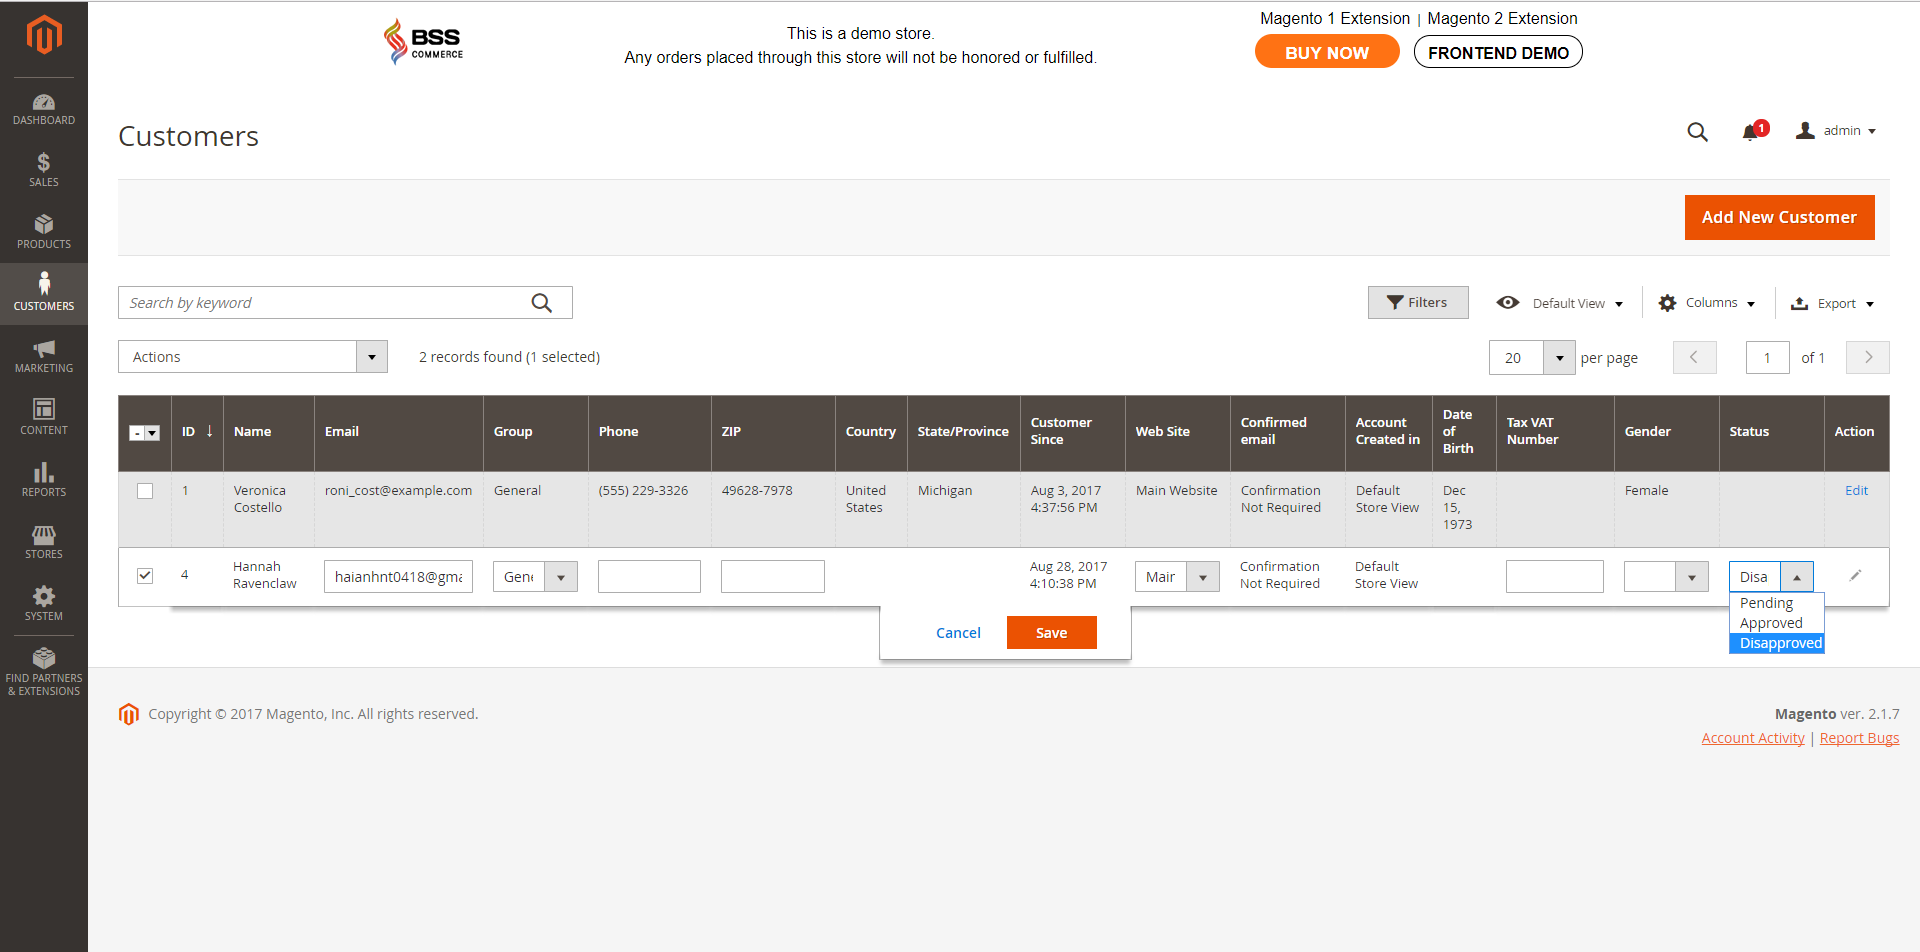
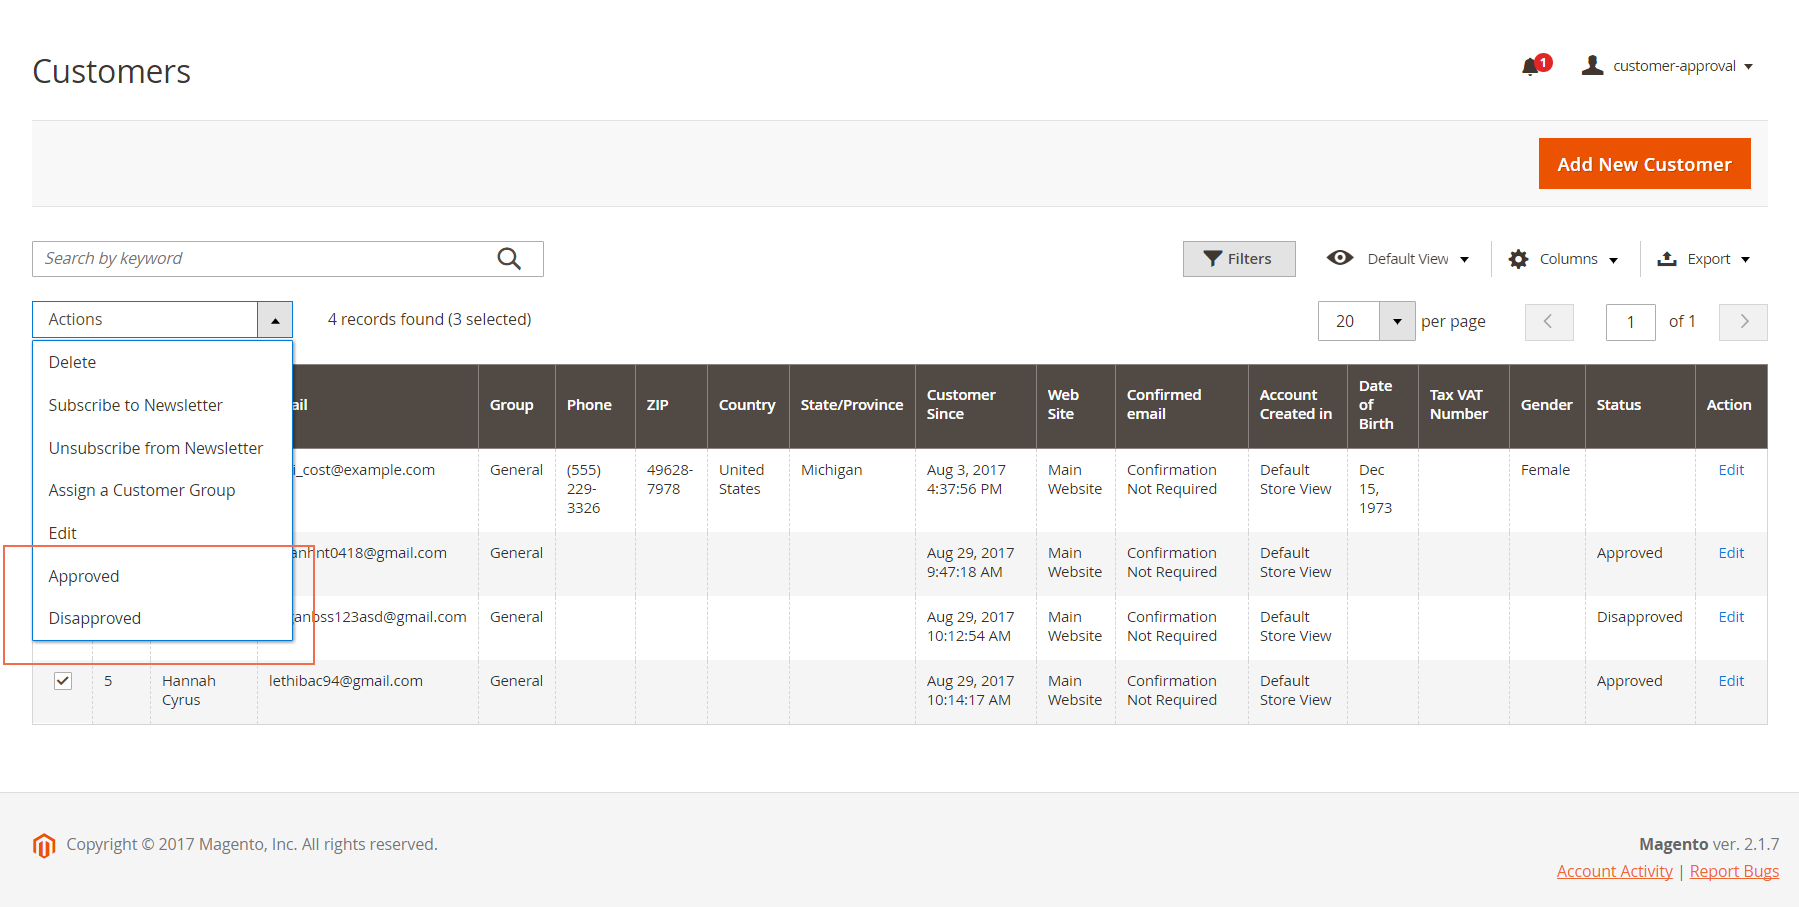
- Moreover, admin can have mass action: choose multiple customer accounts to approve or disapprove them at once:
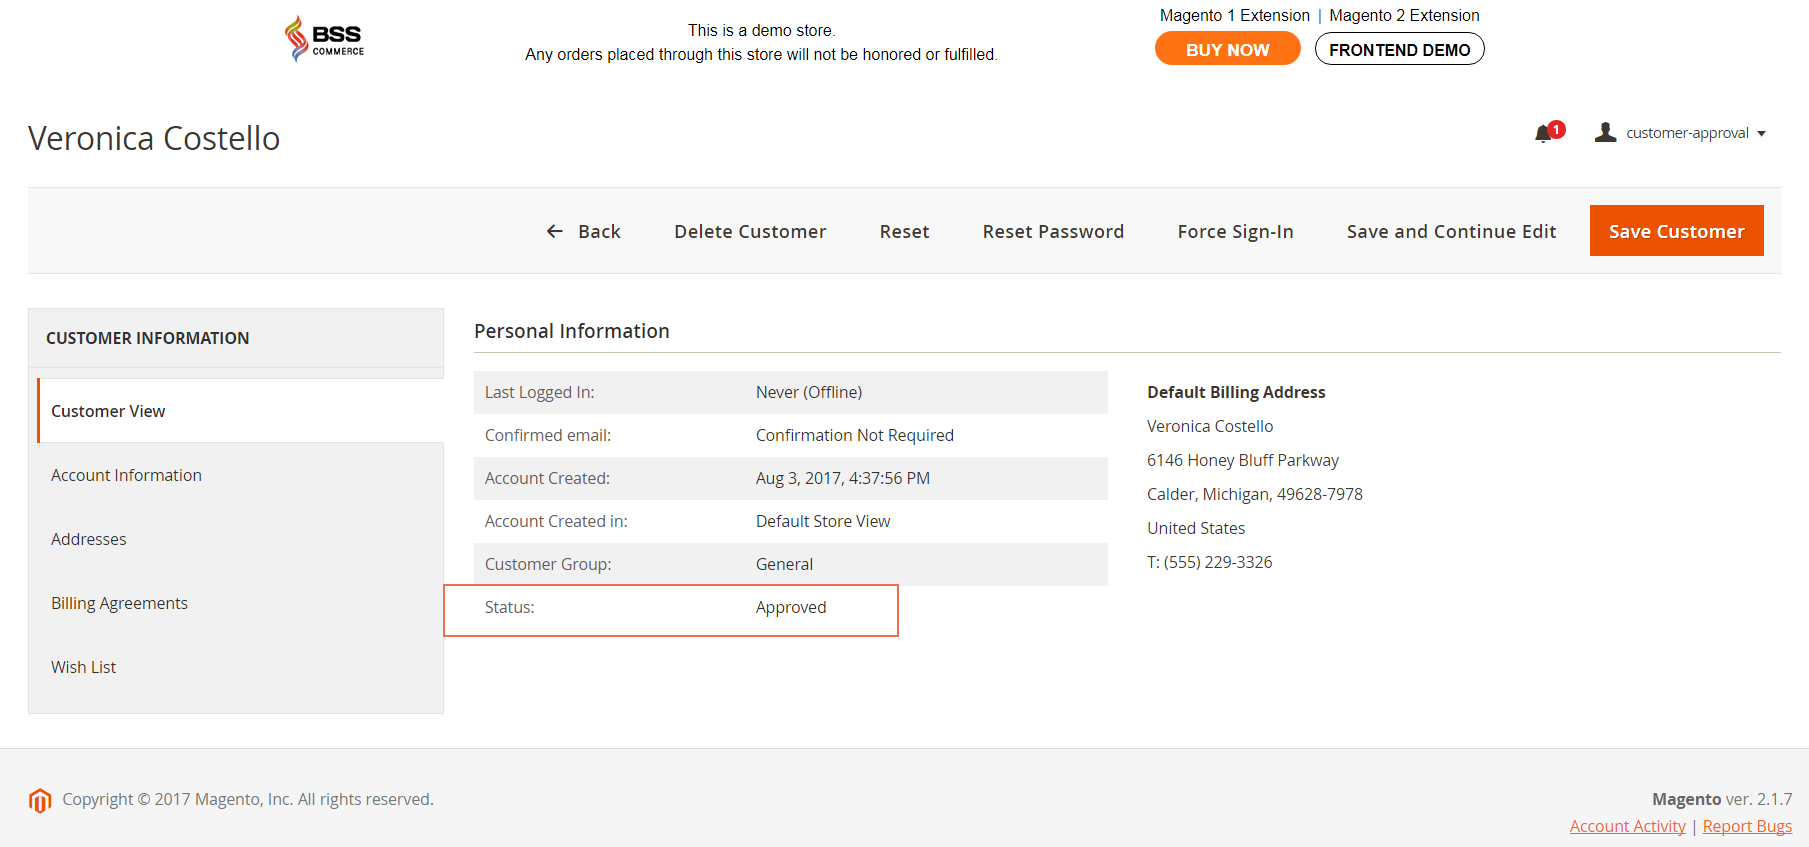
In Customer Information:
- Status information is included in Customer View:
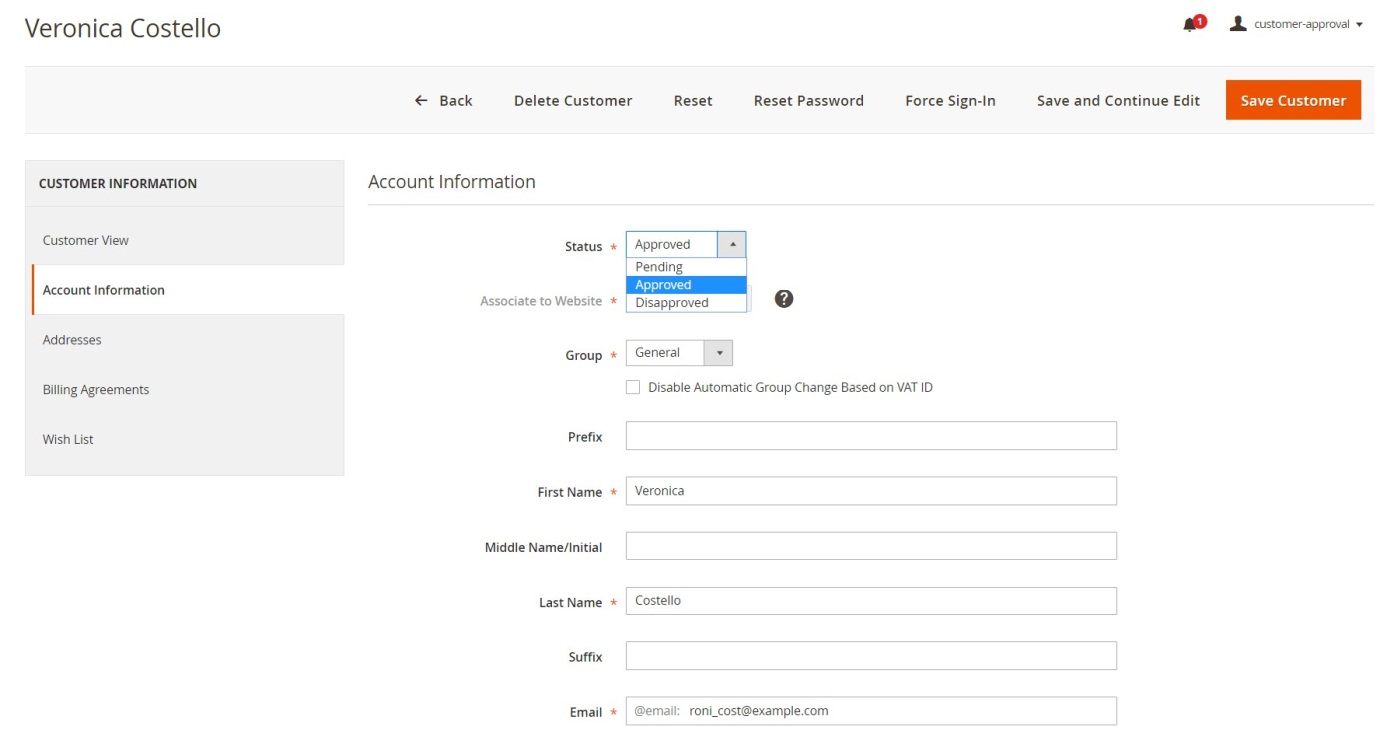
- Admin can change an account status as wish in Account Information:
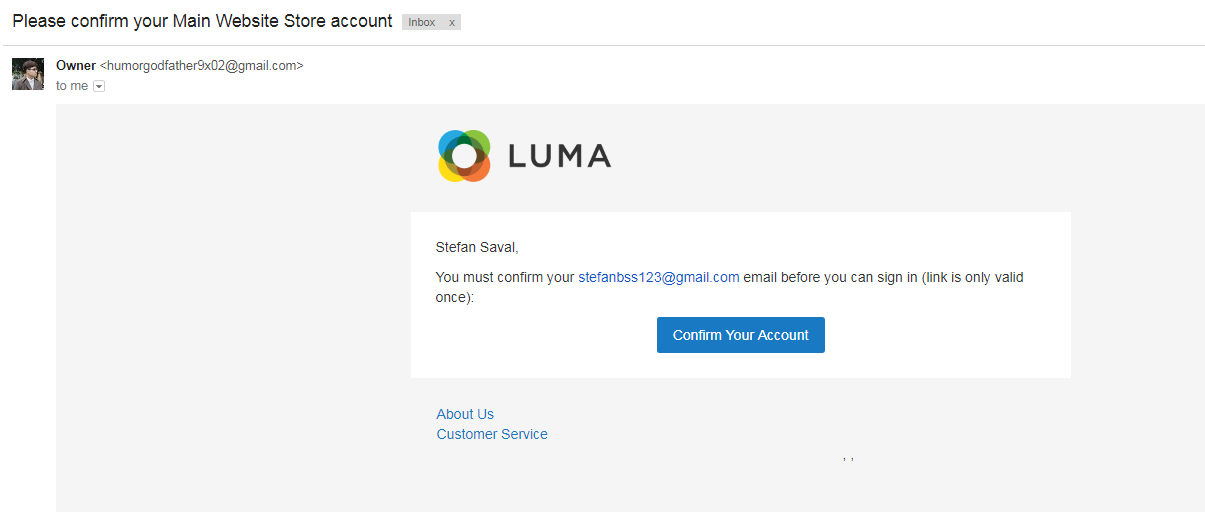
2.2.3. Required Email Confirmation
After installing this extension, in case admin sets Yes in Require Emails Confirmation, then when a customer creates an account, he cannot use his account and will be redirected to login page. A confirmation email will be sent to this customer so as to confirm his email and admin will also receive a notification about new accounts at the same time.
Next, this customer confirms his email then he will redirect to the login page. Pending message will be shown and still cannot use his account until the admin changes its status into Approved.
2.3 Notes for Installation
- Copy all folders of the module into the root folder
- Name the folder: Bss/CustomerApproval
- Run: php bin/magento setup:upgrade in order to setup the module
- Run: php bin/magento cache:flush to clear cache
- Run: php bin/magento setup:static-content:deploy
- Run: php bin/magento indexer:reindex customer_grid to reindex the customer grid
- If the customer grid does not show users then you need to reindex the customer grid by php bin/magento indexer:reindex customer_grid