1. Overview
Magento 2 B2B Registration extension allows the admin to create a new registration form by adding more fields for B2B customers into that form. Hence, the admin effectively obtains additional information from wholesale customers before deciding to accept or reject their registration.
This extension is included in our Magento 2 B2B category also. GRAB all the best Magento 2 B2B extensions NOW!
2. How Does It Work?
2.1. In the frontend
The admin can include a B2B Registration form besides the default form. This form has additional fields to get to know more about B2B customers.
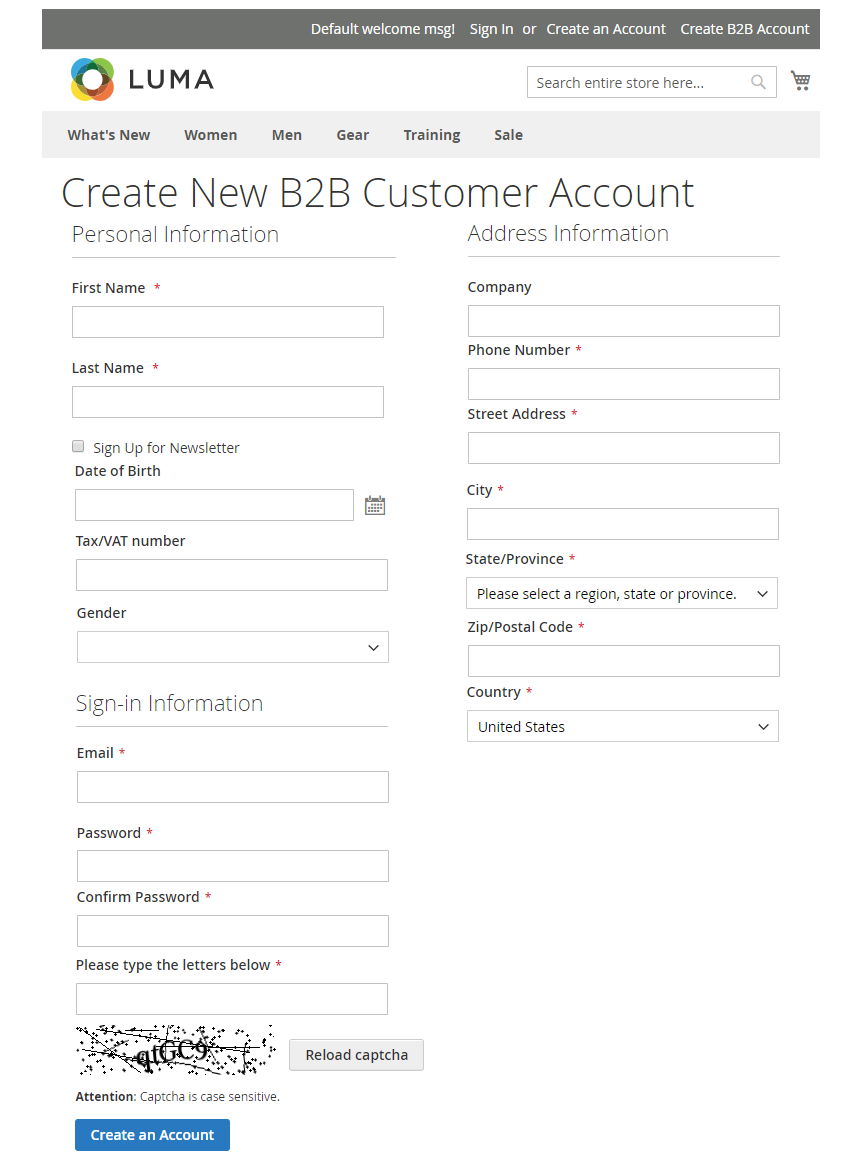
More importantly, the admin can review and approve or reject the B2B registration instead of activating the account automatically, like the default.
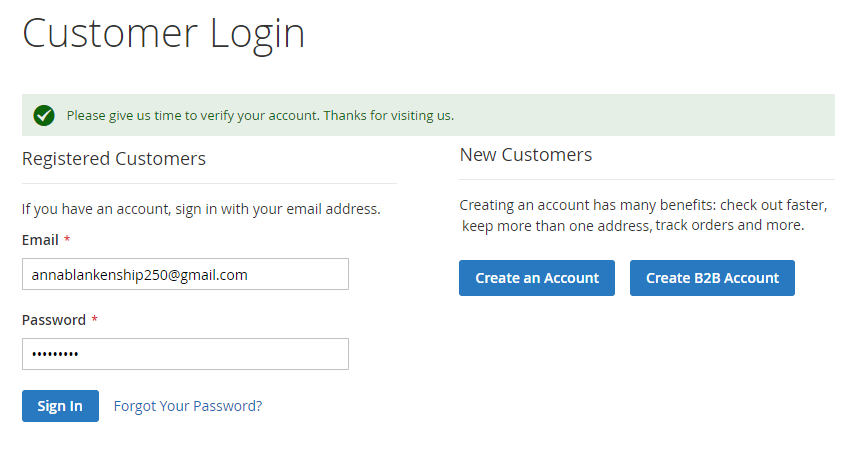
- When the users complete the B2B registration form, a pending message is shown.
An email will be sent to the admin's email to inform of the new B2B registration. Then, admin can manage over that account.
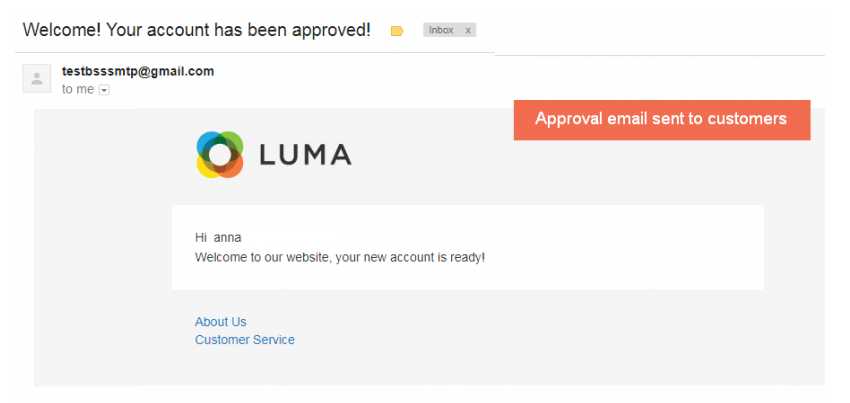
- If the admin approves the registration, an email will be sent to the user's email.
- If the admin rejects the registration, a disapproval email is sent respectively. And, an error message is shown when the users try to access the account in the frontend.
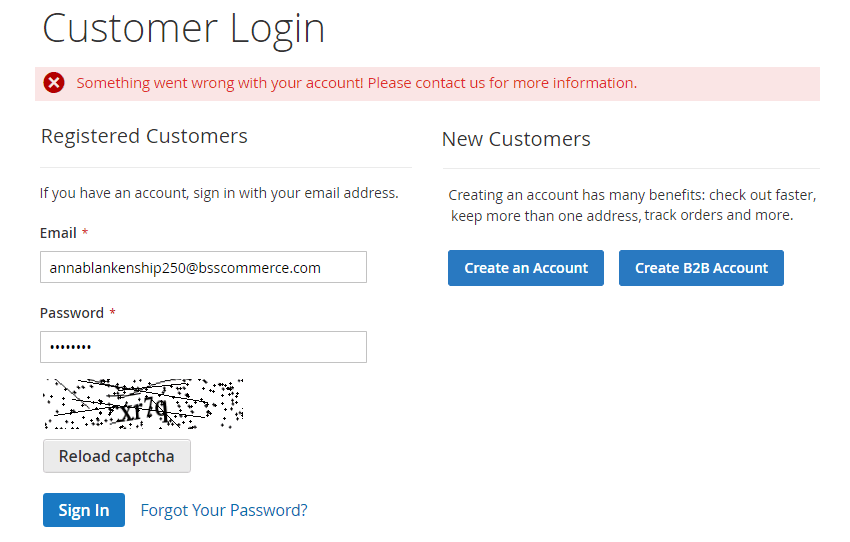
2.2. In the backend
2.2.1. General Configuration
Go through Stores ⇒ Settings ⇒ Configuration ⇒ BSS Commerce ⇒ B2B Registration.
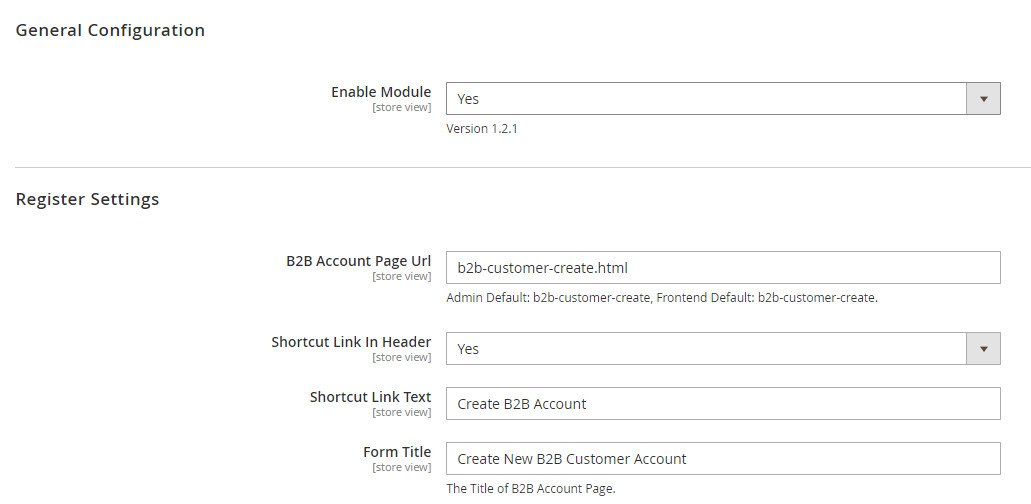
- In Enabled: choose Yes to enable the module.
2.2.1.1 Register settings
- In B2B Account Page URL: enter URL of the customer registration page
- In Shortcut Link in Header: select Yes to enable the shortcut link in the header. So customers can click this shortcut link to navigate the registration page.
- In Shortcut Link Text: enter the title of the shortcut link in the header.
- In Form Title: enter the title of the B2B registration form.
Choose additional fields in the B2B Registration form. If you do not want any fields to show up, choose No.
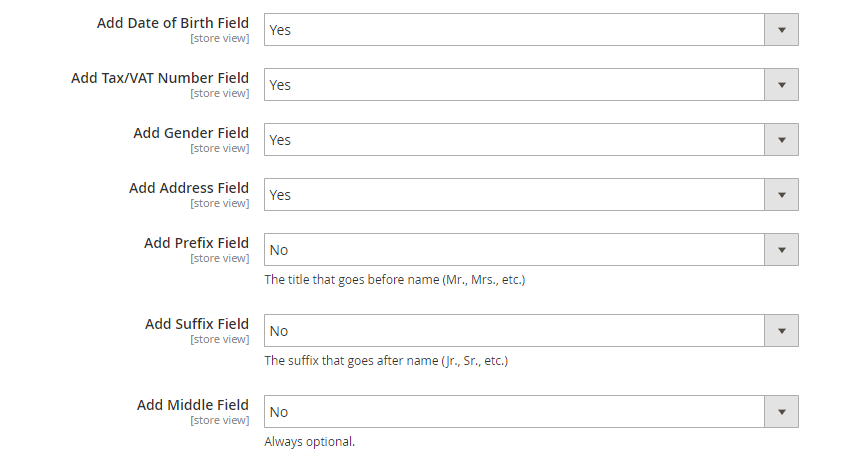 Please ensure that by default, these fields are not required. Go to Configuration ⇒ Customer Configuration ⇒ Name and Address Options to check.
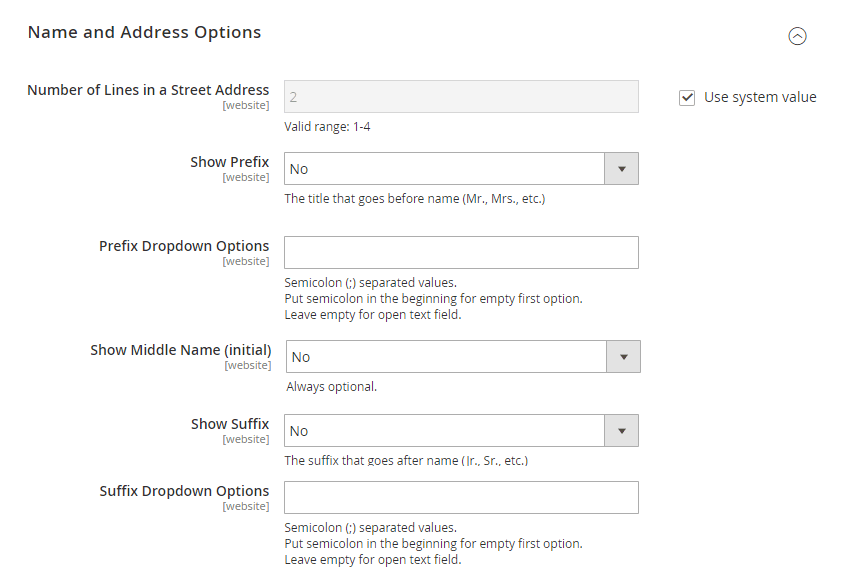
2.2.1.2 Customer groups

- In Default Customer Group: choose a group that you want to add the customer into.
- In Disable Regular Registration: select Yes to disable the standard “Create an Account” link in the header, “Create an Account” button in Sign-in Page, and checkout page.
Choose No to enable both "B2B Registration link" and the default "Create an Account link."
2.2.1.3 Approval settings

- In Auto Approve Accounts: Choose Yes if you want to accept new B2B accounts automatically or No if you want to approve accounts manually.
NOTE: Even when you approve the B2B registration requests automatically, you can still change their status in the backend.
- In Pending Message: enter Pending message.
- In Disapproval Message: enter Disapproval message.
2.2.1.4 Admin email settings
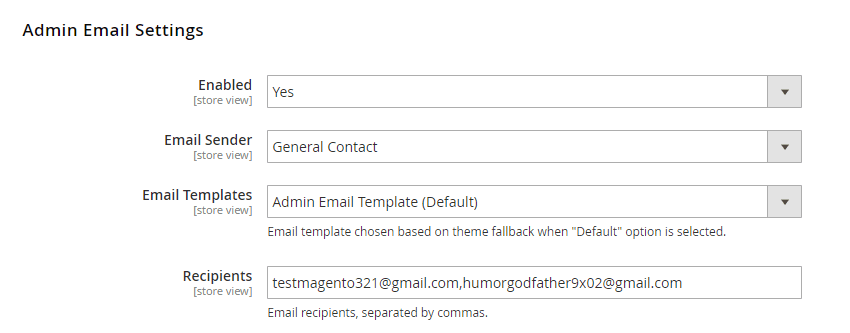
- In Enabled: choose Yes to enable configurations below.
- In Email Sender: enter the name of the sender from Store Email Address of the default.
- In Email Templates: choose among available email templates of websites to notify the admin of new B2B accounts.
- In Recipients: enter emails, separated by commas, to receive notification about new accounts created.
2.2.1.5 Customer email settings
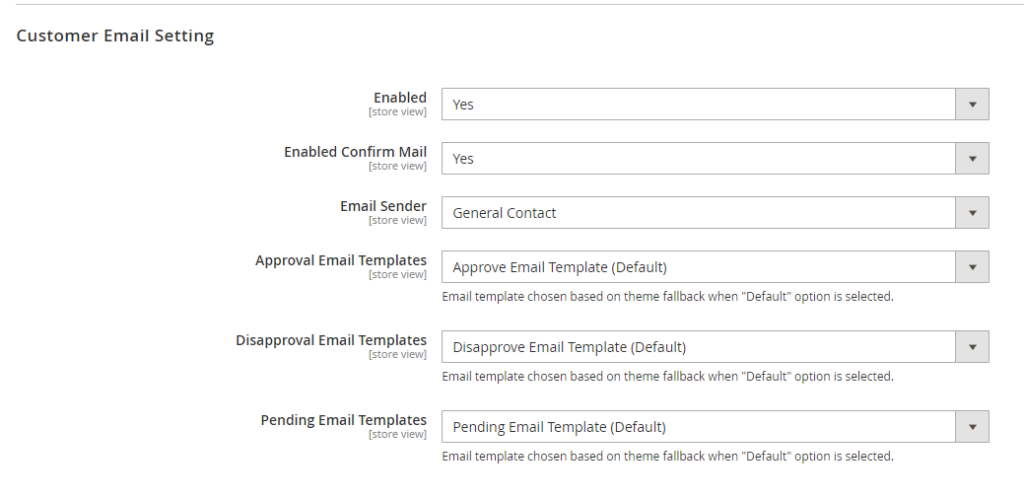
- In Enabled: choose Yes to send notification emails to customer
- In Email Sender: enter the name of the sender from Store Email Address of the default.
- In Approval Email Templates: select among available email templates of your site to send an email after the admin approves the B2B registration.
- In Disapproval Email Templates: select among available email templates of your website to send an email after the admin rejects the B2B registration.
- In Pending Email Templates: select among available email templates of your website to send an email after customer sign-up the B2B account.
2.2.2. Default CAPTCHA support
To enable Captcha in the B2B Registration form, please follow Stores ⇒ Configurations ⇒ CUSTOMERS ⇒ Customer Configuration ⇒ CAPTCHA
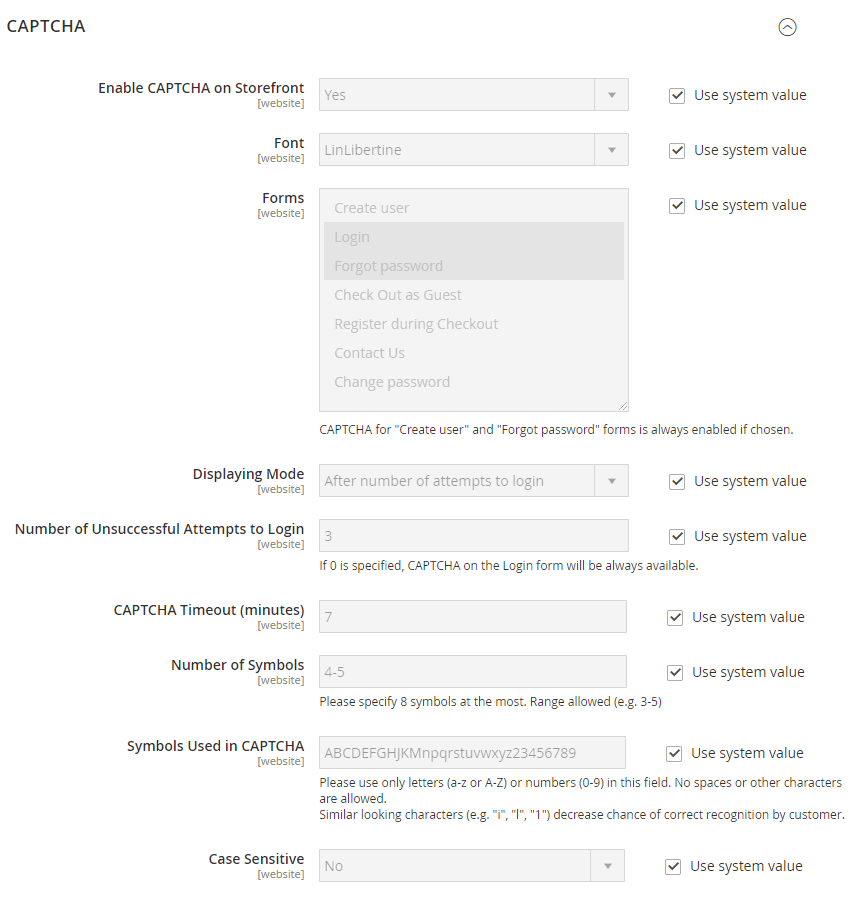
- Set Enable CAPTCHA on Storefront to Yes.
- In Form, choose Create User form to enable the CAPTCHA
- Set Display Mode to either Always to After number of attempts to login.
- Define CAPTCHA settings.
2.2.3 Manage B2B registration requests
In Customer Grid:
There is an additional Status column in Customer Grid in the backend so that the admin can check the status of B2B accounts and make adjustments accordingly.
The admin can edit the status of single B2B account by double-clicking in any position in the row:

or, multiple B2B accounts:
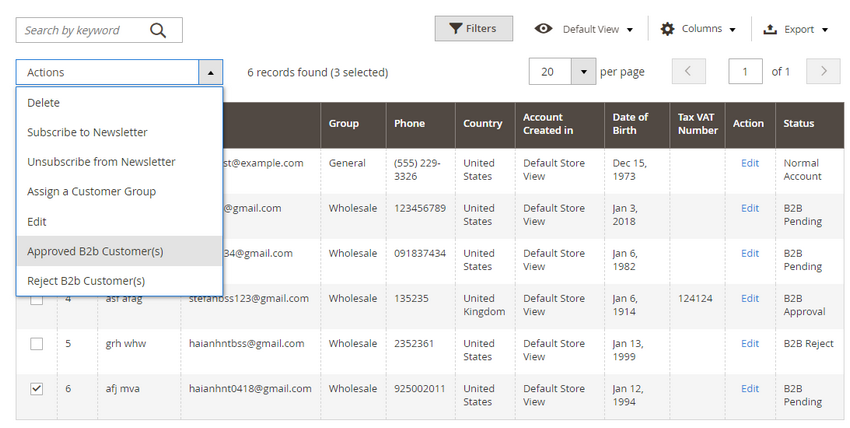
or in Account Information of specific account:
2.3.4 Create Widget with B2B Registration Form as Page Type
Go to Content > Widget -> Select Type -> In Layout -> Specific Page -> B2B Registration Form.
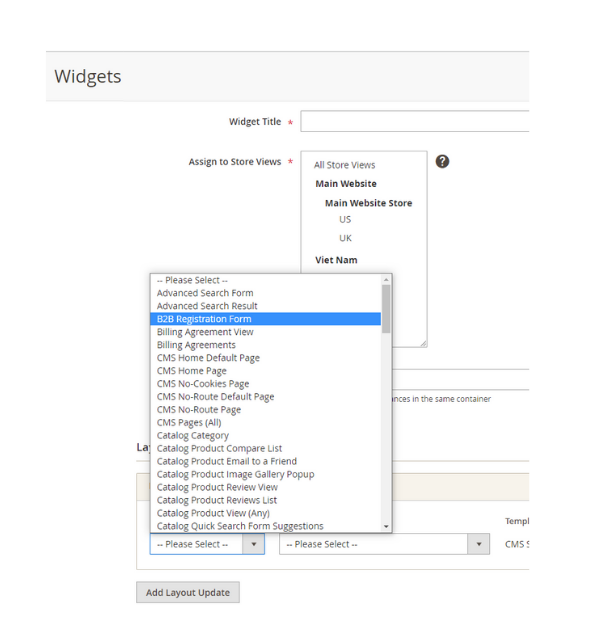
Then you can continue to set up the widget or show at page or include in a block accordingly.
*Note:
- If the admin creates an account in the backend for a customer, there will be an approval notification email sent to the customer after finish creating this account.
However, that account has Normal status; admin can change into B2B Approval status, then there will also be a notification email sent to that customer.
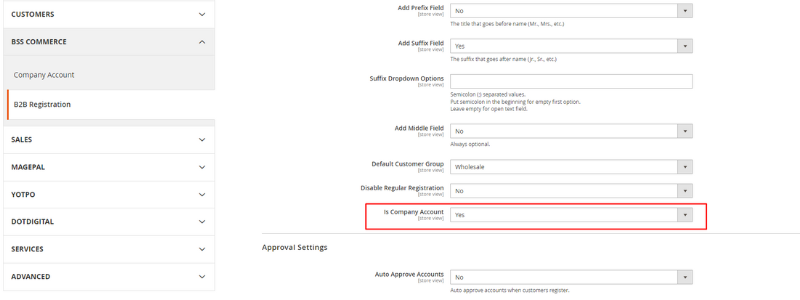
- Magento 2 B2B Registration is compatible with Magento 2 Company Account by BSS. When these modules are installed and enabled at the same time, there is an extra configuration Is Company Account in Register Settings section. This configuration is displayed corresponding to a field - Field Register as a Company Account that allows customers to whether or not to register as a company account.
