
Reminder
Magento 2 Import Export module CAN ONLY WORK smoothly when you do the exact 2 steps below:
- Always backup your database before using the extension for importing orders.
- Always follow the user guide step-by-step while preparing for your importation.
1.Export Order
To export orders, follow this chain:
System -> Export by BSS -> Set Entity to Order
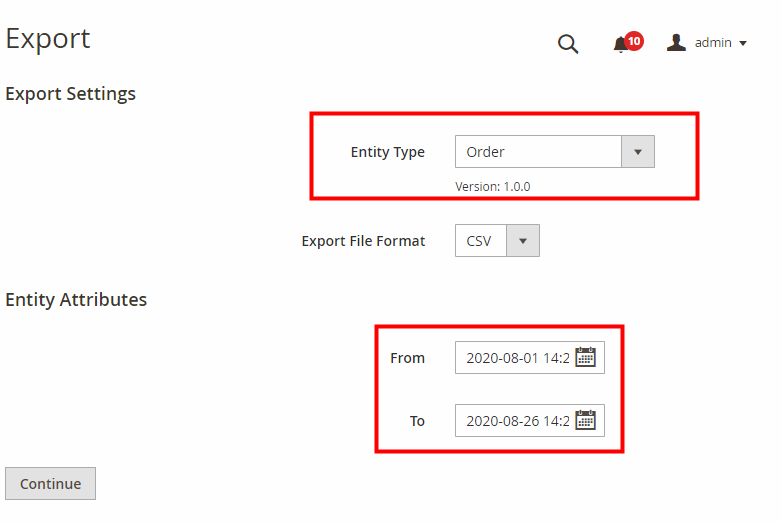
Here, you can choose the time window in which you want to extract and download the order from.
2.Import Order
In the admin panel, go to System -> Import by BSS -> Set Entity Type to Order.
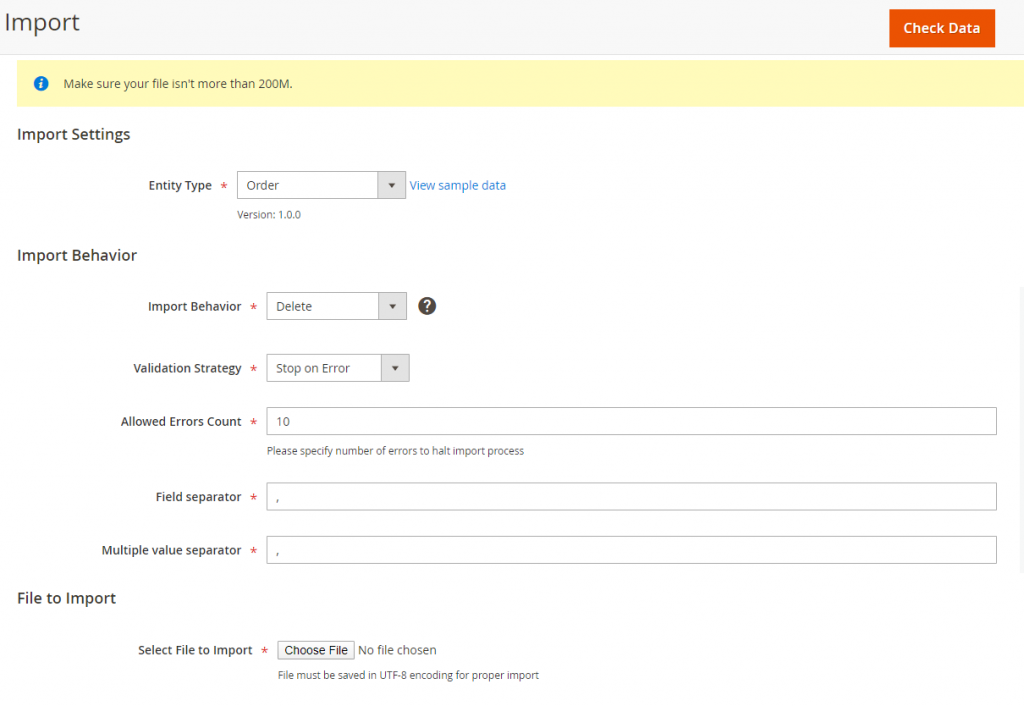
2.1 Understand The Import Behavior
- Import Behavior: There are 3 options for you to select.
+ Add: This option allows administrators to add new order into Magento 2 database.
+ Update: The module will update the existing order with the new information you’ve prepared with the CSV file.
+ Delete: This option allows the system to get orders based on the entity_id in the CSV file, then delete items that are available in the database.
- Validation Strategy: select one option from the drop-down list to determine how the system operates when there are errors in the import process.
+ Stop on Error: the system stops importing when there are errors.
+ Skip error entries: the system skips errors and continues to import.
- Allowed Errors Count: This setting allows you to choose the allowed maximum number of errors when importing. If the number of errors happening in the import process exceeds the maximum number you fill in this field, the system will stop importing.
- Multiple value separator: Accept the default value of a comma (,). A comma is the default separator in a CSV file. If you want to use a different character, please make sure that the data in the CSV file matches the character that you specify.
2.2 Prepare The CSV File
Before you import orders via a CSV file, you need to prepare the CSV file with enough necessary information. You can download this CSV sample file by clicking View sample data next to the Entity Type field, or click here. After that, fill in your CSV accordingly.
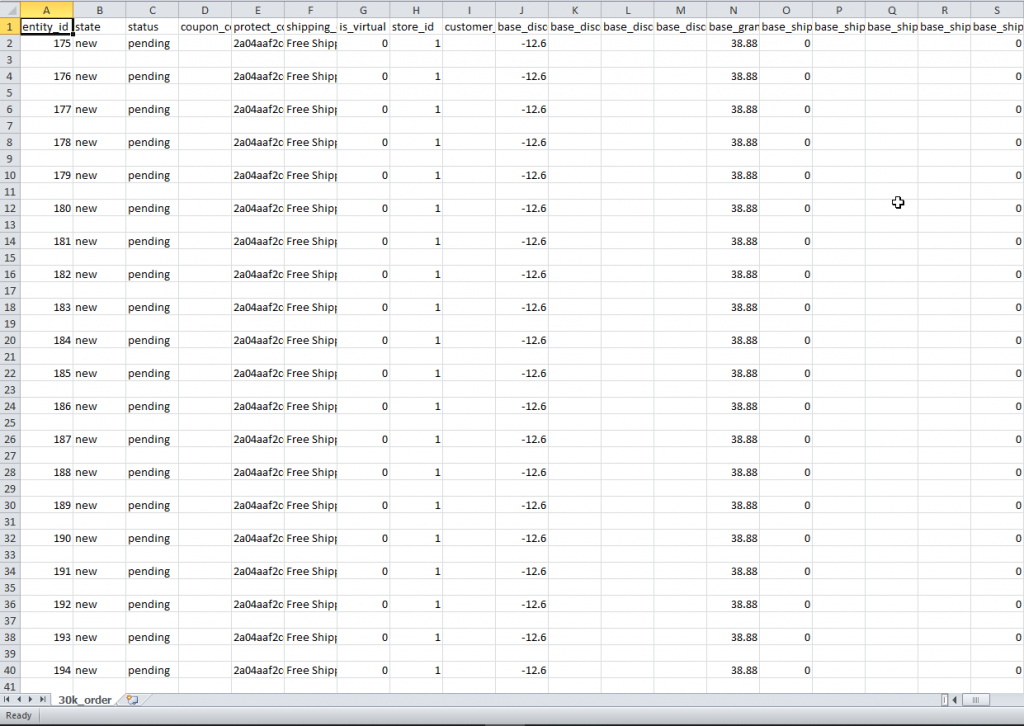
You can find all column descriptions on this spreadsheet.
2.2.1 Note while preparing csv file for each type of behavior
+ For Add and Update behavior, remember to follow this table:
| Object | Fields That Need To Have The Exact Same Value |
| Order | - entity_id - item:order_id - address:parent_id - payment:parent_id - transaction:order_id - tax:order_id - shipment:order_id - invoice:order_id - creditmemo:order_id - status_history:parent_id - download_link:order_id |
| Order Item | - item:item_id - tax_item:item_id - shipment:order_item_id - invoice:order_item_id - creditmemo:order_item_id - download_link:order_item_id |
| Address | - address:entity_id - shipping_address_id - shipment:shipping_address_id - invoice:shipping_address_id - creditmemo:shipping_address_id |
| Address | - address:entity_id - billing_address_id - shipment:billing_address_id - invoice:billing_address_id - creditmemo:billing_address_id |
| Tax |
- tax:tax_id |
| Payment | - payment:entity_id - transaction:payment_id |
| Shipment | - shipment:entity_id - shipment_item:parent_id - shipment_track:parent_id - shipment_comment:parent_id |
| Invoice | - invoice:entity_id - invoice_item:parent_id - invoice_comment:parent_id |
| Credit memo | - creditmemo:entity_id - creditmemo_item:parent_id - creditmemo_comment:parent_id |
| Downloadable Link | - download_link:purchased_id - download_link_item:purchased_id |
| Downloadable Link | - download_link:order_item_id - download_link_item:order_item_id |
+ For Update behavior, DO NOT CHANGE THESE FIELDS:
entity_id
item:item_id, item:order_id
address:entity_id, address:parent_id
status_history:entity_id, status_history:parent_id
tax:tax_id, tax:order_id
tax_item:tax_item_id, tax_item:tax_id, tax_item:item_id
payment:entity_id, payment:parent_id
transaction:transaction_id, transaction:payment_id, transaction:order_id
shipment:entity_id, shipment:order_id
shipment_item:entity_id, shipment_item:parent_id
shipment_track:entity_id, shipment_track:parent_id
shipment_comment:entity_id, shipment_comment:parent_id
invoice:entity_id, invoice:order_id
invoice_item:entity_id, invoice_item:parent_id
invoice_comment:entity_id, invoice_comment:parent_id
creditmemo:entity_id, creditmemo:order_id
creditmemo_item:entity_id, creditmemo_item:parent_id
creditmemo_comment:entity_id, creditmemo_comment:parent_id
+ For Update or Delete behavior, the best way to do this is to export the data first. This step will save you time on matching information in the filling CSV file.
+ For Delete behavior, if your intention is to delete the orders, all you need is a CSV file fills with the entity ID of said orders and you’re ready to go.
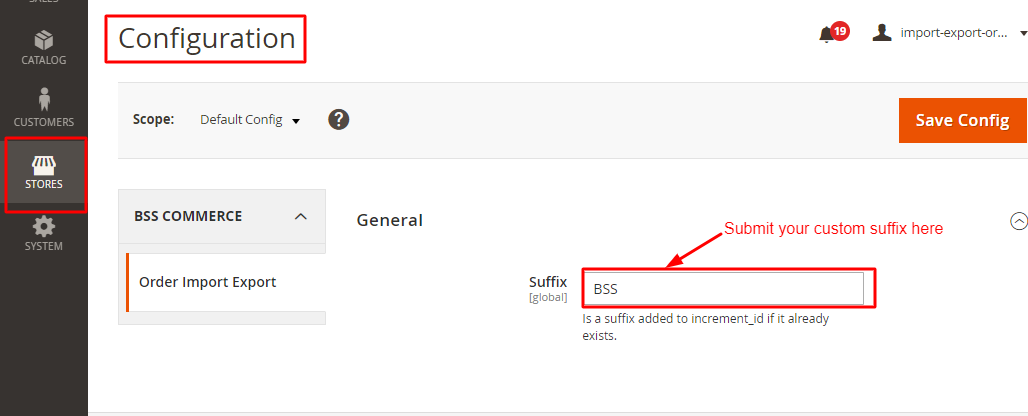
While importing, if the system encounters a similar increment_id in the database, it will automatically add in increment suffix (default: BSS) and proceed to continue the import.
Or you can add your custom suffix at the Suffix config. Please use only letters (a-z or A-Z), numbers (0-9) or underscore (_) in this field, and the first character should be a letter.
2.2.2 Note while preparing CSV file each type of product
a. The least fields required to import order: you can download the file 1 in Sample Data. They include information for:
-Order
-Order Item (fields with prefix as item:)
-Payment (fields with prefix as payment:)
-Address (fields with prefix as address:)
b. For Physical Products, besides all the fields above, you need to have both shipping address and billing address in order to import orders.
c. For Virtual Products, besides all the fields in a., you need to have the billing address in order to import orders. In case you also fill in the shipping address, it will still proceed to import orders.
d. For Downloadable Products, you need to have download_link and download_link_item in addition to all the fields in a. to import order.
2.3 Load File To Import
After you finish the CSV file, tab the Choose File button to select the file to import.
2.4 Check data and import
After you select the CSV file, you need to click the Check Data button to validate data before importing.
If your CSV file is free from errors, there is a message to notify validation results and the Import button now appears to click.
You click the Import button to start importing order in the CSV file into Magento 2 website. There is also a notification about the results of the import process.
If your CSV file includes errors, the Import button cannot be displayed for you to click and there is a notification about these problems.
3. Permission
You can set permission to use this extension for a specific admin user.
To grant Import permission, go to:
System > Permissions > User roles > Pick one admin user> Role Resources > Custom> System > Transfer Data -> Import by Bss -> Import Order
To grant Export permission, go to:
System > Permissions > User roles > Pick one admin user >Role Resources > Custom> System > Transfer Data -> Export by Bss -> Export Order