
1. Overview
Magento 2 Size Chart extension is an essential tool that helps increase remarkably customer experience. The module allows you to create and assign size chart to product conveniently. Moreover, there are three ways to perform size chart if you use this extension. A size chart can be shown in the popup, under Add to Cart button or in the product information tab.
2. How Does It Work?
2.1. General Configs
Please go to Store ⇒ Configuration ⇒ BSSCommerce ⇒ Size Chart.
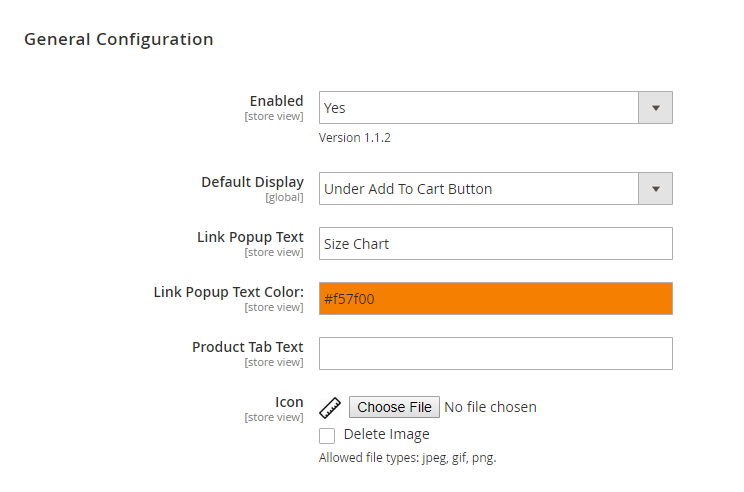
In Enabled: choose Yes to enable the extension, or No to disable it.
In Default Display: select an option to set the default performance of size chart, which means that if you don’t set the display for a size chart, this size chart will be presented on the frontend as the default display chosen in this config. There are 3 options for you to select:
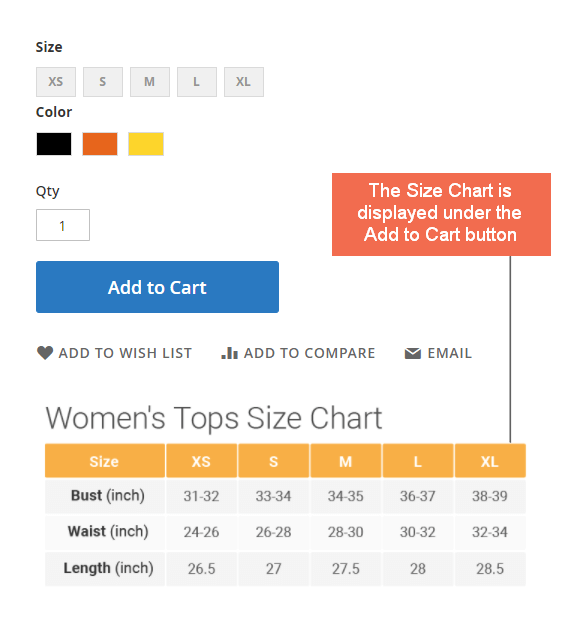
- Under Add to Cart Button: display size chart right on the product page, under the Add to Cart Button.
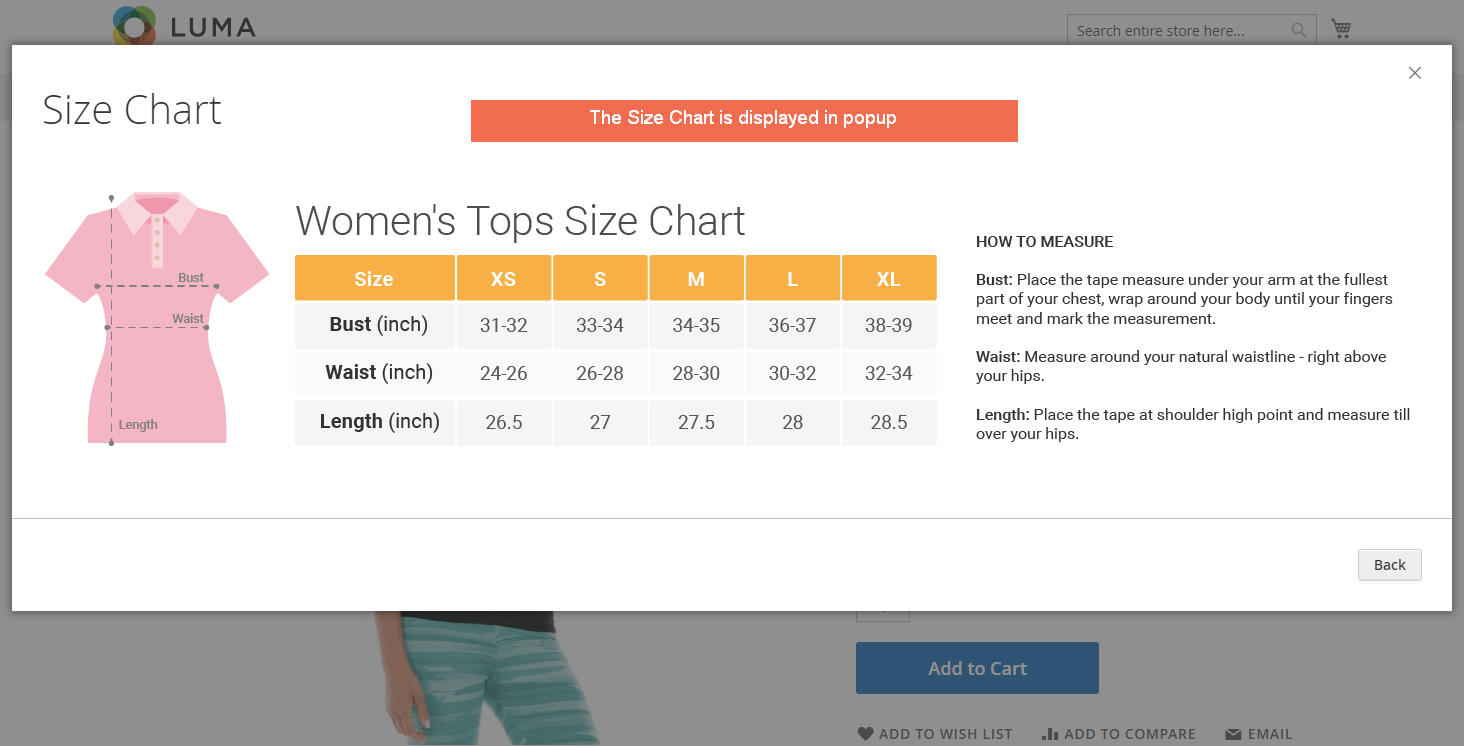
- In Popup: display size chart in a popup. A popup link will be added to product page then customers can click on this link to view the size chart in the popup. You also can edit link text and color without difficulties.
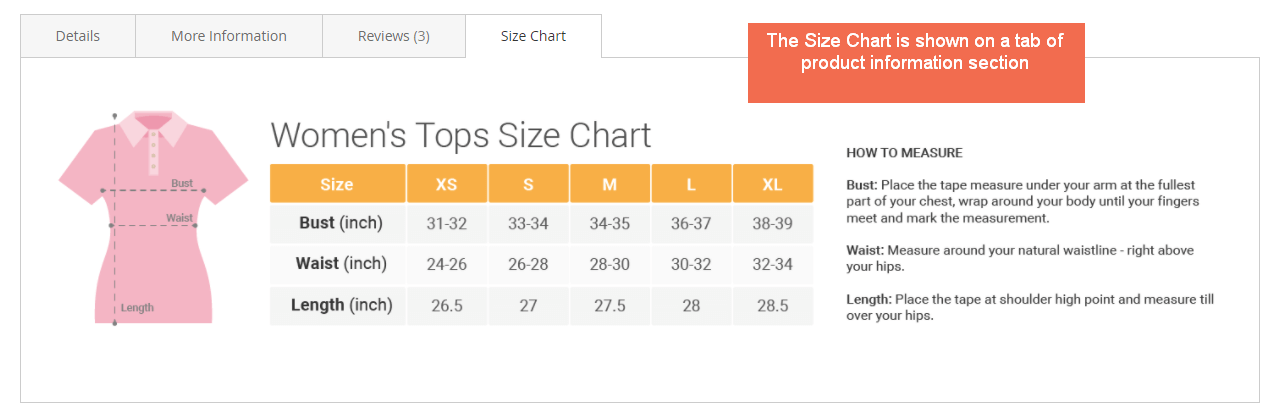
- On Information Section: display size chart on a new tab of product information section.
Customize the popup link:
- In Link Popup Text: edit text of popup link.
- In Text Color: set the color of the popup link.
- In Product Tab Text: edit text of the product tab.
- In Icon: upload the icon of size chart popup link.
After complete settings, please press “Save Config” then flush Cache to make these settings come into effect.
Note: Because the scope of the module configuration is store view, you can customize for each store view.
2.2. Size Chart Management
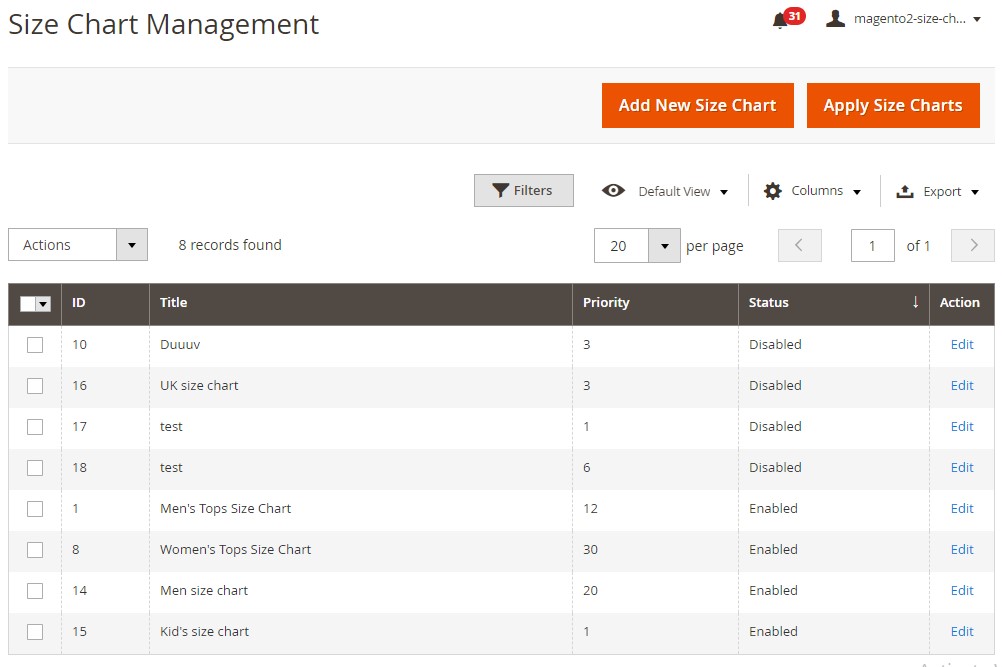
Please go to Catalog ⇒ Size Chart ⇒ Size Chart Management.
A grid listing all size charts will appear.
2.2.1. Edit Size Chart
Click “Add New Size Chart” button to create a new size chart as you want or click “Edit” link on the Action Column to edit available size charts.
In case you add new products, click “Apply size charts” above the size chart grid to update all size charts for them.
Select Edit Size Chart tab to customize the size chart.
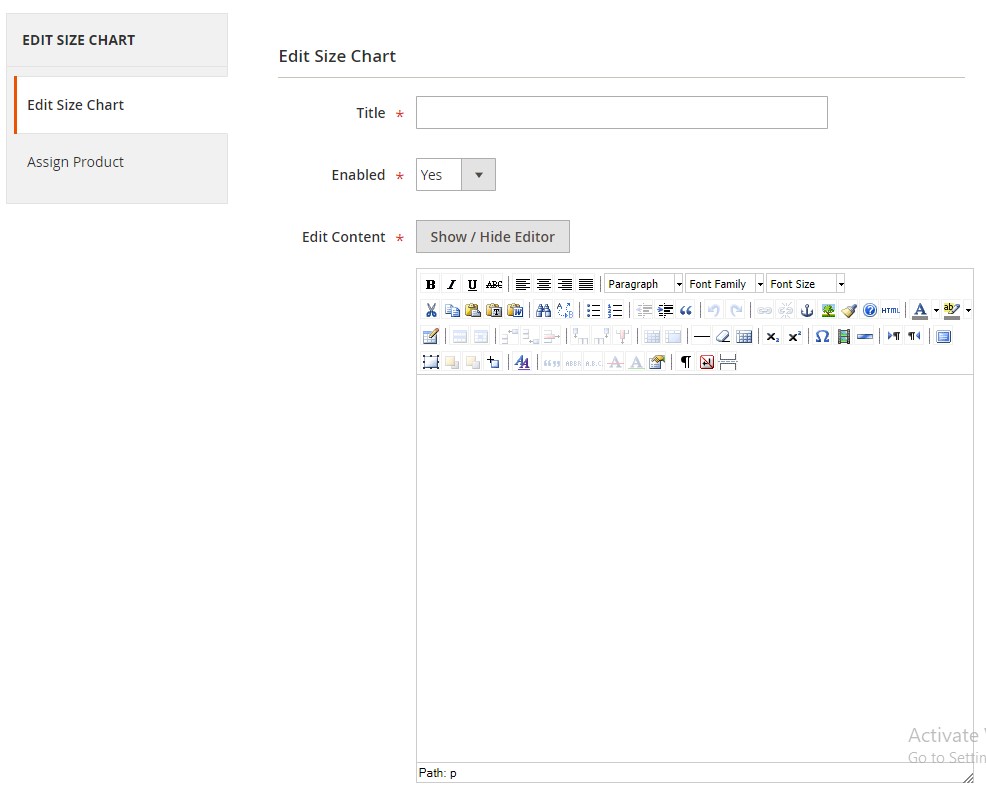
In Title: enter the name of the size chart.
In Enabled: choose Yes to enable the size chart, or No to disable it.
In Edit Content: edit the content of size chart in the WYSIWYG editor.
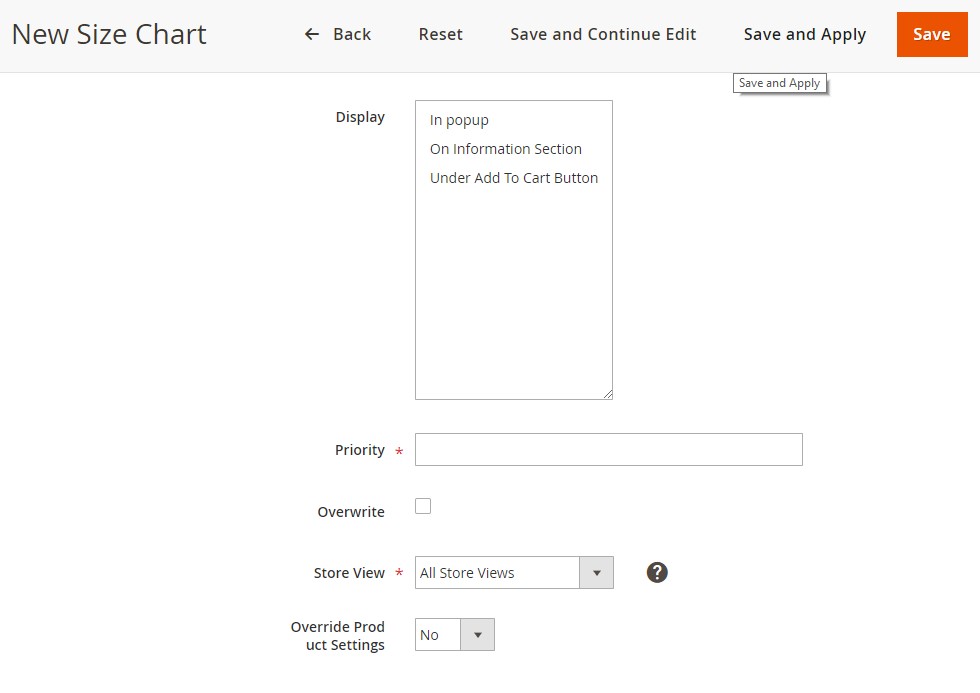
In Display: select the ways to perform the size chart on the product page: In Popup, Under Add to Cart Button or On Information Section. You can select more than one option and the size chart will be shown on the product page as all ways you selected.
In Priority: enter a number to set sort order for the size chart. 0 is the highest priority.
In Overwrite: The size chart that is ticked to Overwrite will be shown in the frontend and ignored Priority section. After saving, it will be cleared automatically, then you can tick “overwrite” for other size charts. A size chart can be recorded over other size charts that have the same scope.
In Store View: choose to enable the size chart for the specific store view.
In Override Product Settings: In each Product edit page, you can select a size chart (A) for a product. Also, when creating another size chart (B), you can assign it for this product or even a category by using rules. Therefore, this override setting is useful to determine which size chart the product will use to show in the frontend.
- Choose Yes, then the product will use this new size chart (B) and skip the size chart selected in the Product edit page.
- Choose No, then the product will use the size chart selected in the product edit page.
After complete all settings, please press “Save Size Chart” button to save the customization for the size chart.
2.2.2. Assign size chart to products
Please press “Assign Products” tab to select condition to apply the size chart to products in size chart edit page.
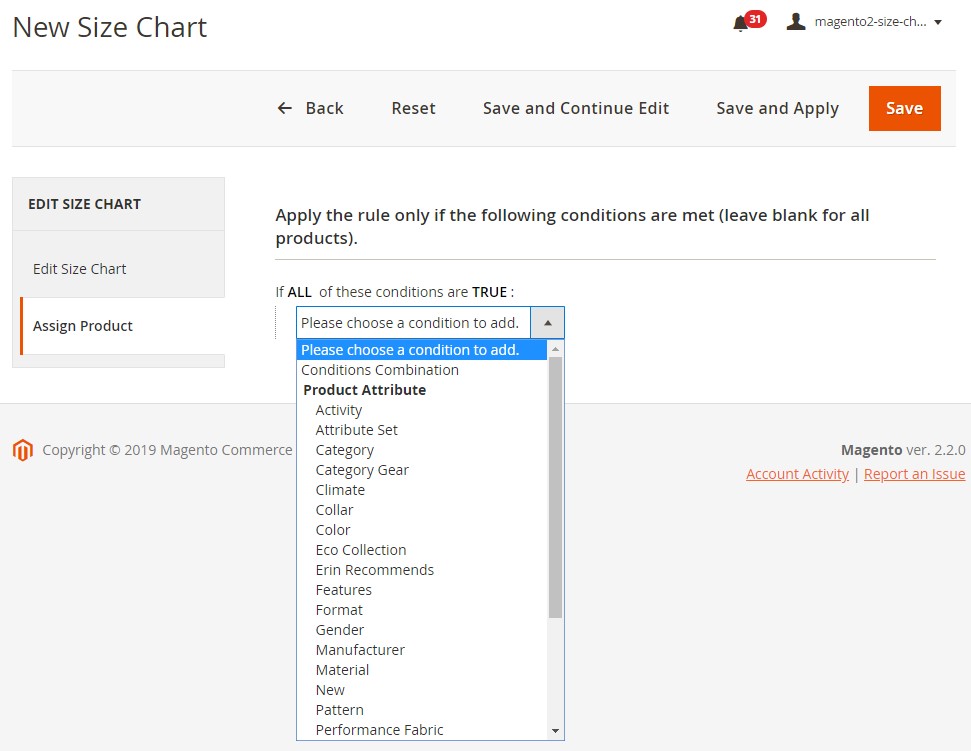
Click on the (+) icon to explore the condition selection field
In this field, you can choose an option, then easily assign the size chart to multiple products by Categories, Attribute Set, or Product Grid,...
After selecting products, please press Save button to save your setting or press Save and Apply button to save your setting and make it come to effect at the same time.
2.2.3. Assign a size chart to specific product
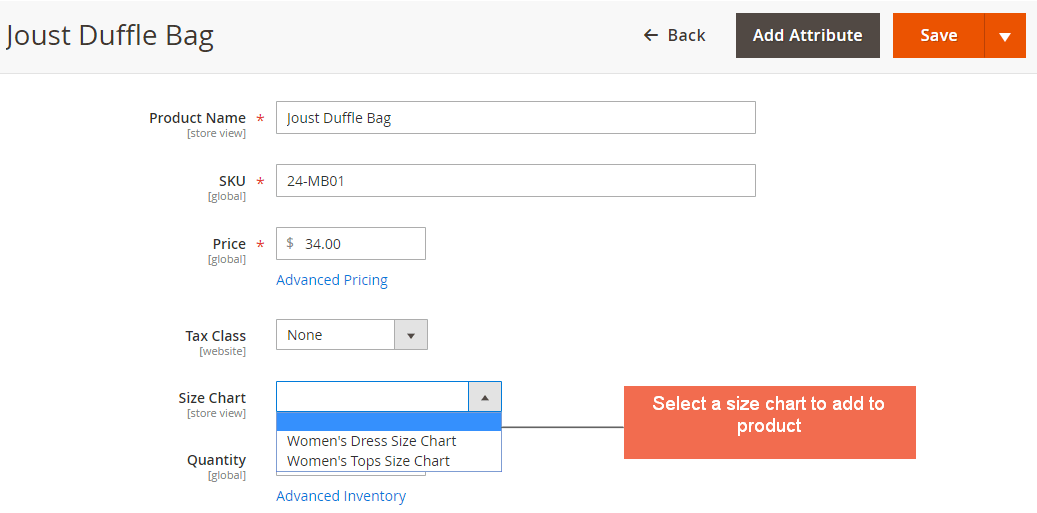
Please go to Catalog ⇒ Products, in the product grid, select a product that you want to add size chart to.
This module adds a dropdown attribute displaying all created size charts to the product edit page of all products. You can select a size chart option to assign to the product then press “Save” button to complete.
Note: This setting is related to the Override Product Settings configuration in the size chart edit page, so you need to notice both 2 settings to get the result as you need.
3. GraphQL support
Note: In order to use this graphQL, you need to install BSS's Magento 2 Size Chart module.
| No | Graph | URL | Method | Header | Payload | Respond | Error code | Validation | |
| 1 | Get size information of a product via product id | {{base_url}}/graphql | POST | Content-Type : application/json | { sizeChartData( id: 1 ) { content display_popup title storeConfig { isEnabled linkPopupText linkPopupColor icon } } } |
{ "data": { "sizeChartData": { "content": "<p><img src=\"http://devm2php74.tk/magento241-x3/pub/media/wysiwyg/1.png\" alt=\"\" /></p>", "display_popup": [ 0, 1, 2 ], "title": "Test", "storeConfig": { "isEnabled": true, "linkPopupText": null, "linkPopupColor": null, "icon": "false" } } } } |
400 bad request GraphQlInputException |
required id (product id)
|