
1. Overview
Gift Card for Magento 2 allows store owners to create gift cards for customers to purchase and give their acquaintances as a present on special occasions.
- Create gift cards as a new product type with flexible prices and values
- Be able to upload diverse gift card templates
- Easily generate or import gift code patterns
- Send gift cards via email, post office and even both
- Ability to apply gift code on the shopping cart and checkout page
- Keep track up gift card purchase and gift card code usage
* Note: Klarna payment is not yet supported from Magento 2.4.4.
2. How to Configure
Navigate to Store ⇒ Configuration ⇒ BSSCOMMERCE ⇒ BSS Gift Card and start making configuration.
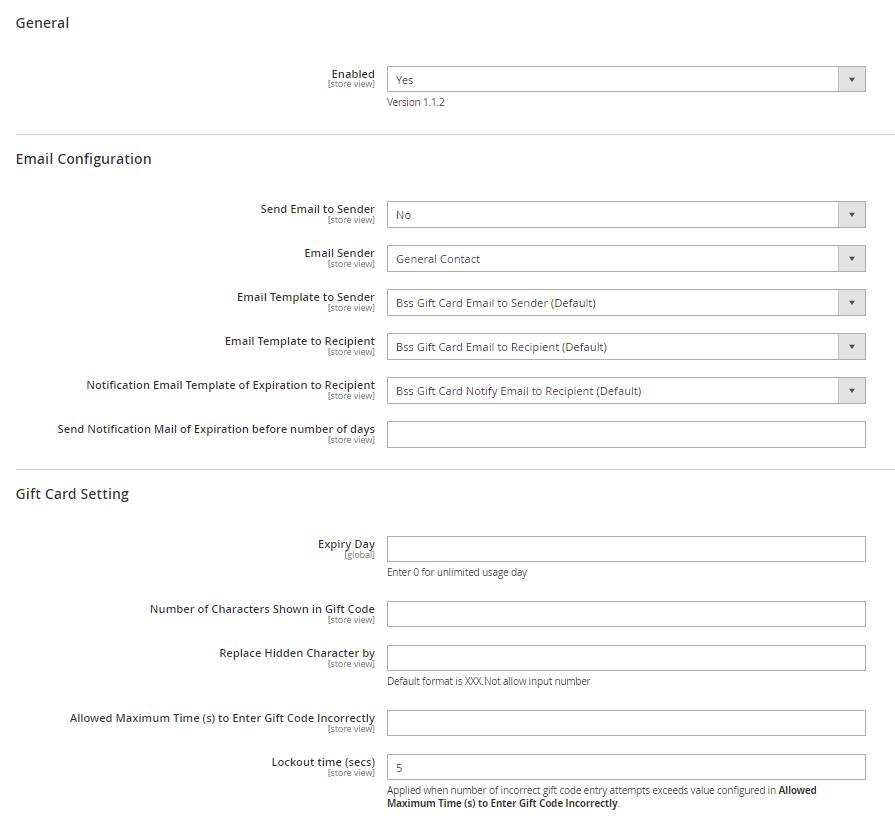
- In General:
- Enabled: Set Yes to enable this module.
- In Email Configuration:
- Send Email to Sender: Set Yes to send emails to the senders when gift codes are created.
- Email Sender: Choose a list of emails set up for the store.
- Email Template to Sender: Select an email template to send to senders.
- Email Template to Recipient: Select an email template to send to recipients.
- Notification Email Template of Expiration to Recipient: Select an email template to notify recipients that the gift card is expired.
- Send Notification Mail of Expiration before number of days: Enter the number of days before the gift card expiry date to send an email notifying recipients that the gift card is expired.
- In Gift Card Setting:
- Expiry Day: The number of days in which gift cards can be valid. When you create a new gift card, this value is automatically applied. You can configure this expiry day for each gift card when creating.
- Number of Characters Shown in Gift Code: Specify the number of characters in Gift codes that are displayed for website visitors. They are shown anywhere except for gift card emails.
- Replace Hidden Characters by: Enter characters to replace for hidden ones in the gift codes. For example, NEWYEAR-4-XXX.
- Allowed Maximum time(s) to Enter Code Incorrectly: Specify the maximum time(s) that recipients can enter gift codes incorrectly.
- Lockout time (s): Set the amount of lockout time in seconds, in which recipients cannot enter gift codes after reaching the maximum times of entering code incorrectly.
3. How to Use
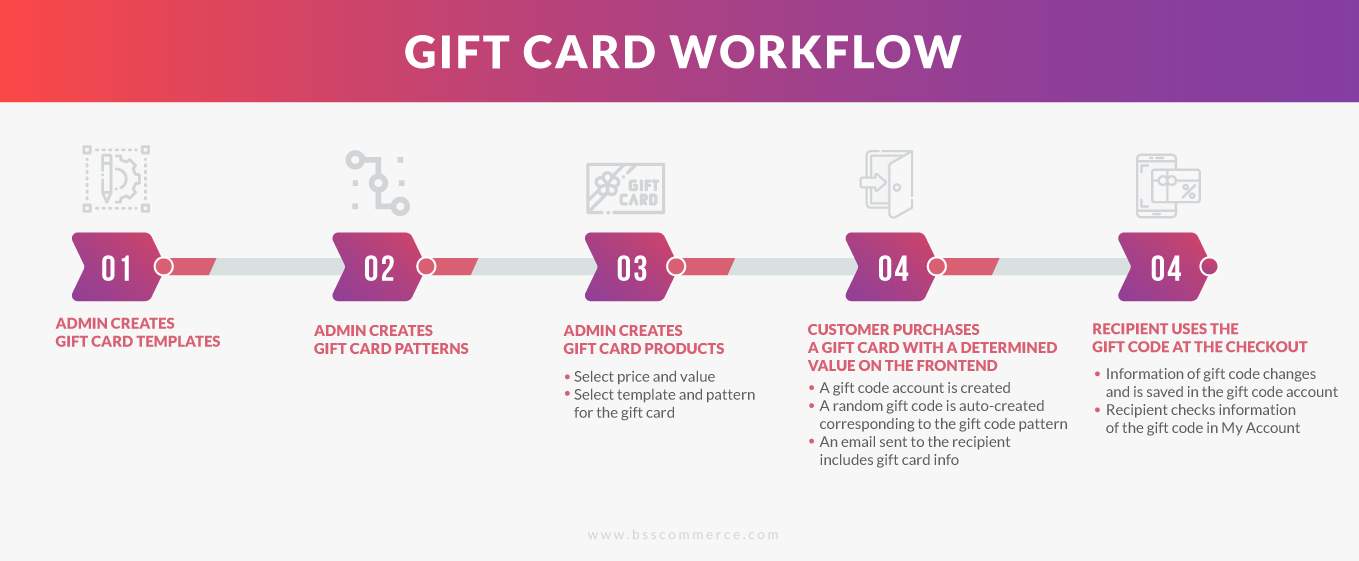
3.1 For Administrators
Before adding a gift card as a new product type, you need to create gift card templates and gift code patterns. They are the required elements of a gift card.
3.1.1 Create a gift card template
Navigate to Catalog ⇒ BSS Gift Cards ⇒ Gift Card Template ⇒ Add New Template.
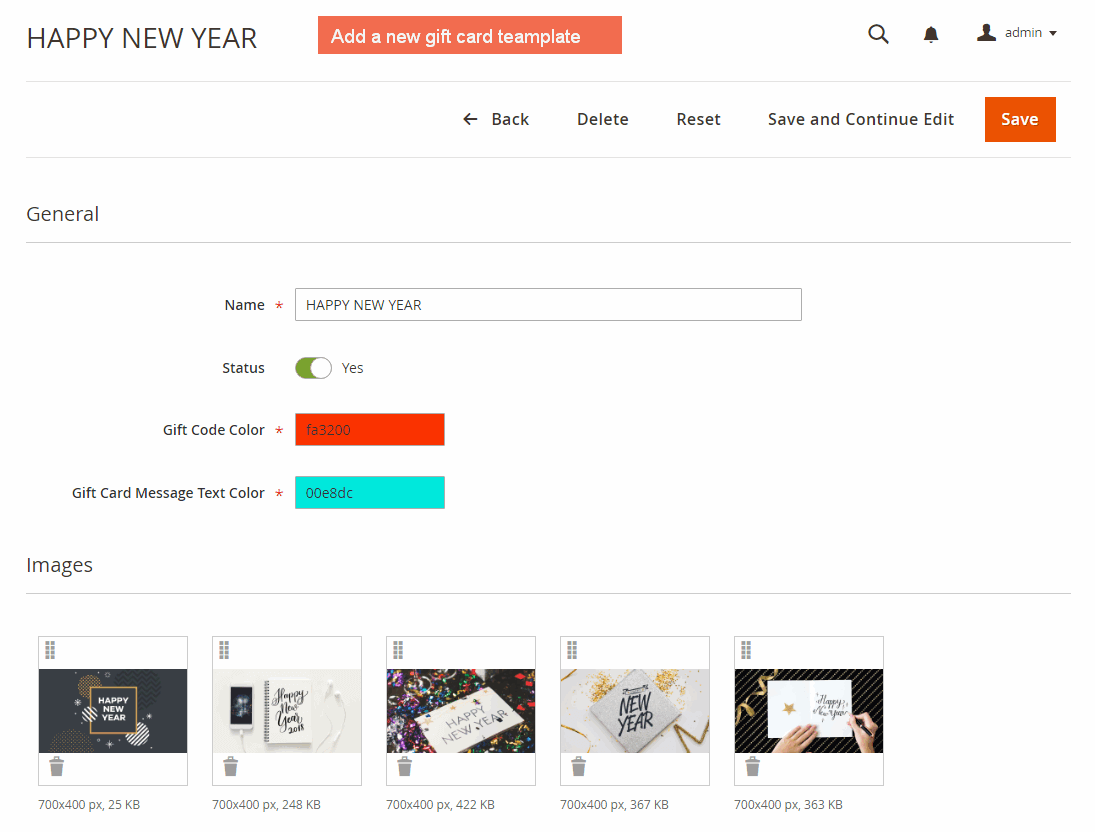
- In Name: Enter a name for the template (eg: Happy New Year, Happy Birthday,...)
- In Status: Choose Yes or No.
- In Gift Code Color: Select a color for the gift code.
- In Gift Card Message Text Color: Select a color for the message sent to recipients.
- In Images: Browse gift card images from your computer and upload them. These images are sent to recipients along with other information of the gift card such as gift codes, messages,...
- Then, you save the template.
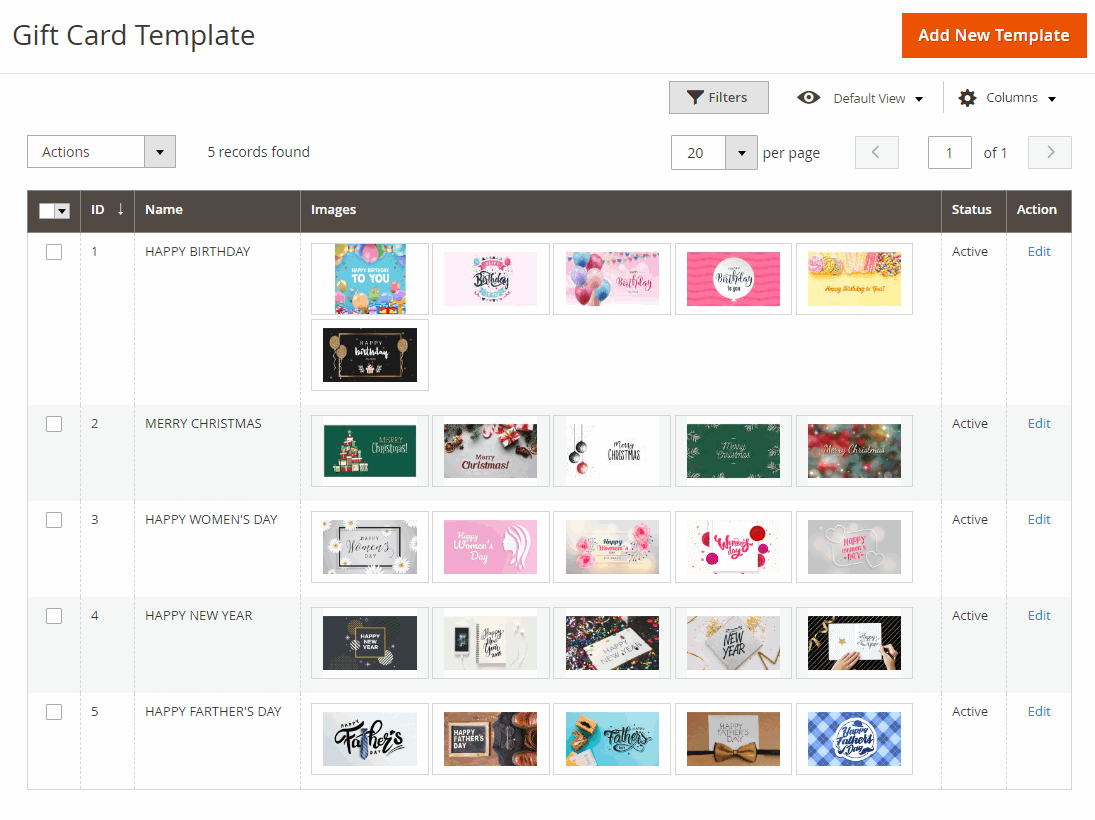
All created templates are displayed in a grid table as below:
3.1.2 Create gift code pattern
Navigate to Catalog ⇒ BSS Gift Card ⇒ Gift Code Pattern.
Here you will see the Gift Code Pattern table, which shows all existing gift code patterns with their detailed information.
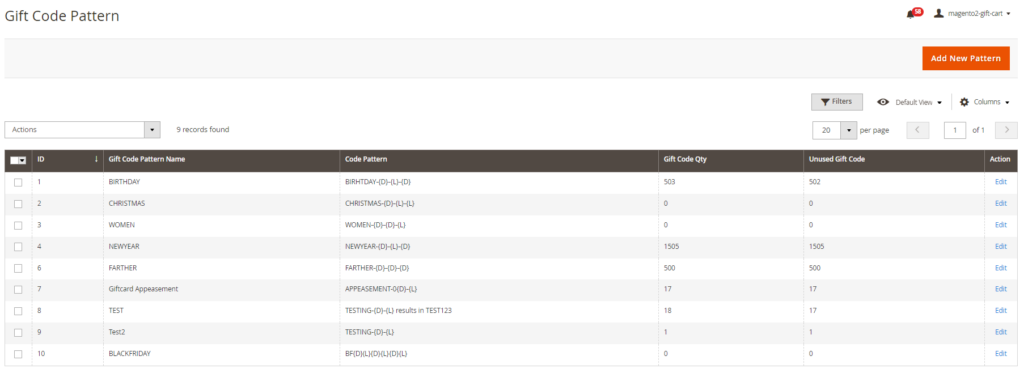
To create a new gift code pattern, click Add New Pattern button on the top right of the Gift Code Pattern table.
- In Name: Specify a name for each code pattern.
- In Pattern: Specify a format for code when generating. You can use dynamic format, for example, {L}: a random letter, {D}: a random number, etc. (When you save, this field cannot be edited).
- In Code Quantity: The number of available gift codes. When you add a new pattern, this field has a value as 0 and cannot be edited.
- In Unused: The number of codes has not been yet used. When you add a new pattern, this field has a value as 0 and cannot be edited.
Then, you save the code pattern. When a customer purchases a gift card in the frontend, a new gift code is automatically created based on settings of the corresponding gift code pattern. (Of course, the gift code pattern is assigned to the corresponding gift card. For example, you create a Happy New Year gift card, the Happy New Year code pattern will be assigned to this gift card. You can get more details in the next section of creating a gift card product).
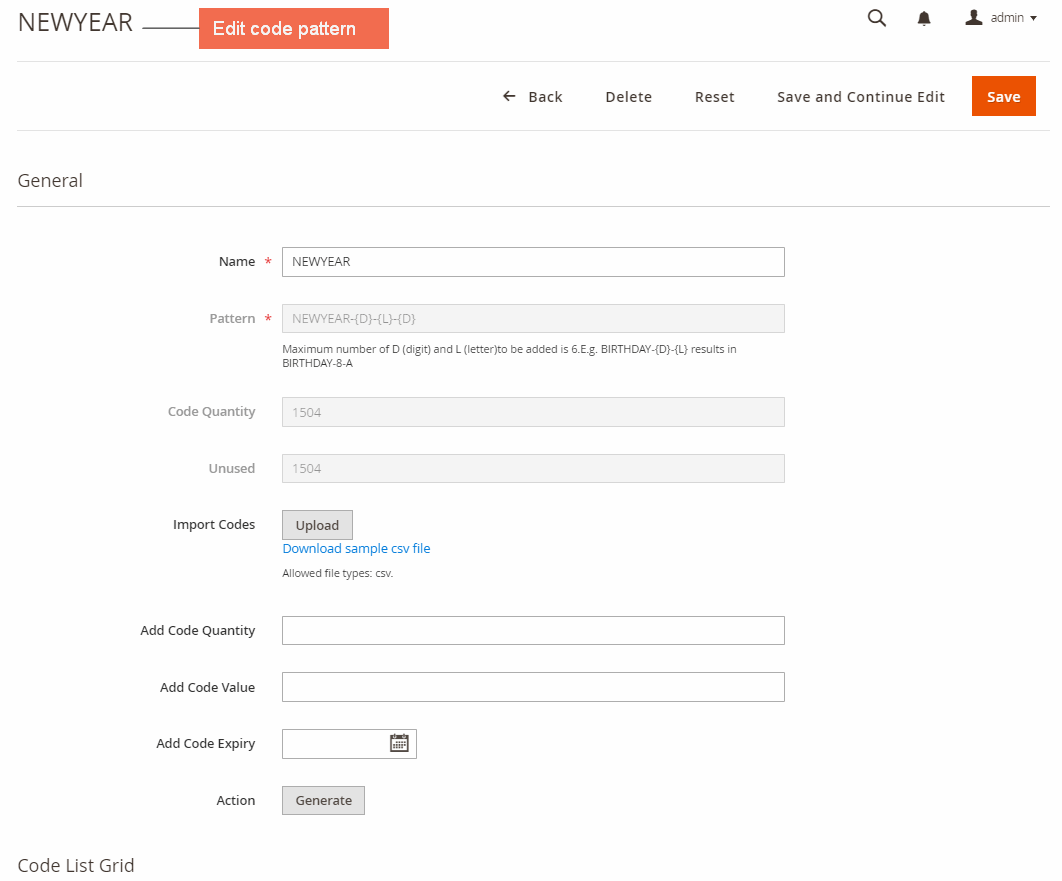
In case you want to import or generate gift codes by yourself, you can make more configurations as below:
- Method 1: Import Code
In Import Code: Allow importing codes via a CSV file. You download the sample CSV file, complete necessary data, and then upload. After you save the configuration, the module will automatically add the corresponding quantity of gift codes.
- Method 2: Generate Code
- In Add Code Quantity: Enter the number of codes you want to generate based on the gift code pattern.
- In Add Code Value: Enter the value for gift codes.
- In Add Code Expiry: Select the expiry date for gift codes.
- Then you click Generate button. Gift codes are created based on settings.
*Note: Importing codes or generating codes is not a must-have task. These codes are created by import or generation by admin. They are not gift codes created when gift cards are purchased in the frontend.
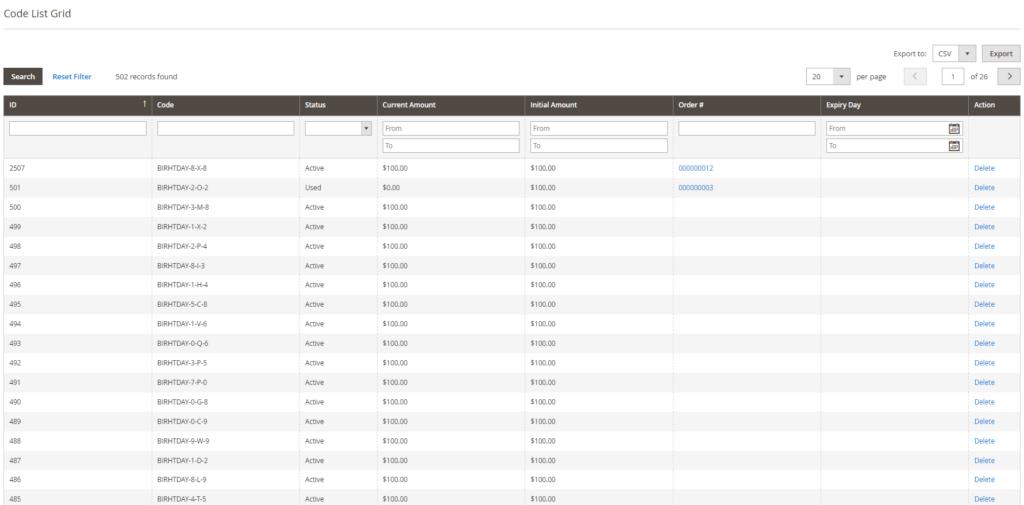
To view and edit an existing gift code pattern, click Edit. Then you can scroll down to see the Code List Grid, which shows all gift codes of that pattern.
3.1.3 Create a new gift card product
Navigate to Catalog ⇒ Products ⇒ Add New Products and select BSS Gift Card.
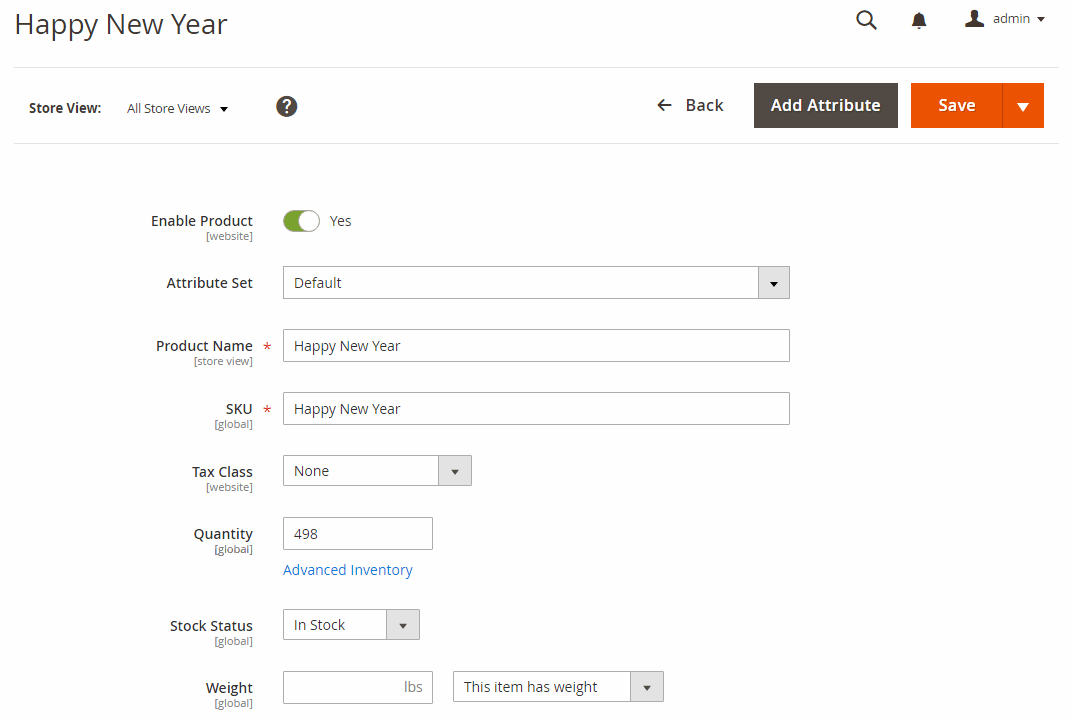
You complete all necessary information on a product such as Attribute set, name, SKU, quantity, and so on. However, the different thing is you need to configure an additional section which is particularly used for Gift Card.
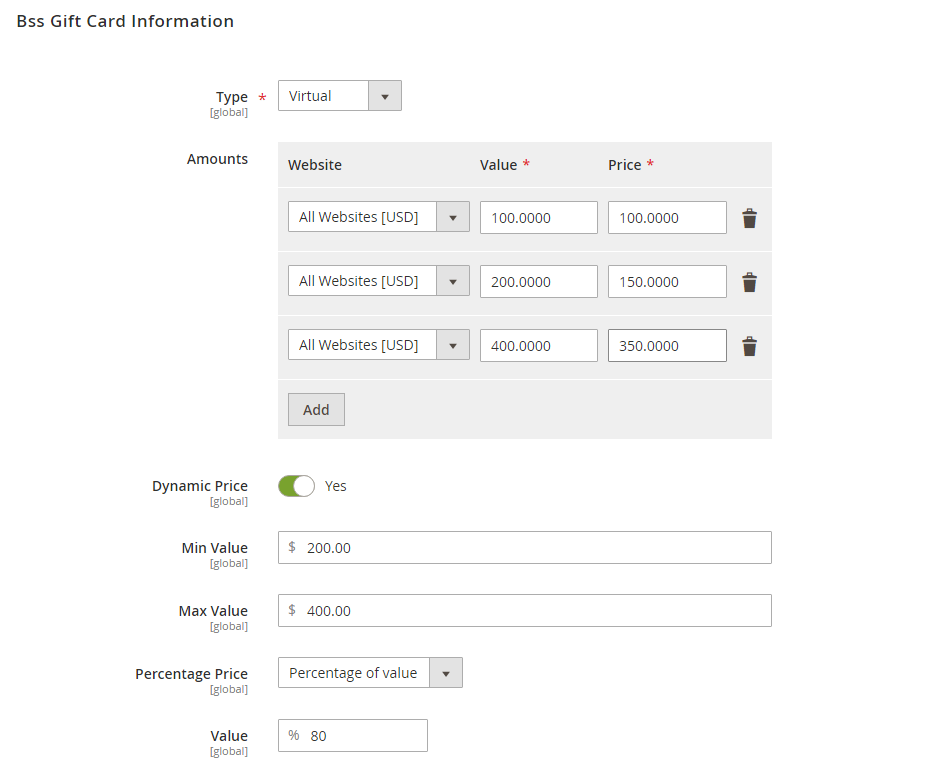
- In Type: There are 3 types for you to select:
- Virtual: Send gift cards via emails to recipients without shipping information in the checkout.
- Physical: Send physical gift cards to recipients and need a shipping address in the checkout.
- Combined: Include both virtual and physical gift cards.
- In Amount: You set up value and price for the gift card. You can set up many options for customers to select on the frontend. (Values are displayed in a drop-down list when you specify various options).
- In Dynamic Price: Set Yes to enable this kind of price or choose No to disable it.
When you choose Yes, you need to choose a range of values for customers to select on the frontend product page by setting up Min Value and Max Value.
- In Percentage Price: Specify how the price of the gift card is calculated.
- Same as value: The price is similar to the selected amount by customers.
- Percentage of value: Price = percentage x selected amount by customers.
If you choose Percentage of value, you have to enter a figure in the Value field.
→ For example, the gift card has a range of values between $200 and $400. A customer selects a value at $300 on the frontend product page.
+ If you choose "Same as Value", this customer has to pay a price of $300 as well.
+ If you choose "Percentage of value" and enter 80% in the Value field, then this customer has to pay as the price of $240. ($300x0.8 = $240).
*Note: Only when you select Dynamic Price, do you have to make those more settings above.
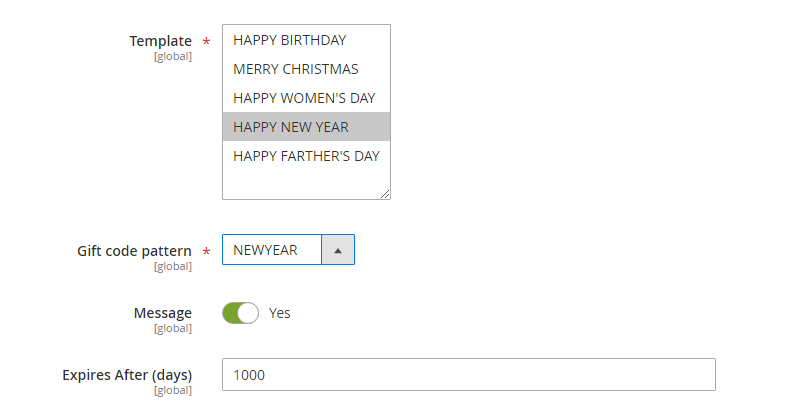
- In Template: Select a template for the gift card.
- In Gift Code Pattern: Select a gift code pattern for the gift card.
- In Message: Select Yes to allow customers to send messages to recipients along with gift cards.
- In Expires After (days): Enter a number of days that specify the valid time to use the gift card. Gift codes that are automatically created after customers purchase Gift Cards have valid time auto-following settings of this Expires After (days) section.
- Then you save configurations and complete a new gift card.
3.1.4 Manage Gift Code Account
Navigate to Catalog ⇒ BSS Gift Card ⇒ Manage Gift Code Account. 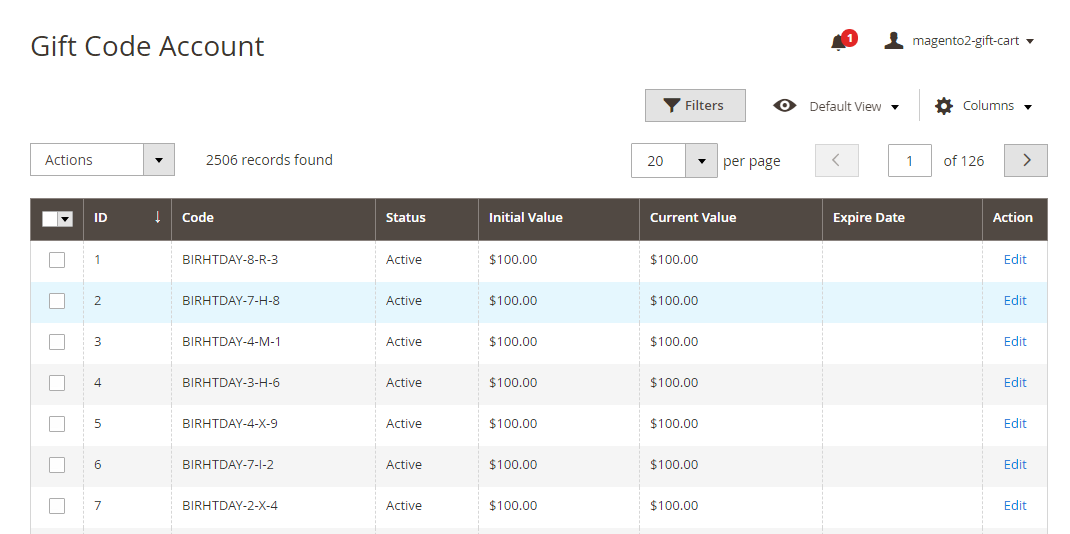
You can see a grid table including all created gift codes with their detailed information. Among them:
- Initial value: Initial gift code value, cannot be changed.
- Current Value: Current gift code value, can be changed in the backend. When a customer apply gift code, the gift cart value will be based on Current Value.
- Expiry Date: The expiry date of the gift code.
You can edit each gift code by click Edit.
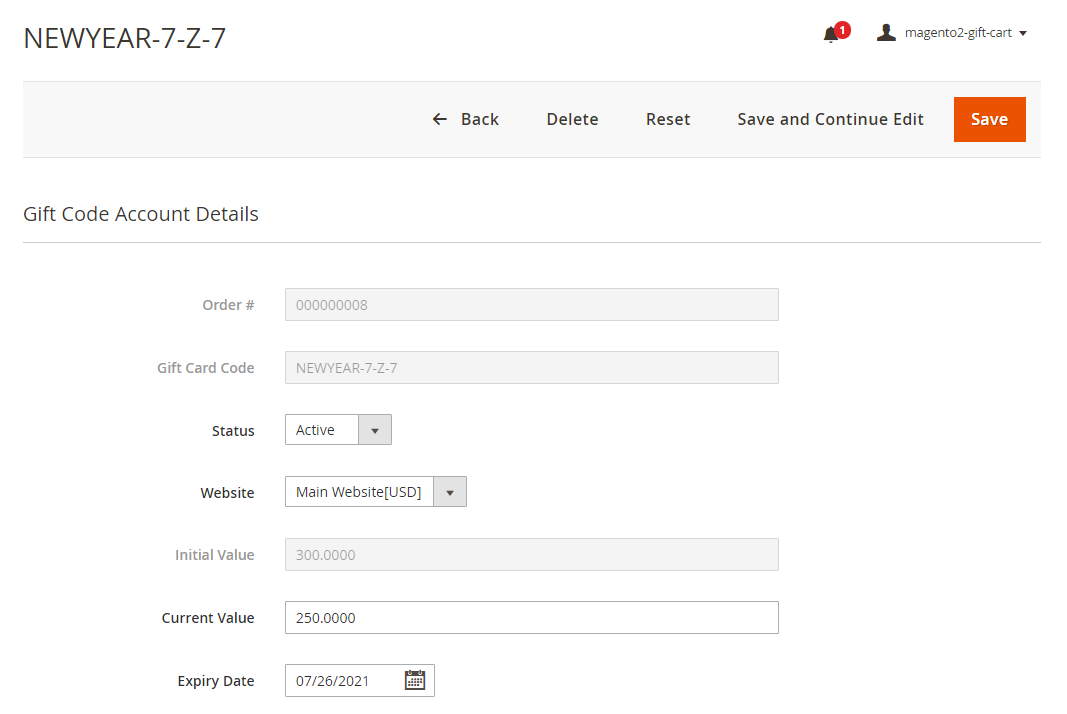
- In Gift Code Account Details: Show details of the gift code and allow you to adjust some information such as Status, Website, Current Value, and Expiry Date.
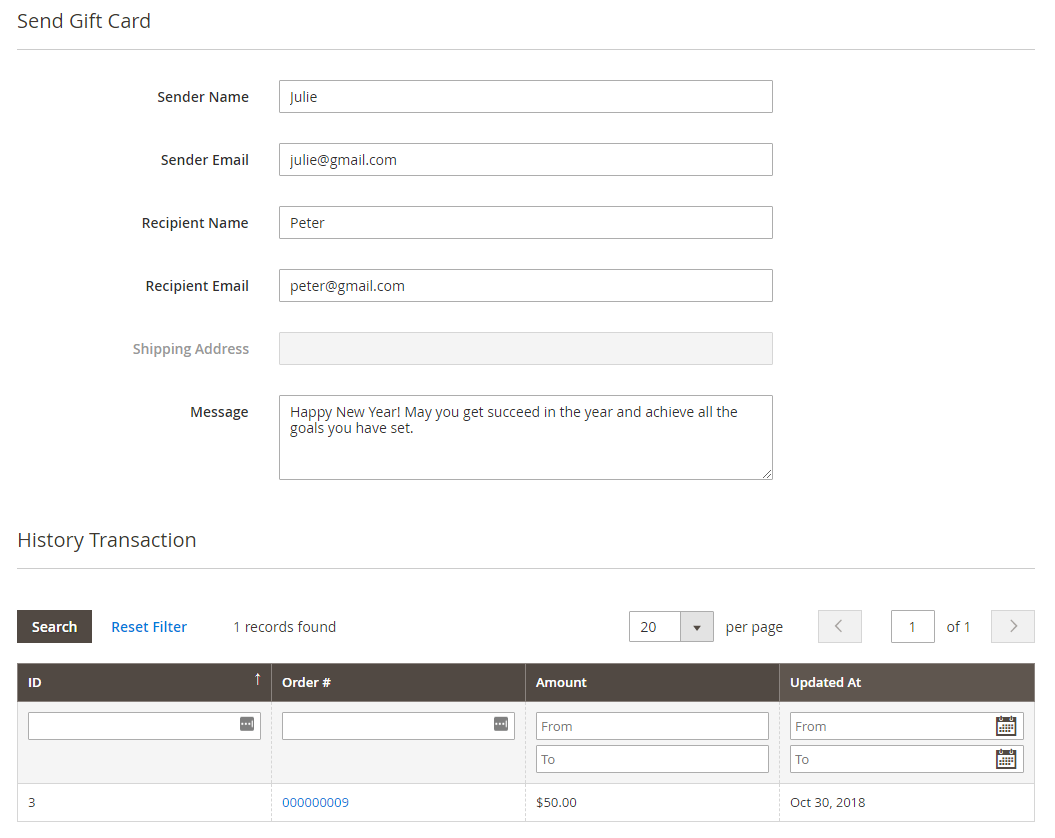
- In Send Gift Card: Show information related to sender, recipient, and message.
- In History Transaction: Show transaction details corresponding to the gift code. Orders recored here are created by recipients. They use this gift code given by the sender and purchase products in the store.
3.2 For Customers (Sender) and Recipients
3.2.1 For customers buying gift cards
Customers or Senders go to the frontend, complete all necessary information of a Gift card, and purchase it.
*Note: Currently, the demo site cannot be set up Run Cron. Thus, when the user purchases a gift code on the demo site, there will be no email sent to them. However, on the real site, the mail-sending function still works perfectly.
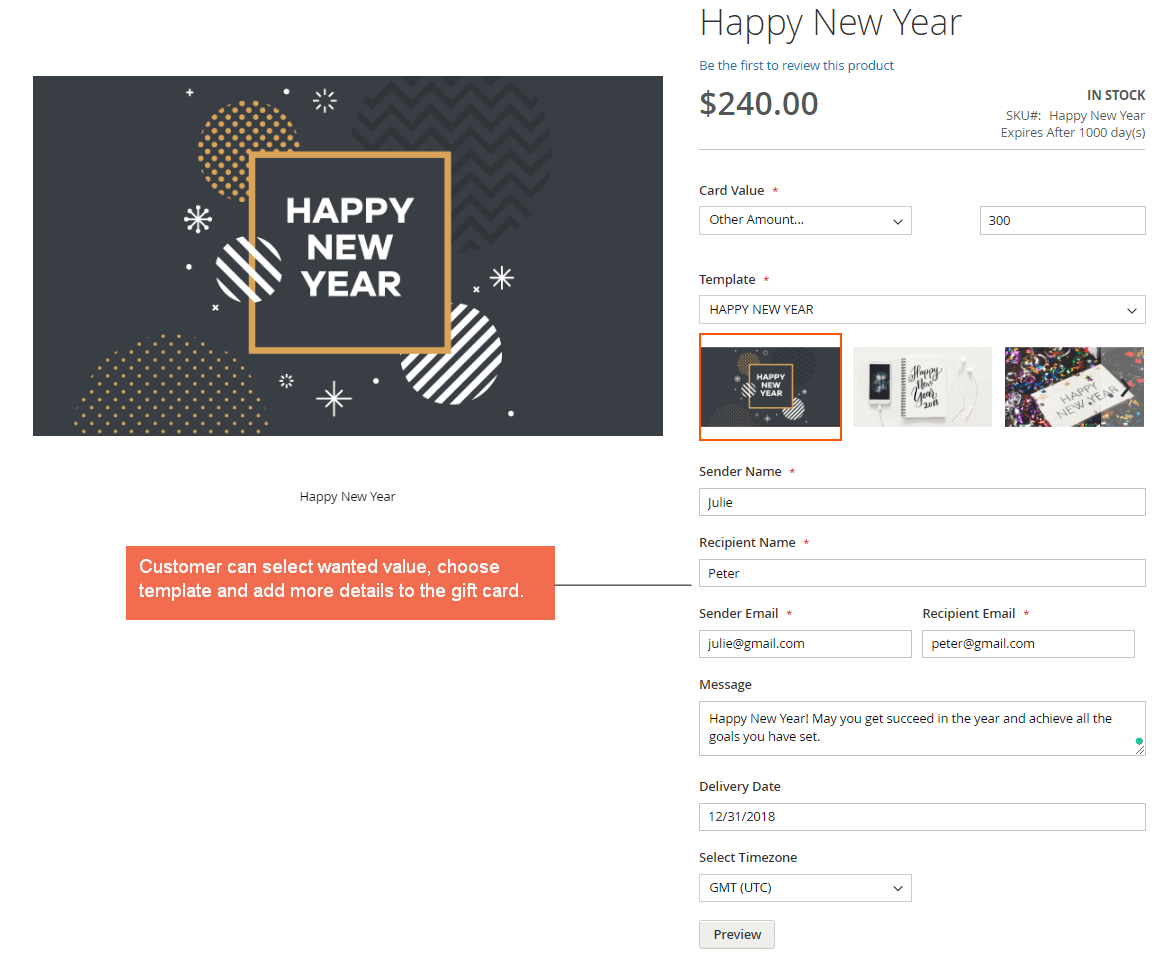
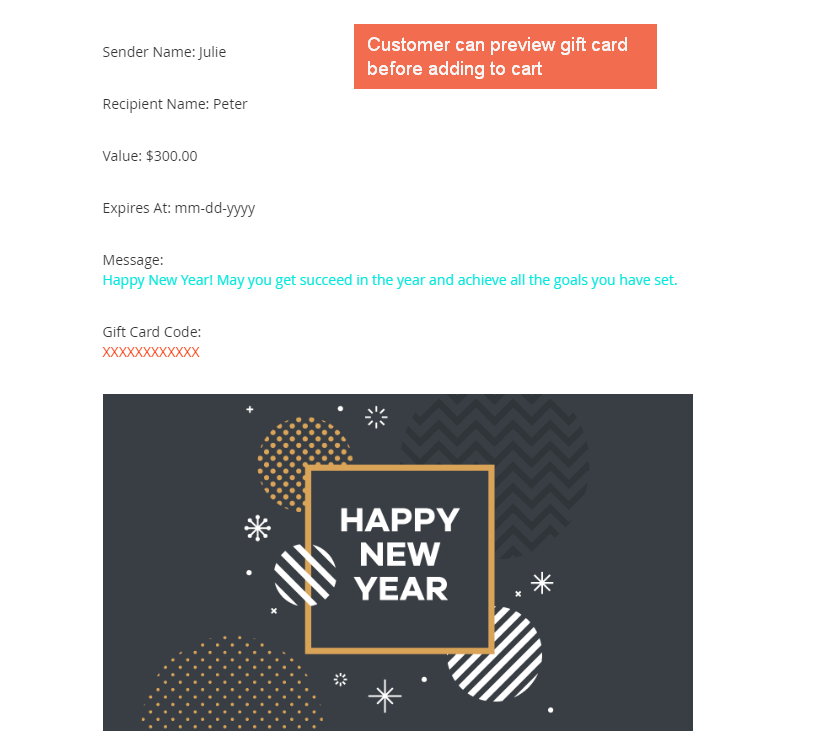
→ For example, a customer purchases a Happy New Year Gift card (a virtual gift card). He needs to fill information such as sender name and email, recipient name and email, message, select delivery date, and time zone to send the gift card. In addition, he can also preview the gift card before adding to cart to see how this information is displayed.
After a successful checkout and the store admin creates the invoice for this order, an email with information of the gift card (including a specific gift code as well) is sent to the recipient. Besides, the sender also receives a similar email.
The sender could manage ordered gift cards on My Account page.
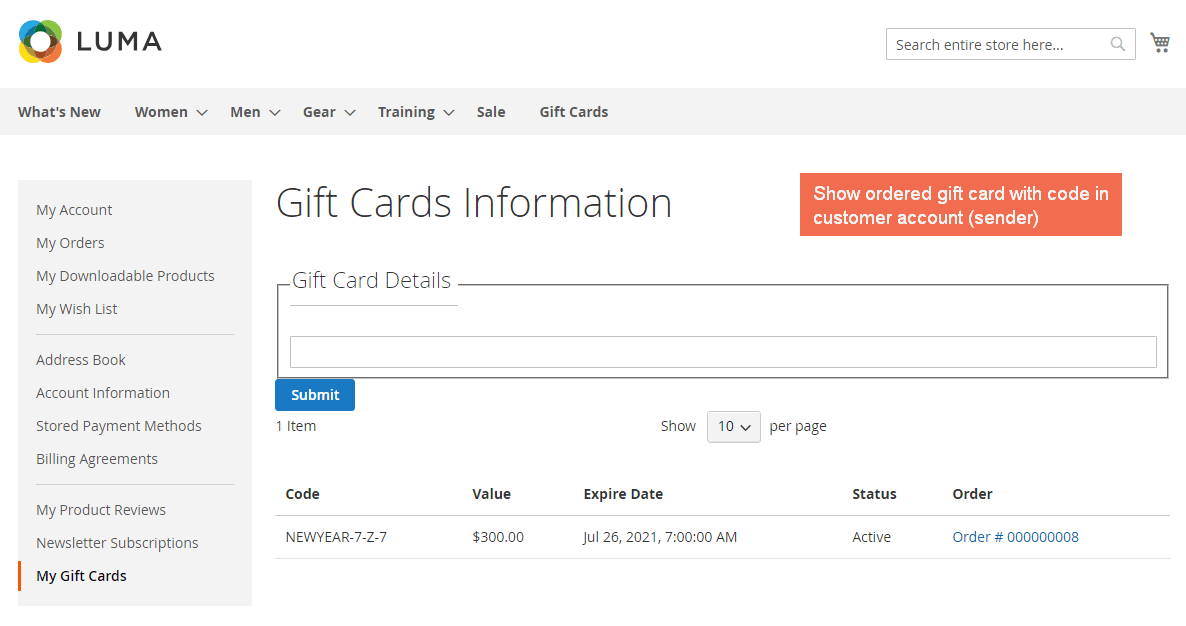
In Gift Card Details, the customer can check Gift code details by entering a valid gift code and then clicking Submit.
3.2.2 For recipients using the gift codes
The recipient uses the given gift code to purchase products on Magento stores.
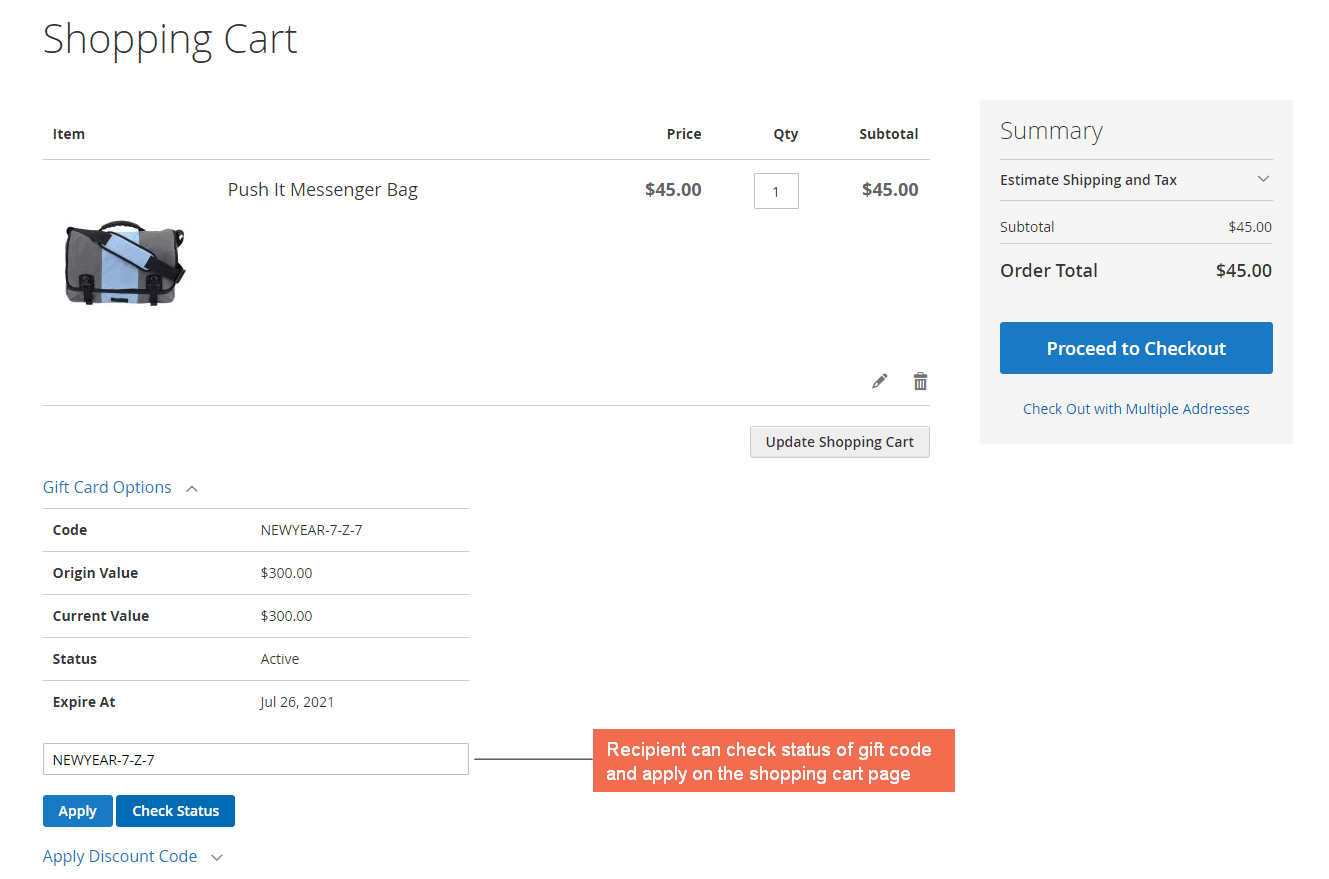
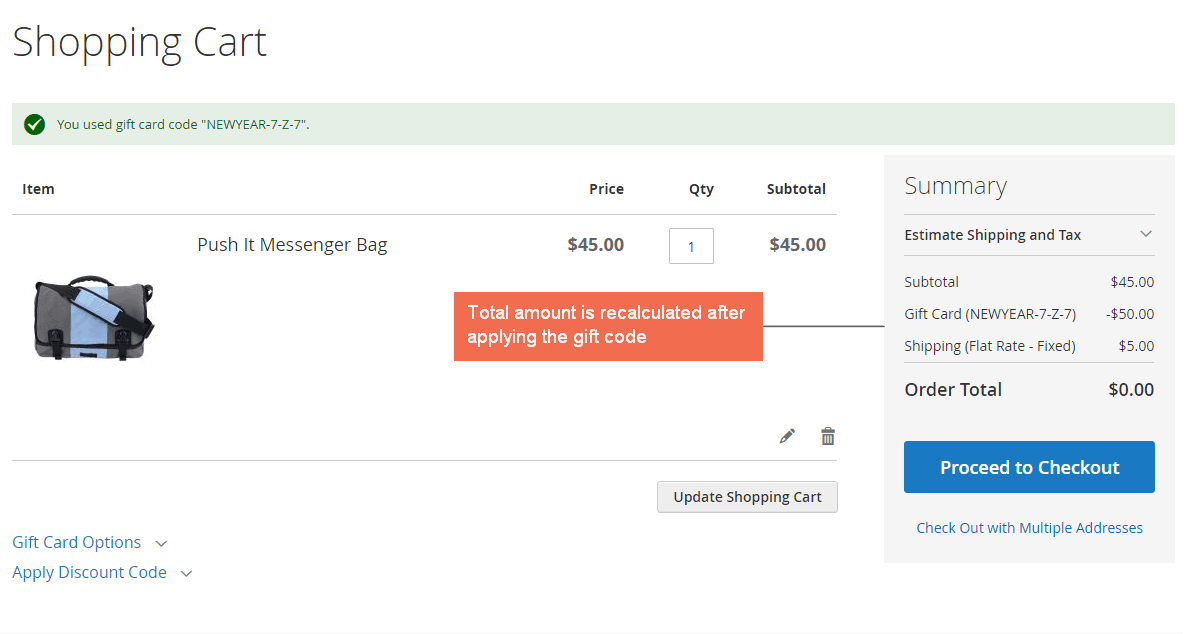
The recipient enters the gift code in the Gift Card Options and checks status before applying. Checking status helps to know the original value, current value, status, and expiry date of the code. When he applies the code successfully, total order amount is automatically recalculated.
Besides, he uses the gift code on the checkout page as well.
4. API Support
We provide you lists of Restful API and GraphQL API that our Magento 2 Gift Card extension supports.
*Note:
- Restful API support is included in the main module package (from Gift Card v1.0.5).
- GraphQL API support is included in the GraphQL package, acting as an add-on for anyone who needs to use GraphQL.
4.1. Restful API
Check all REST API support here.
4.2. GraphQL API
Check all GraphQL API support here.