1. Overview
Magento 2 Product Attachments extension adds more information to products by allowing store owners to upload attachment files and customers can download these file from the frontend.
2. How Does It Work?
2.1 General Configs
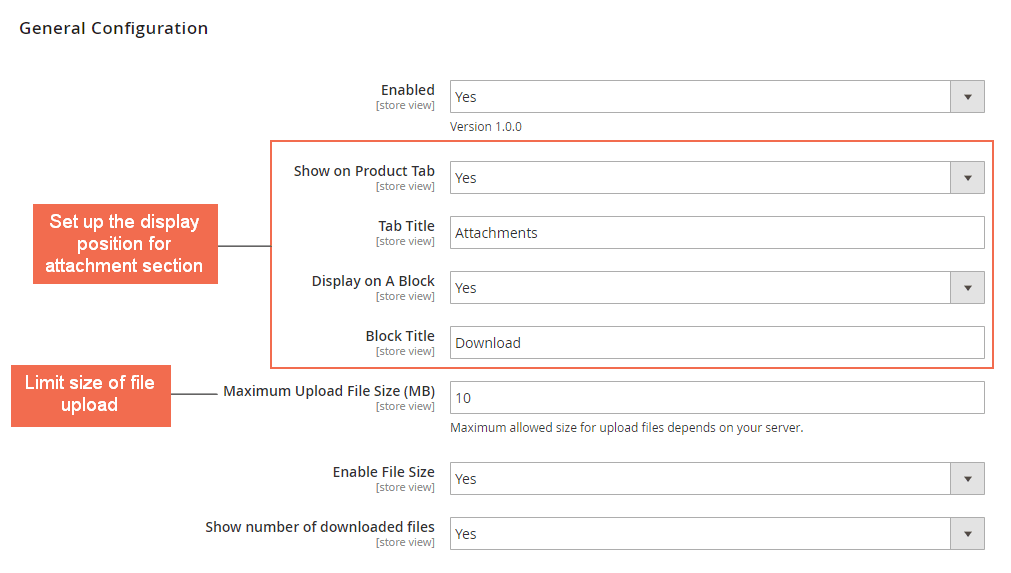
Please go to Store ⇒ Configuration ⇒ BSSCommerce ⇒ Product Attachment
-
- In Enabled: choose Yes to enable the module, or No to disable it.
-
- In Show on Product Tab: choose Yes to display the file attachments on a new tab in the product page, or No to not display in this position.
-
- In Tab Title: edit the title of the attachment tab.
-
- In Display on A Block: choose Yes to display file attachments on a separate block, or No to not display in this position.
-
- In Block Title: edit title for the attachment block.
-
- In Maximum Upload File Size (MB): enter a number to set the max allowed size for upload files. This value also depends on your server.
-
- In Enable File Size: choose Yes to enable file size along to file name in the frontend, or No to disable the file size.
- In Show Number of Downloaded Files: choose Yes to enable the number of downloaded files along to files in the frontend, or No to disable it.
Note:
-
- Because the scope of configs is store view, you can customize for each store view.
- After setting, you need to save your configuration, then flush cache to make these settings come into effect.
2.2 File Attachments Management
Please go to Catalog (Product Attachment by Bss Commerce) ⇒ Product Attachments Management
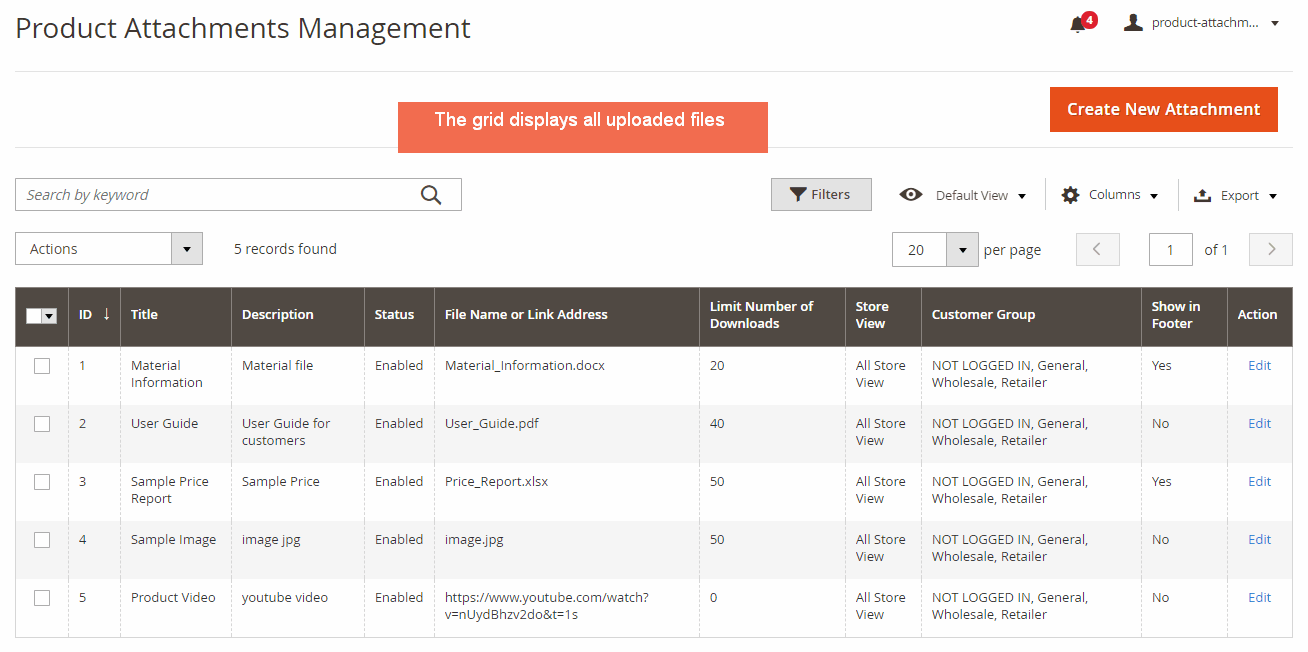
A grid listing all uploaded files will appear, you can edit the setting of uploaded files by clicking on Edit link in the Action column.
Press “Create New Attachment” button to upload and set up a new file.
2.2.1 Attachment edit page
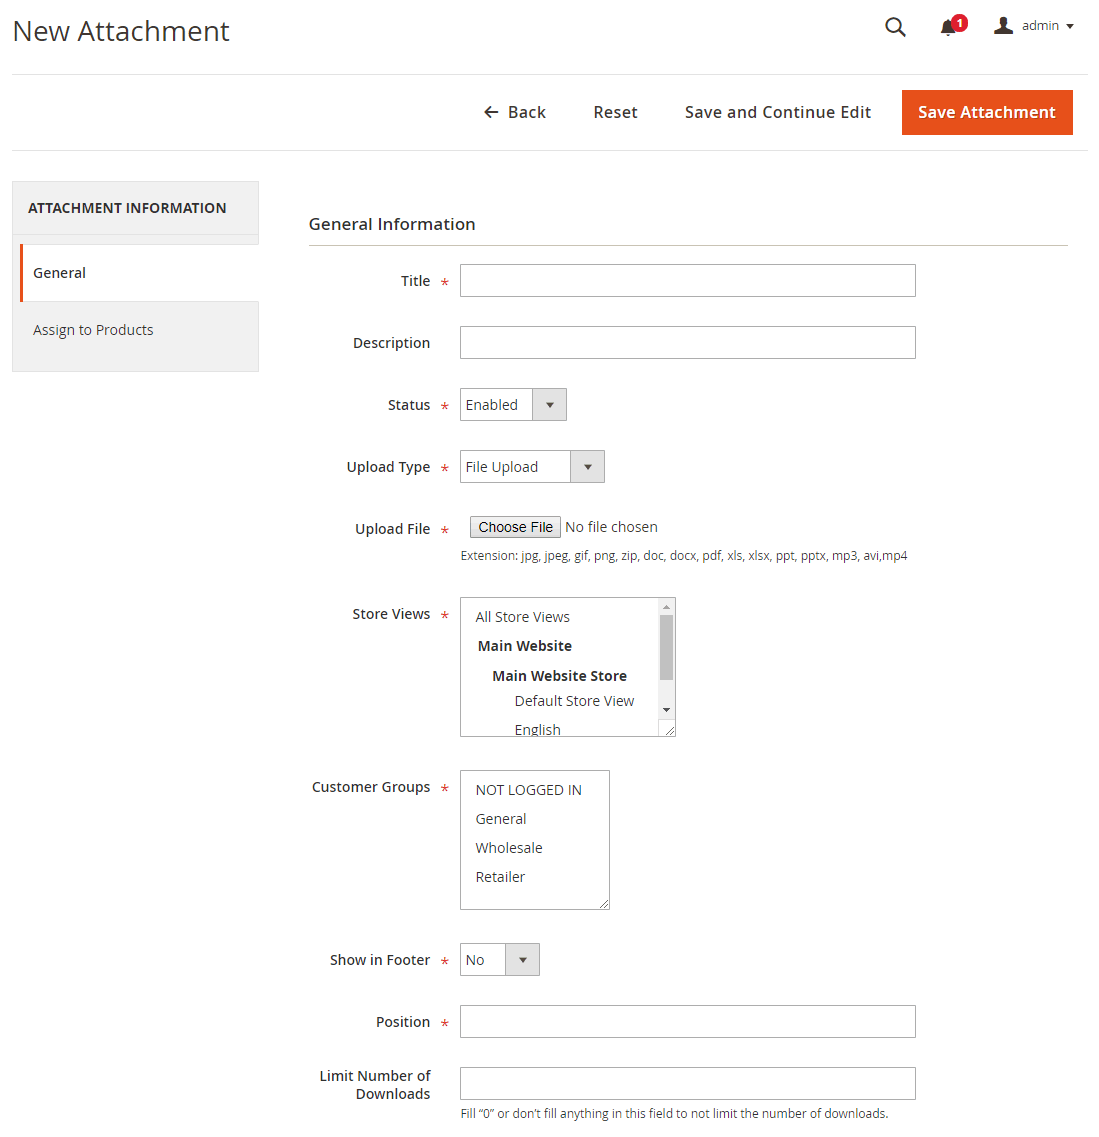
Please press the “General” tab.
-
- In Title: edit the title of file to be shown in the frontend.
-
- In Description: edit description of this file (this text is only shown on the attachment grid in the backend, not in the frontend for customers).
- In Status: choose Enabled or Disable the file.
In Upload Type:
- Choose File Upload to upload a file from your computer. If you select this option, the Upload File button will be enabled for you to click and upload a file from your computer. This file will be shown on the frontend for customers to directly download.

- Choose Link Download to add a URL and display this link to the frontend, customers need to click on this link to view pages or download files.

-
- In URL: enter a URL
-
- In Store Views: choose store views that you want to enable the file.
-
- In Customer Groups: choose customer groups that you want to enable the file.
-
- In Show in Footer: choose Yes to show the file in the footer of your site, or No to hide it.
-
- In Position: enter a number to set sort order for the file attachments. If a product is assigned multiple file attachments, the file with smaller number will have higher position.
- In Limit Number of Downloads: enter a number (>0) to specify the maximum number of downloaded files. If this field is blank or filled “0”, the number of downloads will not be limited.
2.2.2 Assign an attachment to multiple products
In Attachment edit page, please press “Assign to Products” tab
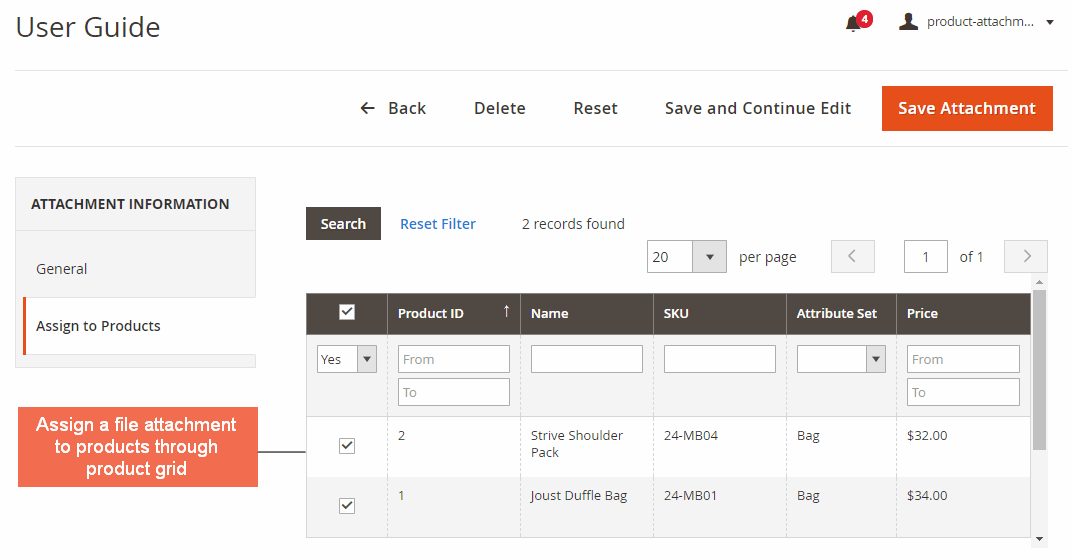
In the product grid, you can sort by selected/ unselected products, Product ID/ Name/ SKU, Attribute Set and Price then assign the attachment to products that you want.
After settings, you need to press “Save Attachment” button to save your settings.
2.2.3 Add many attachments to a product
Please go to Catalog ⇒ Products, then select a product in the grid to go to product edit page.
The “File Attachment” attribute is added to product edit page of each product.
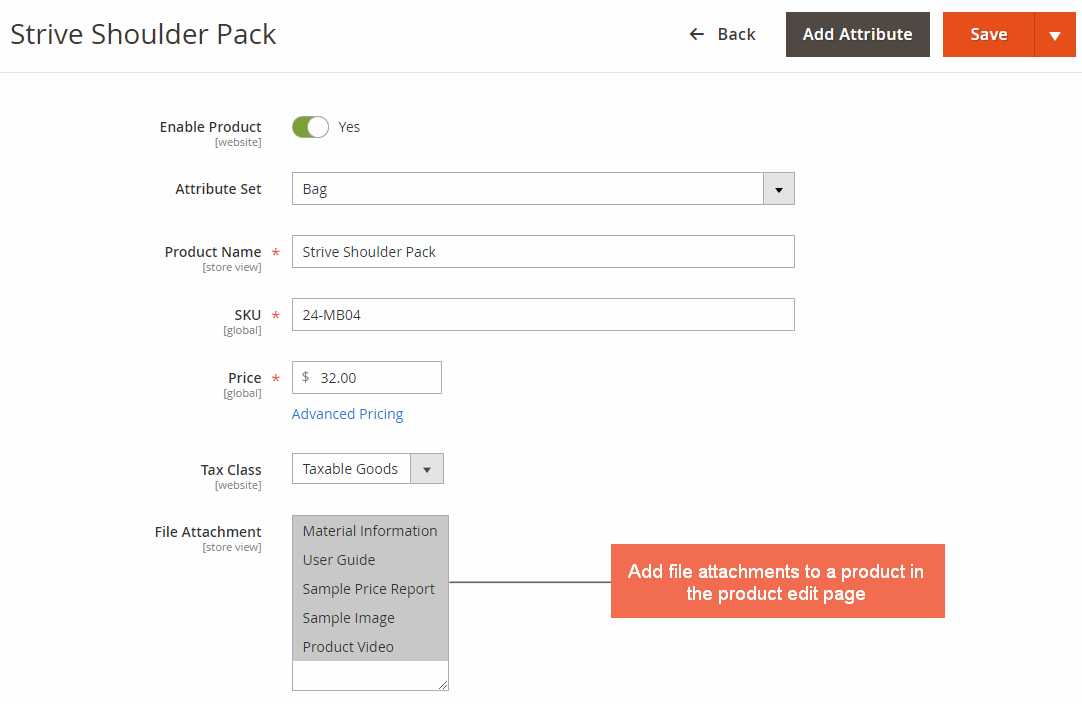
- In File Attachment: select attachments that you want to assign to product then press Save button.
3. API Support
We provide you BSS's list of GraphQL & REST API that our Magento 2 Product Attachments extension supports.
3.1 GraphQL API
Check all GraphQL API support here.
3.2 REST API
Check all REST API support here.
