1. Overview
Advanced Review for Magento 2 provides product page with an upgrade review function. Customers now can write more detailed reviews by adding Pros and Cons for each of them. Moreover, buyers are able to interact with other reviews by voting or reporting as well as sharing reviews to other social networks. And the feedbacks are displayed in the smartest way with the review rating summary and filter – sort by – pagination function. All of these advanced features are easy to manage at the backend.
2. How Does it Work?
2.1 In Store – Configuration
Please go to Stores ⇒ Configuration ⇒ BSSCOMMERCE ⇒ Advanced Review and start configuration.
2.1.1 General

- In Enable Advanced Review: Choose Yes to enable the module, otherwise choose No to disable it.
2.1.2 Pros and Cons Display Options
- In Enable Pros, choose Yes to display the Pros values for customers to select when writing reviews, otherwise choose No.
- In Enable Cons, choose Yes to display the Cons values for customers to select when writing reviews, otherwise choose No.
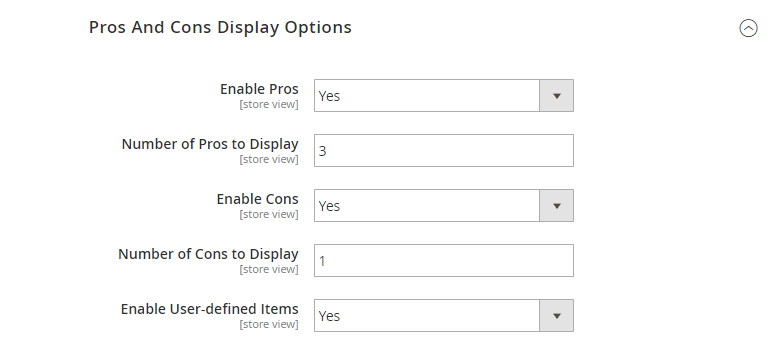
- In Number of Pros to display, choose the number of Pros values you want to display.
- In Number of Cons to display, choose the number of Cons values you want to display.
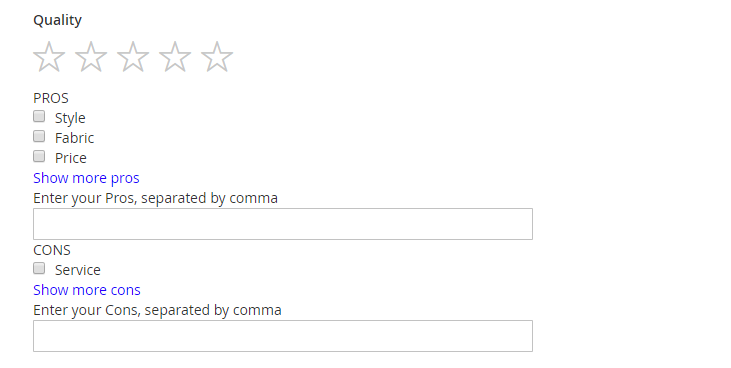
- In Enable User-defined items, choose Yes to enable customers to add new values for Pros and Cons attributes when submitting a review.
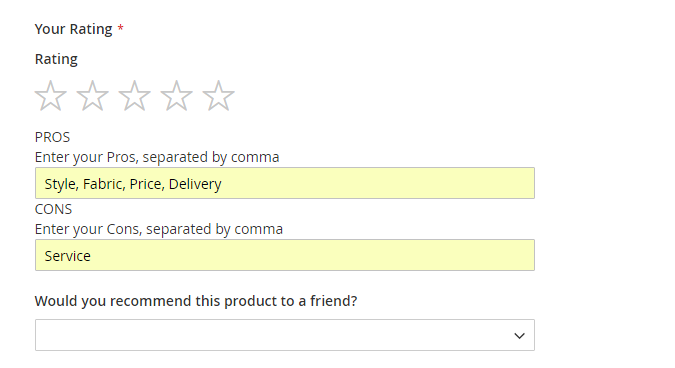
All Pros and Cons are shown in grid tables. Go to Marketing Manage Pros and Manage Cons to see submitted pros and cons. They have status as Disable when customers submit.
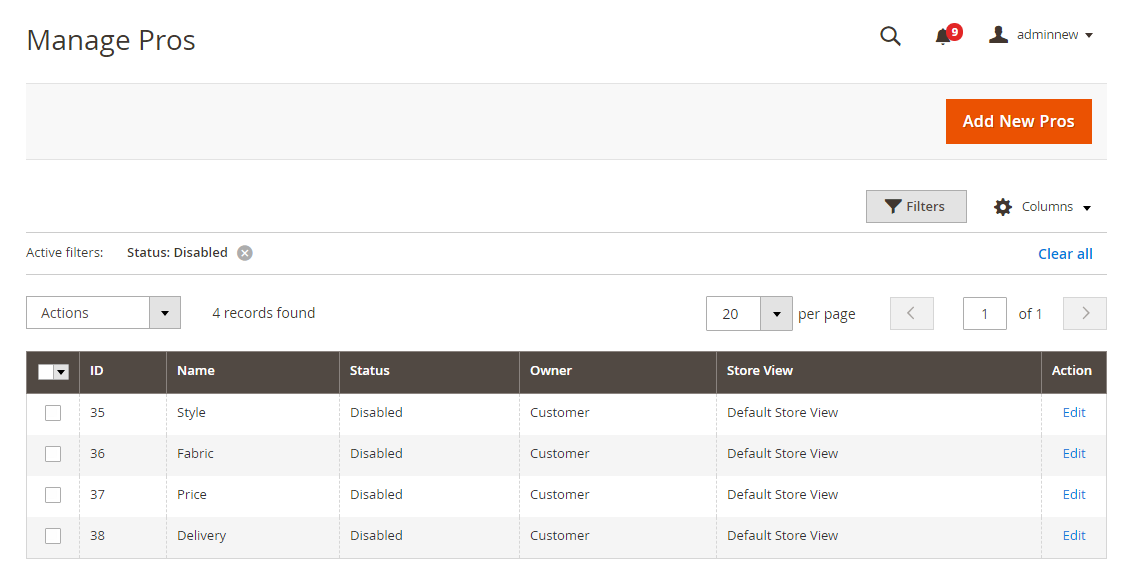
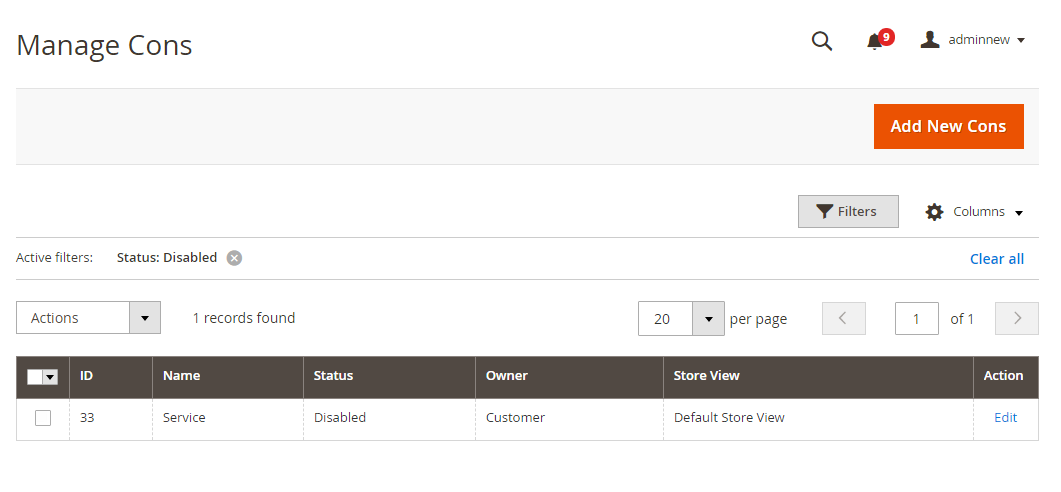
To let these pros and cons be displayed and auto-selected in the Edit review page, you have to change status to Enable. Select pros and cons, then choose Action box and update status to Enable. Only when staus of Pros and Cons is Enable, they are shown in the drop-down list Pros and Cons in the Edit Review page.
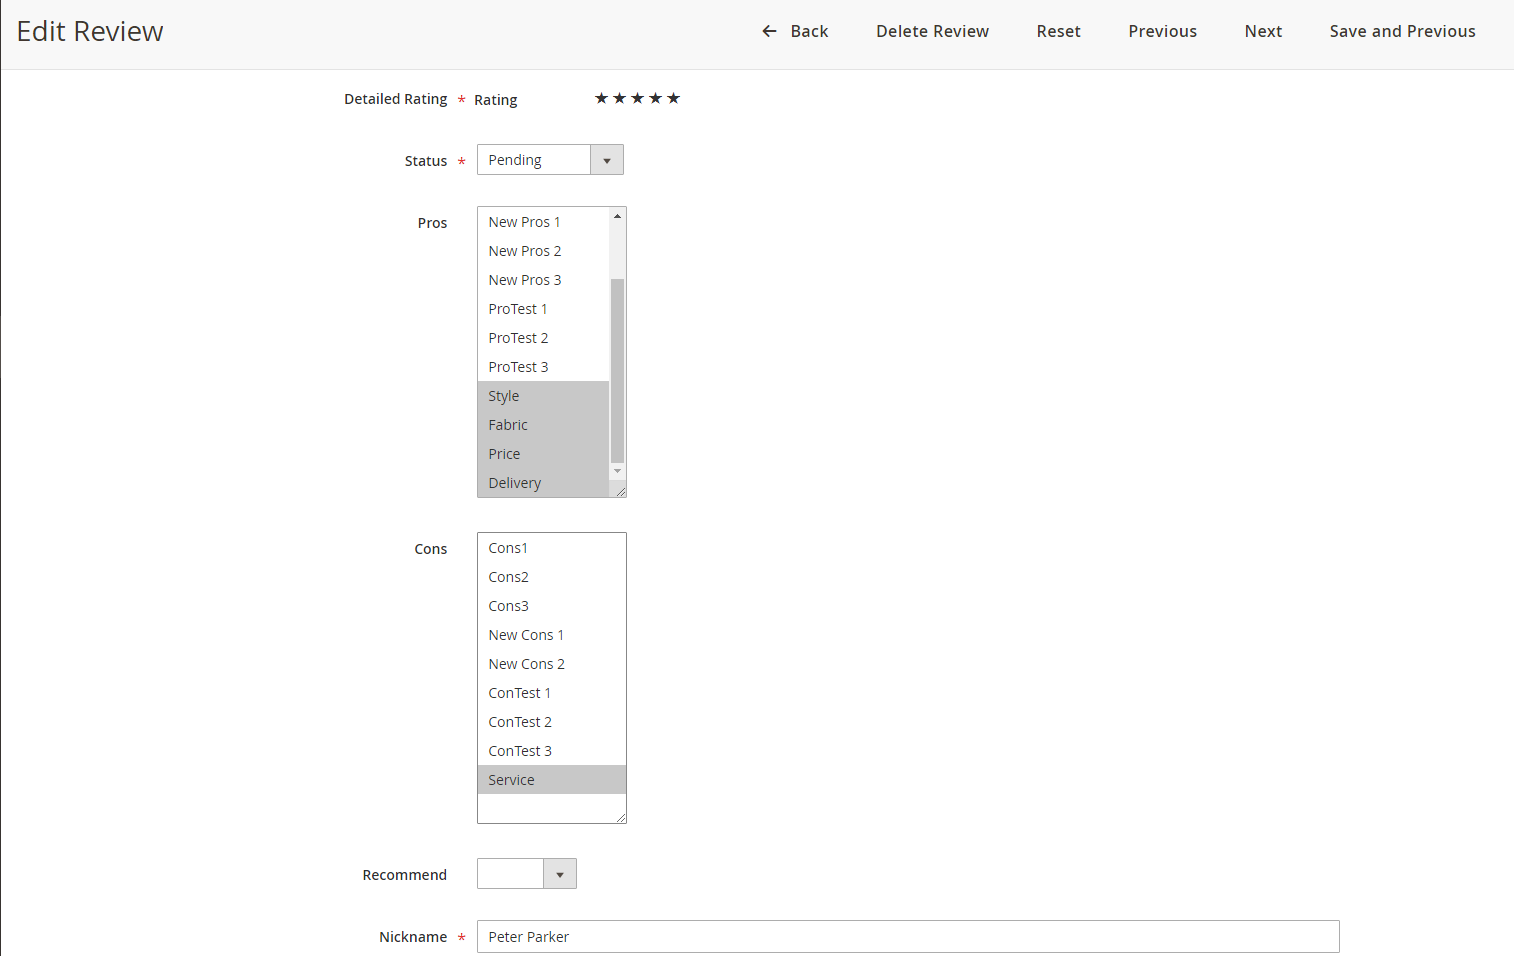
After the review is approved, these pros and cons are also shown in the frontend for other customers to select when they submit new reviews.
2.1.3 Helpfulness Display Options

- In Show Helpfulness, choose Yes to enable displaying helpfulness vote in each product, otherwise choose No.
- In Allow Guest Vote, choose Yes to enable not logged in customers to vote for helpfulness, otherwise choose No.
2.1.4 Abuse Report

- In Enable Report, choose Yes to enable customers to report inappropriate review or spams, otherwise choose No.
- In Allow Guest Report, choose Yes to enable not logged in customers to report inappropriate review or spams, otherwise choose No.
Here is how Helpfulness and Abuse report will be displayed in reviews.

2.1.5 Review Summary Block

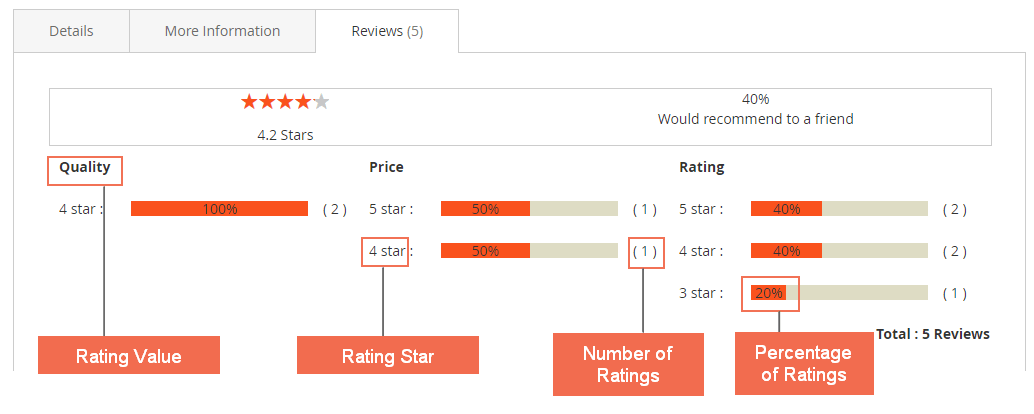
- In Enable, choose Yes to display Review Summary block, otherwise choose No.
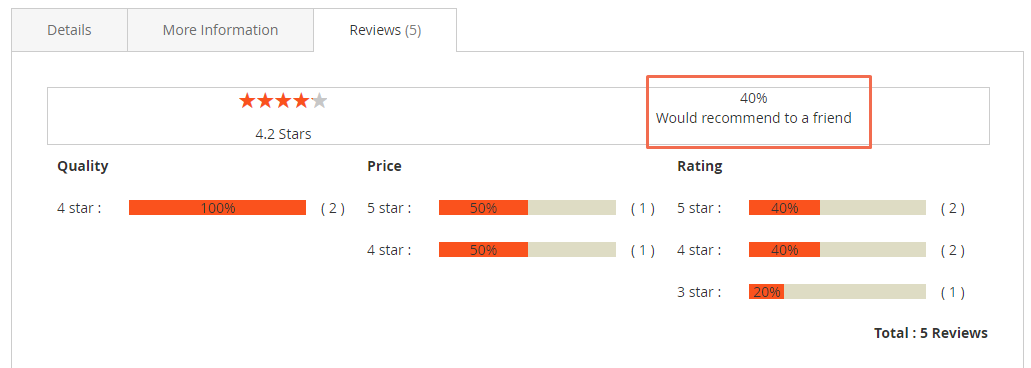
Module allows to display the percentage, total votes of each rating value, rating stars.(1-5 stars).
2.1.6 Recommend to a Friend
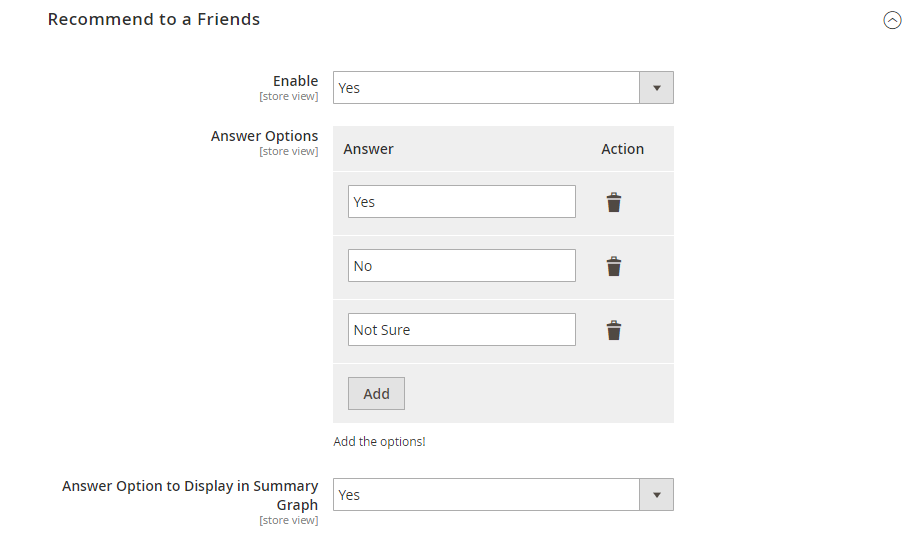
- In Enable, choose Yes to enable Recommend to a Friend feature for each review.
- In Answer Options, enter the value for the answers of Recommend to a Friend box.
- In Answer Options to Display in Summary Graph, enter the value for the answers which will be used to calculated the percentag for summary graph in the below section.
2.1.7 Access Options

- In Who Can Review The Product?, choose either All, Only customer or Only registered customers who bought the product can review it to select customer groups you want to enable review.
If you chooose Only registered customers who bought the product can review it option, an additional config name Order state to post review will show up.
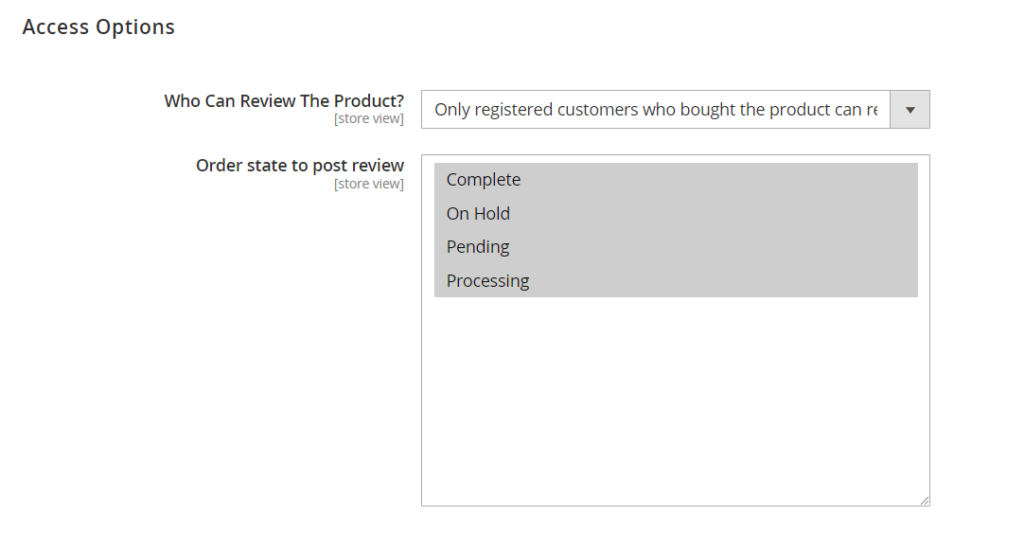
- In Order state to post review, you can choose in which order state (Complete, On Hold, Pending, Processing) the customers are allow to review the product.
2.1.8 Social Sharing
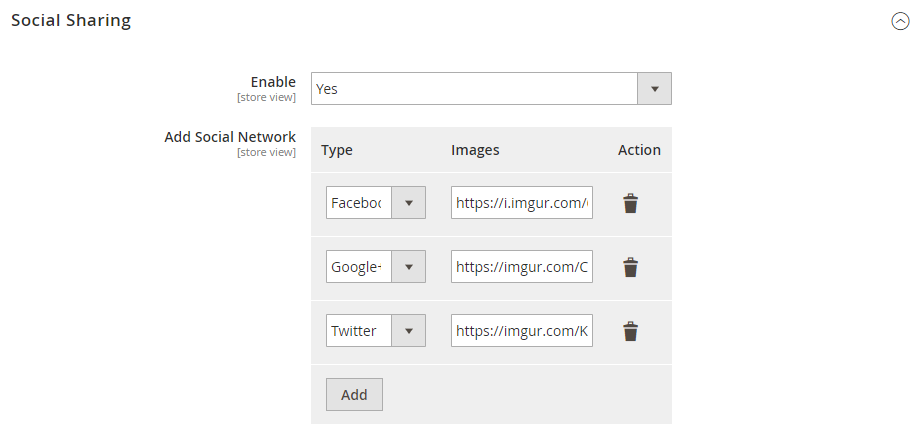
- In Enable, choose Yes to enable Social Sharing, otherwise choose No.
- In Add Social Network, choose the Type of social networks you want to display along with the Images for them. The image can be uploaded at store backend or other hosting. The best image size for display is 40x40.
- Click Add to add more social networks.
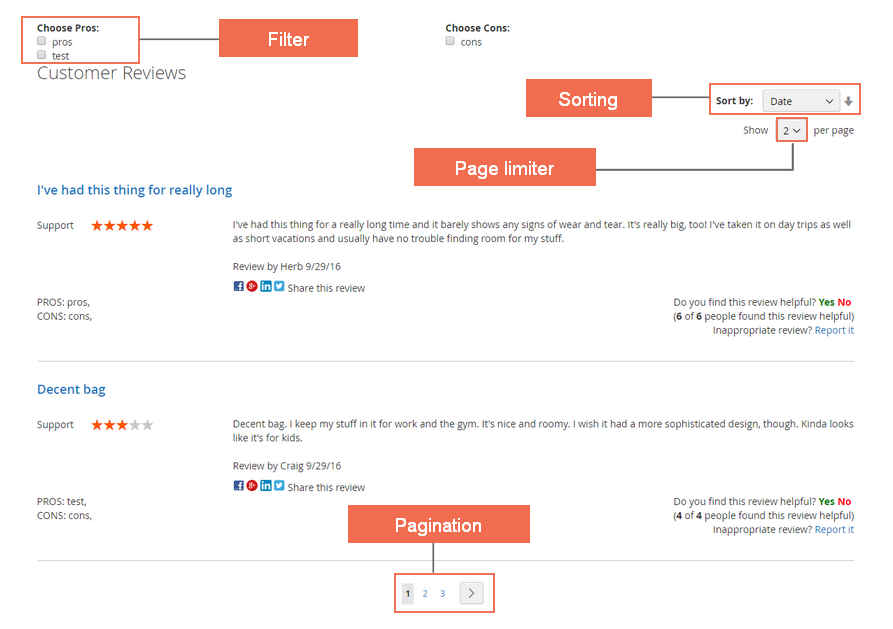
2.1.9 Sorting and Filter
- In Enable, choose Yes to enable Sorting and Filter, otherwise choose No.
- In Available Page Limiter, choose the number of reviews available for customers to choose to be displayed in a sorting and filter page.
- In Default Page Limiter, choose the default number of reviews to be displayed in a sorting and filter page. The default limiter must be among the above available limiter.

- Allow Sorting by, choose among Date, Rating or Helpfulness for sorting options.
- In Allow Filter Review, choose Yes to enable Filter Review, otherwise choose No.
- In Filter by Pros, choose Yes to enable Filter by Pros, otherwise choose No.
- In Filter by Cons, choose Yes to enable Filter by Cons, otherwise choose No.
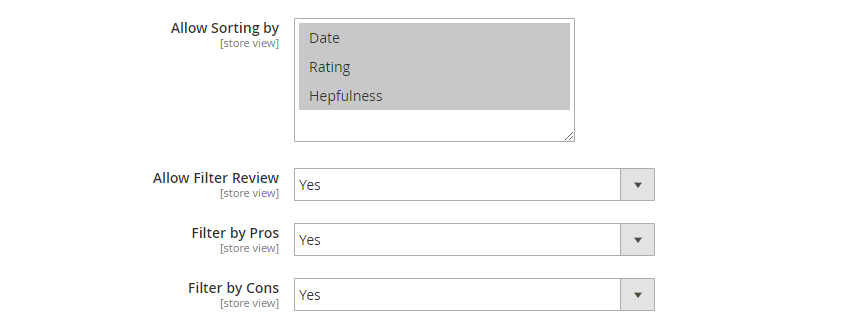
When admins enable filter and sorting, customers can easily search for reviews.
2.1.10 Email Notification
- In Enable New Reviews Notification, choose Yes to enable sending notification via email when there are new reviews, otherwise choose No.
- In Send Emails to, select the email receiving the notification.
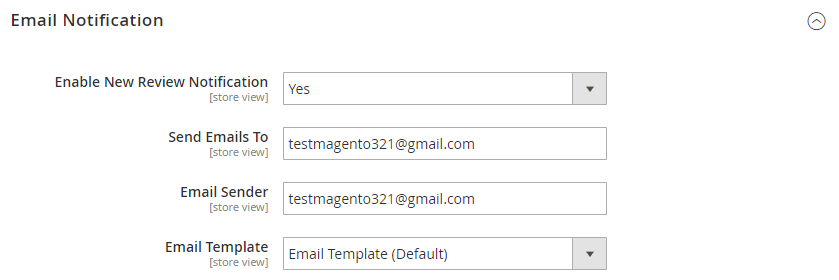
- In Email Sender, select the email sending the notification.
- In Email Template, select the email template for the notification.
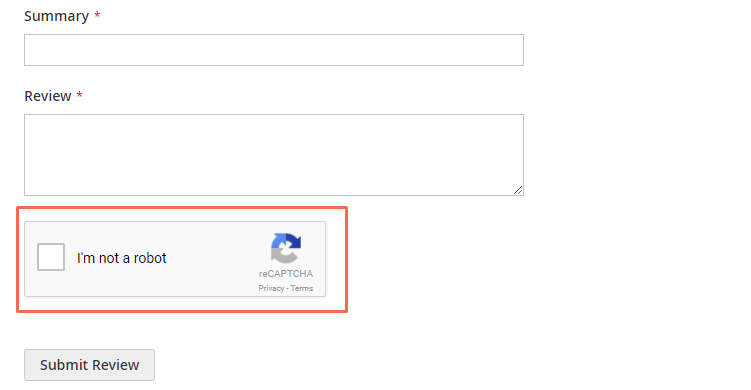
2.1.11 AntiSpam Protection
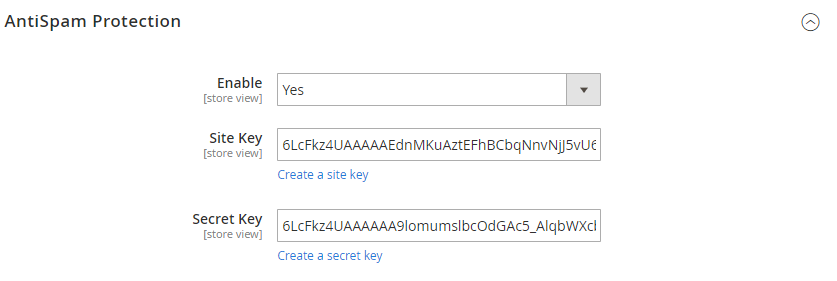
- In Enable, choose Yes to enable anti-spam protection, otherwise choose No.
- In Site Key, click on Create a site key and get the Site Key to create reCAPTCHA for your site fill in the configuration.
- In Secret Key, click on Create a site key and get the Site Key to create reCAPTCHA for your site then fill in the configuration.
2.2 In Marketing – Advanced Review
Please go to Stores ⇒ Marketing ⇒ Advanced Review and start configuration.
2.2.1 Manage Pros

- Tick on the Pros value and click on the Actions box to choose either Delete or Update Status.
- Click on Add New Pros to add more Pros value.
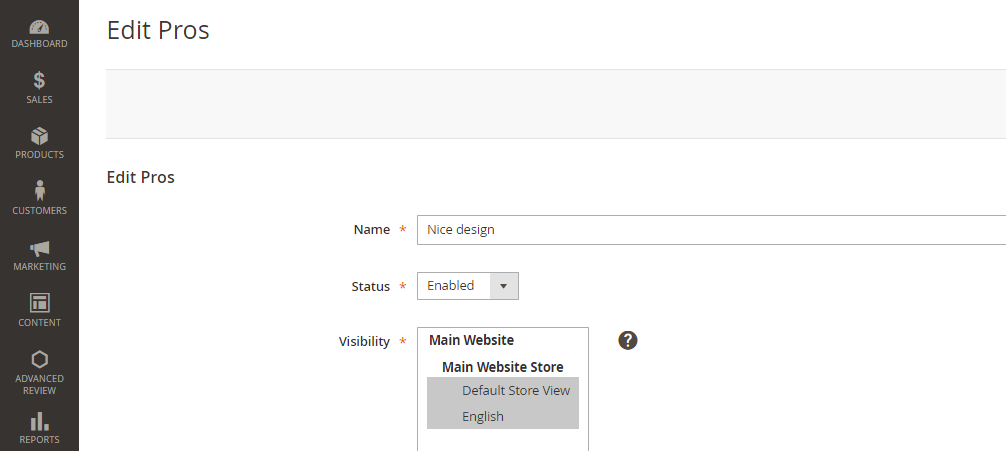
- In Edit Pros, admin can assign Name, choose Status and the Visibility of each Pros value.
2.2.2 Manage Cons
Tick on the Cons value and click on the Actions box to choose either Delete or Update Status.
- Click on Add New Cons to add more Cons value.

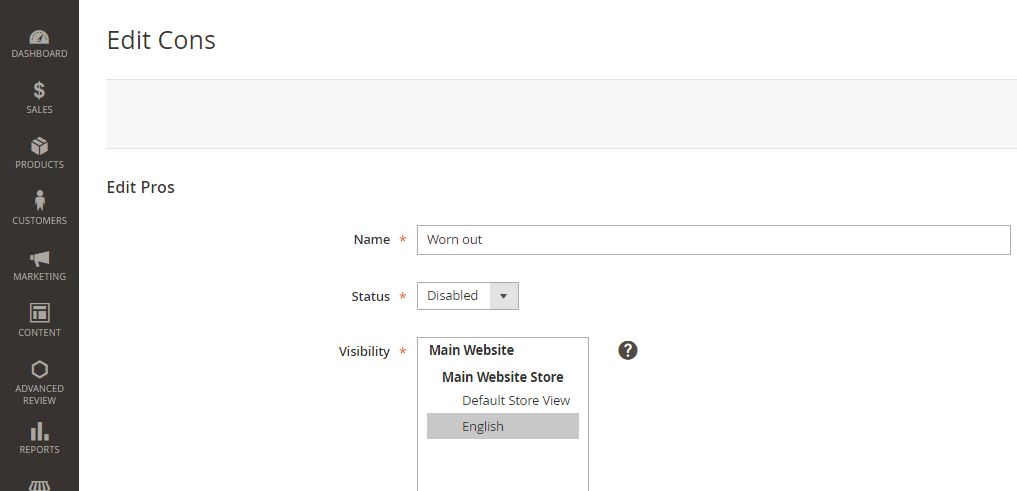
- In Edit Cons, admin can assign Name, choose Status and the Visibility of each Cons value.
2.3 In Store - Rating
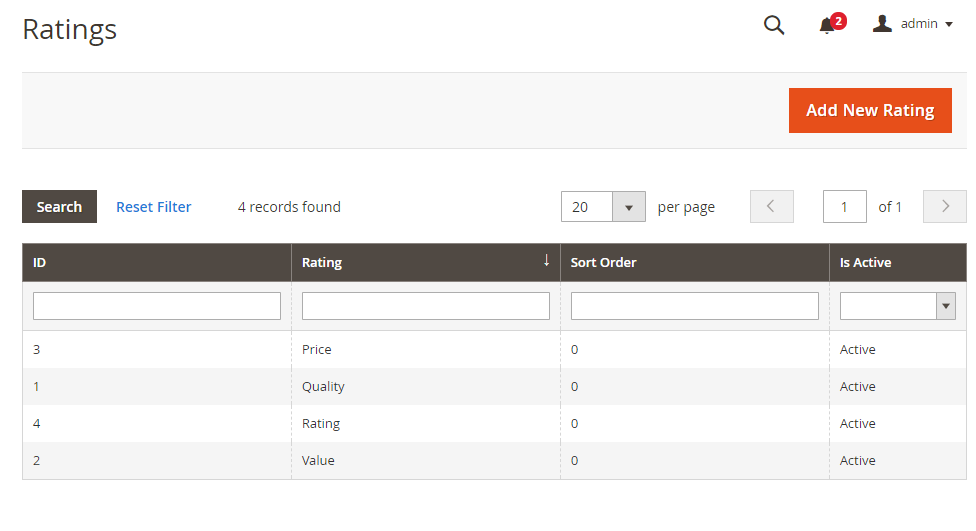
- Click on Add New Rating to new Rating Value.

- In Default Value, enter the default value for the new rating. If you are using multiple store view, fill in the value for each store view below.
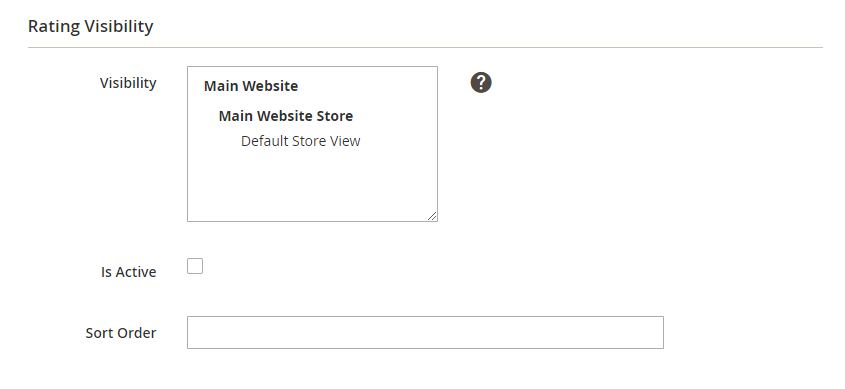
- In Visibility, set the visibility for the store views you want to show the rating
- In Is Active, check to active the value.
- In Sort Order, enter the order of the rating value in the frontend.
