Note - This extension does not work on:
- Operating system: iOS
- Web browser: the private mode of Firefox, IE.
1. Overview
Push Notifications for Magento 2 extension allows admin to reach customers in the fastest way by sending a message in small popup form even if they are offsite or even when the browser isn’t open.
*Note: The extension doesn’t support push notifications on tablets and mobiles.
2. How Does It Work?
2.1 General Configs
Stores ⇒ Configuration ⇒ BSSCommerce ⇒ Push Notification.
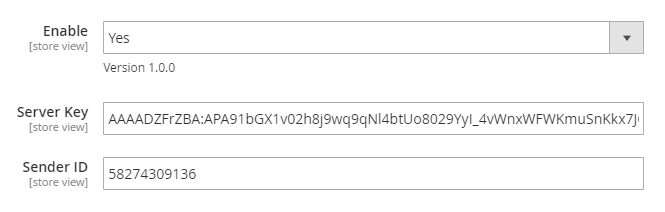
- In Enable, choose Yes to enable the extension, or No to disable it.
- In order to get Server Key and Sender ID of Firebase project, follow this instruction:
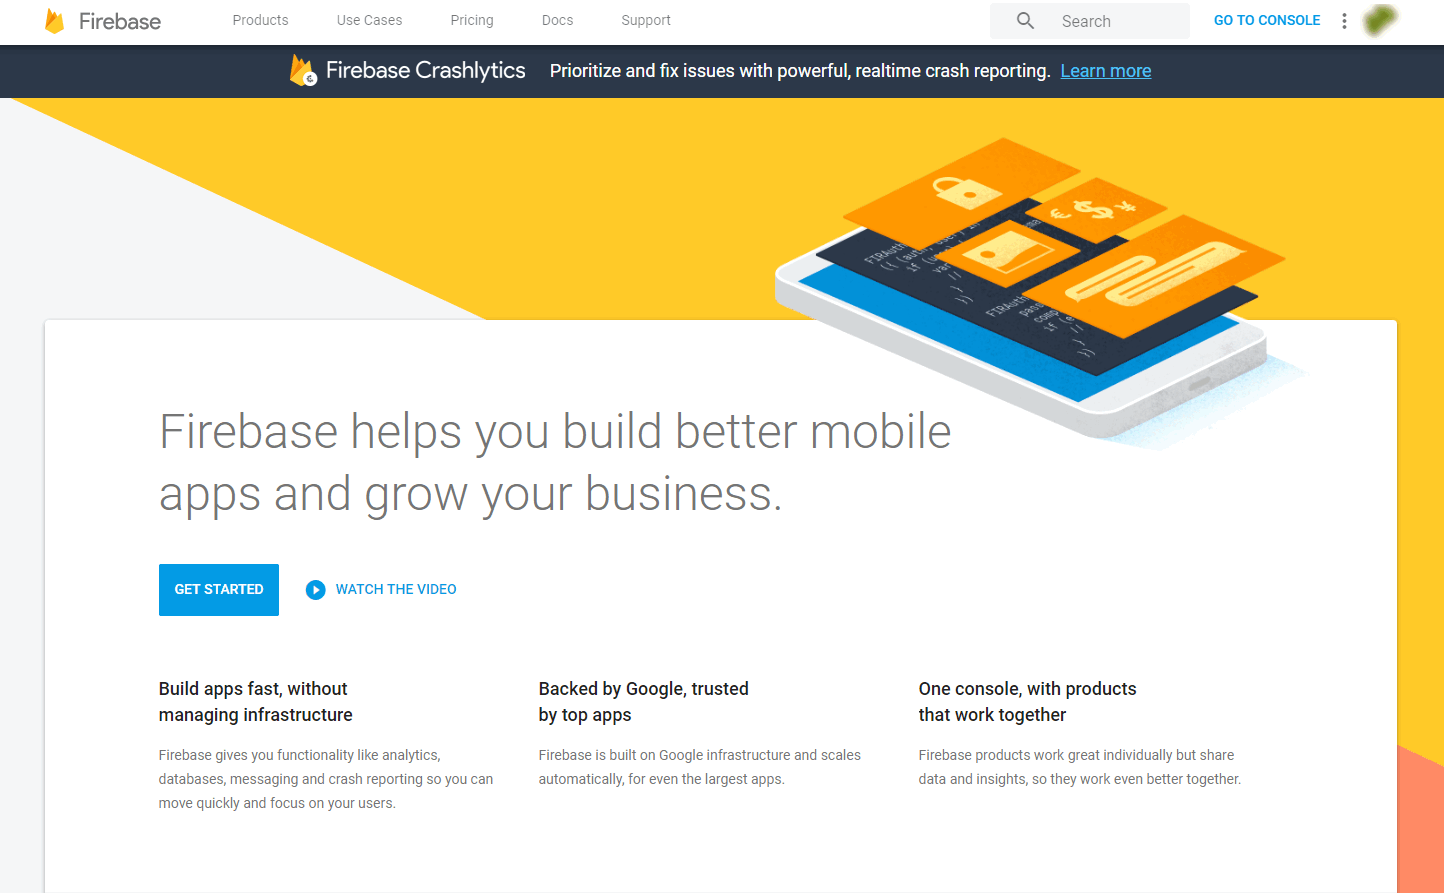
Go to https://firebase.google.com/, then log in your Gmail account or register a new Google account if you haven’t got one. Click the Get Started button.
*Note:
If changing Sender ID or Server Key, all previous subscription can’t be normally operated.
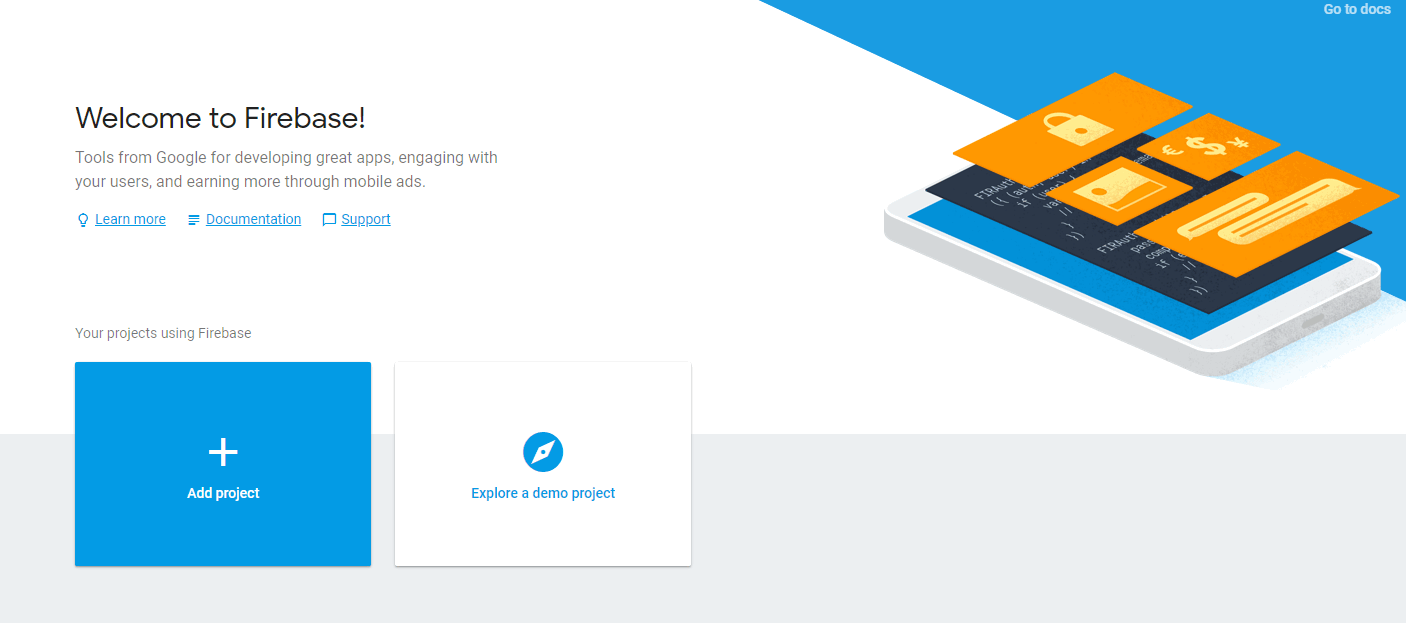
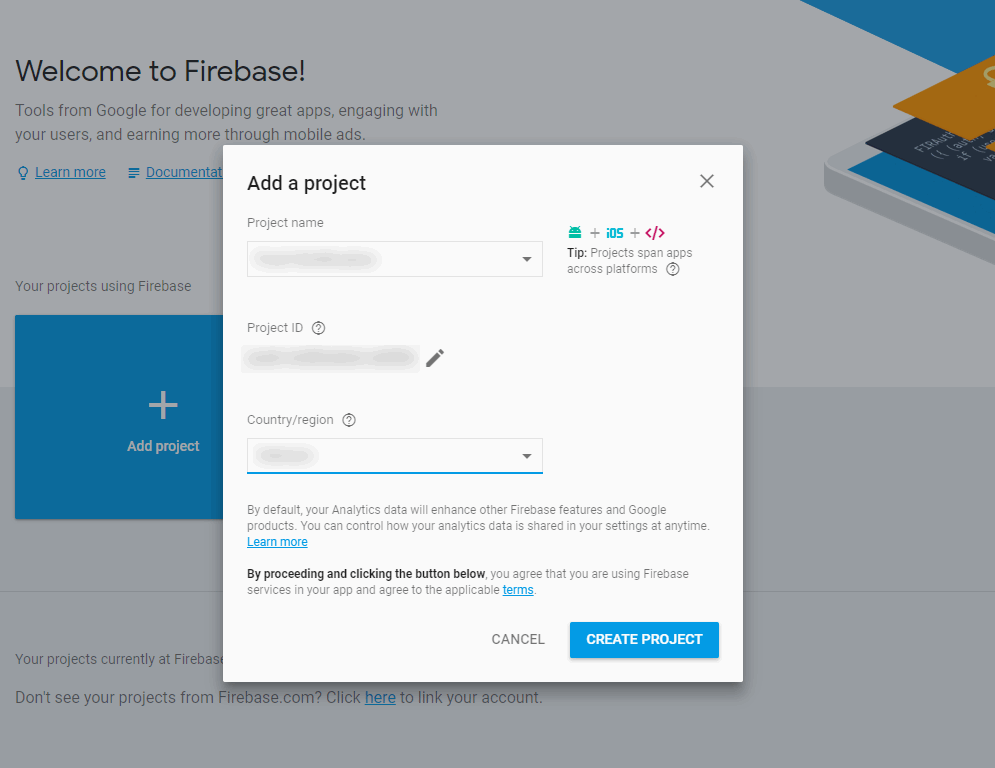
- Add a new project by click Add Project button.
- Enter Project Name, then Project ID will be automatically created and fill in the Country/Region option. Click the Create Project button.
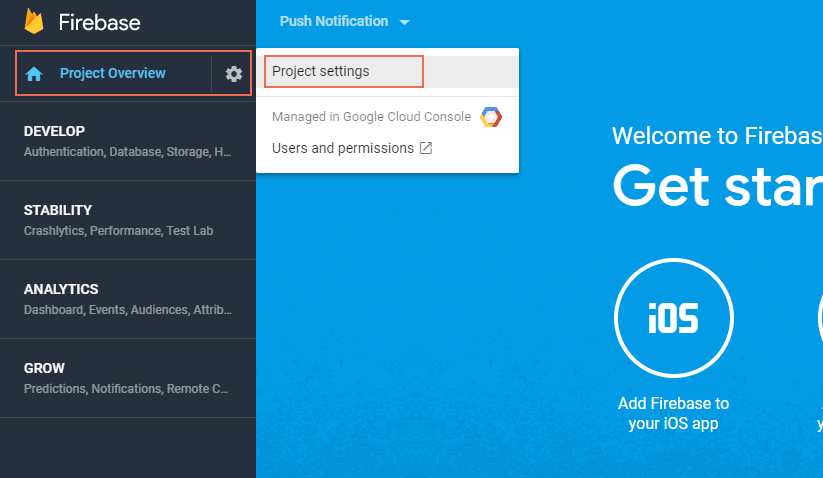
- On the Project Overview section, select Project settings.
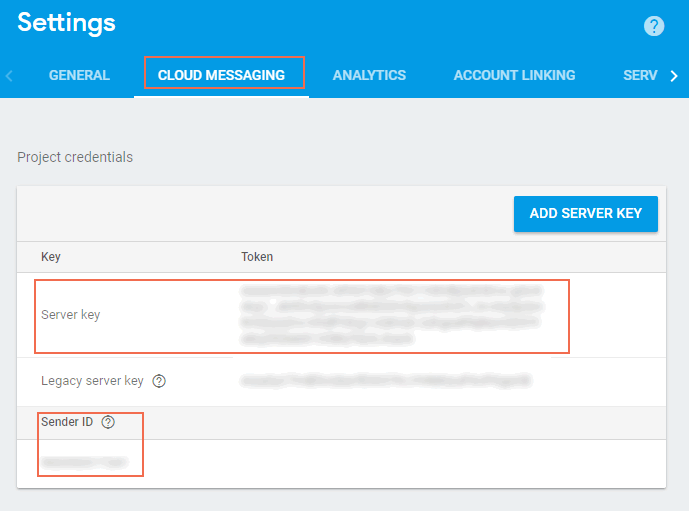
- In Settings, choose Could Messaging. Then you can get the Server Key and Sender ID.
*Note:
Magento 2 Push Notification extension can only be used for https website.
The reason is clearly stated: “The FCM SDK is supported only in pages served over HTTPS. This is due to its use of service workers, which are available only on HTTPS sites.”
In case you have further questions on Firebear, please read the document.
2.2 Push Notifications Configs
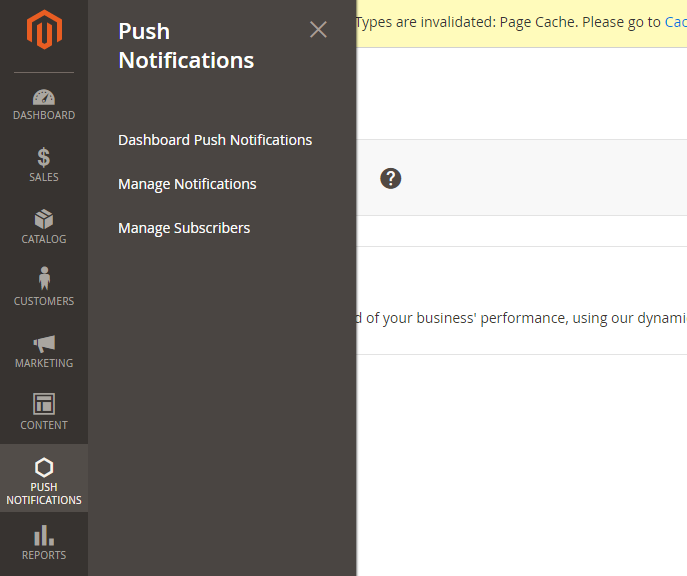
2.2.1 Dashboard Push Notifications
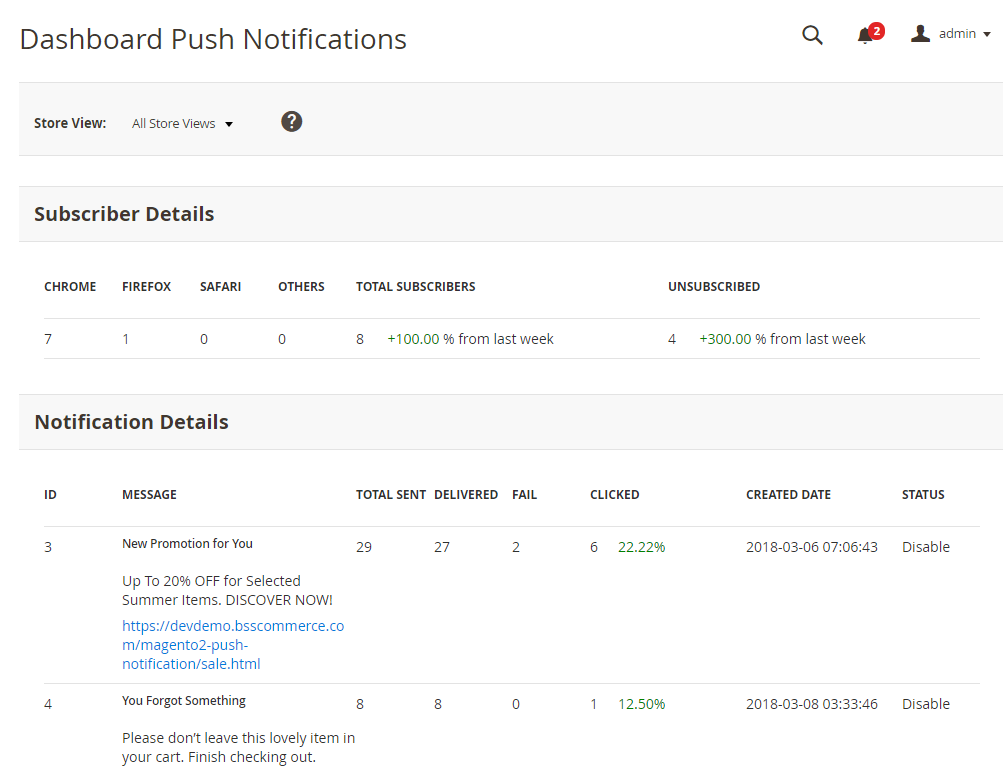
The Push Notifications Dashboard provides a report with a full statistic of:
- Subscriber information: number of subscribers from each browser, a total of subscribers, and unsubscribed.
- Notification information: total sent, delivered, fail, clicked, message, date, and status.
2.2.2 Manage Notifications
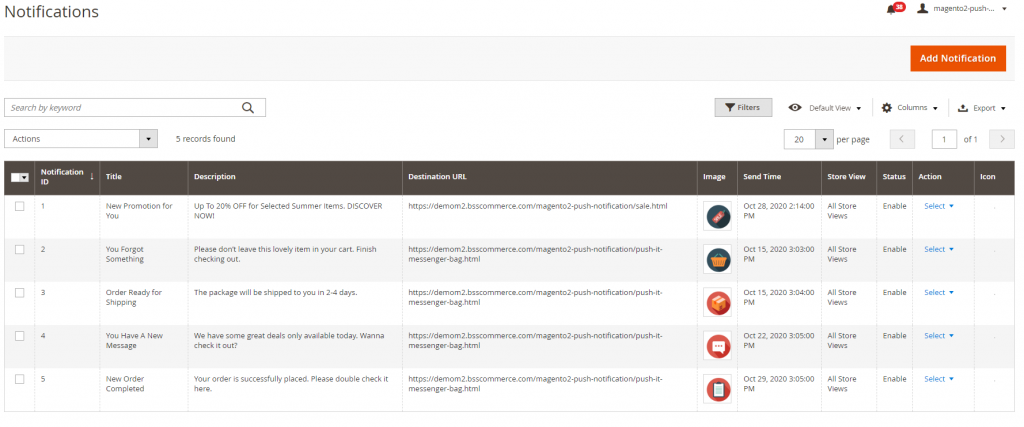
The Notifications Grid allows admin to add new, edit, and manage notifications. In Action column, after clicking Select, you can see Edit and Delete.
To create New Notification, follow these steps:
- Click Add Notification button.
- You will be redirected to Edit Notification Page, fill in the required fields to create a new push notification.
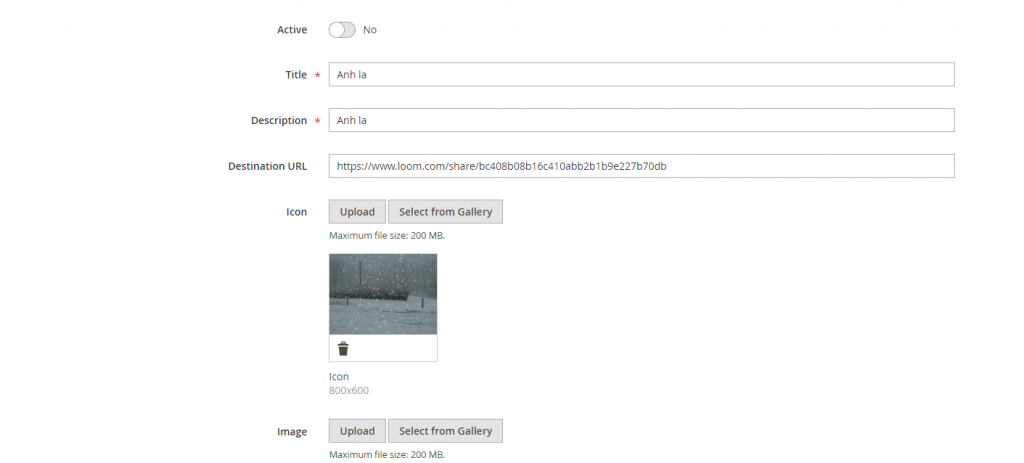
- In Active, select Yes to enable the notification, No to disable it.
- In Title, enter the title of the notification.
- In Description, enter the content for the notification.
- In Destination URL, fill in the link you want to redirect customers after they click the notification.
- In Icon, upload icon image.
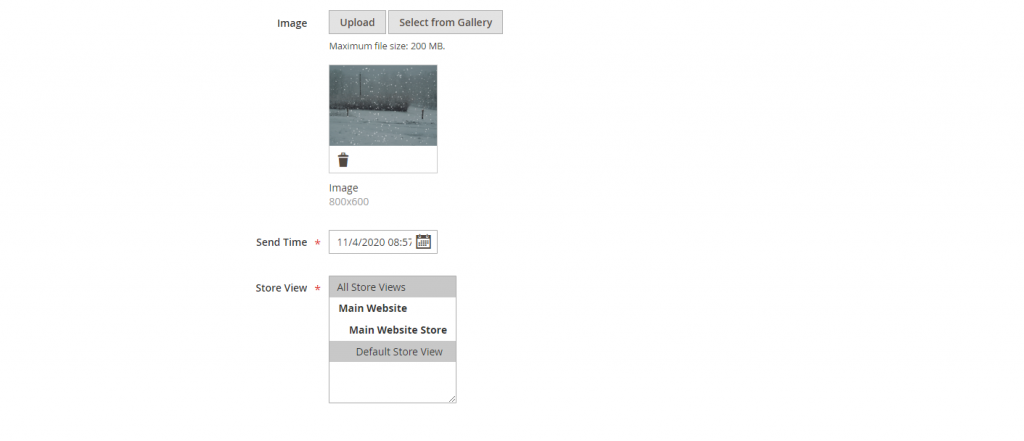
- In Image, upload an image to display on the notification.
- In Tags, enter tags of the notification. This is optional.
- In Send Time, schedule the time to send push notifications to subscribers.
- In Store View, select which store views you want to display the notification.
- Click Save button to save all configurations.
*Note:
After a notification is sent based on the Send Time config, the status of that notification will be automatically changed to “Disable” on Manage Notifications grid. You can perform mass action to send the notifications with “Disable” status.
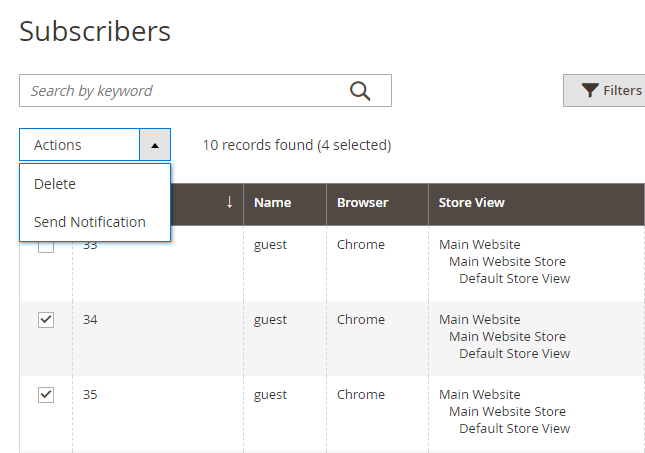
2.2.3 Manage Subscribers
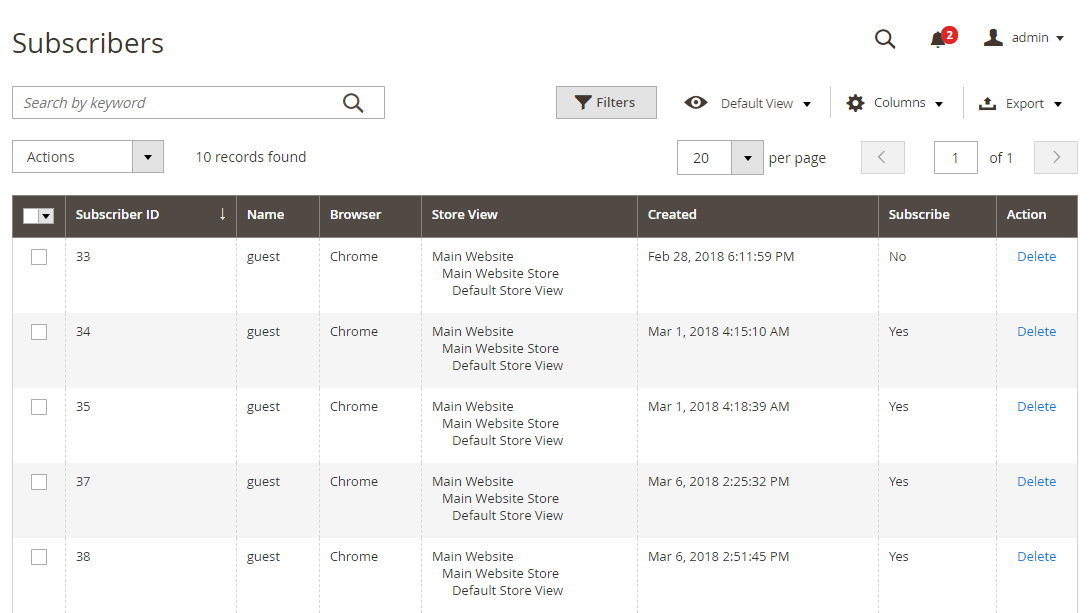
The Subscribers Grid allows you to keep track of the customers who receive the push notification. The Subscribers Grid contains Subscriber ID, Name, Browser, Store View, Created, Subscribe and Action.
In Action, you delete the subscriber.
You can use mass action to send notifications to selected subscribers.