
1. Overview
Magento 2 Checkout Success Page is an extension that allows store owners to customize Checkout Success Page (known as Thank You Page) as they want, display order details and style success page with a thank you message, a coupon code, CMS blocks, suggested products, etc. With this module, your thank you page will be more informative and will give customers the convenience in the checkout process.
2. How Does It Work?
Please go to Store ⇒ Configuration ⇒ BSSCommerce ⇒ Checkout Success Page
2.1 General

In General, choose Yes to enable the module, No to disable it.
2.2 Order Information Section
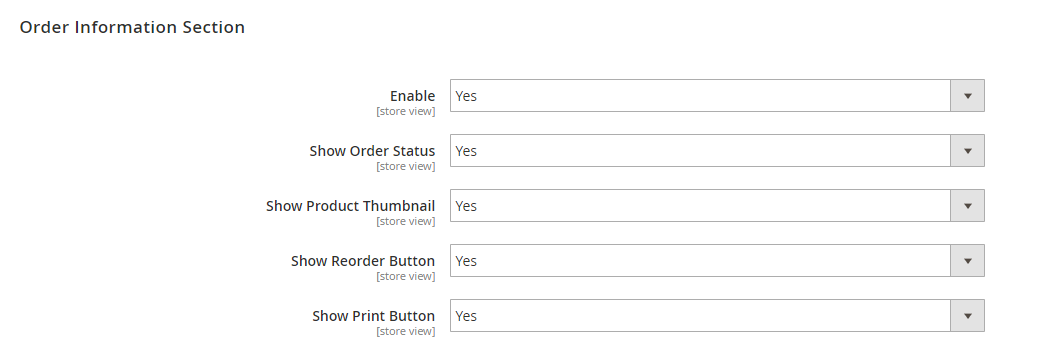
- In Enable, choose Yes to enable section, or No to disable it
- In Show Order Status, choose Yes to enable order status, or No to disable it
- In Show Product Thumbnail, choose Yes to enable product image, or No to disable it
- In Show Reorder Button, choose Yes to enable, or No to disable it
- In Show Print Button, choose Yes to enable, or No to disable it
Note: Other order information like shipping address, shipping method, payment method, billing address and order summary are set to enable/disable with the whole section.
Moreover, on the checkout page, your customer can click on the order number to see their order review in seconds.
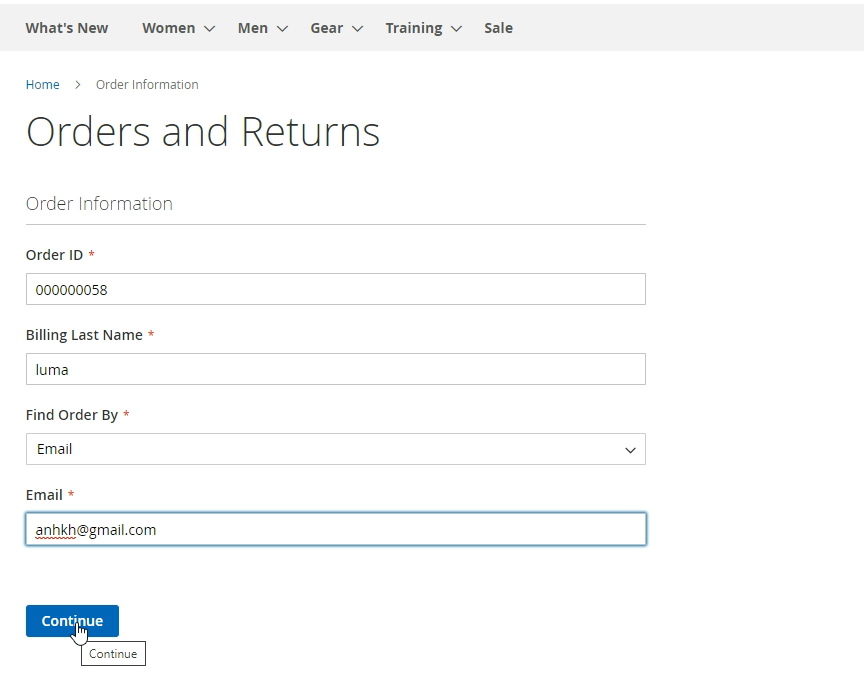
If it's a login customers, it will redirect to My Orders in their profile.
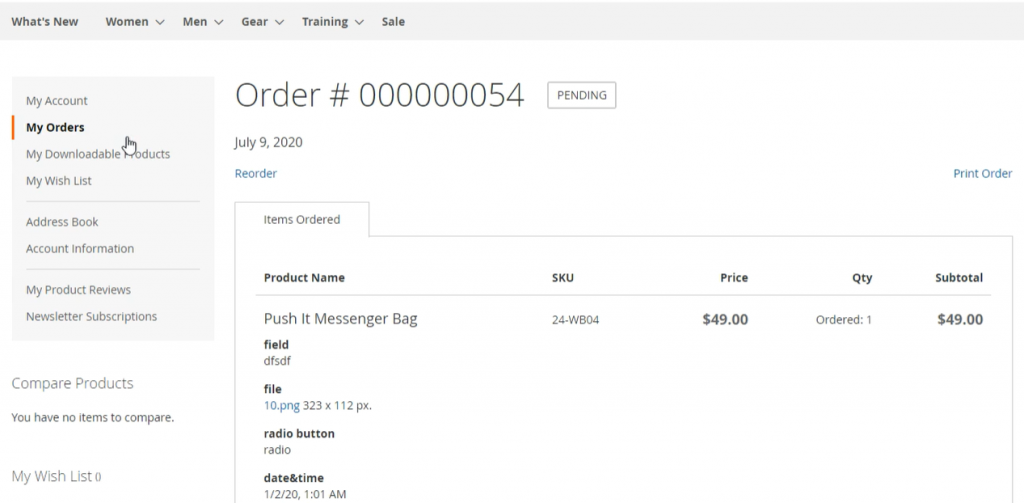
If it's a non-login customer, by tapping the order number, customers then have to fill in the form to see their order details.
2.3 Thank You Message
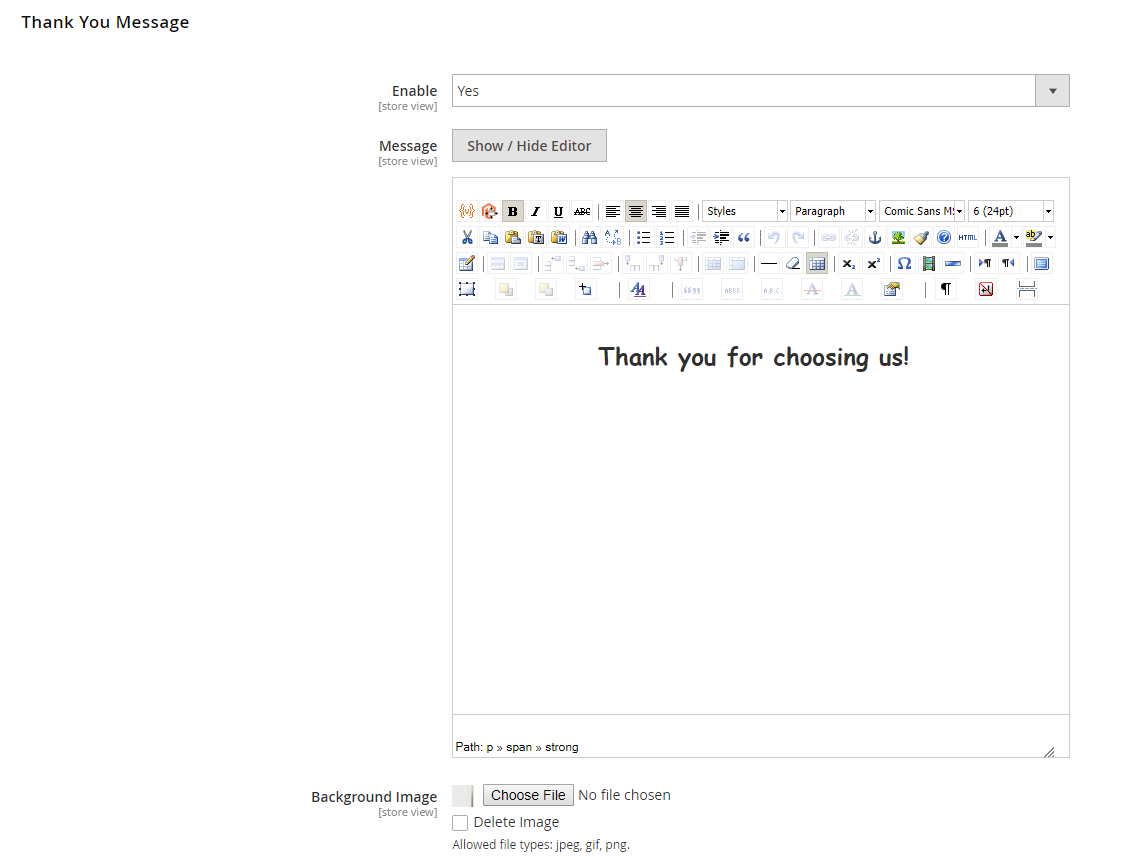
- In Enable, choose Yes to enable Thank you message on success page, or No to disable it.
- In Message, you can edit the Thank you message.
- In Background Image, insert background image for Thank you message.
Note: In case you don’t add the background image, this module still support displays the text message well.
2.4 Coupon Code Section
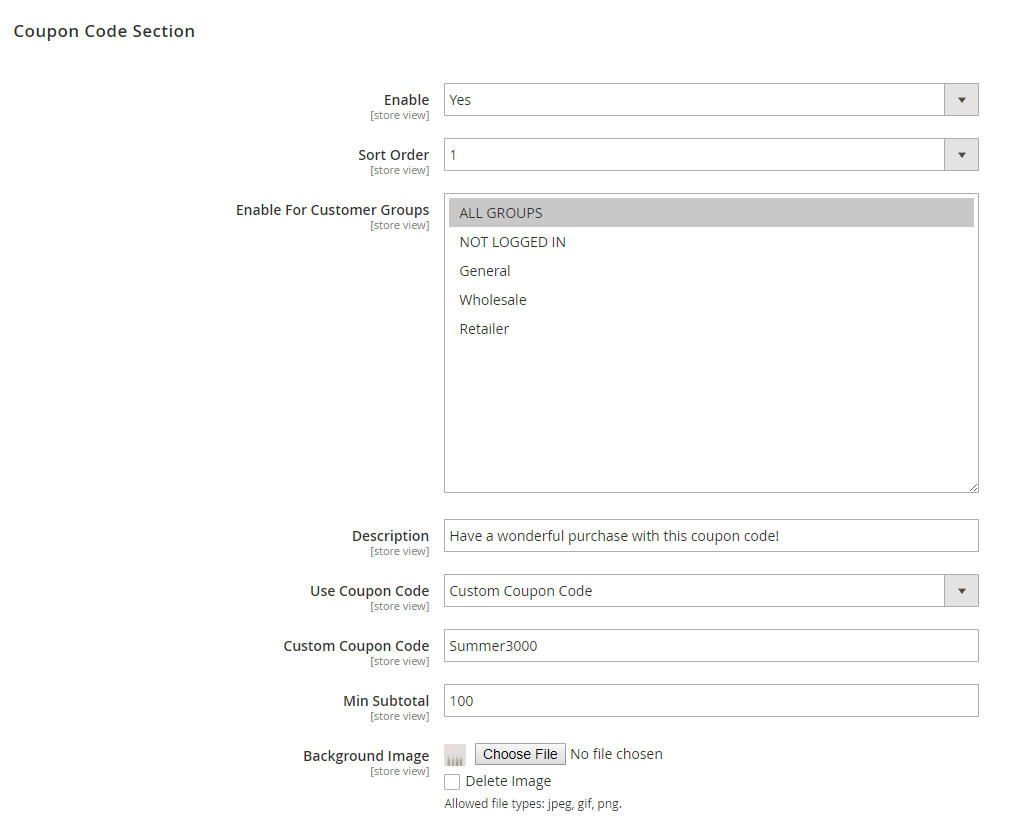
- In Enable, choose Yes to enable coupon code section, or No to disable it.
- In Sort Order, select number (1 to 6) to set the position of this section in the frontend.
- In Enable for Customer Groups, choose customer groups who can see the coupon code.
- In Description, input the description for the coupon code.
- In Use Coupon Code, choose available coupon code in the database or choose “Custom Coupon Code” to enter a coupon code not been in the sale rules database.
Note: The Custom Coupon Code field and Min Subtotal field only appear when you select Custom Coupon Code option.
- In Custom Coupon Code, enter a coupon code. This coupon code can be from the third party extension or from another store.
- In Min Subtotal, set the minimum amount of merchandise that the customer must purchase to qualify for the discount. This feature is valid only for the coupon entered in Custom Coupon Code field above.
- In Background Image, click Choose File button to insert background image for the coupon code.
2.5 Social Network Sharing Section
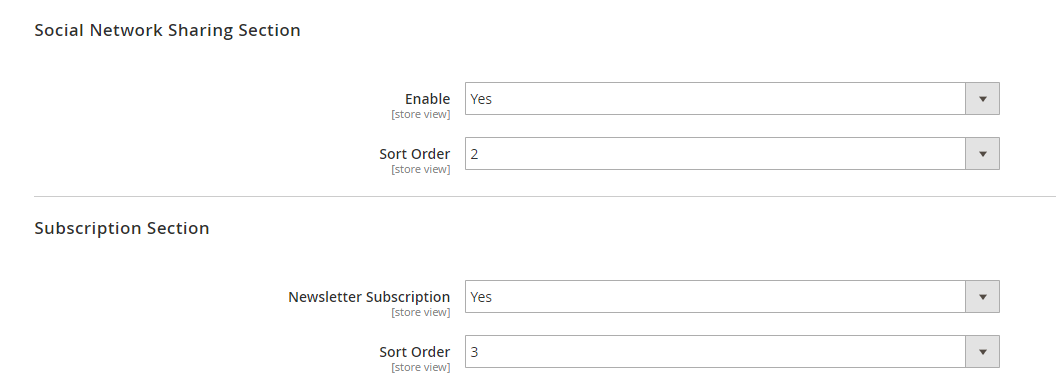
In Enable, choose Yes to enable social networks sharing section, or No to disable it.
In Sort Order, select number (1 to 6) to set the position of this section in the frontend.
Note: this module shares the website homepage on social networks instead of the success page.
2.6 Subscription Section

- In Enable, choose Yes to enable subscription section, or No to disable it.
- In Sort Order, select number (1 to 6) to set the position of this section in the frontend.
2.7 CMS Block Section
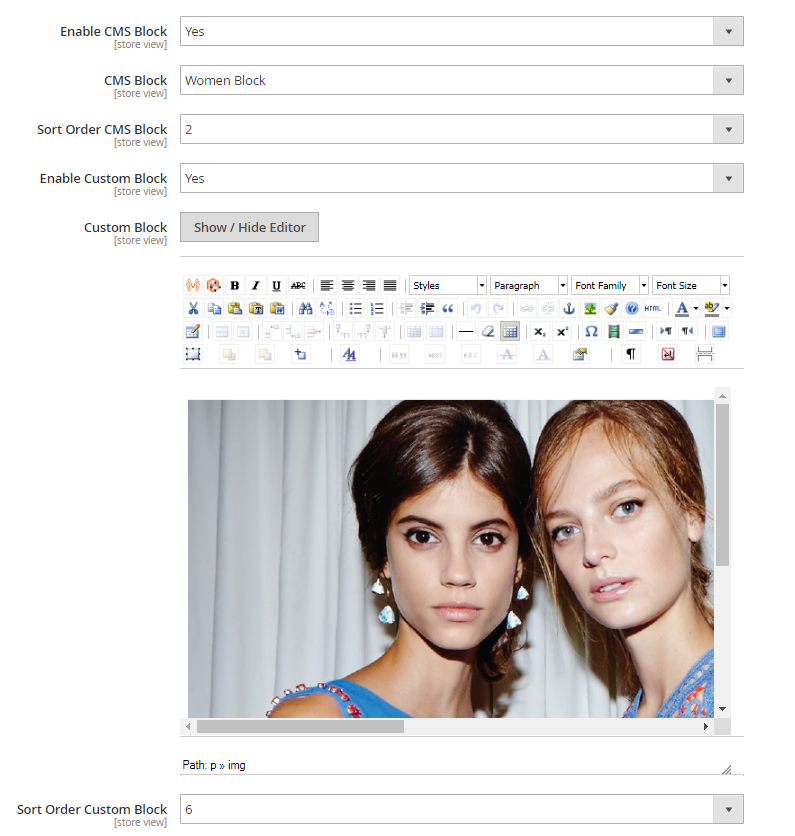
- In Enable CMS Block, choose Yes to enable CMS Block, or No to disable.
- In CMS Block, select available CMS Block in your store.
- In Sort Order CMS Block, select a number (1 to 6) to set the position of sections in the frontend.
- In Enable Custom Block, choose Yes to enable custom Block, or No to disable.
- In Custom Block, edit a new CMS Block.
- In Sort Order Custom Block, select a number (1 to 6) to set the position of sections in the frontend.
2.8 Products Suggestion Section
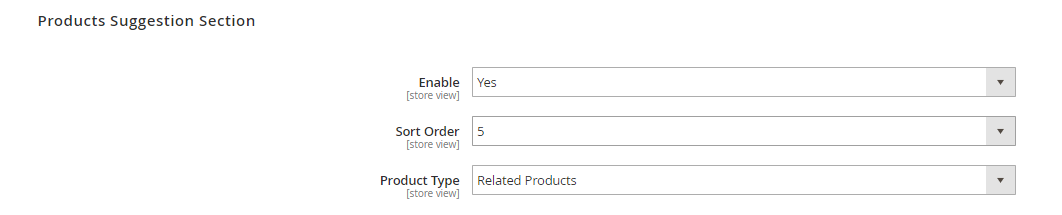
- In Enable, choose Yes to enable social network sharing buttons, or No to disable it.
- In Sort Order, select number (1 to 6) to set the position of this section in the frontend.
- In Product Type, choose Related Products, Cross-sell Products or Up-sell Products to be displayed in success page.
2.9 Frontend Preview

- In Order Number, enter order number of an order that you want to watch its success page.
- In Preview Here, click on the link to go to success page in the frontend of that order. In case the order number that you fill in does not exist, the success page of the latest order will be presented when you click on the link.
Note: You need to save config before clicking on the link to preview the success page of the order.
2.10 Custom Style
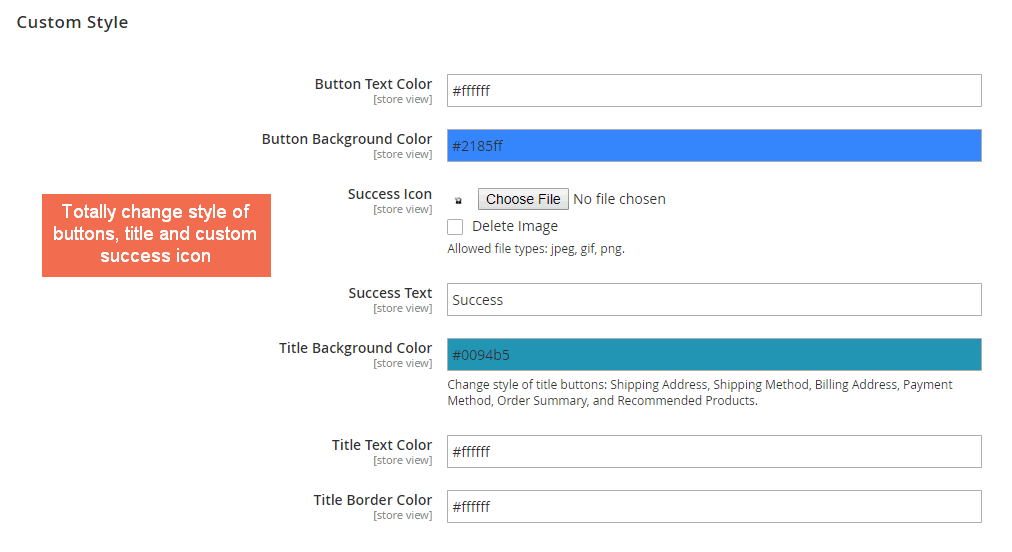
- Change style of buttons: Print order, Re-order, Continue Shopping, and Subscribe.
In Button Text Color, set the color for text in buttons.
In Button Background Color, set the background color for buttons.
- Custom Success title
In Success Icon, upload an icon to be displayed along with the success title
In Success Text, edit a short title for the success page.
- Change the style of title boxes, including Shipping address, Shipping method, Billing address, Payment method, Order summary, and Recommended products.
In Title Background Color, choose the background color for the title box.
In Title Text Color, choose text color
In Title Border Color, choose border color for the title box.
Note:
Because the scope of the module configuration is store view, you can customize the success page for each store view.
After setting, you need to save your configuration then flush cache to start using the module.