
1. Overview
Magento 2 Product Images by Customer extension allows your buyers to upload pictures of products to Magento stores. This will increase your reliability and encourage next customers to buy with validated preferences from other real customers.
2. How Does It Work?
2.1 Configuration
Please go to Admin Panel ⇒ Store ⇒ Configuration ⇒ BSSCommerce ⇒ Product Images By Customer
2.1.1 General Configs
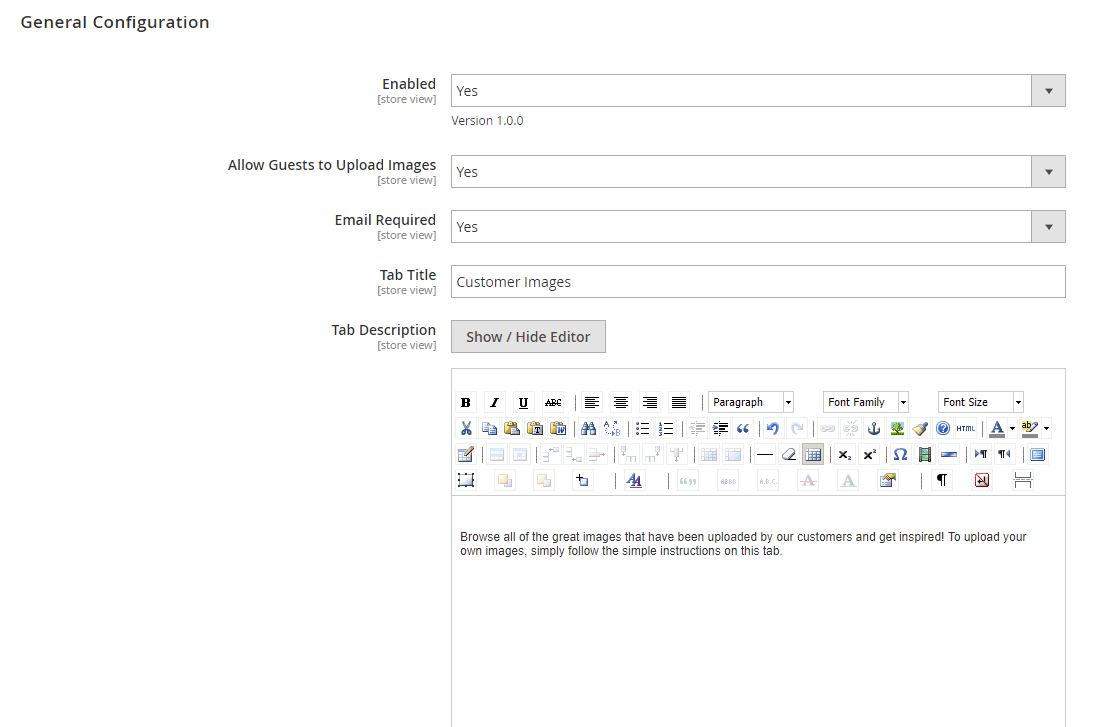
- In Enabled, choose Yes to enable the module, or No to disable it.
- In Allow Guests to Upload Images, choose Yes to allow both guests and registered customers to upload images, or No to not allow.
- In Email Required, choose Yes to force users to submit emails to upload images, or No to not require.
- In Tab Title, edit tile for the tab that displays images uploaded by customers on the product page.
- In Tab Description, edit a message for customer product images.
2.1.2 Display settings
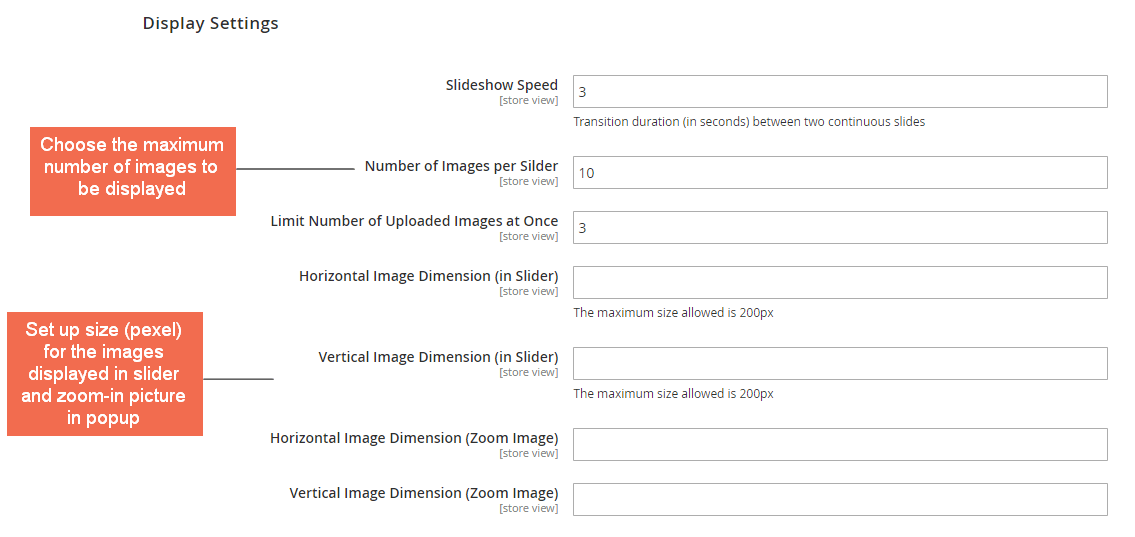
- In Slideshow Speed, enter the transition duration (in seconds) between two continuous slides.
- In Number of Images per Slider: limit the number of images to be shown on the customer product image tab.
- In Limit Number of Uploaded Images at Once: enter the maximum number of images that users can upload at once.
- In Horizontal Image Dimension (in slider), set the width (px) of images displayed in the slider. The maximum number allowed is 200px.
- In Vertical Image Dimension (in Slider), set the height (px) of images displayed in the slider. The maximum number allowed is 200px.
- To see the full size of images, users need to click on an image in slider then it will be shown in a popup. The user can zoom in this image by hover over it.
- In Horizontal Image Dimension (Zoom Image), set the width (px) of the image when it is zoomed in.
- In Vertical Image Dimension (Zoom Image), set the height (px) of the image when it is zoomed in.
2.1.3 Set up email notification
The admin can set up to receive notification emails whenever customers have uploaded images to the website.
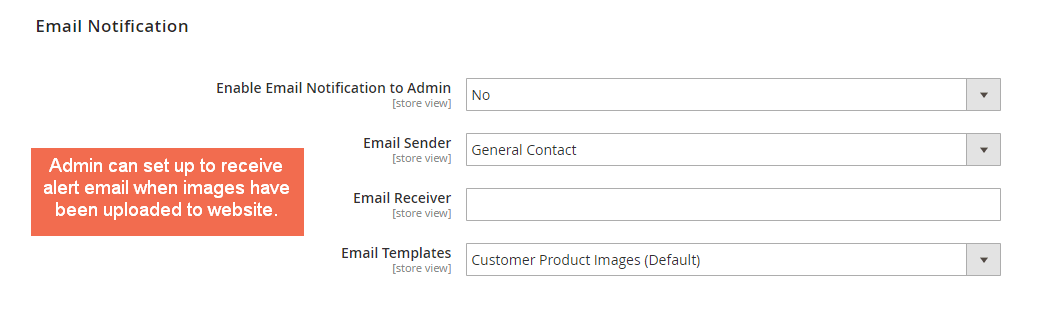
- In Enable Email Notification to Admin, choose Yes to send emails to admin when a customer has uploaded images, or No to not send.
- In Email Sender, select an email sender.
- In Email Receiver, enter email address to be sent notification emails.
- In Email Templates, select a template of the notification email.
Note: After settings, you need to press “Save Config” button to make your configuration be effective.
The scope of all config is store view, so you can setup for each one.
2.2 Customer Product Images Management
Please go to Marketing ⇒ Product Images by Customer ⇒ Customer Product Images Management
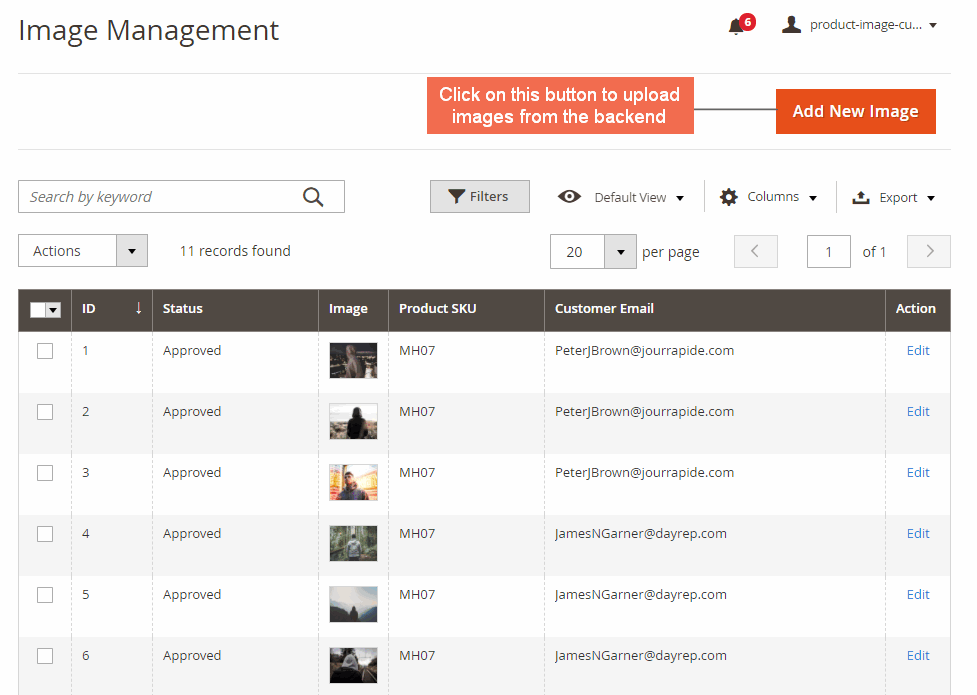
2.2.1 Image Management grid
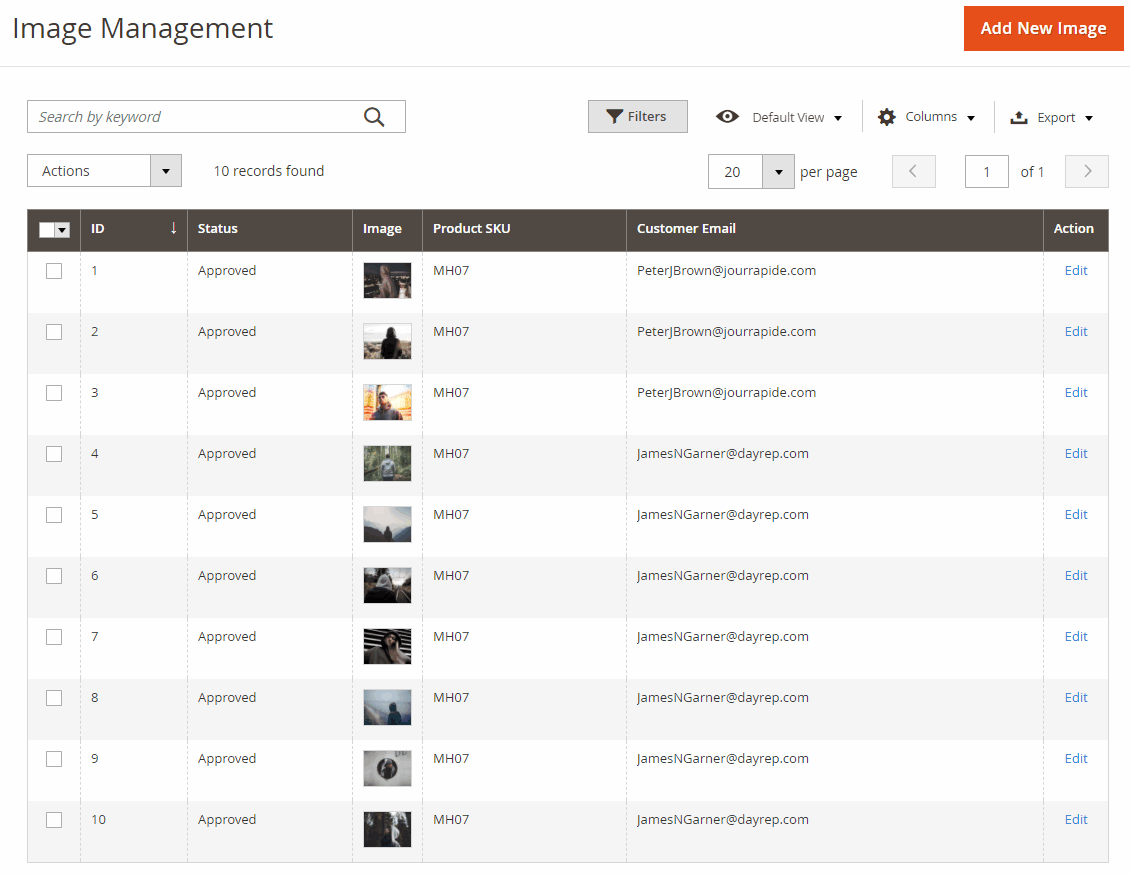
This grid display information of uploaded images.
- ID column: image’s ID
- Status column: the status of uploaded images. It can be Approved or Not Approved. The default status of pictures that have just been uploaded is Not Approved.
- Image column: image thumbnails
- Product SKU column: the SKU of product that is added image to.
- Customer Email column: email that customer submitted when uploading images.
- Action column: linked to the image details page.
You can approve/ disapprove/ delete multiple images right in the grid easily:
- Select the images that you want to add mass action.
- In Actions drop-down: choose Approved to enable images in the frontend, Not Approved to disable them or Delete to delete them from your site.
2.2.2 Image details page
Please click on Edit link in the Action column to go to the image details page.
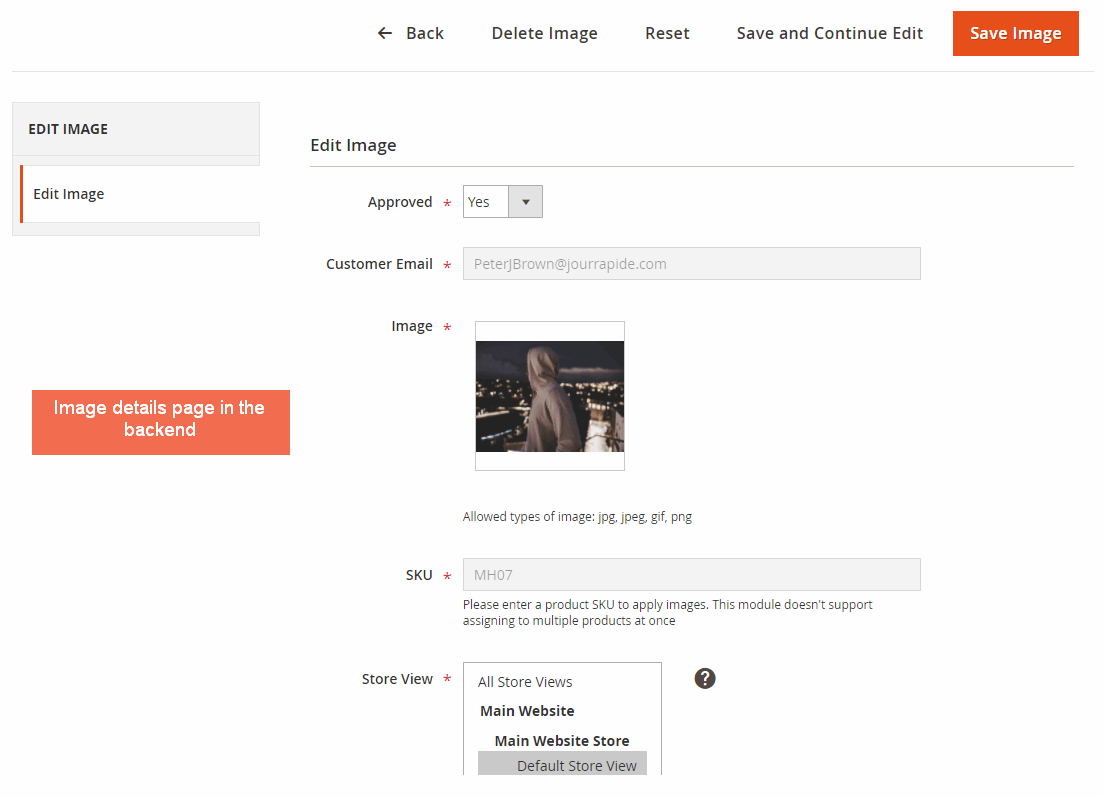
- In Approve: choose Yes to enable the image in the frontend, or No (set as default) to disable it.
- In Customer Email: the image that customer submitted. You are not allowed to edit this field.
- In Image: the uploaded image. You can click on the image to view the full size pic, Image Size, and Image Resolution.
- In SKU: product SKU. You are not allowed to edit this field.
- In Store Views: select store views to enable the image.
3. Upload Images
3. 1 Upload images from the frontend
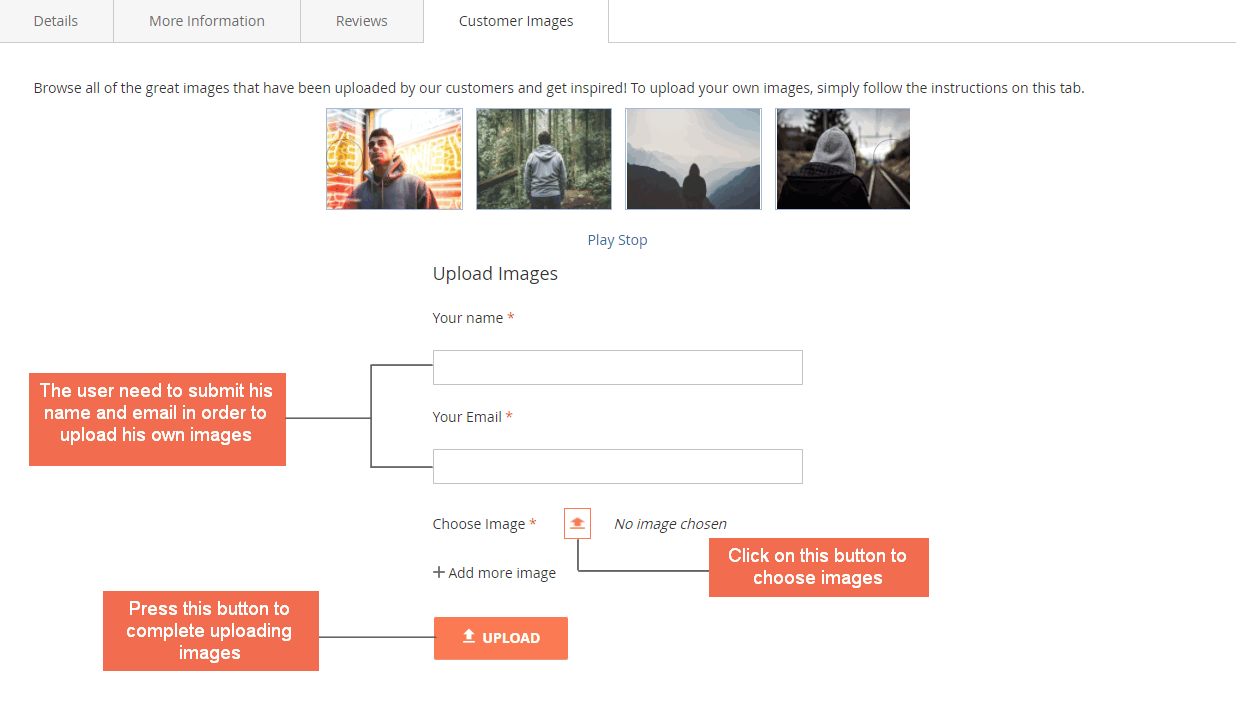
In order to upload images from the frontend, please go to Customer Images tab in a product page and follow the instructions:
- In Your Name: enter your name in this field.
- In Your Email: enter your email in this field.
- In Choose Image: click on the button to select an image from your database.
- Click on Add more image to choose more images to be uploaded at once.
- Finally, Press UPLOAD button to complete
Note:
- * means Required Fields
- The maximum allowed size for uploaded images is 2MB.
3.2 Upload images from the backend
To upload images from the backend, please press the Add New Image button on the Image Management page.
In Image Edit page, you can upload multiple pictures and assign to a product.
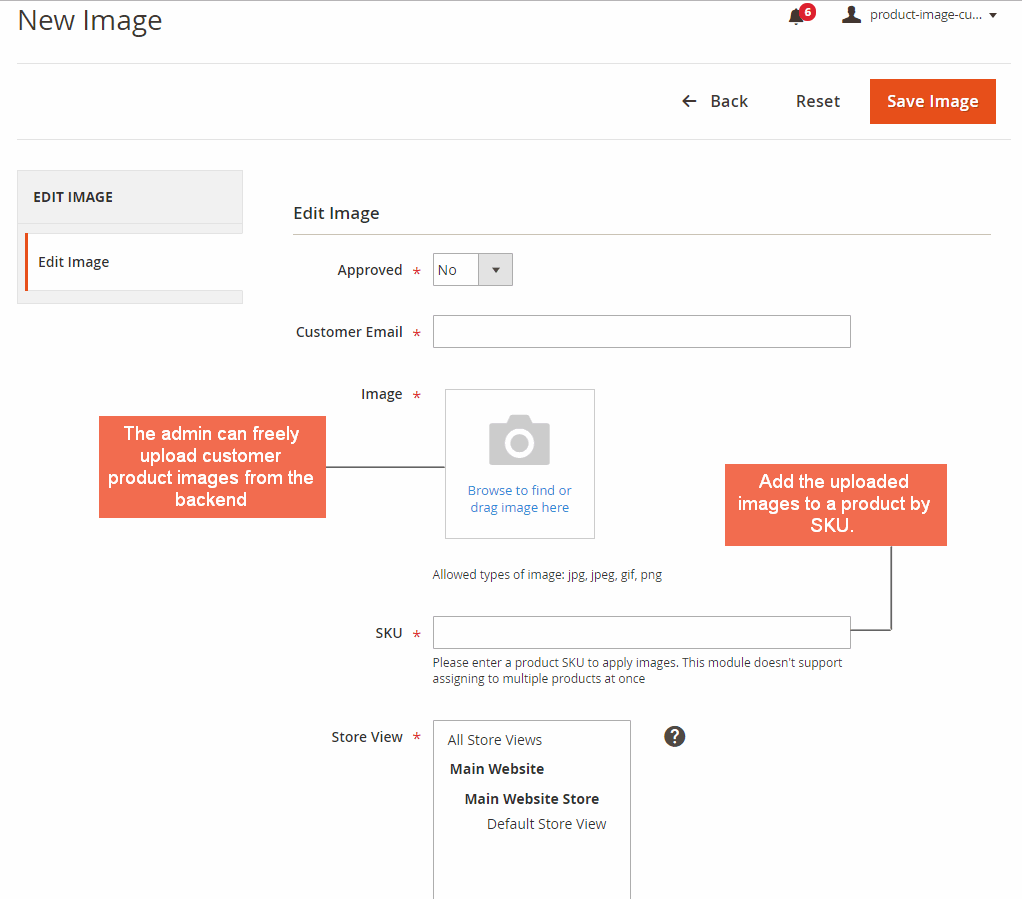
- In Approved, choose Yes to enable the uploaded images in the frontend, or No to disable them.
- In Customer Email, enter an email address
- In Image, upload images, you can browse to find or drag image to this field.
- In SKU, enter a product SKU that you want to assign images to.
- In Store View, select store views that the images are enabled.
- Press Save Images button to complete.