
1. Overview
Magento 2 Cookie Consent extension allows users to create a consent bar for customers to be informed and granted the right to accept or deny cookies explicitly. This is required to comply with the EU Data Privacy Policy.
The consent bar will be displayed on the frontend like this:

2. How Does it Work?
Please navigate Stores ⇒ Configuration ⇒ BSSCommerce ⇒ Cookie Consent
2.1. Update GeoIP database
This module supports setting consent mode & cookie banner to specific countries. Therefore before that, you need to update the GeoIP country database.
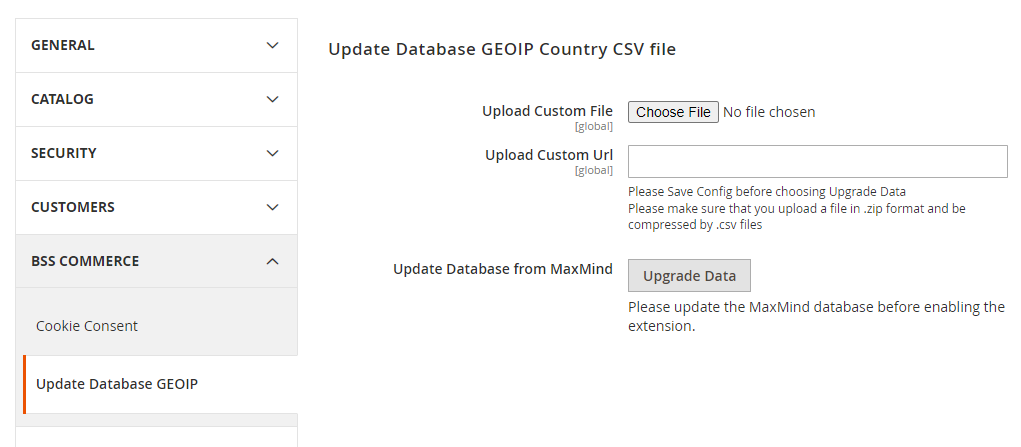
In Upload Custom File, you can upload a custom file (such as a paid database version from MaxMind) to be the database. However, in case the uploaded file is larger than the limit of the server, this option will be not available.
* Note: When you upload the file, you need to rename it and use the right format so that the file can be uploaded successfully and then the system runs cron. The file format must be the .zip file (This .zip file includes CSV files). After finishing uploading, choose Save Config then click Upgrade Data.
In Upload Custom URL, you can fill in the URL of the database file if you cannot upload it in the Custom File option (when the file is larger than the limit of the server). After completing, choose Save Config then click Upgrade Data.
In Update Database from MaxMind, please click in Upgrade Data to automatically download the Database from MaxMind or to use the uploaded file. After the file is extracted, a notification “Waiting for Cron run!” will be shown, and please wait for the database to be updated.
*Note: If Upload Custom File and Upload Custom URL are left blank, the module will use the Country Lite Database in MaxMind page. Hence, not all IP countries are available in this database.
On the other hand, the extension also uses another tool named IPinfo to identify the IP country in case it cannot be found in the database.
2.2. Cookie Consent Configurations
2.2.1. General configurations
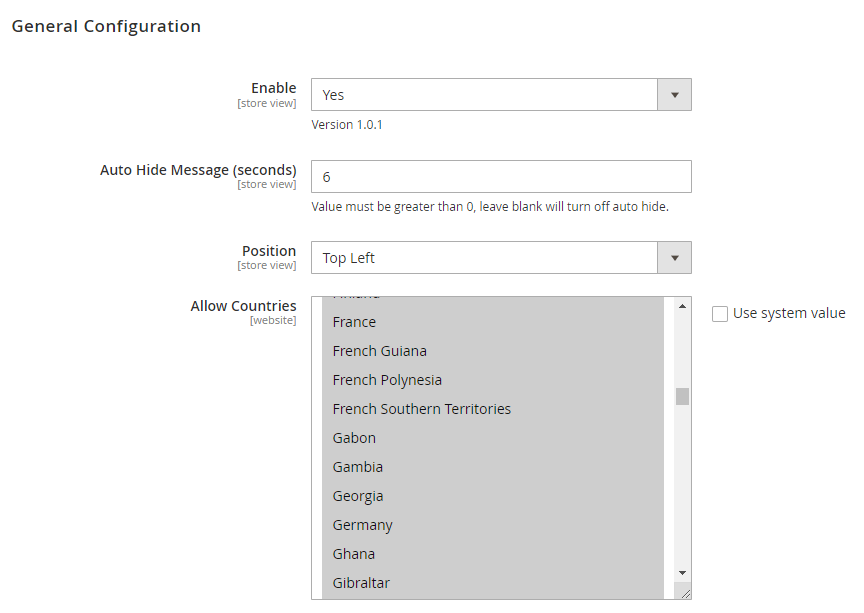
- In Enable, choose Yes to enable the extension, or No to disable it.
- In Auto Hide Message (seconds), enter a number to set the duration that the cookie consent bar is displayed. When the time is over, the notification is hidden automatically.
- In Position, select an option to set the position of the notice to be shown on your website pages. There are 4 available options: Bottom Left, Top Left, Bottom Right, and Top Right.
- In Allow Countries, choose the countries that you want to apply consent mode to. This means that the consent mode will not be active & affect non-selected countries.
2.2.2. Default Consent
Usually, the default status when visitors do not interact with the cookie bar/popup is “Denied”.
However, with this module, you can configure the default status for each of the consent types that will be sent to Google tools such as GTM, GA4, or Google Ads in case there’s no interaction from users with the consent bar.
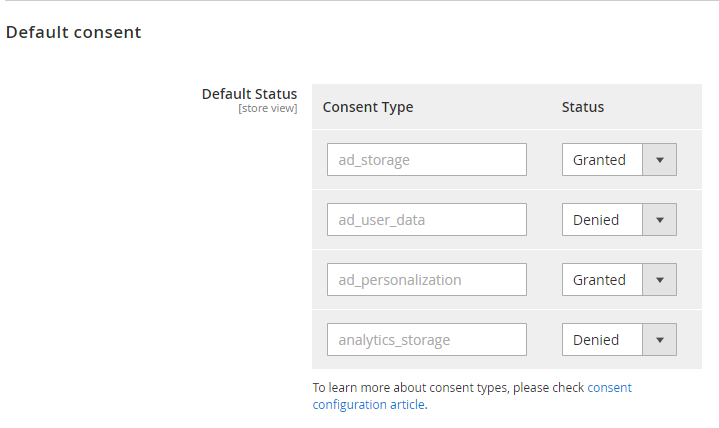
At Default Status, with each consent type, Choose “Granted” or “Denied” at the Status column as you wish. Then click Save Config button to save this default setting.
To learn more about the consent types, please check the Consent configuration article from Google.
2.2.3. Consent Style
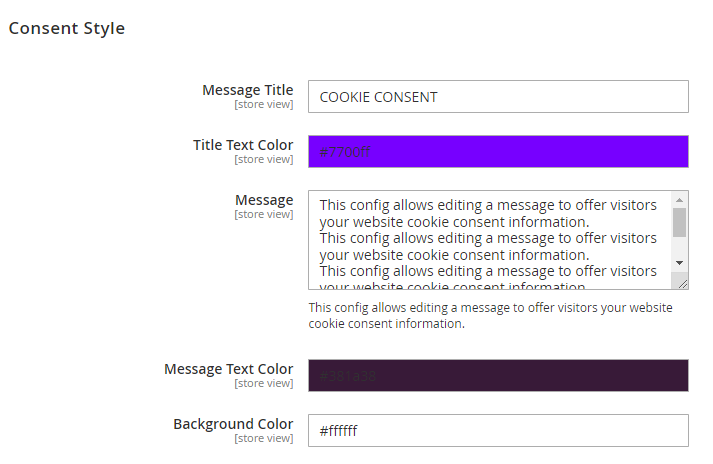
- In Message Title, edit a title for the consent bar.
- In Title Text Color, select color text for Message Title.
- In Message, edit a message to offer information about your website cookies. Here you also can add links to text in the message. SPECIAL: Here, you can also add links to any text in the message. To do so, add this tag:
<a href="https://...">Text</a> - In Message Text Color, select the color for the message text.
- In Background Color, select the background color for the notification.
2.2.4. Accept All Button Configs
An Accept All button is presented for customers to confirm that they have understood the notice. If they click this button, the notice will hide immediately, and they consent to cookies being collected. If they don’t, the notice will be displayed every time they change pages on the website or refresh a page.
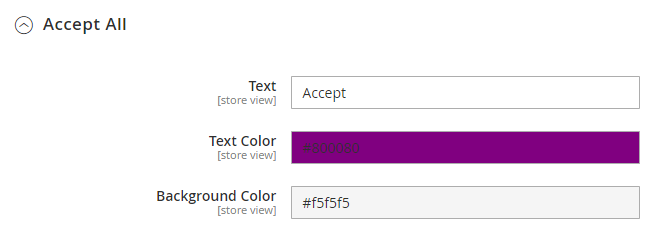
- In Text, edit text on the Accept button.
- In Text Color, select the color for the text on the button.
- In Background Color, select the color for the button background.
2.2.5. Deny All Button Configs
When clicking the Deny All button, customers will confirm that they do not consent to their cookies being collected & stored on your site.
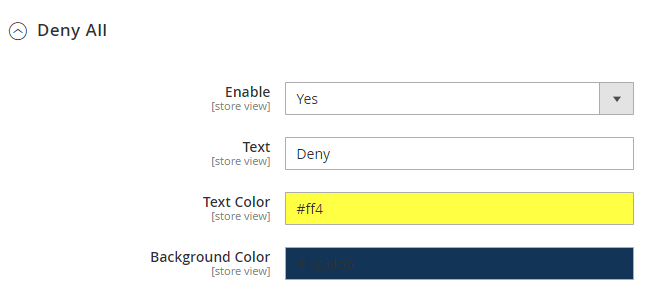
- In Enable, you can set this button to be displayed or not on the consent bar.
- In Text, edit text on the Deny All button.
- In Text Color, select the color for the text on the button.
- In Background Color, select the color for the button background.
2.3. Set up cookie popup link on webpage by widget
By adding this link, even when already choosing the consent mode, customers can click it to show cookie popup again to reselect consent mode.
After enabling the module, navigate Content ⇒ Widgets ⇒ Add Widget.
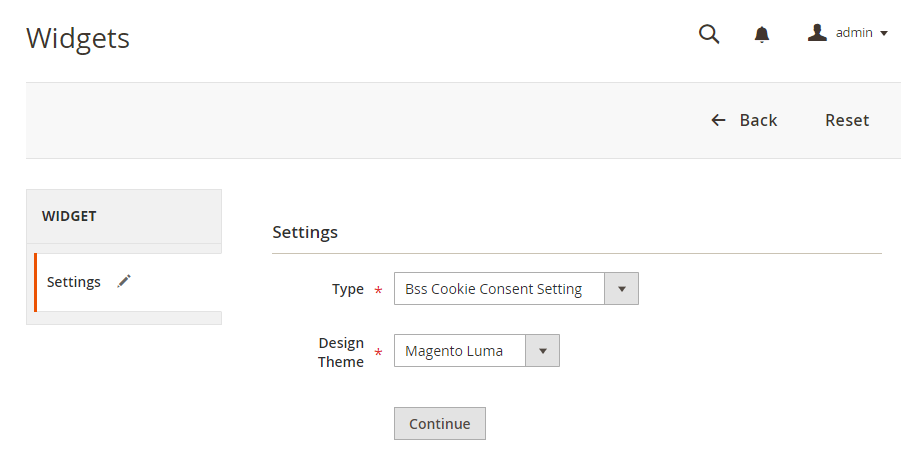
At Type: click to see the dropdown, choose “BSS Cookie Consent Setting”. Then choose Design Theme & Click Continue button.
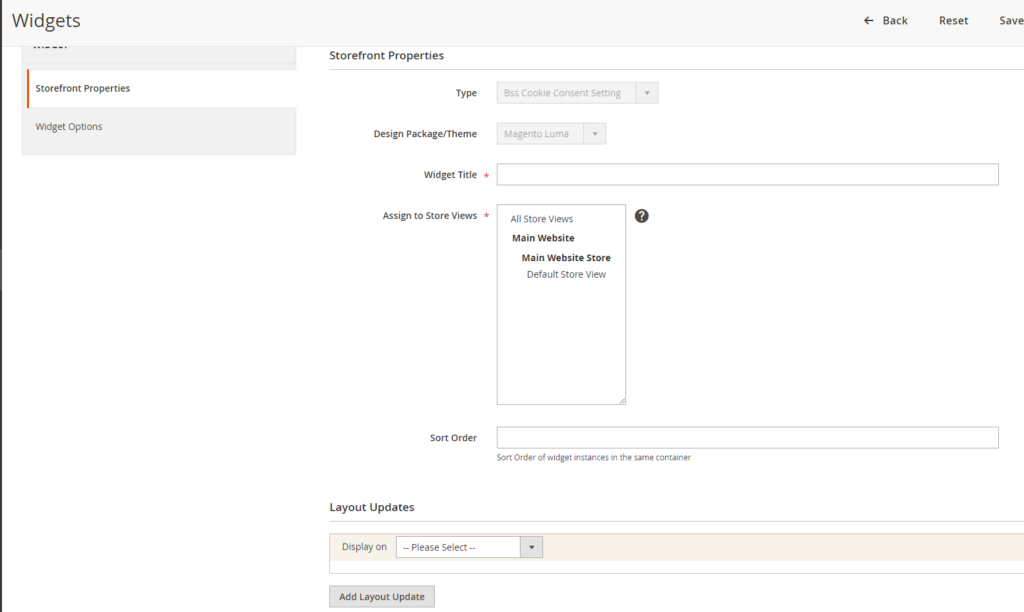
Here you’ll see more configuration options. Set the Widget Title & Assign to Store View. & Then choose the Layout Updates to add the link to which page/position.
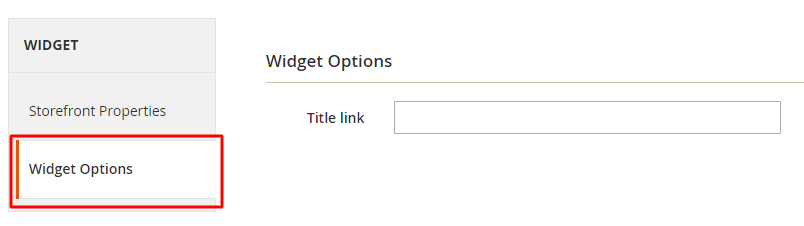
In Widget Options, fill in the title for this cookie banner link. This title will be displayed on store page. Then click Save to finish.
Note:
In this demo, we also install the Google Analytics 4 extension so that you can easily test if this module has impact on reports in GA4.
And Please follow the documents from Google to test the impact of consent mode on Google products:
- Google Analytics 4: https://support.google.com/analytics/answer/14275483?hl=en
- Google Tag Manager: https://support.google.com/tagmanager/answer/14218557?hl=en
- Google Ads: https://support.google.com/google-ads/answer/14218557?hl=en