
1. Overview
Pop-up for Magento 2 extension helps you create the eye-catching pop-up that is highly flexible and customizable for many purposes, such as promotion, notification, guideline, or newsletter. You decide where to display the pop-up, set display animation, and apply for customer groups or store views.
2. How Does It Work?
2.1 General Configuration
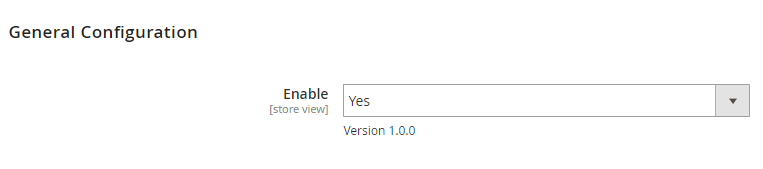
Please go to Stores ⇒ Configuration ⇒ BSSCommerce ⇒ Pop-up General Configuration.
In Enable, choose Yes to enable the extension, or No to disable it.
2.2 Manage Pop-up Grid
Go to Marketing ⇒ BSSCommerce ⇒ Pop-up ⇒ Manage Pop-up.
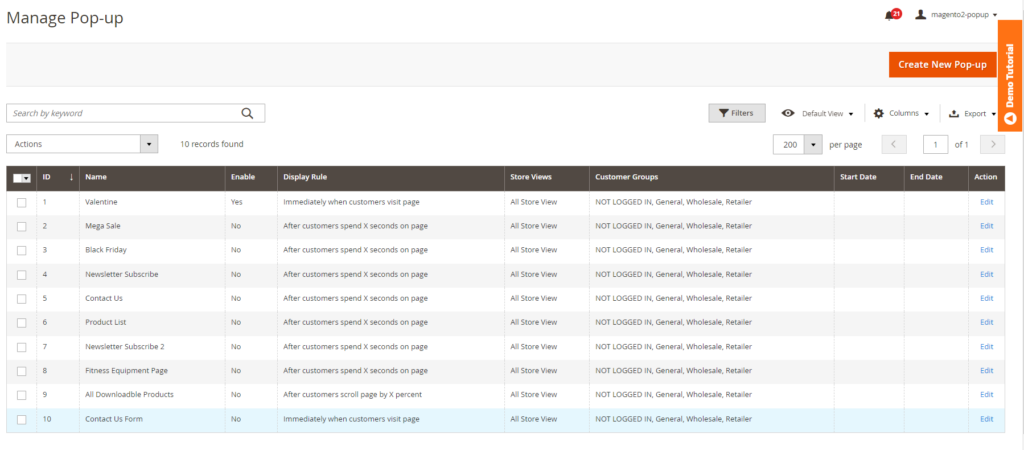
Manage Pop-up grid shows all pop-up you have created with full information, including Pop-up Name, Enable, Display Rule, Displayed Pages, Content, Store Views, Customer Groups, Start Date and End Date. The Manage Pop-up grid works just like standard grid in Magento 2 default with features such as mass action (delete, enable, disable), filter and column display.
2.3 How to Create New Pop-up
Please click on the Create New Pop-up button located on the top right of the grid. You will be redirected to the New Pop-up Page, which has 3 tabs:
- General
- Display Rule
- Content and Design
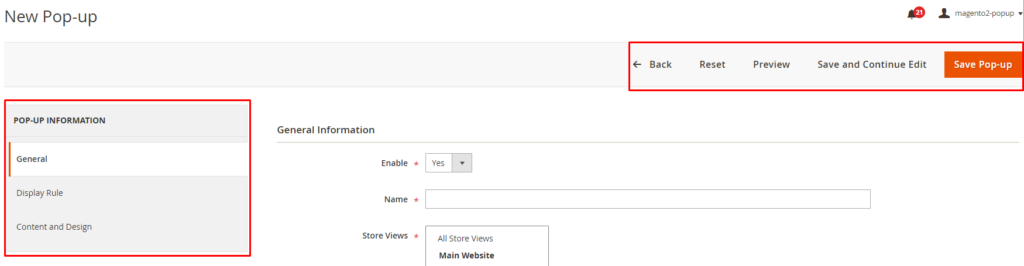
There are 4 buttons to support creating a new pop-up:
- Back
- Reset
- Save and Continue
- Save Pop-up
2.3.1 General
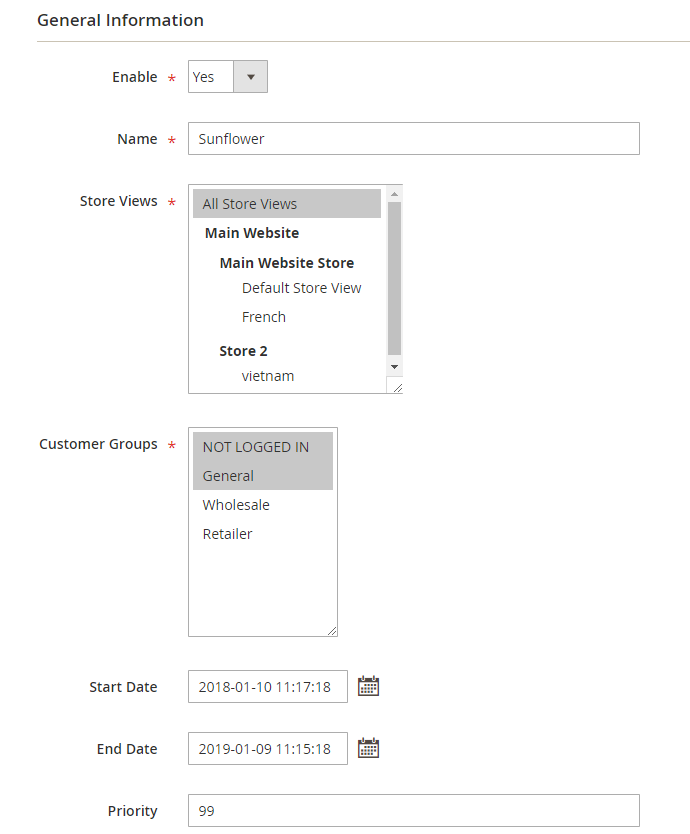
In Enable, choose Yes to enable the new pop-up.
In Name, enter the pop-up’s name.
In Store Views, select which store views to display the pop-up.
In Customer Groups, choose the customer groups to view pop-up.
In Start Date, select a date in the calendar view to begin showing the pop-up.
In End Date, select a date in the calendar view to stop displaying the pop-up.
In Priority, enter a number to decide the priority of the pop-up when multiple pop-ups are created on a page.
2.3.2 Display Rule
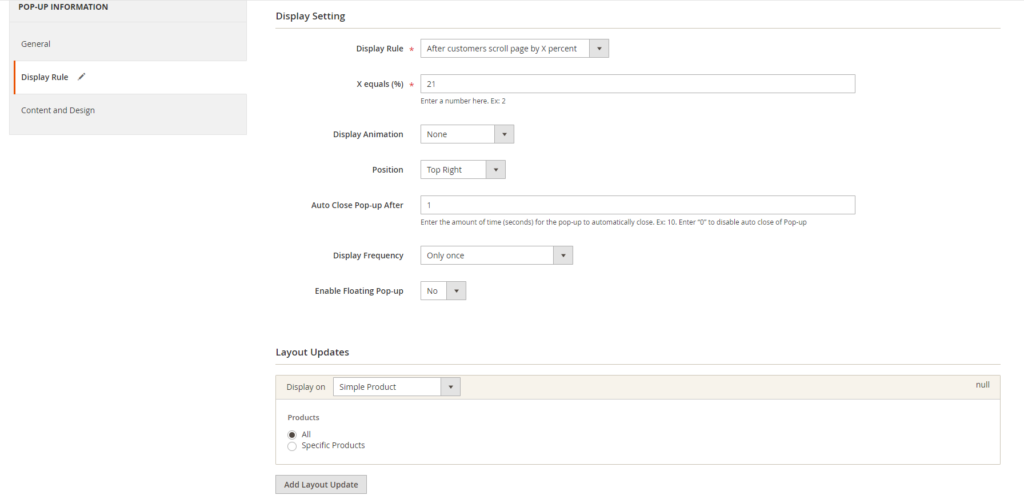
In Display Rule, choose one of the four following conditions to set conditions for displaying the pop-up:
- After customers spend X seconds on the page.
- After customers scroll page by X percent.
- After customers view X pages.
- Immediately when customers visit the page.
- Exit Intent
In X equals, enter a number to decide the value of X.
In Display Animation, choose one of the six following options to set display effects for the pop-up:
- Zoom
- Horizontal Move
- Move from Top
- 3D Unfold
- Zoom-out
- None
In Position, select the position to display the pop-up on the page.
- Top Left
- Top Center
- Top Right
- Middle Left
- Middle Center
- Middle Right
In Auto Close Pop-up After, enter the amount of time (seconds) for the pop-up to automatically close. Ex: 10. Enter “0” to disable auto close of Pop-up
In Display Frequency, determine the frequency of pop-up display by selecting one of the following options:
- When all conditions are satisfied: the pop-up appears if the above rules are executed.
- Only once: the pop-up only appears one time per customer.
+ For guest customer: the popup will show one time per session.
+ For login customer: the popup will show one time when they open the site and not login yet, then it will show only one more time when the customer login the account after the popup is created.
+ When the admin click the backend button Reset display event counter (and choose OK when confirmation popup shows up): the popup will show one more time for both guest and login customer. - Only once per session: the pop-up appears once in a session. If you choose this option, you need to set Cookie Expires.
For example, if you choose Display Frequency as “Only once per session” and set the 2 minutes for the Cookie Expires, the pop-up is displayed when the conditions are satisfied, then it won’t be shown in the next 2 minutes (until the session ends or the cookie expires).
When and only when Display Frequency is When all conditions are satisfied, floating popup can be enabled. In Enable Floating Pop-up, choose Yes to display Floating Popup (Popup still appear on product page after being closed by customer).
After choosing Yes, you need to implement these configurations:
In Floating Pop-up Type: Alter Popup into Icon/Button by selecting one.
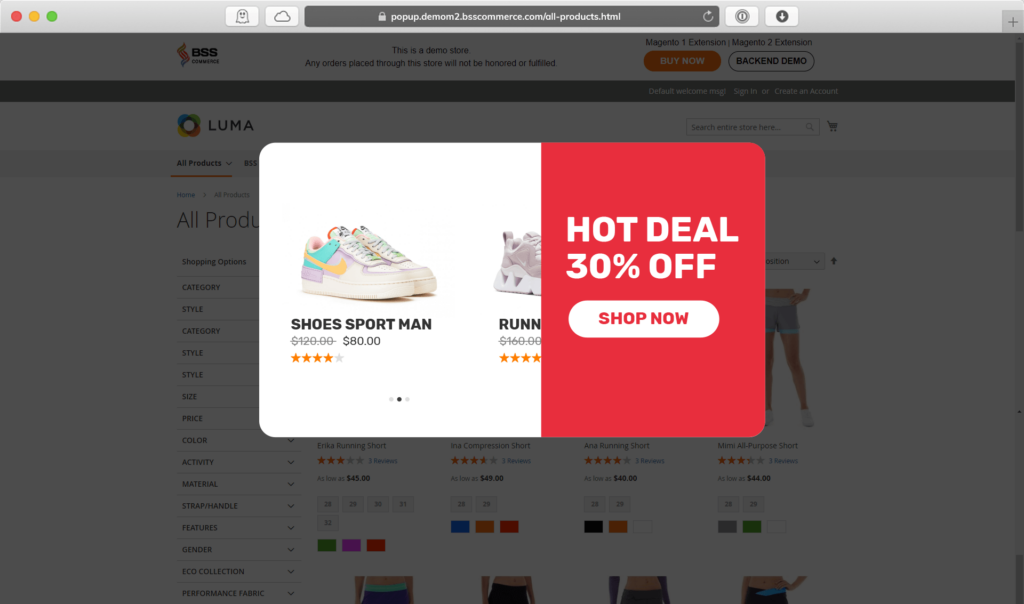
- If you choose Icon, in Floating Icon, you can choose one of 8 available icon designs:
- Contact Form
- Hot Deal
- Newsletter
- Notification Bell
- Promotional
- Promotions
- Social Media
- Warning.
![]()
- If you choose Button, you can customize the text and color of the popup in Floating Button Text and Floating Button Fill Color.
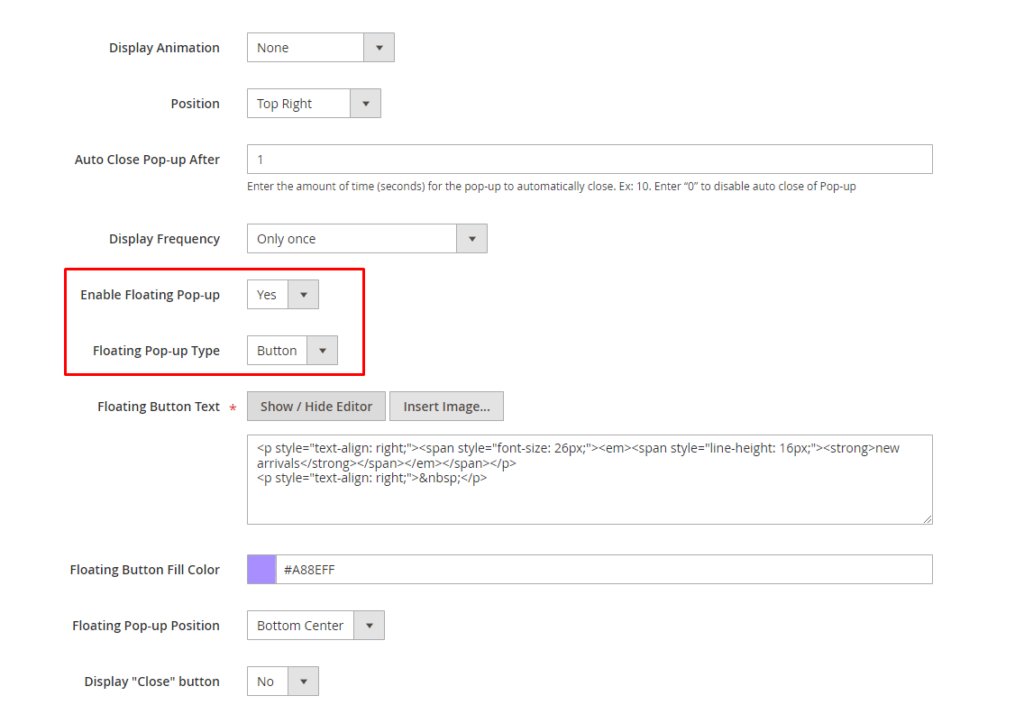
In Floating Pop-up Position, select the position to display the floating pop-up on the page:
- Middle Left
- Middle Right
- Bottom Center
- Bottom Left
- Bottom Right
In Display "Close" button, select No to not allow customers to close Floating Popup. Otherwise, select Yes.
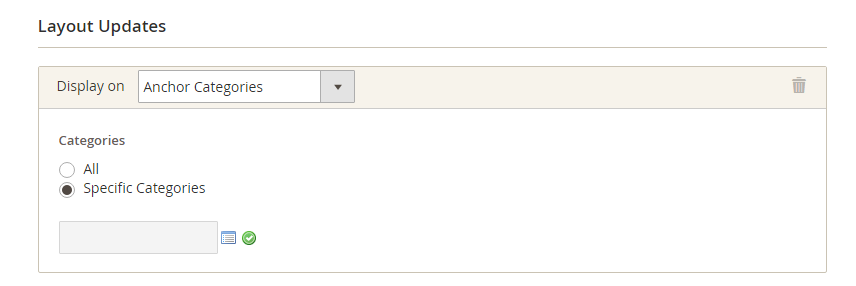
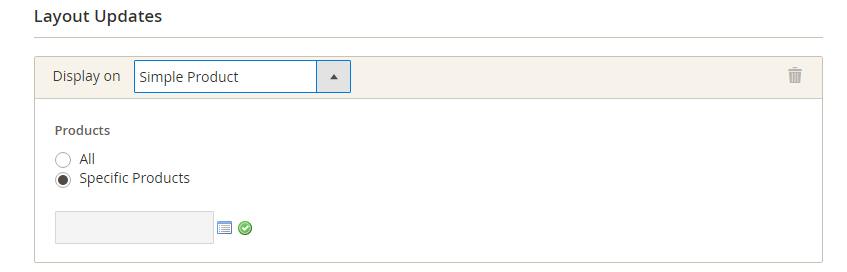
In Layout Updates:
In Display on, select pages to show the pop-up, including the following types of pages:
- Category Pages
- Product Pages
- Generic Pages
When you choose each type of page, you can select all pages or specific pages depending on your demand.
For example:
+ Category page:
+ Product page:
+ All pages:
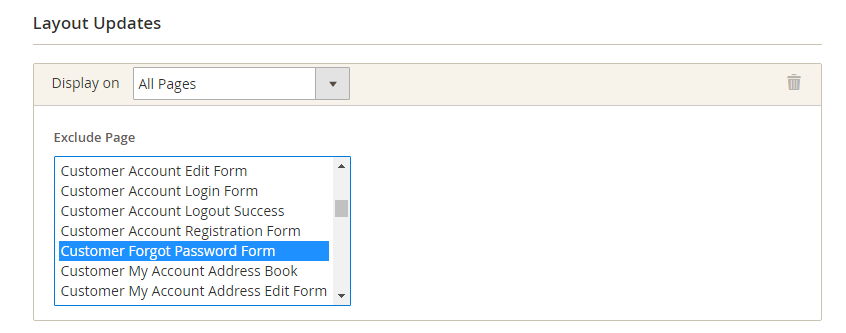
(You can exclude specific pages from displaying a popup when you select the option as All pages)
Furthermore, it is easy to add more layout updates to show popup in more pages by clicking the button.
After selecting the position and page, you can check the result on the front end.
2.3.3. Content and Design
Content and Design
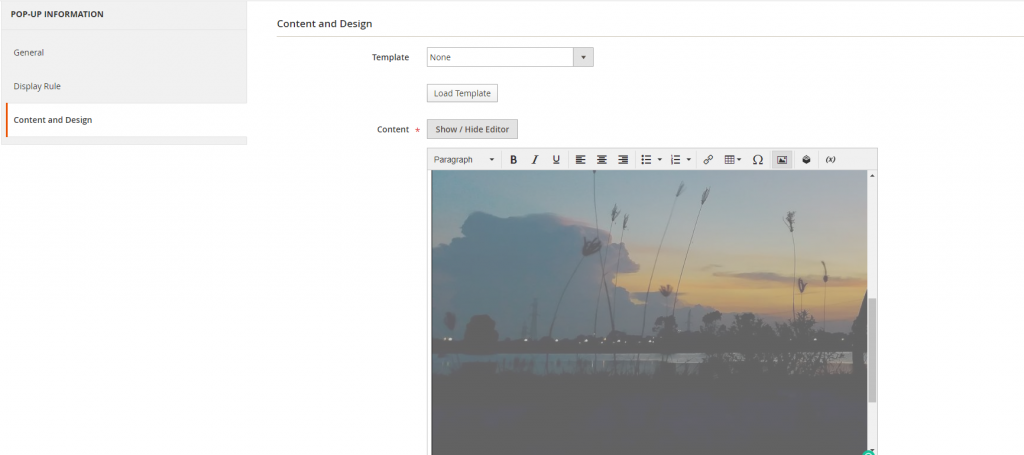
In Content, use the WYSIWYG editor to create content for the pop-up.

You can use this tool to insert widget, image or video for the pop-up’s content.
In Pop-up CSS, use CSS to change the design of the pop-up. If leaving blank, the default pop-up will be applied.
Or, you can use our default template to quickly render your pop up.
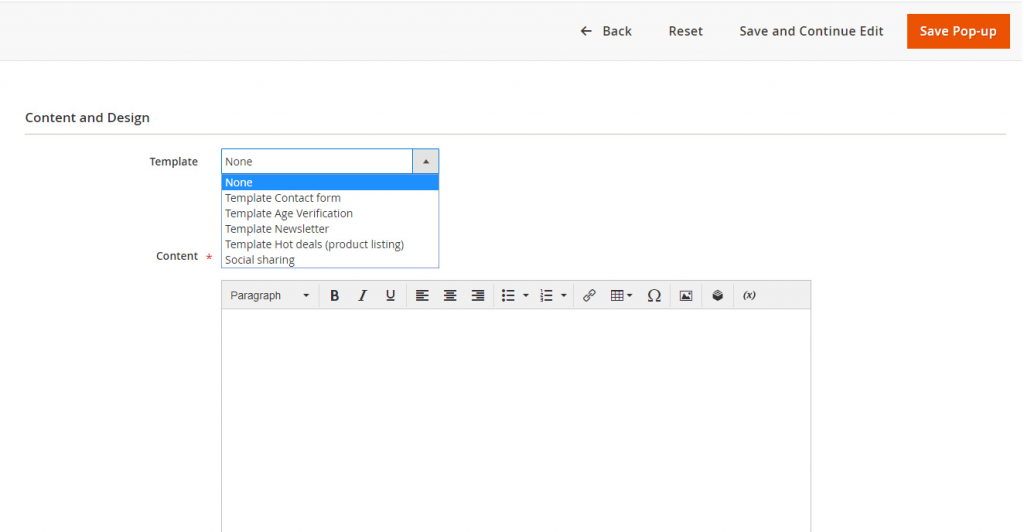
There are 5 templates to choose from:
- Contact Form
- Age Verification
- Newsletter
- Hot deals (product listing)
- Social sharing
After choosing your template, click on the Load Template button to make the template appear in the Content edit interface.
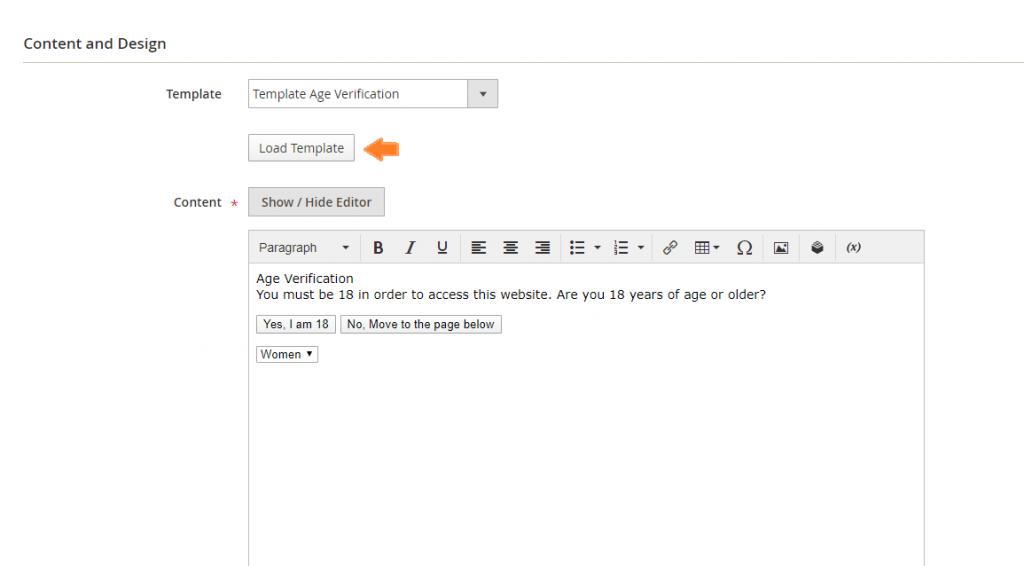
In the Content edit, you can make any modification if needed.
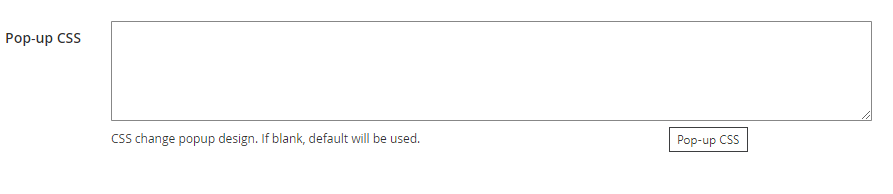
In Popup CSS, you can enter CSS code to change the popup design. If leave blank, the default design will be used.
Note: After any change to the pop-up configuration, either Save, Delete, Mass delete, Mass active, is made, a cache notification will appear.
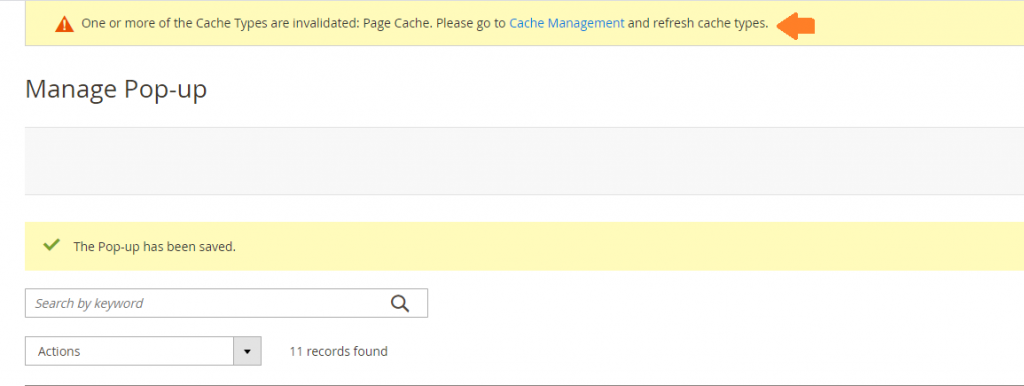
You then must go to SYSTEM -> Tools -> Cache Management ->Flush Magento Cache for those changes to be applied to the front end
3. API Support
We provide you BSS's list of GraphQL API that our Magento 2 Pop up extension supports.
Check the full list here.