1. Overview
Mega Menu for Magento 2 extension helps store owners to take control of navigation bar mega menu. The navigation bar is the first sight when customers come to your site. If your store has an eye-catching mega menu, it will look very professional and improve user experience as well. So, your customers just need a few clicks to find what they want.
2. How Does It Work?
2.1. Configuration
Please go to BSS Commerce ⇒ Configuration
Or Stores ⇒ Configuration ⇒ BSSCommerce ⇒ Mega Menu
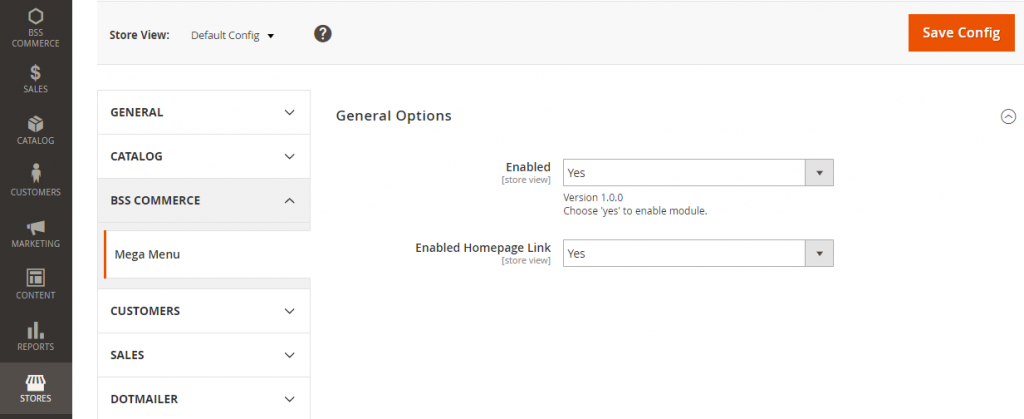
Select your storeview to enable/disable the module (M2 Mega Menu does not work with “All Store Views”)
2.2. Mega Menu grid
Go to BSSCommerce ⇒ Manage Menu Items.
Here you can add new mega menu and manage existing mega menus.
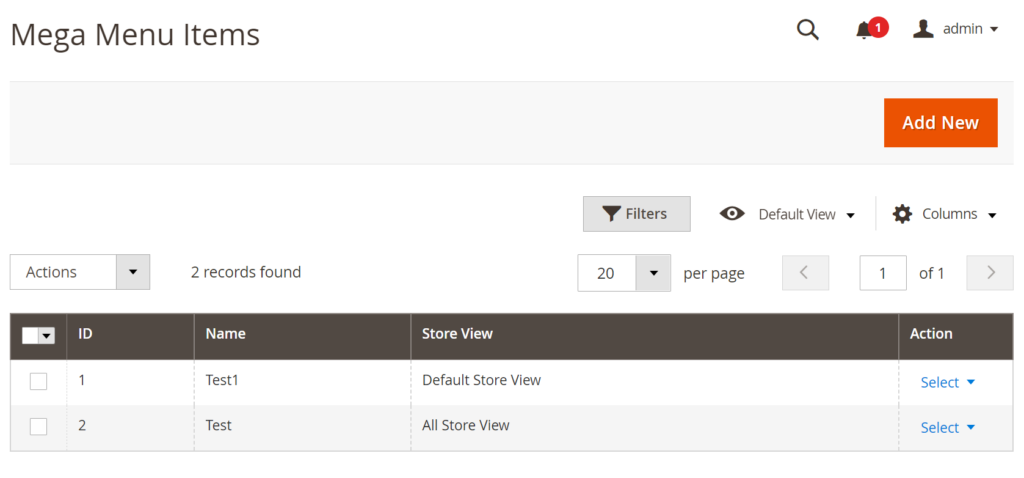
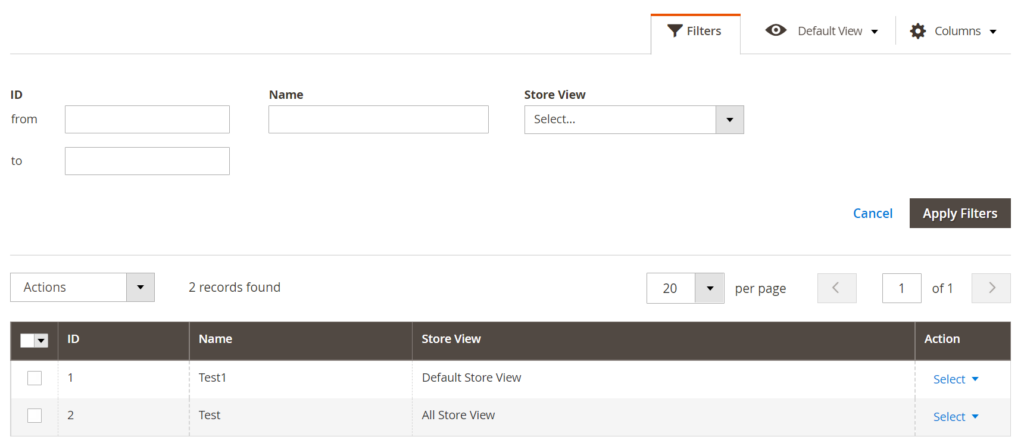
You can filter the mega menu grid by the ID, name and store view.
2.2.1. Add new mega menu
Click the Add New button.
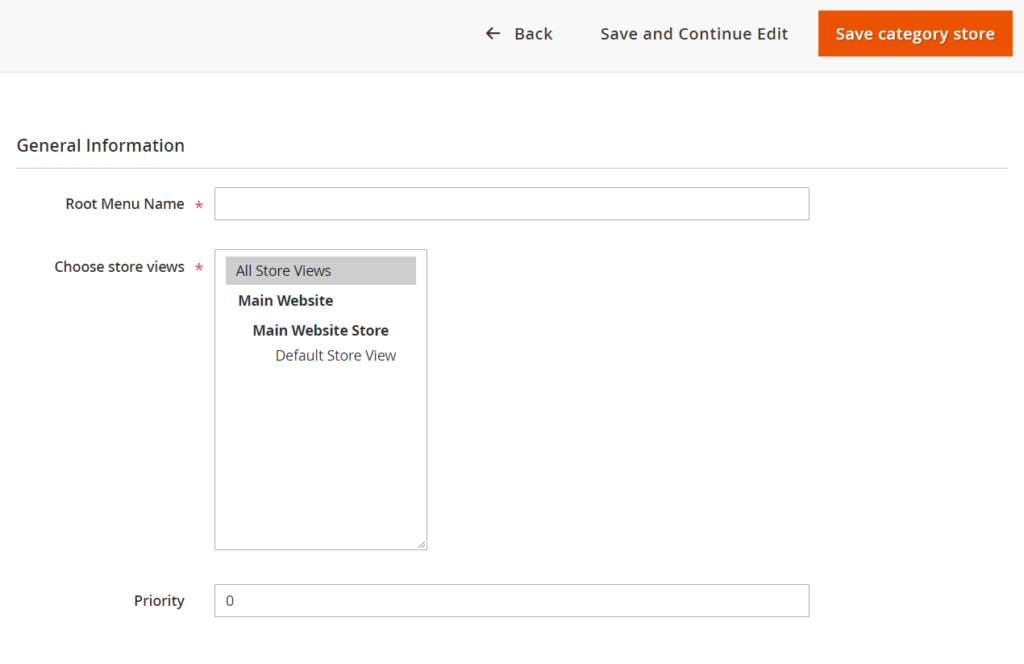
- Root Menu Name: Enter the name of your menu
- Choose store views: Choose the Store view that the menu will display on. The default setting is set as All Store View. To choose specific store views, hold Ctrl and click on the name of the store views. (You can change the store view setting after saving the mega menu and creating root menus for it)
- Priority: Enter the priority value. The default value is 0, which is the lowest priority. 1 will be the highest priority. From 1 and above, the higher the value, the lower the priority level.
*NOTE: In case there are 2 or more menus is set for the same storeview, the priority value will be considered.
- If one menu has a lower priority value, it will be displayed on the front end of that storeview.
- If 2 or more menus have the same priority value, the newest created menu will be displayed on the front end of that storeview.
2.2.2. Set mega menu structure
You can choose to edit configuration and edit menu right from the Action column of the mega menu grid.
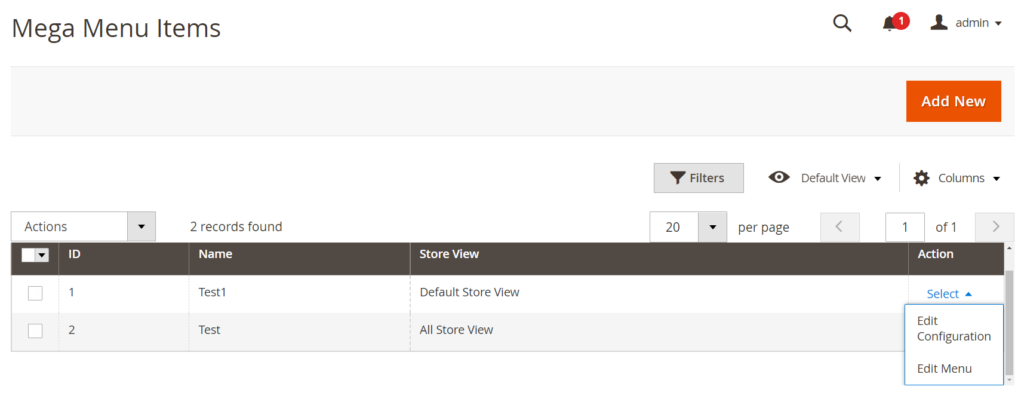
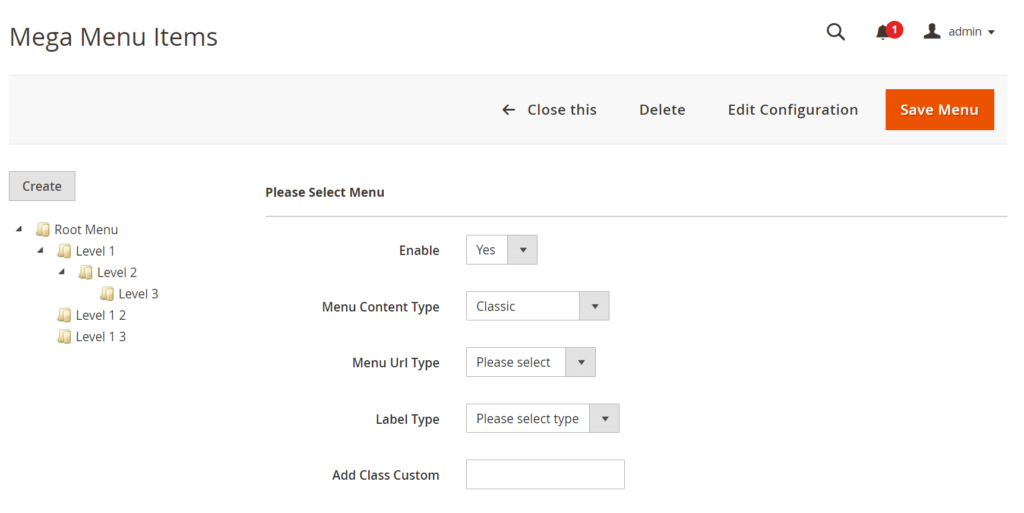
Click Edit Menu to set mega menu structure.
On this window, you will see the structure of your mega menu. You can edit up to 3 levels of sub-menu and add unlimitedly.
Note: You can also choose to edit configuration on this window.
In the Back-end:
In the Front-end:

3. 3 types of sub-menu
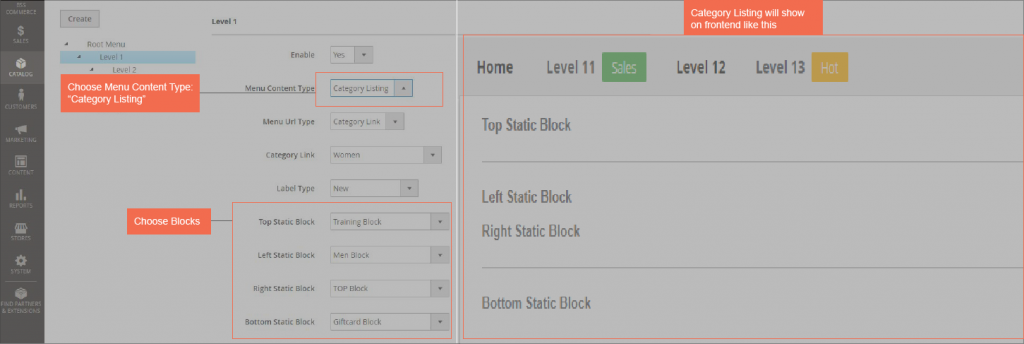
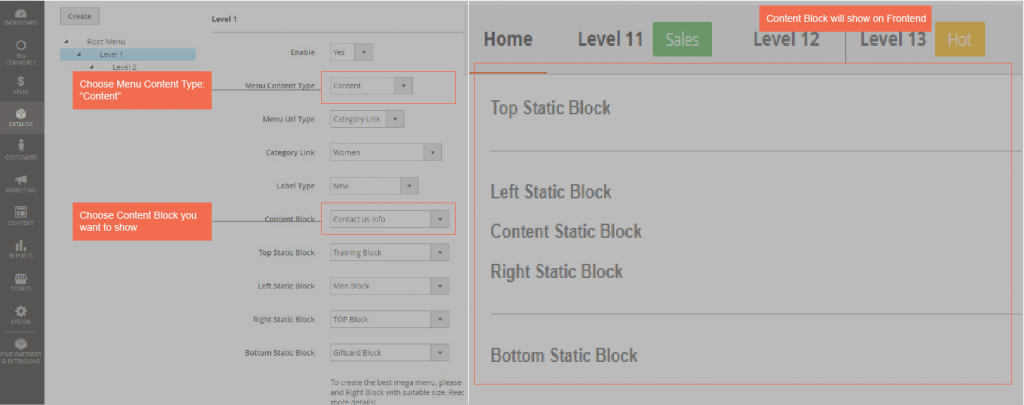
There are 3 types of sub-menu. Each of them has different views. So you can freely change to get what you want to show for customers
*NOTE: Menu Content Type just works with Parent Menu Item level 1.
- “Category Listing” option: there are 4 positions where you can freely put blocks, including Top, Left, Right, Bottom.
- “Content” option: Besides 4 positions in “Category Listing”, “Content Option ”add a Content Block.
- “Classic” option:

*NOTE: you can add, edit, delete menu items by right click on the menu

