
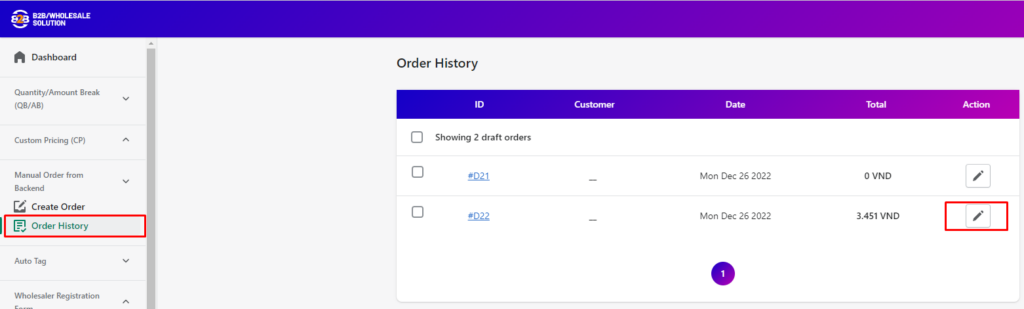
Order History > Click Icon Edit
Edit Order Details
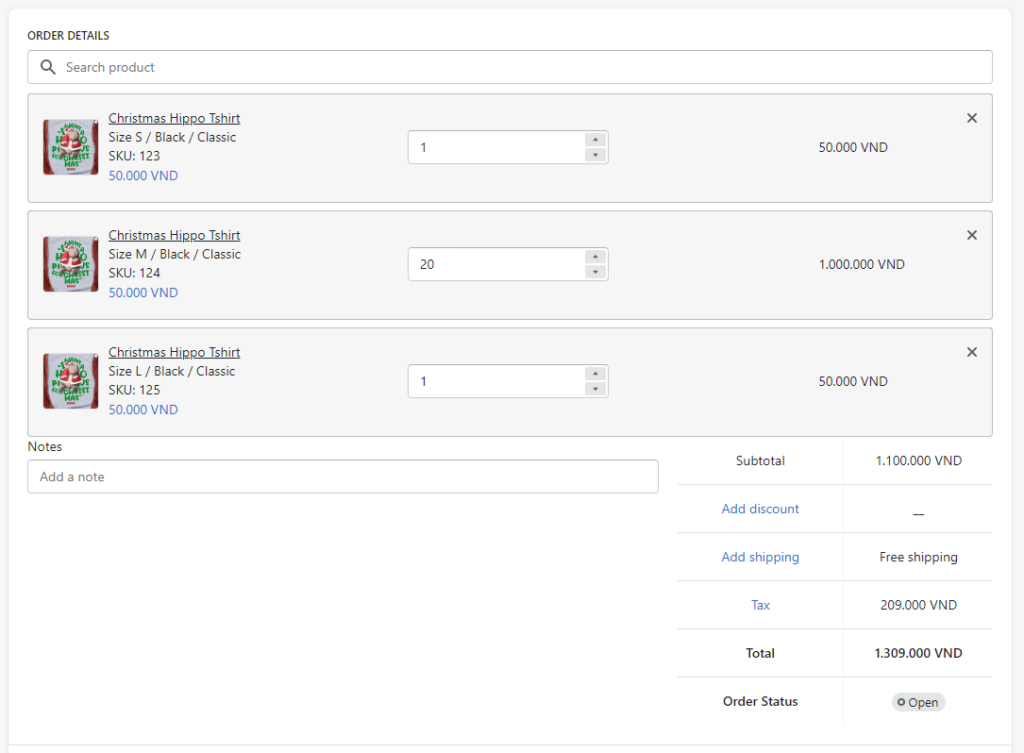
- Edit Products1.1. In the Order details section click Search Products1.2. In Select specific products. search product by Title/ SKU/ Barcode
1.3. Check the individual products or variants that you want to include in the order.
1.4. Click Select.
1.5. To remove a product from the order, click the
Xbutton beside it in Order details section.1.6. Check the quantity of products you have added to the order.
- Add Note
- Add Discount3.1. Click Add Discount
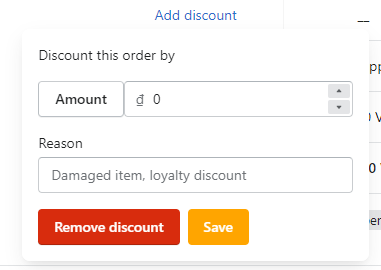 3.2. Enter Discount Amount/ Percentage
3.3. Enter Reason (optional)
3.4. Click Save
- Add Shipping4.1. Click Add Shipping
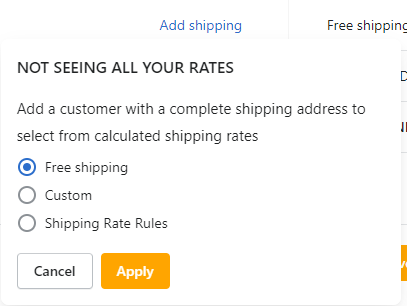 4.2 Choose Shipping Option
- Free Shipping
- Custom: If you selected Custom, then enter the custom rate name and the shipping rate.
- Shipping Rate Rules
4.3. Click Save
- Edit Tax
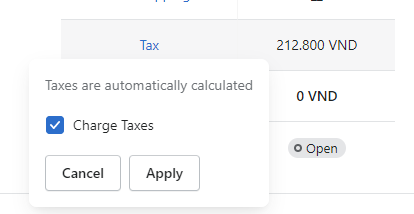 Tick Charge Taxes to colect tax
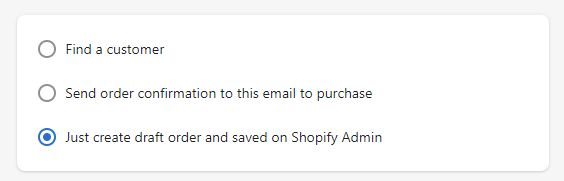
Select Order Options
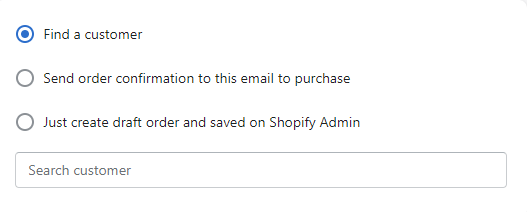
Option 1: Find a customer
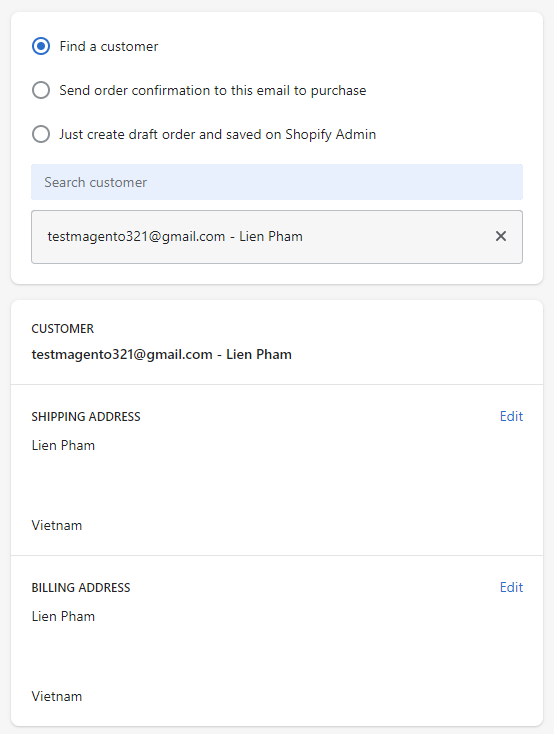
- Add a customer1.1. Select Find a customer.1.2. Click Search customer.
1.3. Choose the customer to assign them to the order.
1.4. Click Select
- Change a customer's contact information2.1. In the Customer section of the order, click Edit next to the customer's email, shipping address, or billing address.2.2. Make any required changes.
2.3. Click Save.
Option 2: Send order confirmation to this email to purchase
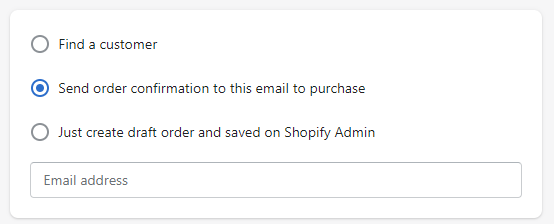
- Select Send order confirmation to this email to purchase
- Enter Email Address you want to sent order confirmation
Option 3: Just create draft order and saved on Shopify Admin
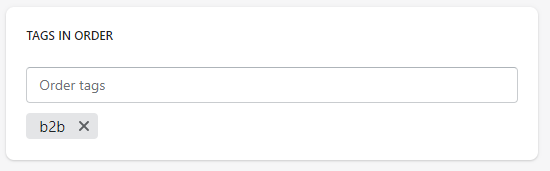
Add tags
You can organize your orders beyond whether they're captured, paid, and fulfilled by adding tags.
Steps:
- In the Tags in Order section, click Order tags
 Enter the tag names
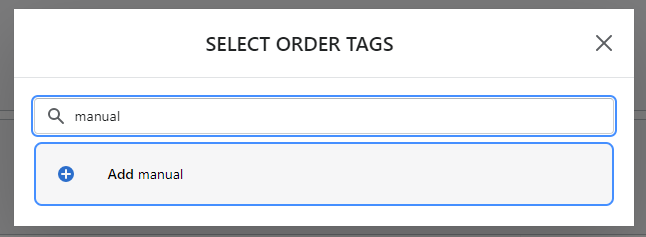 Click Add to add tag for order
- Click Save
Set payment terms for payments due later
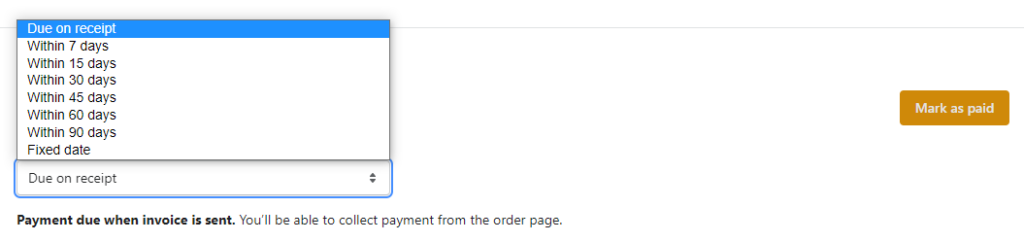
You can choose from the following options when setting the payment terms:
- Due on receipt: Use this option to set the payment as due on the date that you send the invoice to your customer.
- Net term: Use this option to set the payment as due within the specified number of days from the issue date. For example, you can choose Within 30 days, and the payment due date is set to 30 days after the issue date. By default, the issue date is set to the current date, but you can change the issue date after you select a net term option.
- Fixed term: Use this option to set the payment as due on a specific date.
Steps:
- In the Payment section, select Payment due later.
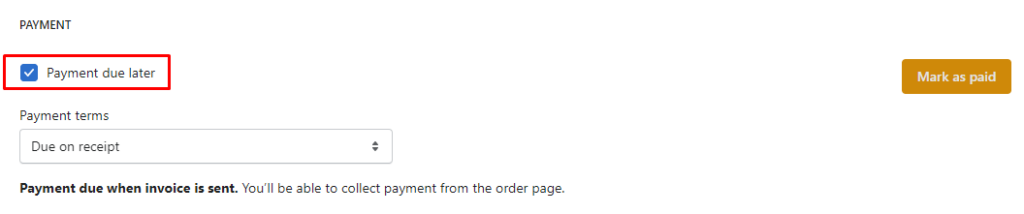 Select one of the following Payment terms:
-
- To set the payment due on the day that you send the invoice, select Due on receipt.
- To set the payment due within a time duration of an issue date, select one of the Within days options, and then enter the Issue date.
- To set the payment due on a specific day, select Fixed date, and then enter the Due date.
3. Click Save.
Send invoice
You can send an invoice to your customer with a link to the checkout page. Your customer can use the link in the email to enter billing information, select a shipping method, and submit payment.
Steps

- Click Send invoice.
- In the Send invoice dialog, enter the message that you want to include in the invoice.
- Click Review invoice.
- In the dialog, review your invoice and click Send invoice.