
I. Introduction
Sales Rep is the module that allows store owners like you to manage your sales representatives team to drive sales.
The app also provides a portal that let sales rep manage their activities such as commission tracking, customer management, order management, and more.
II. How to set up?
Step 1. Enable Sales Rep module
In B2B Customer Portal app, go to Dashboard and enable Sales Rep module.
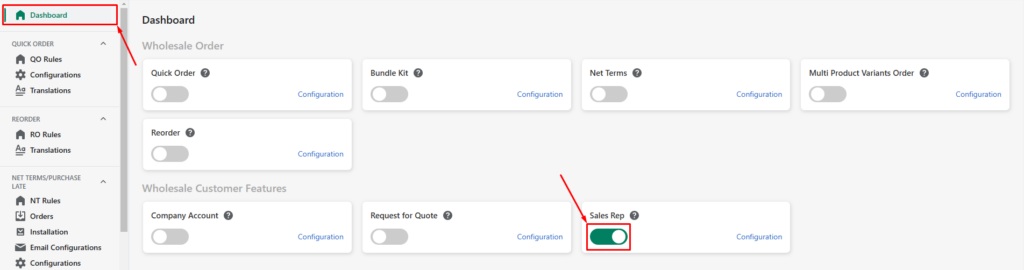
After the module is enabled, the Sales Rep section in the customer portal will be generated on your storefront.
Because you haven't added any sales rep yet so no one can access this section on the Portal page. Let's go to the next step!
Step 2. Create new sales rep
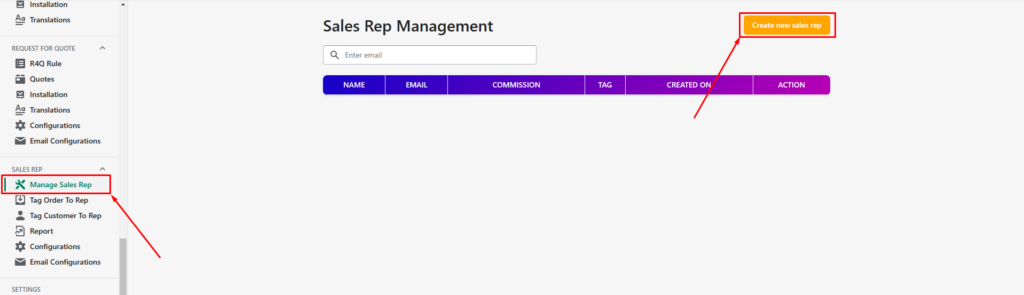
In the app, at the SALES REP section, click Manage Sales Rep. To create a new sales rep, click Create new sales rep button
Here is the information of a sales rep:
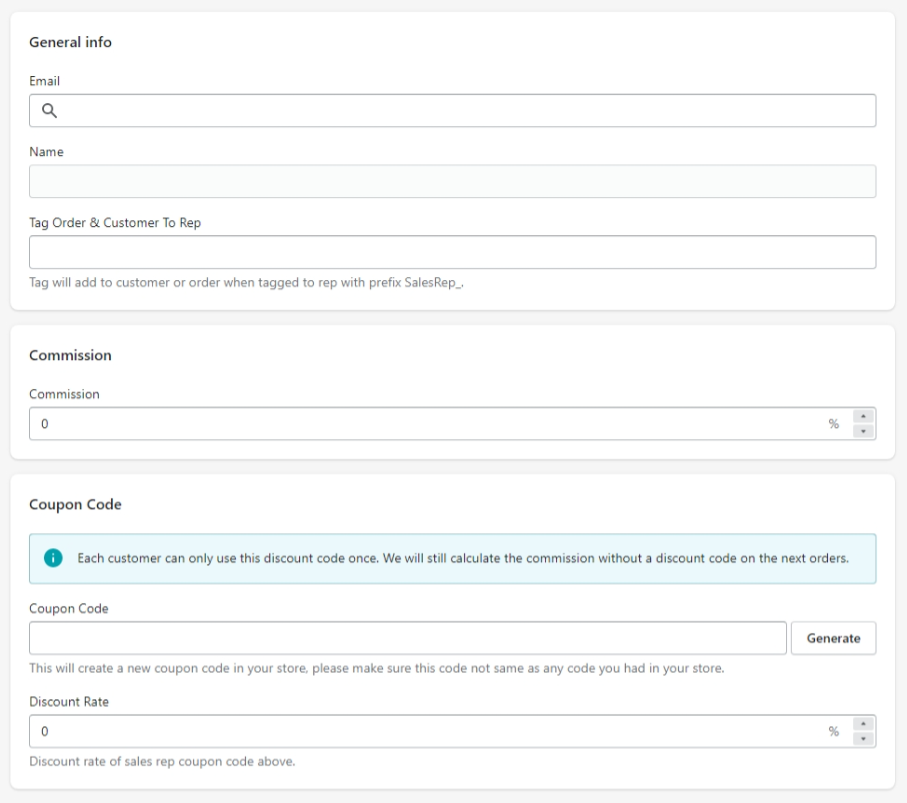
Sales Rep - Email

Your sales reps will use accounts as normal customers but they will be granted access to the portal to manage their activities.
Email is the email of your sales rep account.
Sales Rep - Name

The name will be automatically generated from the email. This can't be changed in the app.
In case you want to edit a sales rep's name, you should go to Shopify Admin to do the action.
Sales Rep - Tag order & customer

The tag you set will be tagged to customers and orders to mark them with the respective sales rep.
Sales Rep - Commission

Commission refers to the percentage of the total order amount that a sales representative is entitled to receive from the orders placed by their customers.
Example: Sales rep A has a customer placing an order with the total amount is $1,250 (tax and shipping included). If the commission is 10%, he/she will get $125 from the order.
Sales Rep - Coupon code

A coupon code is the discount code that your sales reps should give their customers to use.
The application will automatically assign the sales representative to both the order and customer based on the configured discount codes.
Sales Rep - Coupon discount rate

This is the percentage value of the discount code.
If you want to change the type to fixed value or set customer conditions, you can go to Shopify Admin and edit the discount code.
After a sales rep profile is created, he/she will be able to to access to the Portal page.

III. How to manage - as a sales rep
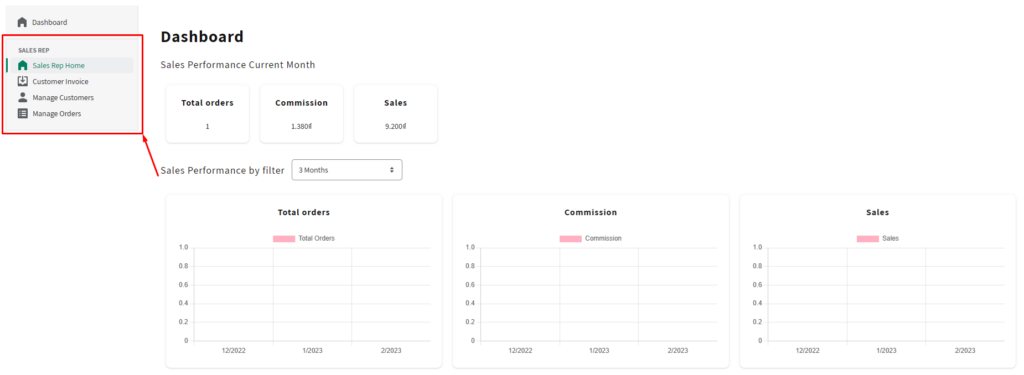
As a sales rep, to manage your activities, you should go to the section Sales Rep in the Customer portal at <your domain>/apps/customer-portal.
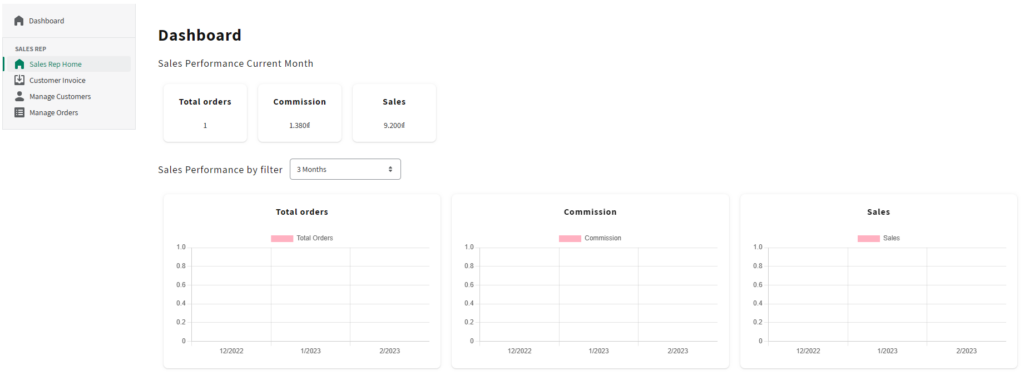
Portal - Sales Rep Home
Here's the place a sales rep can see the overview of their activities.
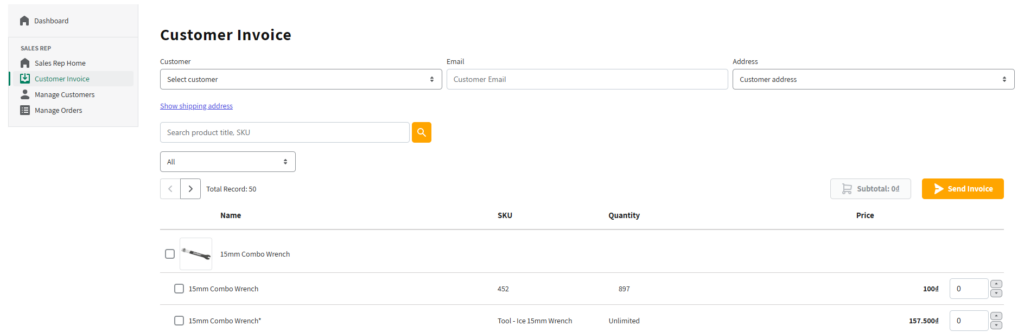
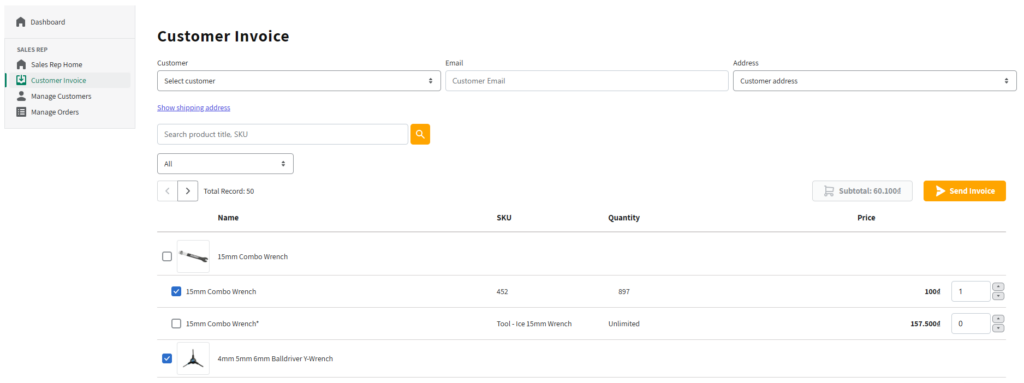
Portal - Customer Invoice
In this section, your sales rep can manually create orders and send them to the customers.
Portal - Manage Customers
Sales reps can view their customers ' information in this tab.

Portal - Manage Orders
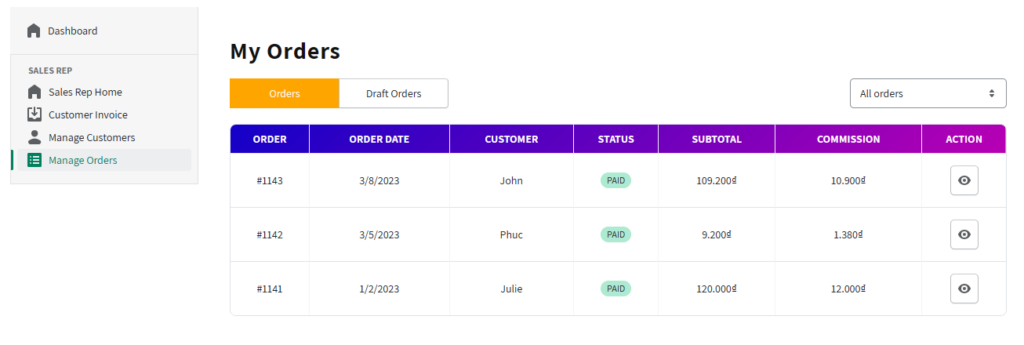
Similar to Manage Customers, sales reps can view their orders and draft orders in Manage Orders section.
Completed orders made by customers will be listed in the Orders tab, whereas orders created manually by sales representatives and sent as invoices will be listed in the Draft Orders tab.
IV. How to manage - as the store owner
As a store owner, to manage your Sales Rep team activities, you should go to the Sales Rep section in the B2B Customer Portal app which can also be call CMS - Content Management System.
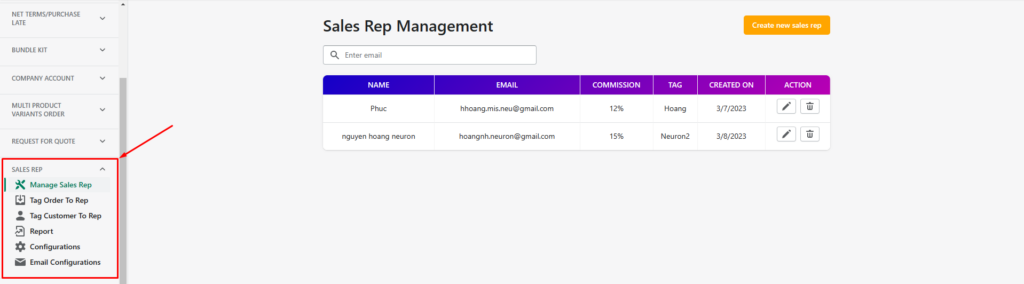
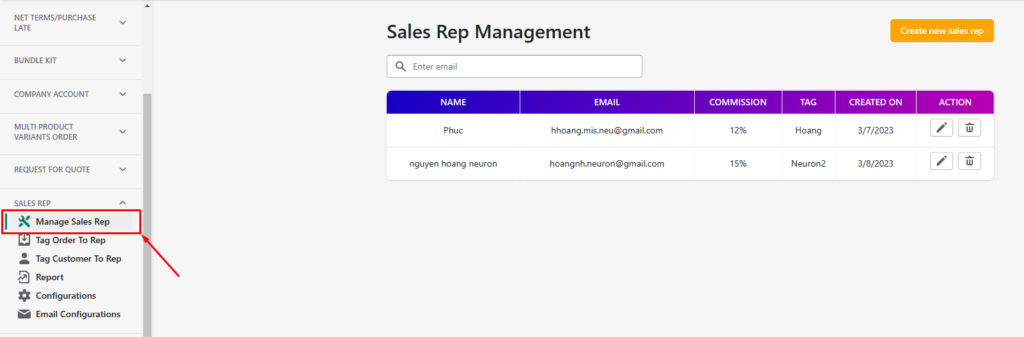
CMS - Manage Sales Rep
Here's the section that you can create, edit or remove Sales Rep. To create a new sales rep, please follow the instructions mentioned in II. How to set up.
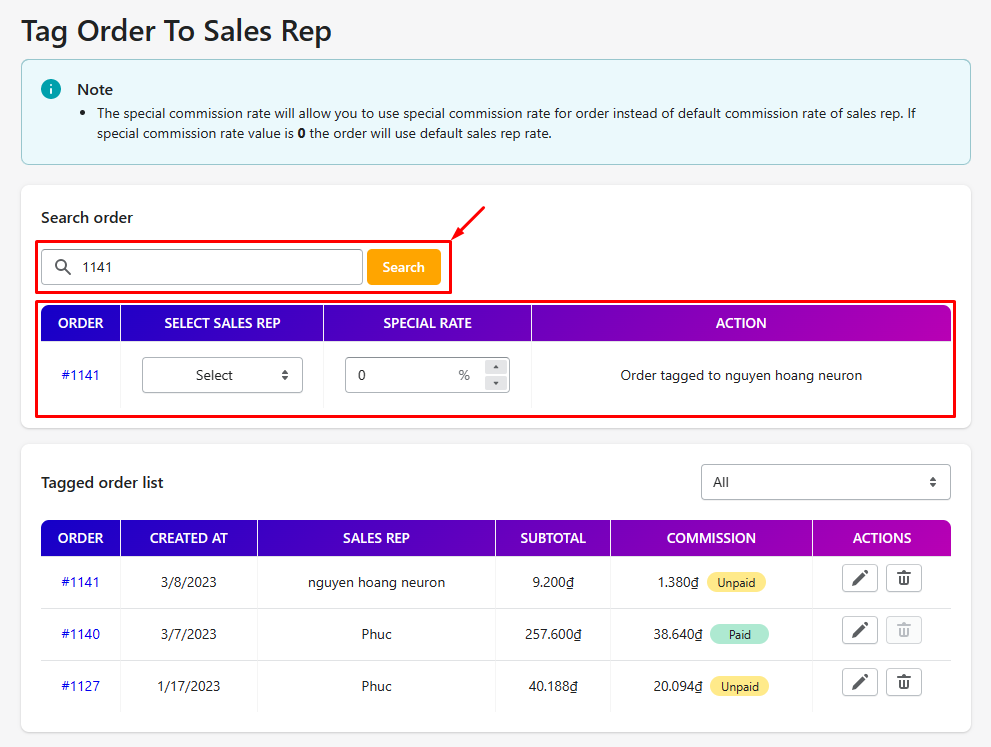
CMS - Tag Order To Rep
This is the section where you can manage orders from your Sales Rep team.
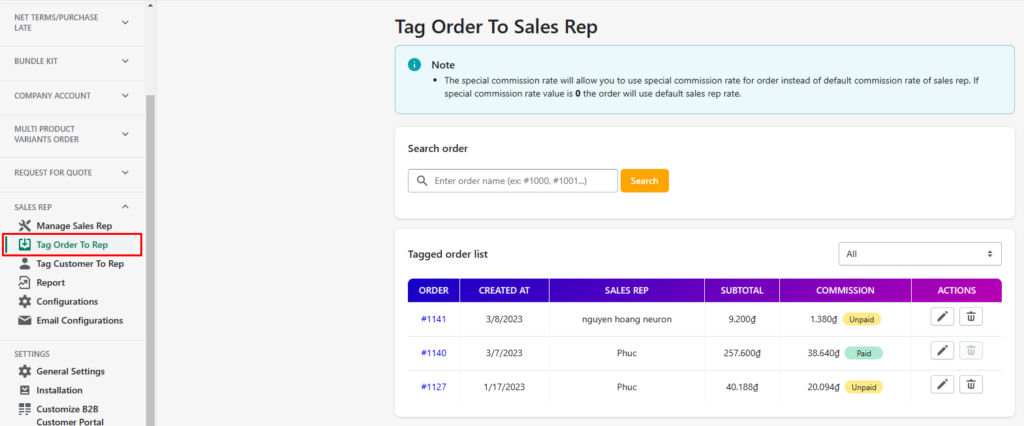
Here, you can also change Commission rate or the Sales Rep of your orders.
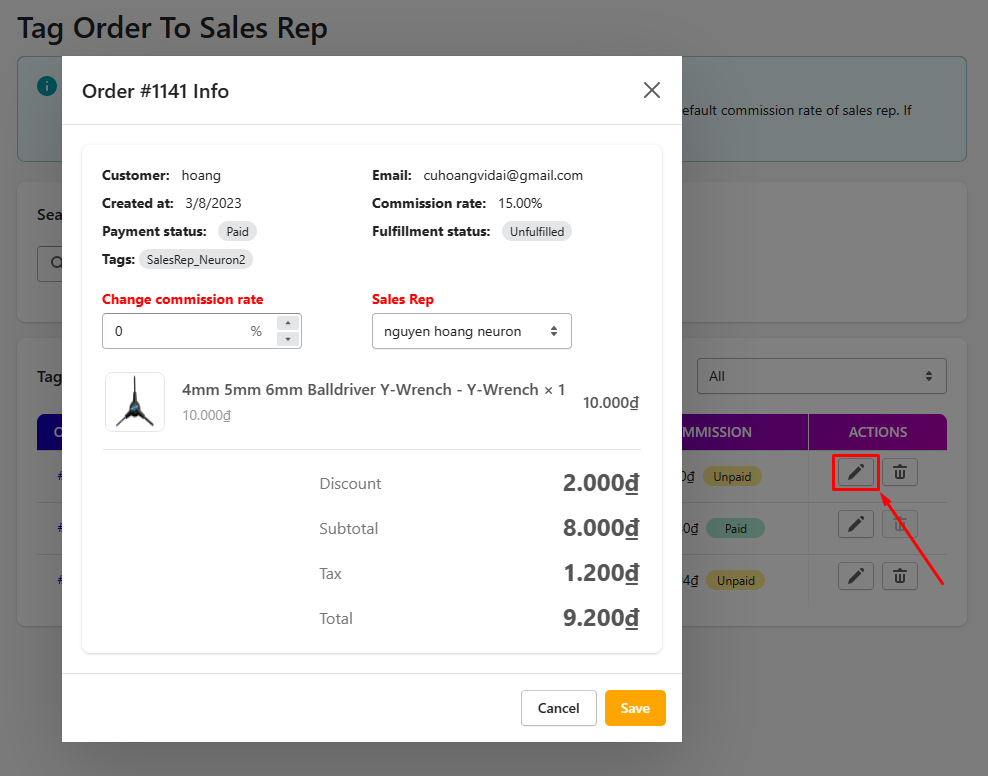
In case you want to tag directly an order to a Sales Rep, you can search by order id in the search box. Then you should set commission rate and the Sale Reps you want.
Note: To tag orders to Sales Rep, you must do it directly through the app - CMS. Please keep in mind that the app cannot automatically detect if you add tags to customers or orders in the Shopify Admin.
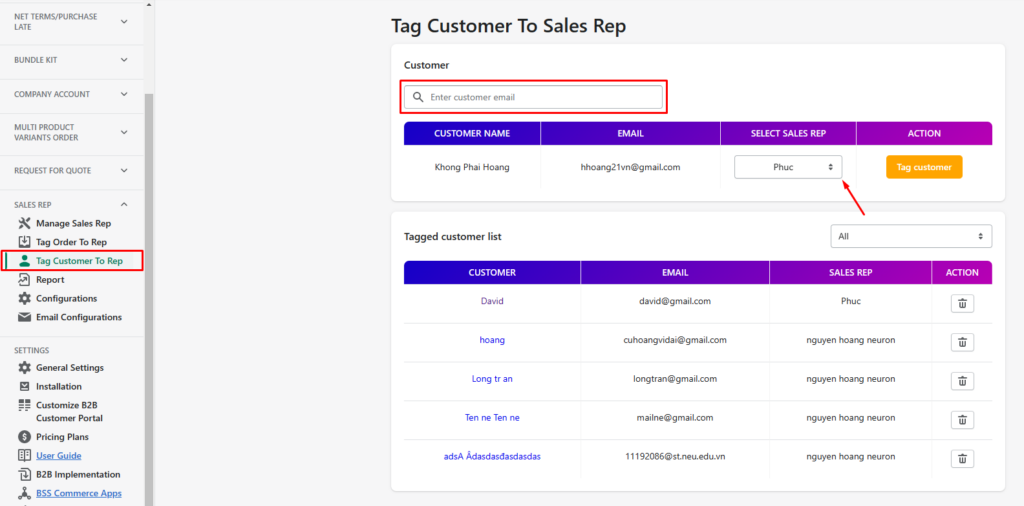
CMS - Tag Customer To Rep
Similar to Tag Order to Sales Rep, this section allows you to tag customers to your Sale Reps. You can find customers and tag them with Sales Reps.
Note: To tag customers to Sales Rep, you must do it directly through the app - CMS. Please keep in mind that the app cannot automatically detect if you add tags to customers or orders in the Shopify Admin.
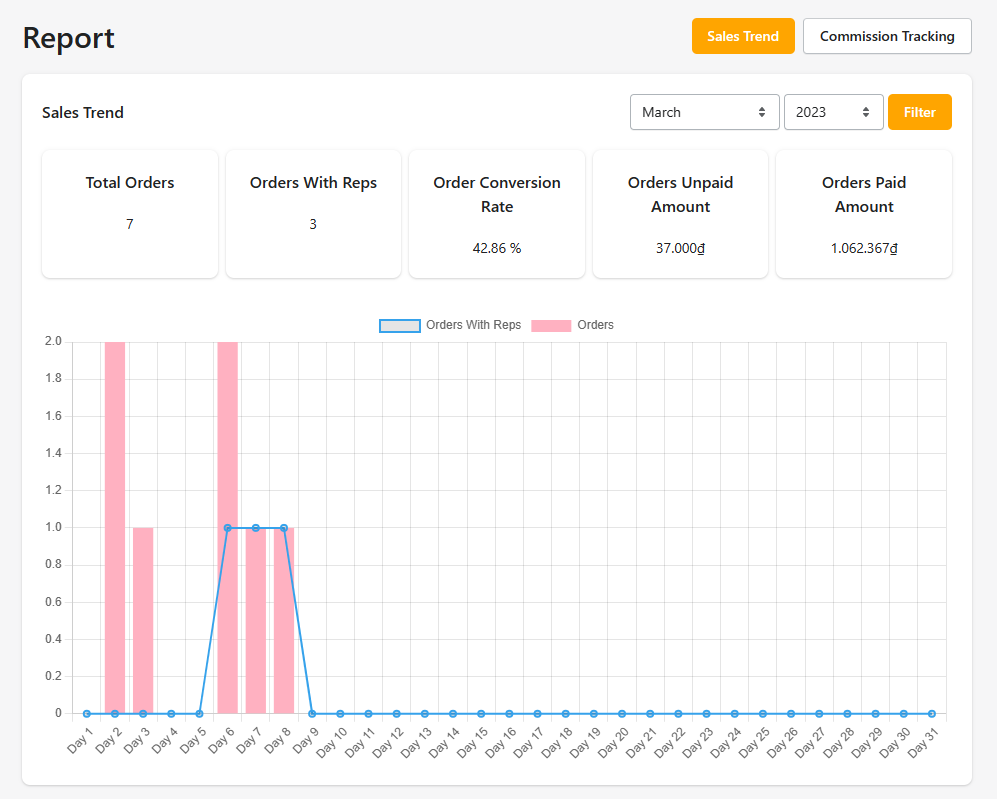
CMS - Report
To have an overall view of your Sales Rep team activities, you should go to Report tab in Sales Rep section.
This page shows you a Dashboard that includes information about orders, conversion rates, unpaid amount, and paid amount.
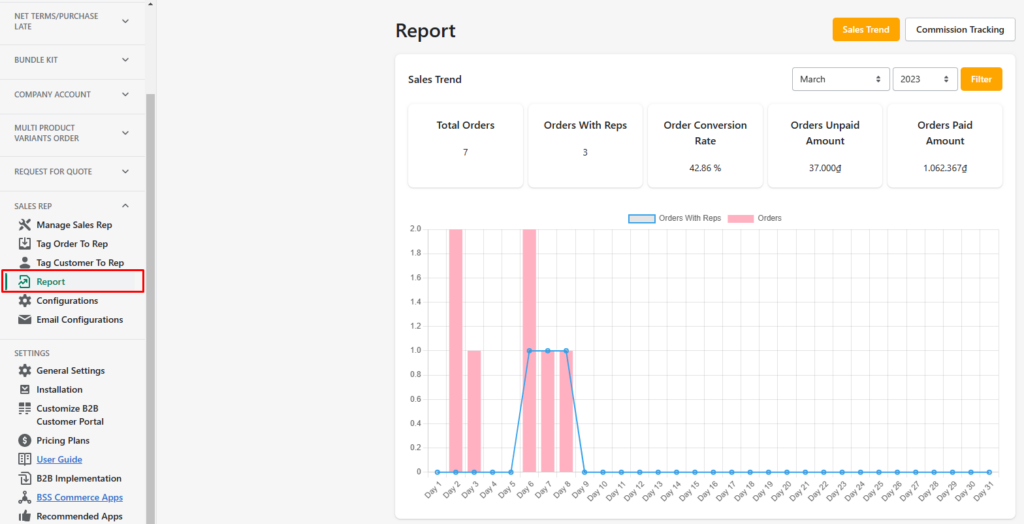
To track the commission of your Sales Reps, you should click Commission Tracking button on the top-right of the page.
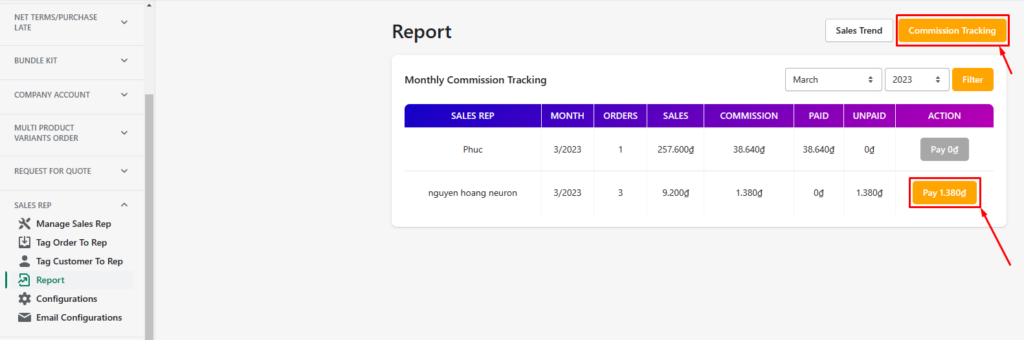
Here you can mark commissions of Sales Rep as paid.
Note: Our app does not support you directly paying Sales Rep commissions. You should pay outside the app and mark it as paid in Commission Tracking tab.
CMS - Configurations
In this section, you have the options to display or hide the Client Invoice and Coupon Code sections in the Portal.
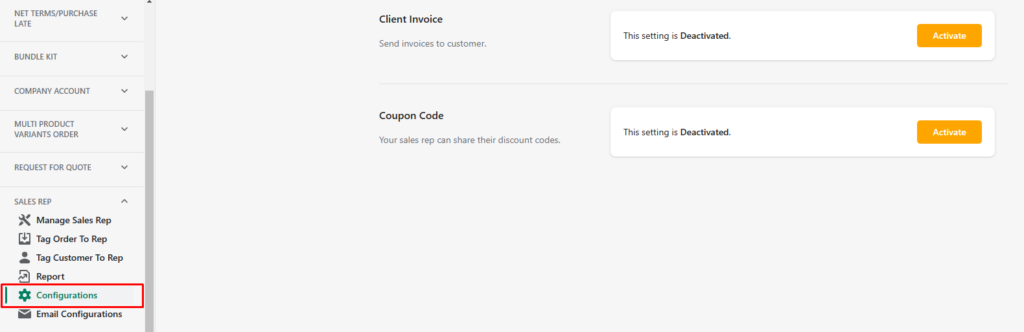
These two above settings are equivalent to the two following tabs:

CMS - Email Configurations
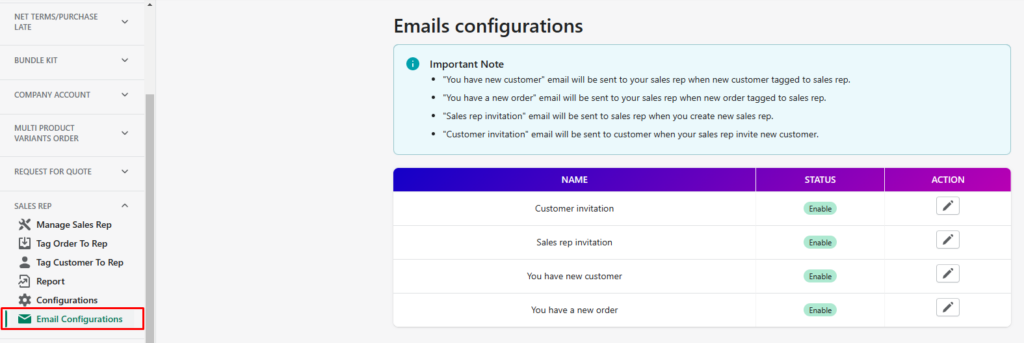
The Email Notifications page enables you to customize the content of each type of notification.
If you have any further questions, feel free to contact us at sales@bsscommerce.com.