You have to go to the app => Pricing Plan and subscribe to the Advanced Plan ($25/mon) or Premium Plan ($50/mon) to use the function. You will have a trial of 14 days.
Please follow the instructions to test the function and hope you enjoy it.
1. Enable the function
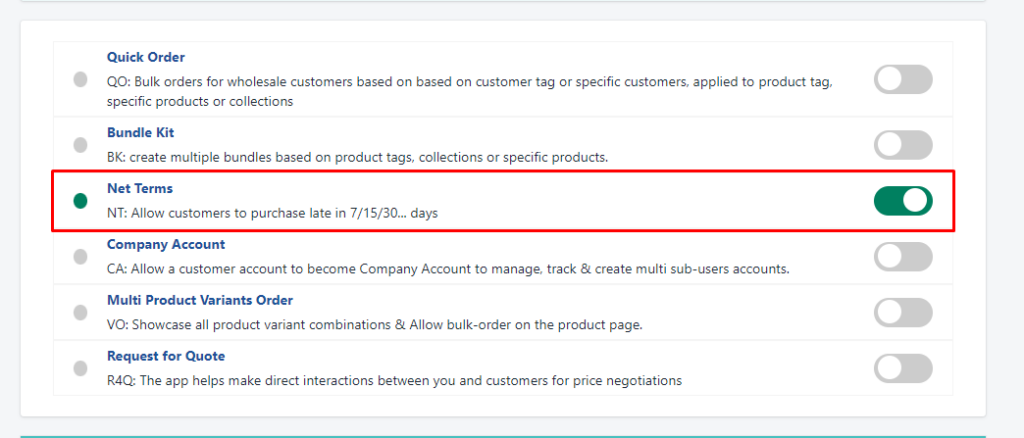
Go to Dashboard and turn on the Net Term function.
2. Installation
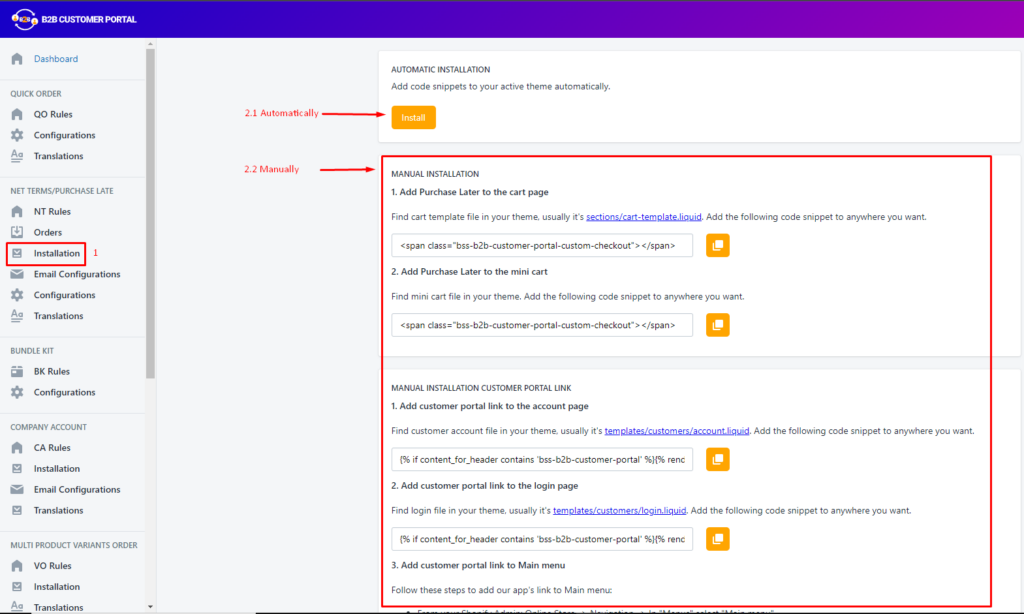
Go to Installation and click the “Install” button to add the function to your theme. You can install the function automatically or manually.
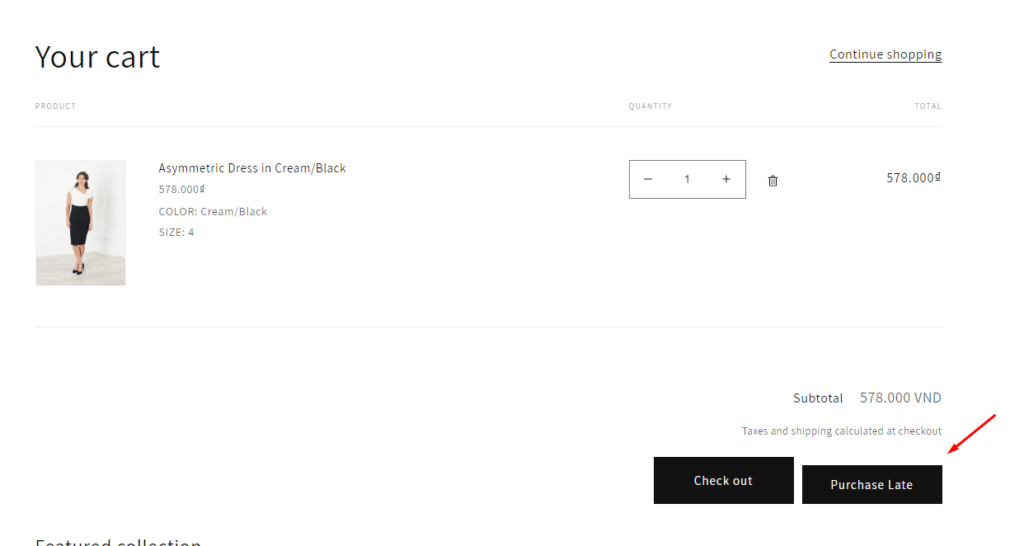
There will be a Purchase Late button shown on the Shopping Cart page.
*Note:
- If you install but the button “Purchase Late” is not showing, kindly follow the manual installation guide or contact us at sales@bsscommerce.com.
- When you change your theme, kindly go to the Installation tab and re-install the function on your new theme.
3. Configuration
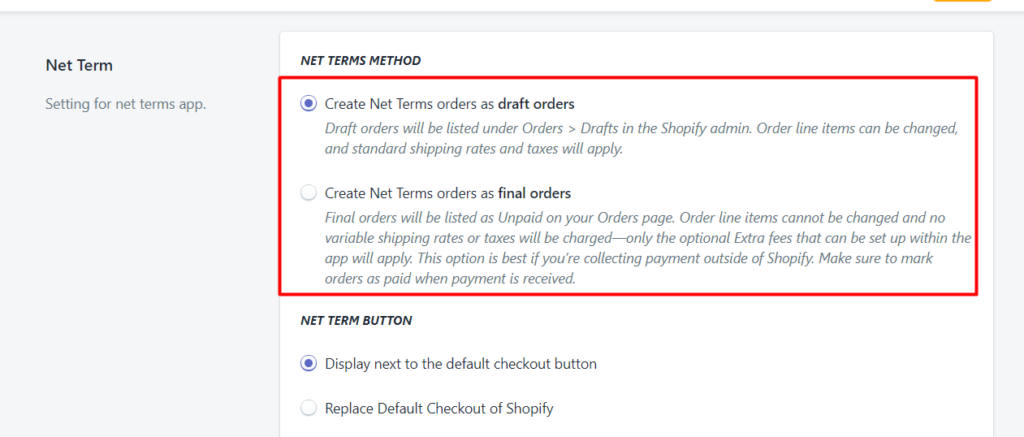
Under the NET TERMS METHOD, there are two options available.
3.1. Create Net Terms orders as draft orders
When customers click on “Purchase Later”, the order information will be saved on Shopify Admin => Orders => Draft Orders.
You can change the order items and the shipping rate/taxes will be automatically updated. Also, make use of the “Email Invoice” option to collect the payment within or outside Shopify.
*Note: Remember to mark orders as paid when you receive the payment.
3.2. Create Net Terms orders as final orders
When customers click on “Purchase Later”, an official order will be created on Shopify Admin => Orders. The payment status is Unpaid.
You will not be able to change the order items, shipping rates, or taxes. However, you can set up Extra fees on the app.
We would recommend this option if you use the Payment methods set up on your Shopify store.
*Note: Remember to mark orders as paid when you receive the payment.
3.3. Net Term Button
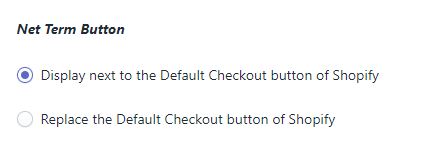
Under NET TERM BUTTON, there are two options:
- Display next to the default checkout button: The customers can still checkout as normal.
- Replace Default Checkout of Shopify: The customers can only Purchase Late.
3.4. Thank You Page
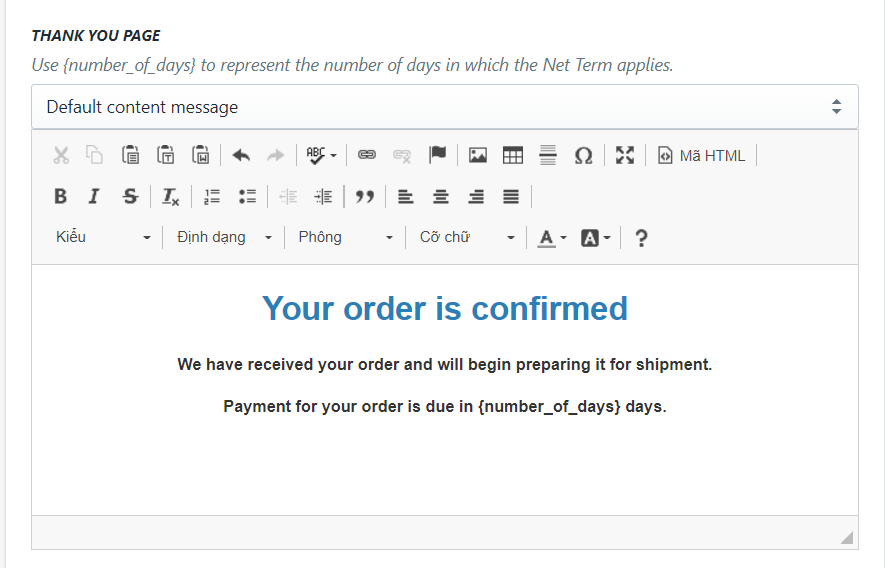
You can use Default content message or add your custom message.
After the customers complete the “Purchase Late" orders, they will be redirected to a THANK YOU PAGE. you can add more information in the box.
3.5. Buttons Setting On Cart Page
There are 3 options:

Enable "Purchase Late Button" for All Customers: Net Term button will be visible to all customers no matter they are involved in any Net Term rules or not.
Enable "Purchase Late Button" for Applied Customer in NT Rules: Net Term button who be visible to applied customers in NT rules
Enable Multiple Buttons for All Customers: All buttons of the rules that admin sets up in the app are displayed. If customers are in two or more NT rules, they will be applied these rules.
For example:
Rule #1:
- Name: Net Terms 15 for Special customers, Retailers
- Apply to: Customers tagged with Special, Retailers
- Apply to: All Products
- Rule settings: Net Terms
- Apply Net Terms within: 15 days
Rule #2:
- Name: Net Terms 30 for Retailers
- Apply to: Customers tagged with Retailers
- Apply to: All Products
- Rule settings: Net Terms
- Apply Net Terms within: 30 days
On cart page, customers with tag Special, Retailers can see the both the button "Net Terms 15 for Special customers, Retailers" and "Net Terms 30 for Retailers".
Retailers can choose either Net Terms 15 or 30 button while Special customers can only choose Net Terms 15.
For more information about this setting, you can read at: <link to post>
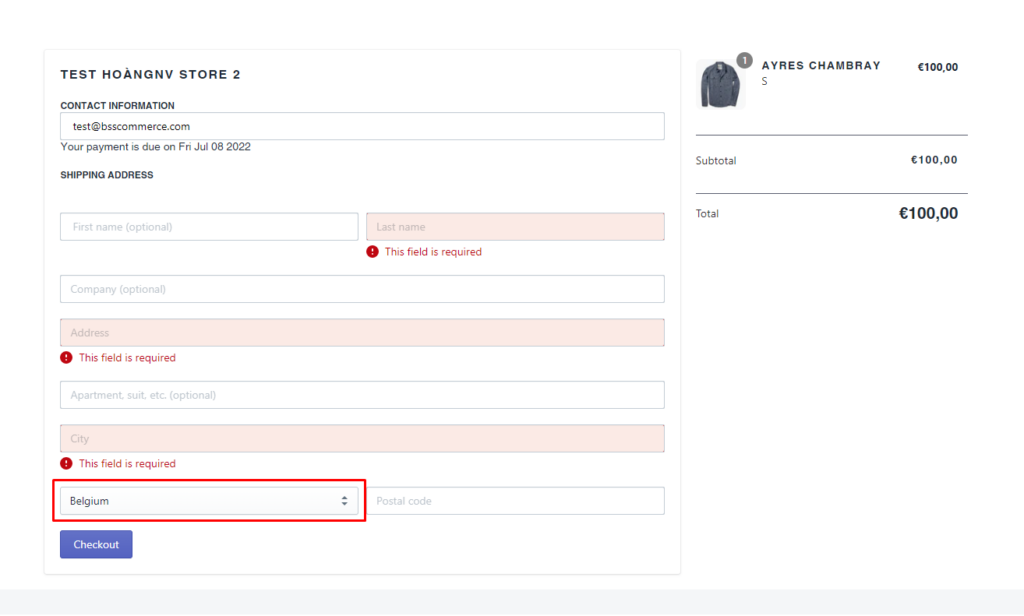
3.6. Default Country Address

This configuration allows you to set the default country address for non-logged-in customers in Cart Purchase page:
3.7. Translation of Purchase Late
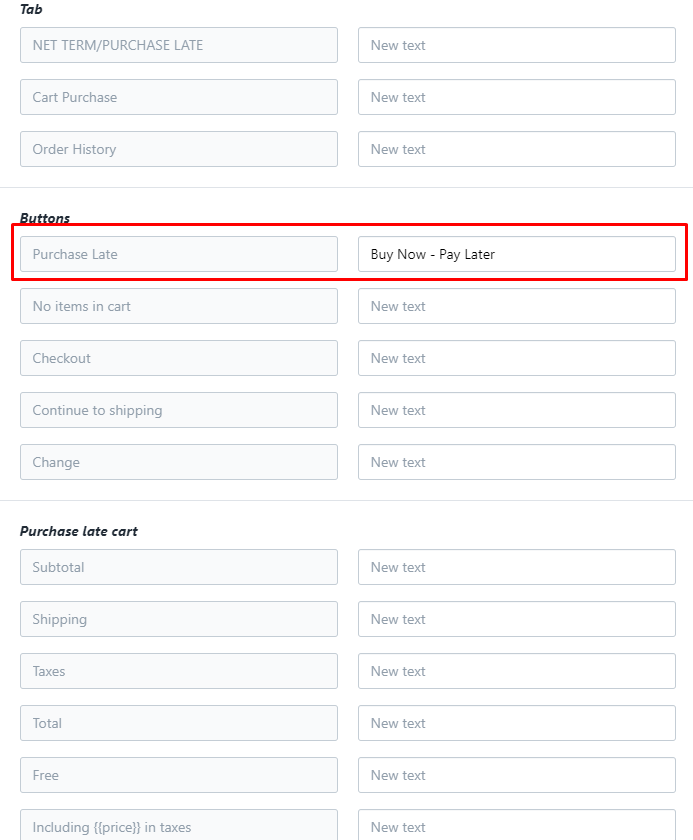
Under Translation, you can set up the “Purchase Late" button. For example, set it to “Buy Now - Pay Later".
4. Net Terms Rules
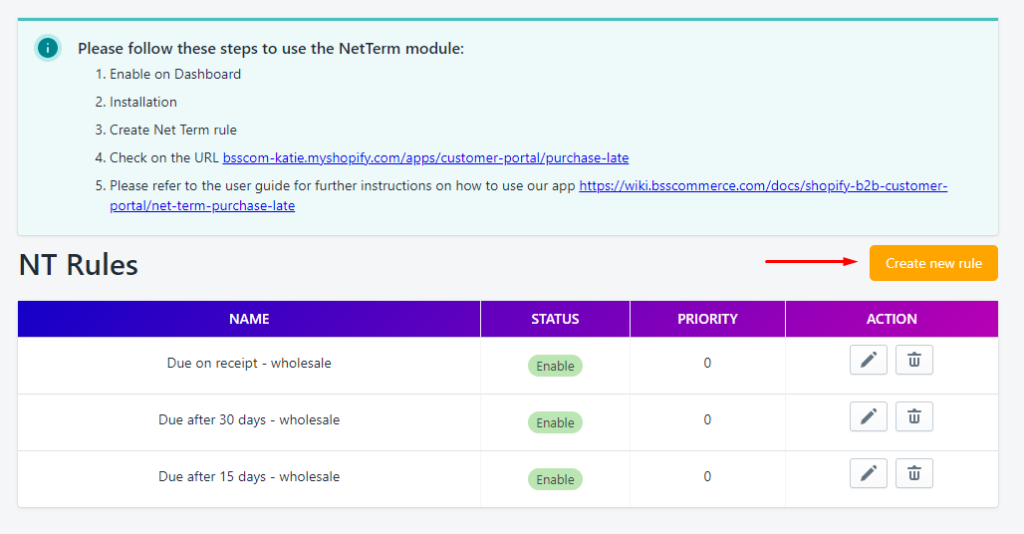
Go to NT Rules to create the NetTerms rules within a specific time period.
4.1. General Information
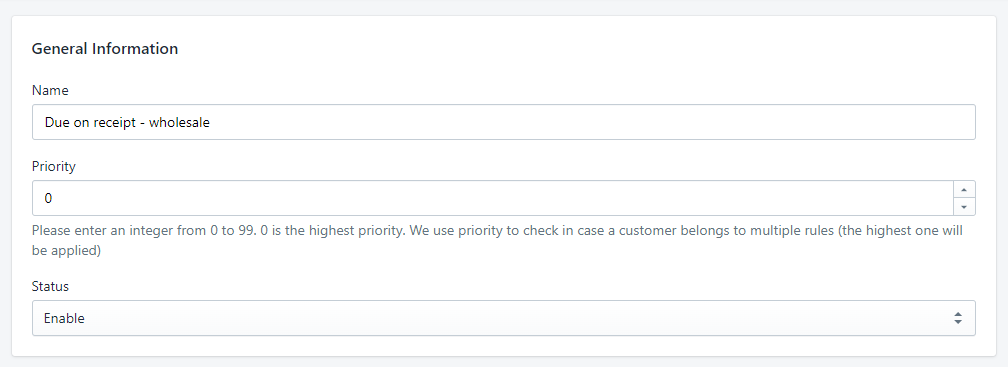
Under General Information:
- Enter the rule’s Name
- Enter a number to set up the Priority. 0 is the highest priority.
- Set the Status to Enable/Disable.
*Note: The priority will be considered when there are more than one NetTerms rule applied to the same customer(s) at a time.
4.2. Apply to Customers/Product
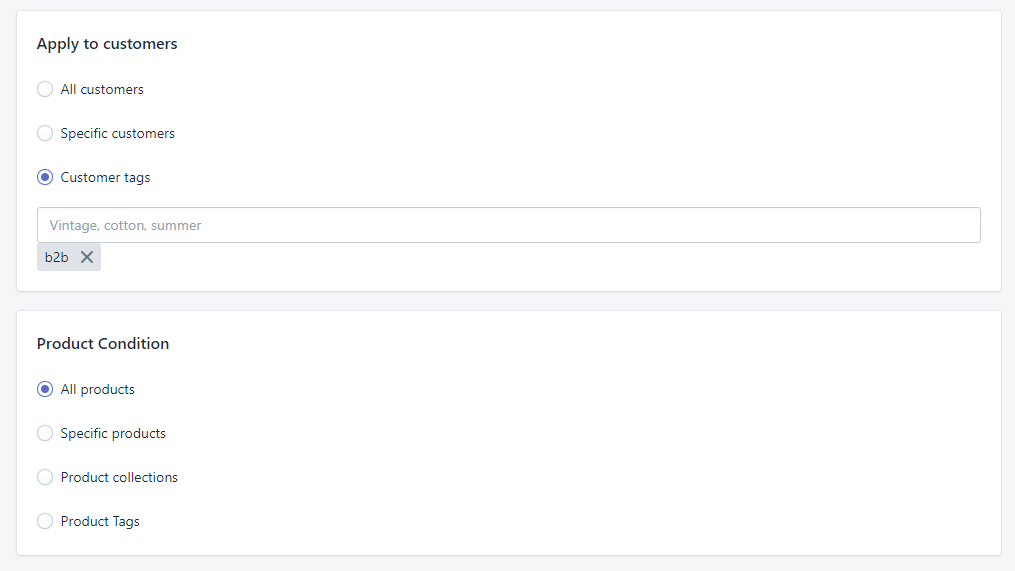
Under Apply to customers, choose the customers you want to apply the NetTerms rule.
For example, you can add a tag “b2b” for B2B customers.
Under Product Condition tab, choose the products you want to apply the rule.
4.3. Auto-tag orders when purchasing with this rule

We would suggest enabling the Auto-tag orders function so that you can easily search for NetTerms orders by their tag.
4.4. Apply Within

Under Apply Net Term within, choose a time range when chosen customers will receive the invoice after that time. Or, you can manually Send Invoice.
There are 6 options available:
- Due on receipt:
- Within 7 days
- Within 15 days
- Within 30 days
- Within 60 days
- Within 90 days
- Custom
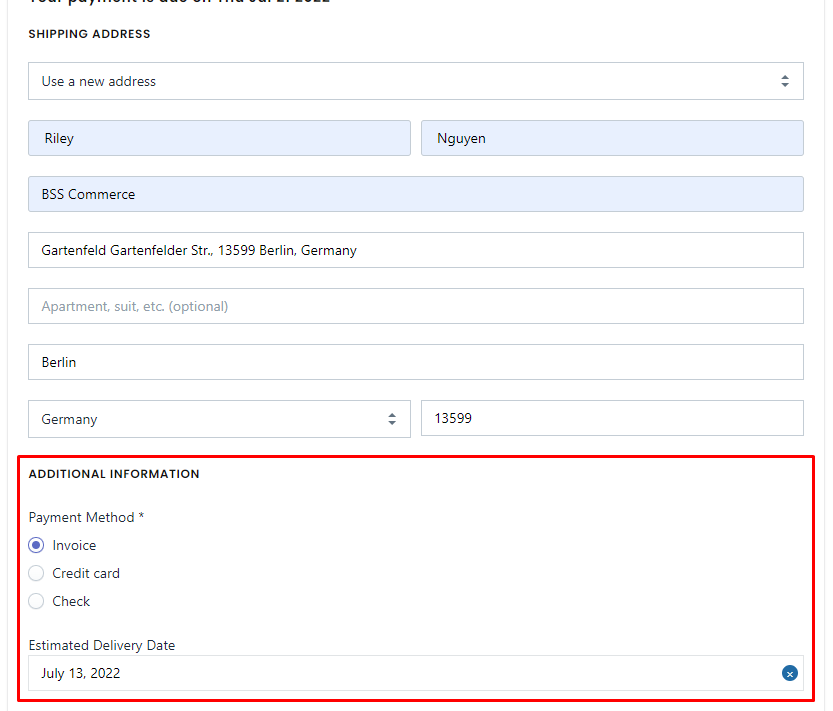
4.5. Purchase Late Form
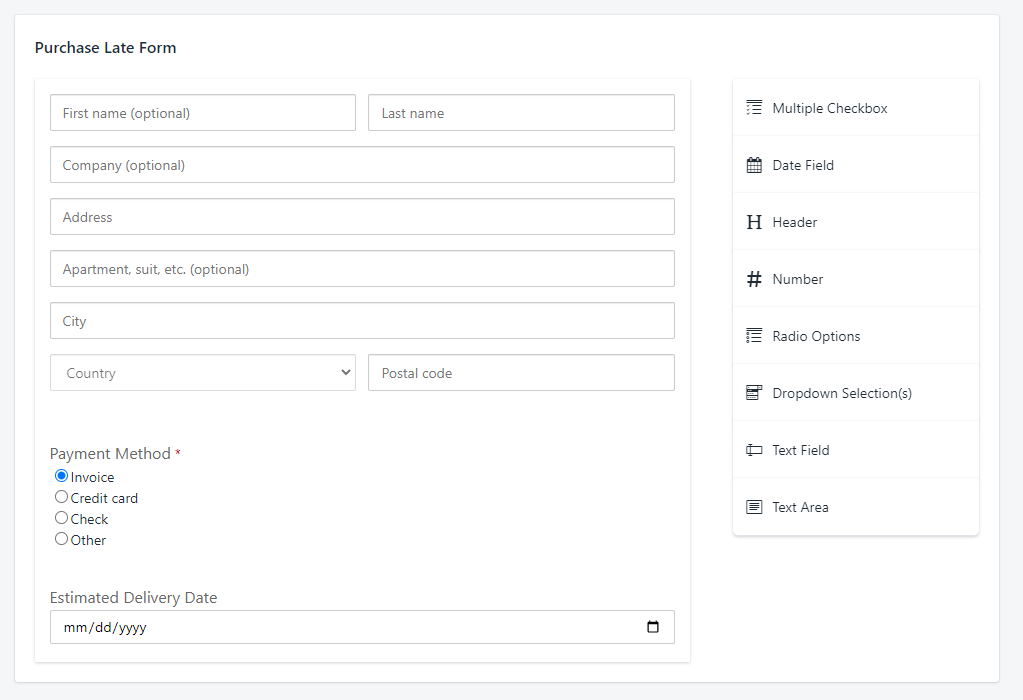
Besides the Shipping Address information, you can collect further by adding custom fields: multiple checkboxes, date field, header, number, radio options, dropdown selection(s), text field, and text area.
Other than these, B2B Customer Portal allows you to add custom fields such as EU VAT Validation, ABN Validation, India GST Validation, UK Validation, and Phone.

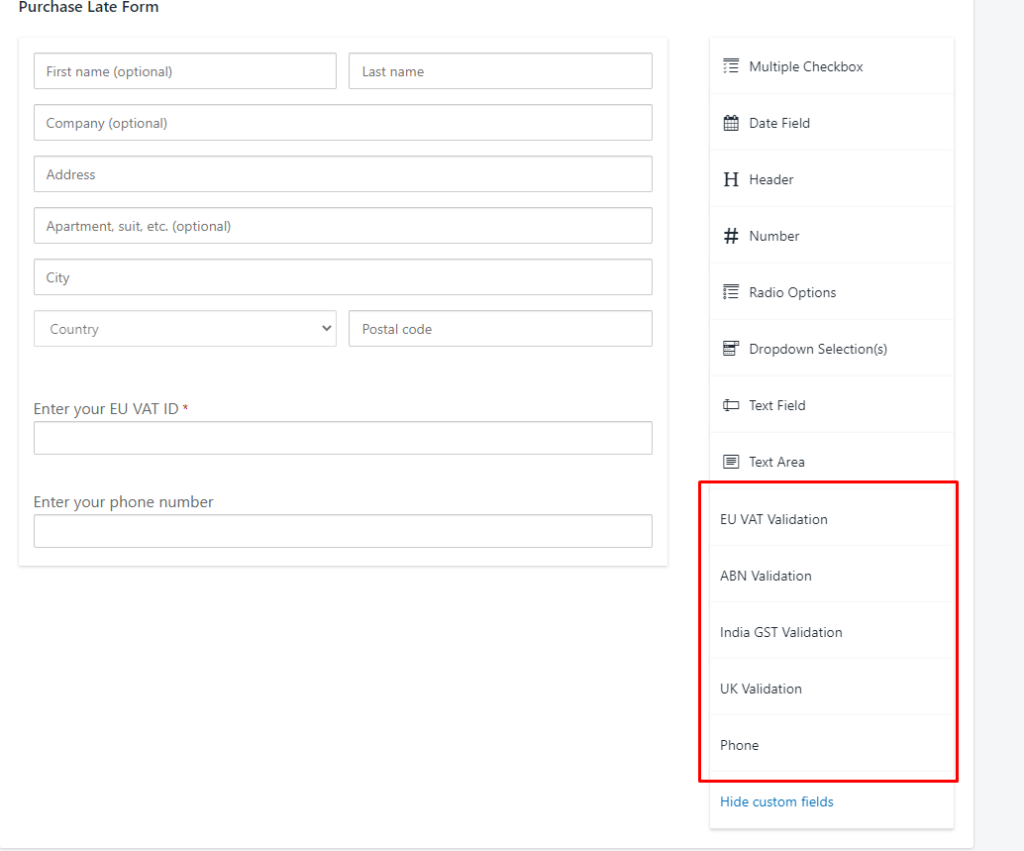
On the Online Store, customers can enter additional information:
5. Purchase Later Process (Frontend)
On the storefront, the chosen customers will login into the account with the tag B2B to make a Netterm purchase.
When the customers add the product to the cart, they can choose the “Checkout” button as normal or the “Buy Now - Pay Later" button.
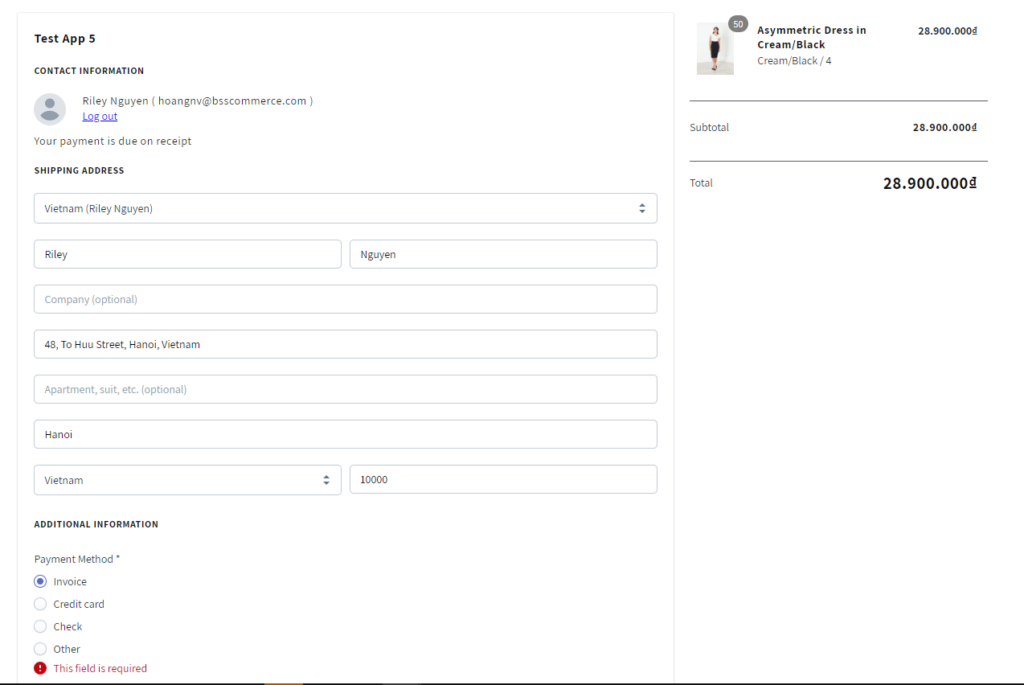
The customers will be redirected to a Purchase Late page (/apps/customer-portal/purchase-late) to add Shipping information.
When clicking on the Checkout button, the customers will be redirected to Thank You Page.
On the page, the customers can check the Cart Purchase and Order History.

5.1. The Admin sets up “Create Net Terms orders as draft orders”
The orders will be created on Shopify Admin => Orders => Draft Orders.
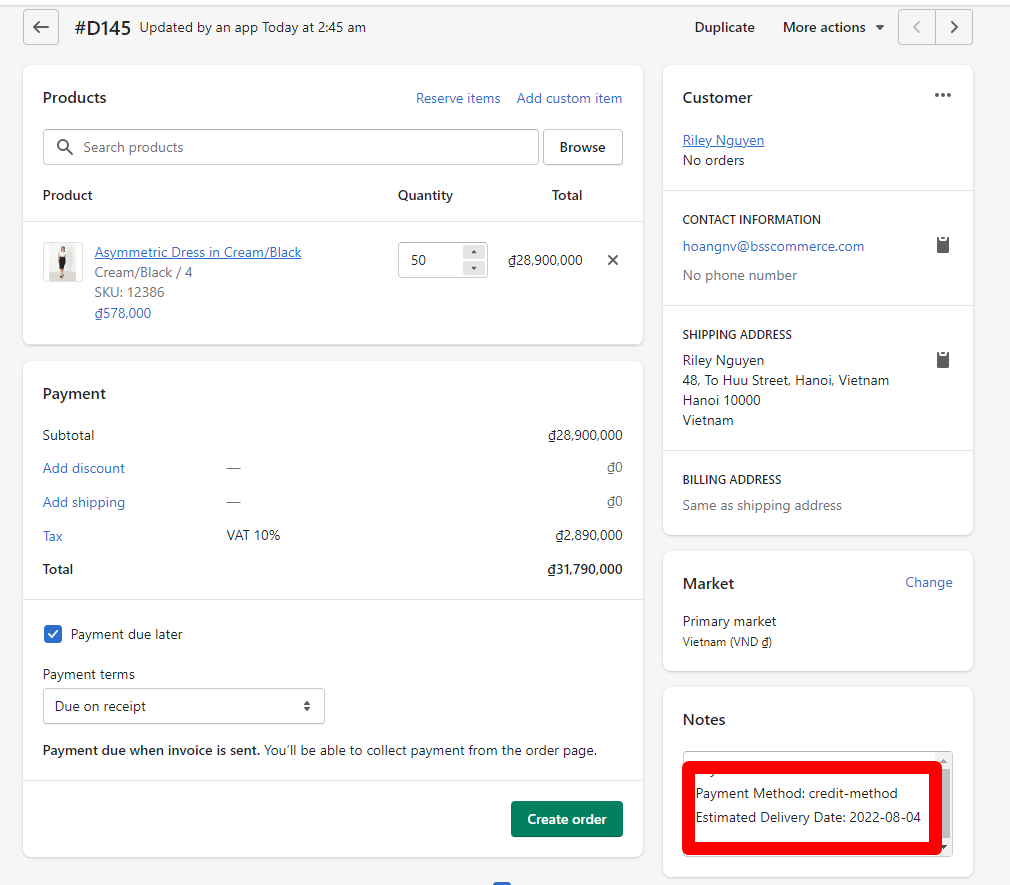
You can change the order items and the shipping rate/taxes will be automatically updated. Also, make use of the “Email Invoice” option to collect the payment within or outside Shopify.
*Note: Remember to mark orders as paid when you receive the payment.
5.2. The Admin sets up “Create Net Terms orders as final orders”
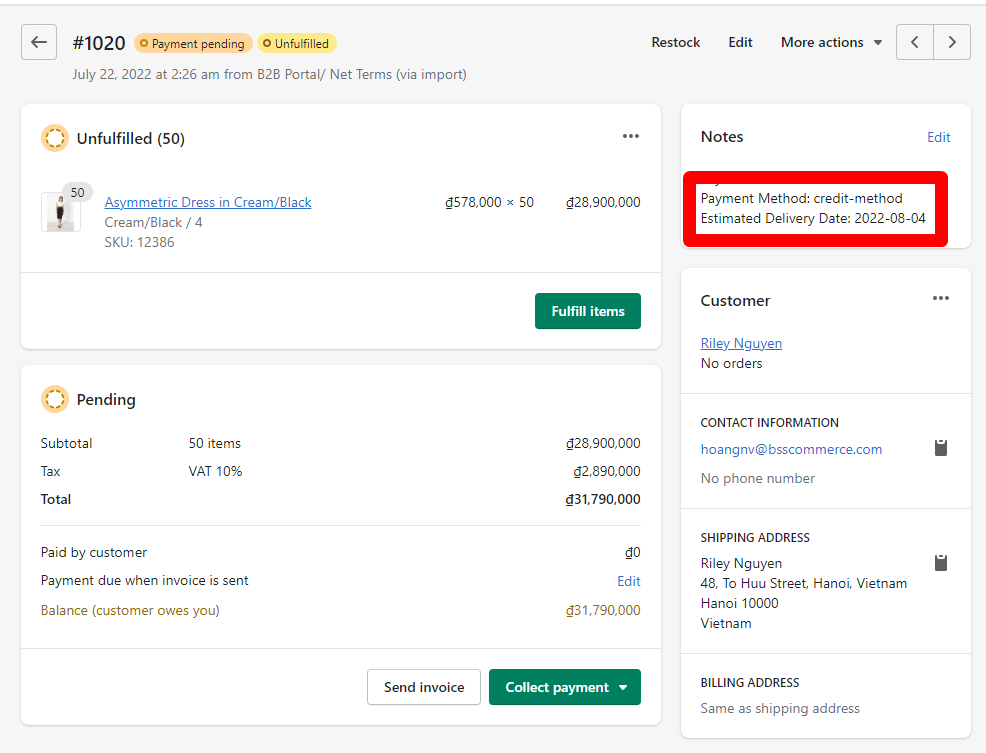
You will not be able to change the order items, shipping rates, or taxes. However, you can set up Extra fees on the app.
We would recommend this option if you use the Payment methods set up on your Shopify store.
*Note: Remember to mark orders as paid when you receive the payment.
6. Orders List
Admin can check the Orders list in the app via Orders tab
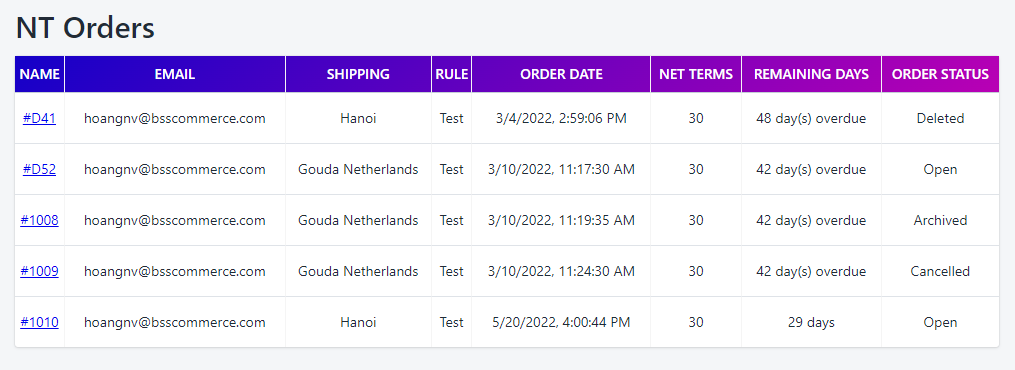
There are 8 columns in NT Orders table:
- Name: Order Number of Net Terms order. You can click order number to view order details in Shopify Admin.
- Email: Customer's email.
- Shipping: Shipping city + country address.
- Rule: Name of the NT Rules .
- Order Date: Date that customer placed net terms order.
- Net Terms: net terms period.
- Remaining Days: remaining days that customer have to pay their order.
- Order Status: Order status in Shopify Admin: Archived (order is paid & fulfilled), Open (order is unpaid & unfulfilled), Cancelled (order is cancelled), Deleted (order is deleted).
You can also find the Orders in Shopify Admin => Orders by the tag.

7. Email configurations
Here you can enable the email type you want and set up the email template

