
1. Overview
Checkout Custom Field for Magento 2 extension helps admins collect additional information from customers by letting them fill in custom fields during the checkout process. Admin can create these custom fields and include them in Shipping or Review and Payments of the checkout page.
2. How Does It Work?
2.1 General settings
Go to Stores ⇒ Configuration ⇒ BSSCommerce ⇒ Checkout Custom Field.
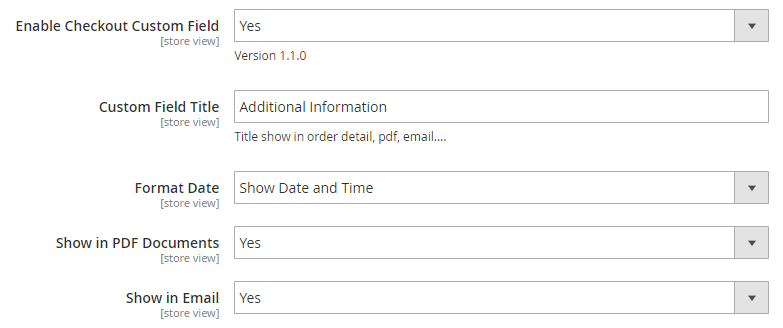
In Enable Checkout Custom Field, choose Yes to enable the extension or No to disable it.
In Custom Field Title, enter the title for custom fields which are displayed in order detail, PDF invoice and email.
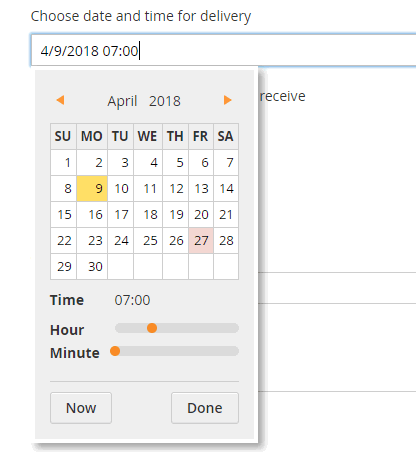
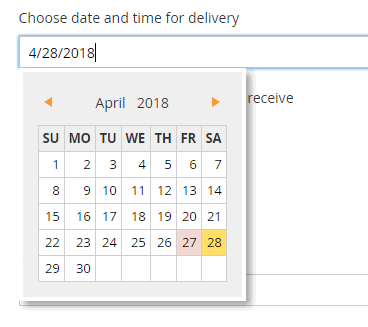
In Format Date, choose the format for the date input type to display on the checkout. There are 2 options:
- Show Date and Time: Both date and time are included in the calendar view.
- Only Date: the Only date is included in the calendar view.
In Show in PDF Documents, choose Yes to include custom fields in PDF documents or NO to exclude them.
In Show in Email, choose Yes to include custom fields in the email sent to customers or NO to exclude them.
2.2 Manage custom fields
Go to Sales ⇒ BSSCommerce ⇒ Manage Checkout Custom Fields.
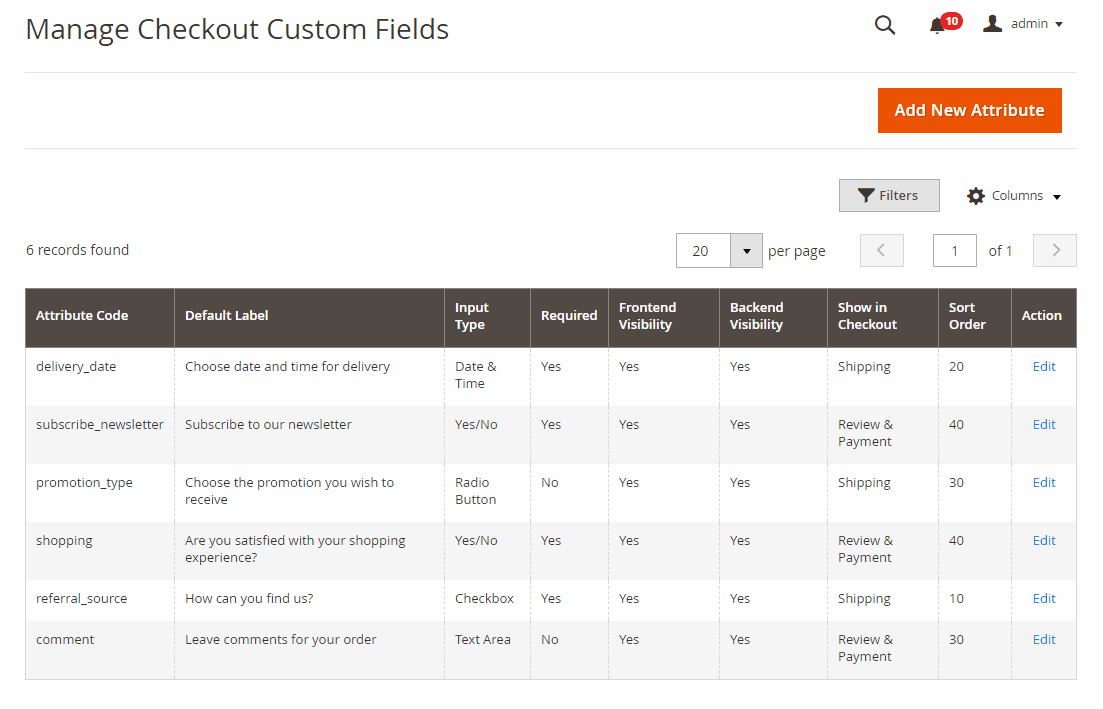
To create a new custom field, click Add New Attribute.
In Attribute Information ⇒ General Information ⇒ Attribute Properties.
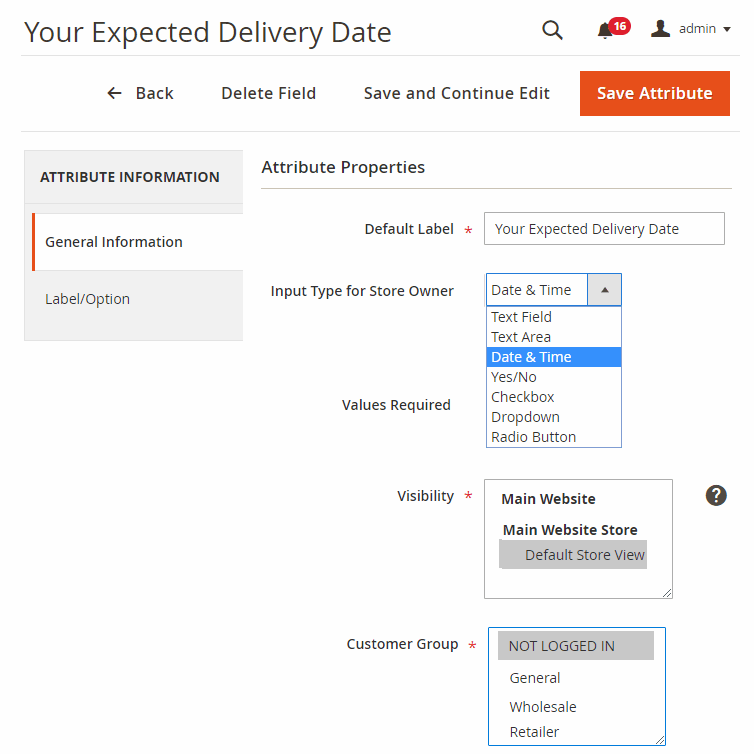
In Default Label, enter the name of the new custom field.
In Input Type for Store Owner, choose one of the following input types for the custom field: Text Field, Text Area, Date & Time, Yes/No, Checkbox, Radio Button, and Dropdown.
In Values Required, choose Yes to make the custom field compulsory to fill in; otherwise, choose No.
In Visibility, select which store view the custom field is available.
In Customer Group, pick up the group you want to show the checkout custom field.
In Attribute Information ⇒ General Information ⇒ Advanced Attribute Properties.

In Attribute Code, enter a code for the new custom field. No space allowed and no more than 30 symbols.
In Sort Order, decide the order of displayed custom fields in checkout.
In Default Value, set default value for the custom field so that if customers don’t fill in that field, the default value will be applied.
In Input Validation for Store Owner, choose one of the following input types to be validated for the custom field: Decimal Number, Integer Number, Email, URL, Letters, and Letters (a-z, A-Z) or Numbers (0-9).
In Frontend Visibility, choose Yes to display the field in the frontend; otherwise choose No.
In Backend Visibility, choose Yes to display the field in the backend; otherwise choose No.
In Show in Checkout, display custom field in Shipping Address, Shipping Method or Review & Payments of the checkout page.
In Add to Order Grid, choose Yes to add the custom field to order grid; otherwise, choose No.
In Add to Order Detail, choose Yes to add the custom field to order detail; otherwise, choose No.
In Add to PDF Documents, choose Yes to add the custom field to PDF documents; otherwise, choose No.
In Add to Email, choose Yes to add the custom field to email; otherwise, choose No.
2.3 Orders
Go to Sales ⇒ Orders.
Custom fields are added to the Order grid.
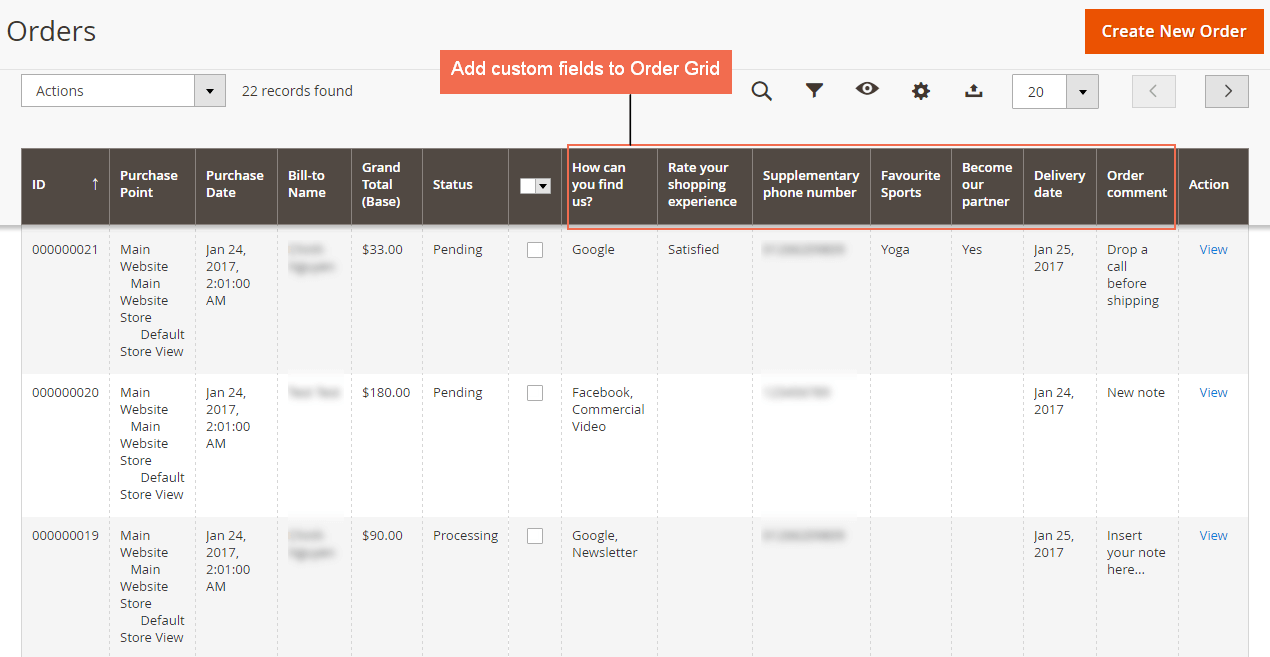
BSSCommerce Checkout Custom Field for Magento 2 extension also supports you to get order information from API.
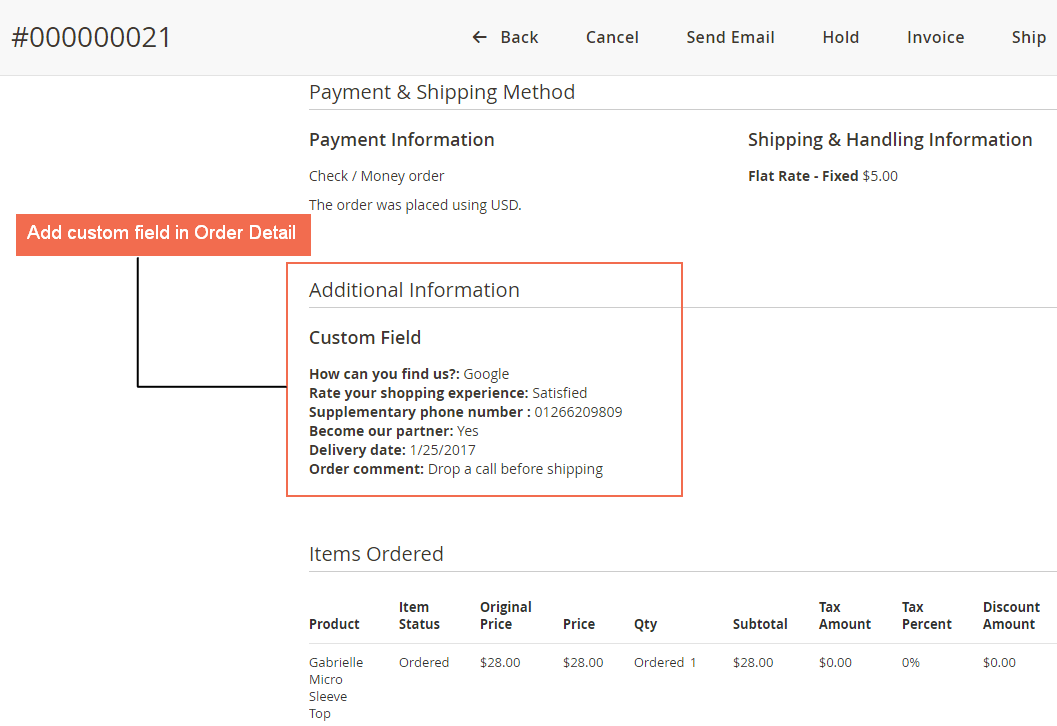
Custom fields are displayed on Order Detail page.
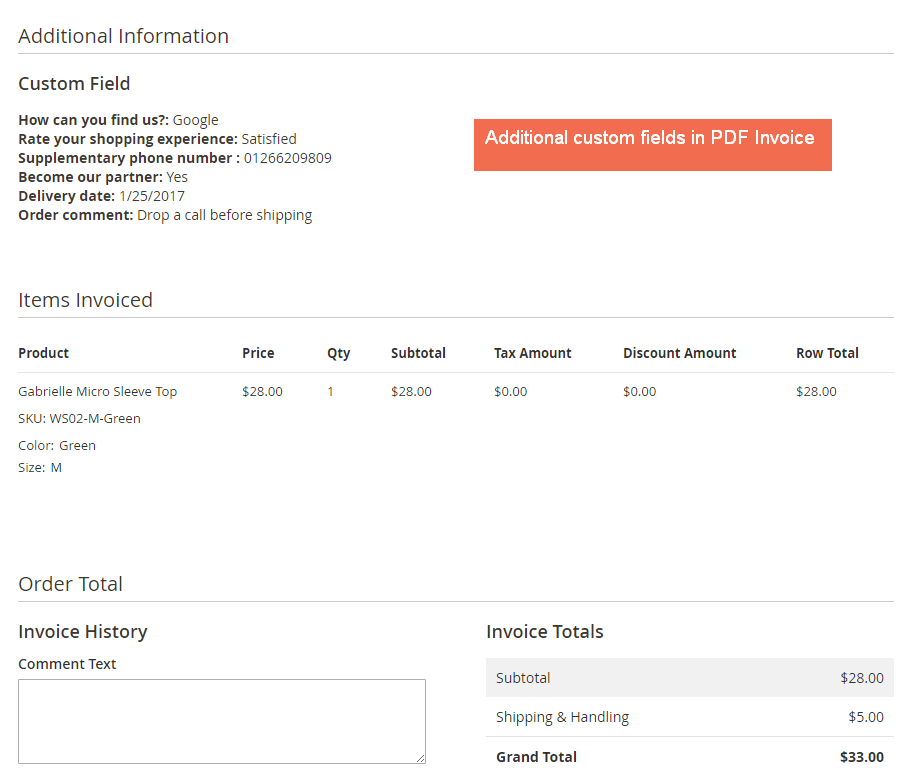
2.5 PDF invoice
In order to include custom field value in PDF invoice, you need to enable config Show in PDF Documents (see 2.1, page 3), and enable config Add to PDF Documents (see 2.2, page 6) before placing the test order.
Custom fields are displayed in PDF invoice.
2.6 Email
Go to Marketing ⇒ Communications ⇒ Email Templates ⇒ Add New Template.
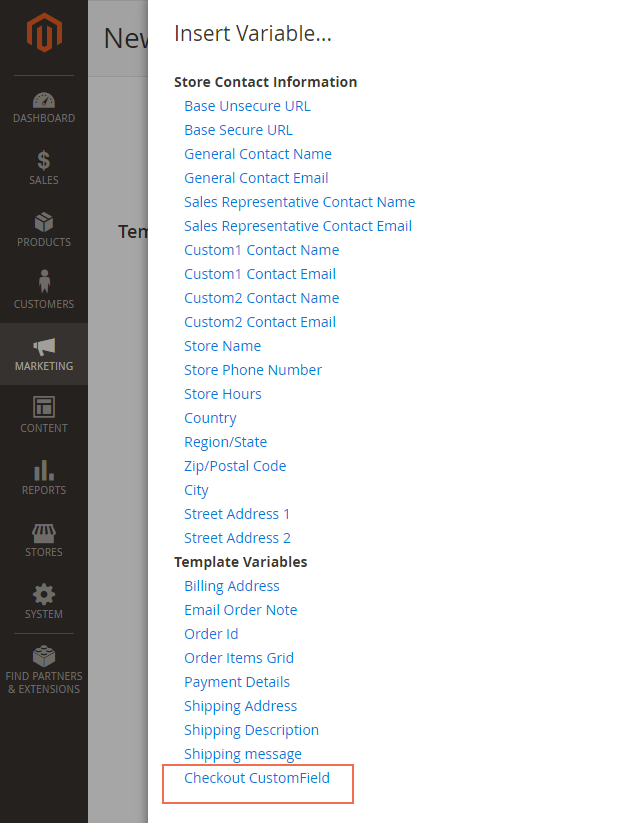
After loading the default template, in Template Information, click Insert Variable.
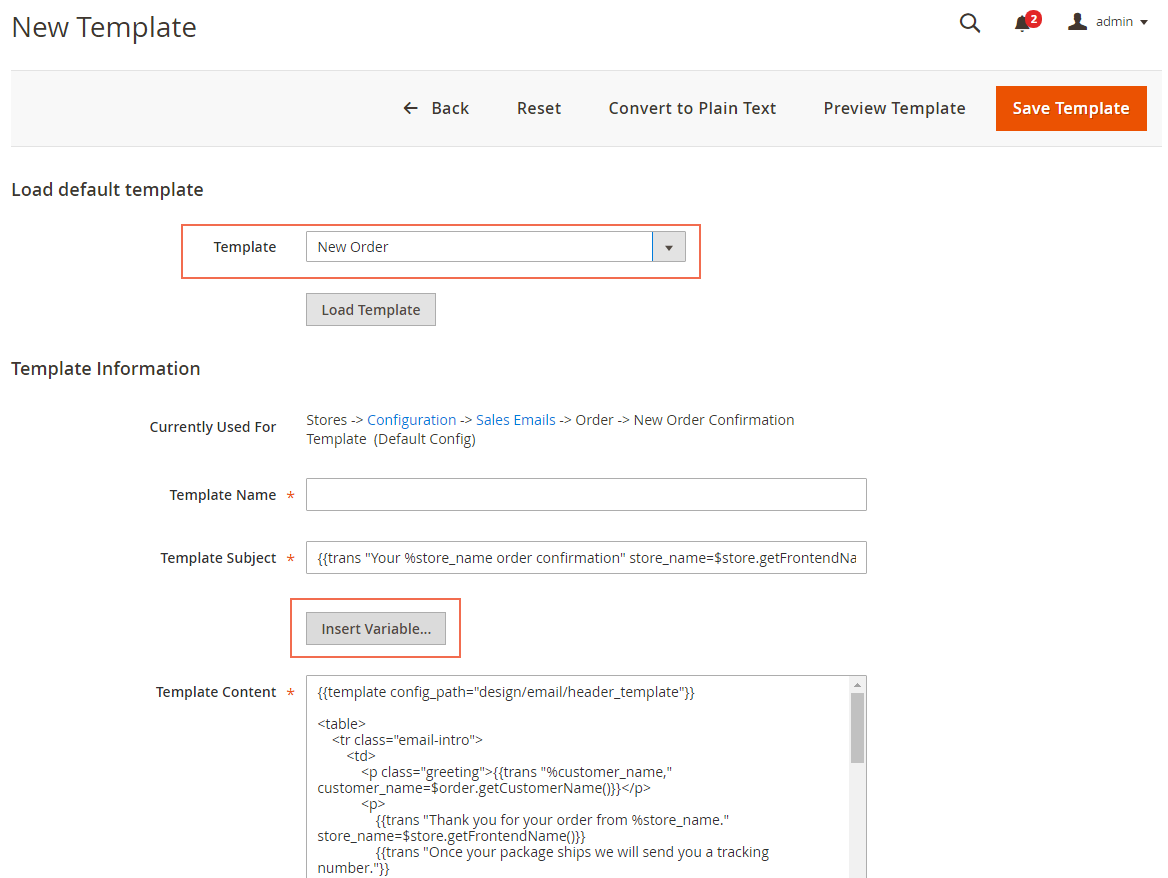
Add the variable Checkout Custom Field to any place in the template content, then click Save Template.
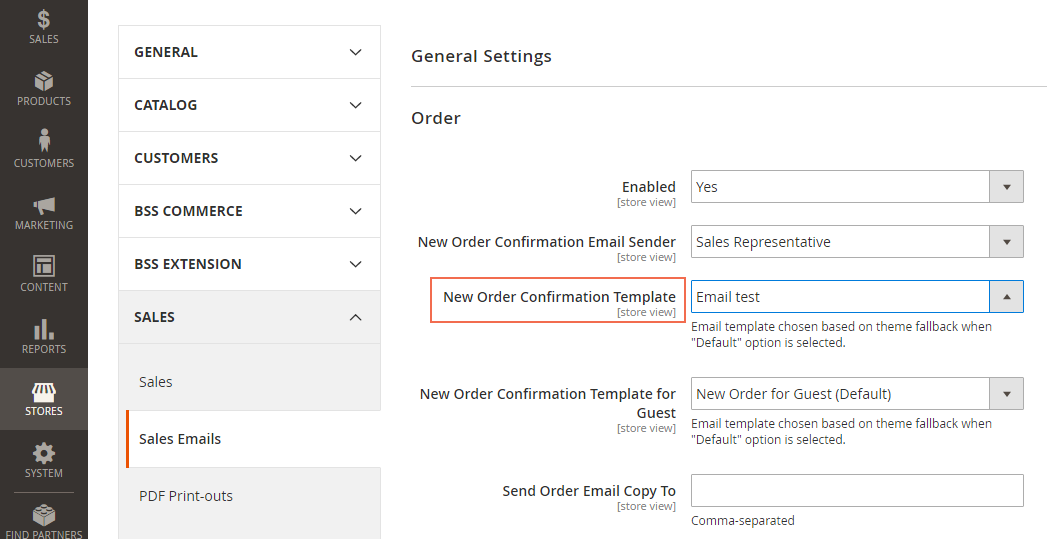
Then go to Stores ⇒ Configuration ⇒ Sales ⇒ Sales Emails.
In Order New Order Confirmation Email Template, choose Email template you have just created.
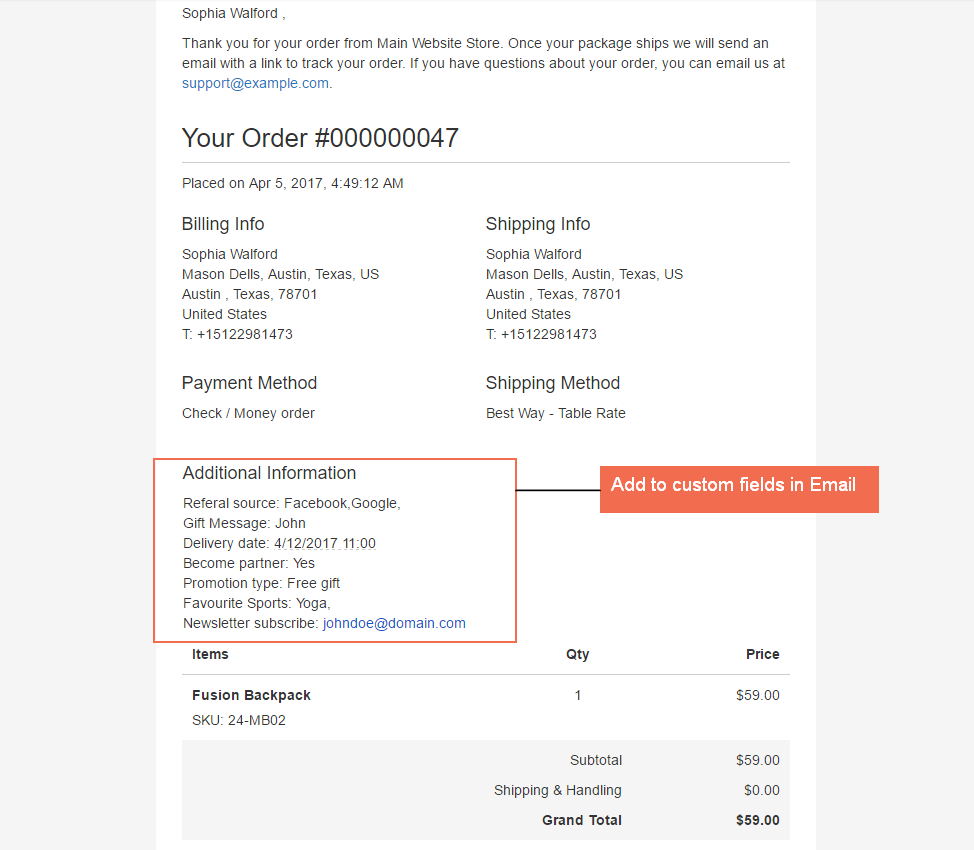
When you send an email to the customer using the new template that has been created, the custom field value will be included.
3. API Support
We provide you BSS's list of GraphQL & REST API that our Magento 2 xxx extension supports.
3.1 GraphQL API
Check all GraphQL API support here.
3.2 REST API
Check all REST API support here.
*Note: Restful API support is included in the main module package (from Checkout Custom Field v1.2.5).