1. Why You Should Upgrade to PLUS Version?
With the FREE plan, you can only require visitors to log in to access some page types, which is still limited.
In the Pro version, we allow creating multiple Force Login or Passcode rules to log specific pages. However, every visitor can create an account and view the page.
If you want to better manage the access, you should upgrade to the Plus plan ($10/mon) to:
- Disable registration form. Visitors have to contact you to create the account.
- Or, still enable the registration form but choose to grant the access for specific customer tags. Visitors also have to contact you to have the tags added.
In the Plus plan, you can also hide prices for all products and from non-logged-in customers.
2. Enable the app
In order to make the app work, you should go to Dashboard and enable the features you want to use.

2.1. Force Login Rule
The Force Login rule means non-logged-in customers will have to create an account and log in to see the content.
On the left panel, choose Force Login > FL Rules > Create rule.
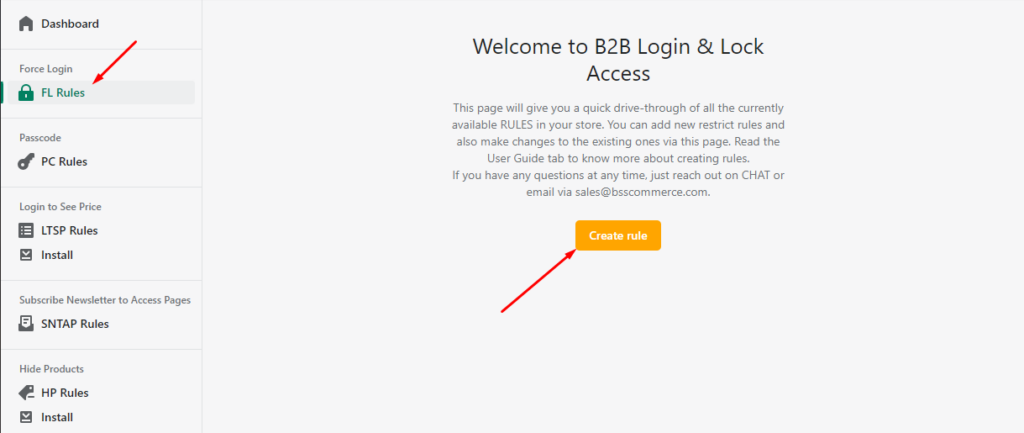
The setting is extremely easy to follow:
2.1.1. Enable the rule

The priority will be considered when there are duplicated rules. 0 is the highest priority.
2.1.2. Set Rule setup

Instead of showing the pages' content, it will show the message and the form set as above.
You can choose among three options available:
- Custom content message
- Shopify Default Login Form
- Custom content message and Login form (recommended).
We would recommend the last option since you can show the Login form directly to customers and set up the redirection after they log in successfully:
- Account Dashboard - My Account Page of Shopify Default
- Custom Page - a specific URL path. For example: /collections/all
- Restricted Page - the locked page the visitors are trying to access.
2.1.3. Choose Customers To Grant The Access
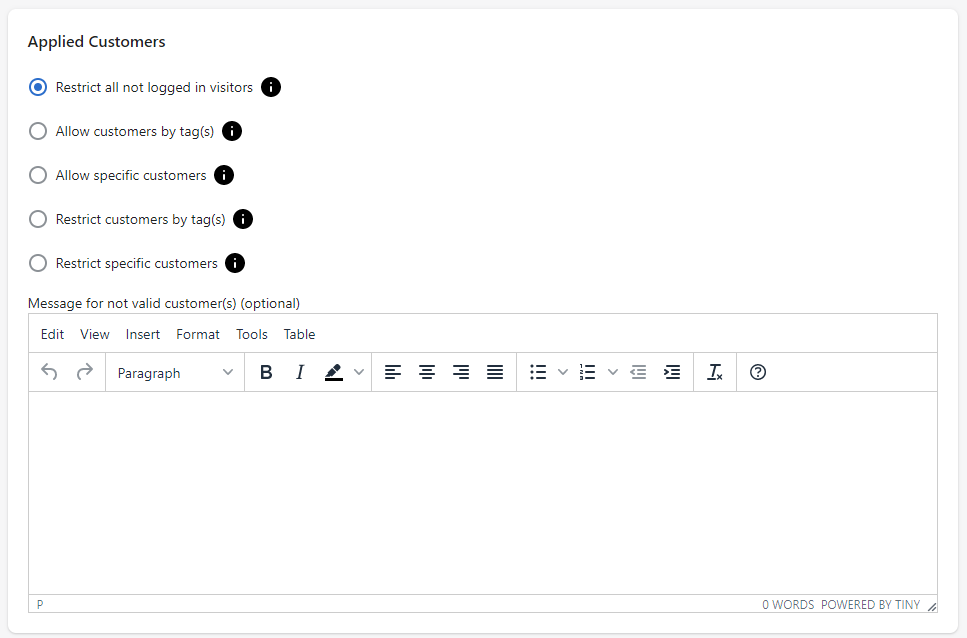
You can choose specific customers to grant and prevent access.
- Restrict all not logged in visitors: Any logged-in customers can see the pages' content.
- Allow customer by tag(s): Only chosen customer tags can login and see the pages' content.
- Allow specific customers: Only chosen customers can login and see the pages' content.
- Restrict customers by tag(s): Chosen customer tags and non-logged-in customers can't see the pages' content
- Restrict specific customers: Chosen customers (search by emails) and non-logged-in customers can't see the pages' content.
2.1.4. Choose Specific Pages to Lock
Multiple selections are allowed.

2.1.5. ADVANCED Settings

- Also, you can set up a period to automatically enable or disable the rule.
- Hide Header and Footer if you do not want non-targeted customers to access links on Header, Menu, and Footer.
2.1.6. Frontend Display

2.2. Disable Registration Form
Go to the app and scroll down to the bottom of the left panel.
Select Setting > General Config > Disable Registration Form.
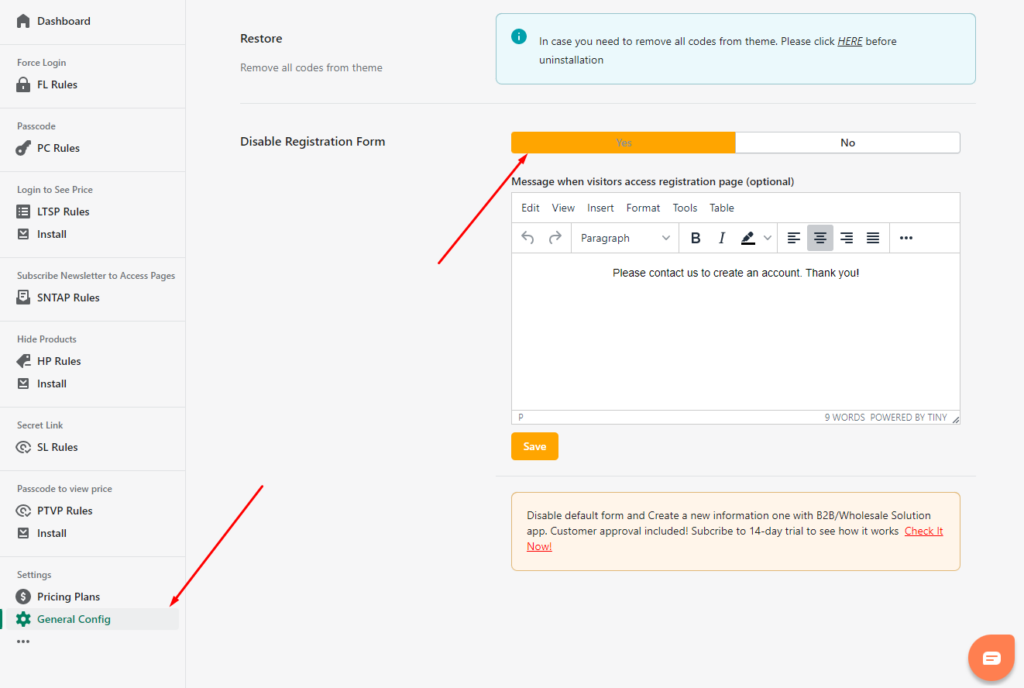
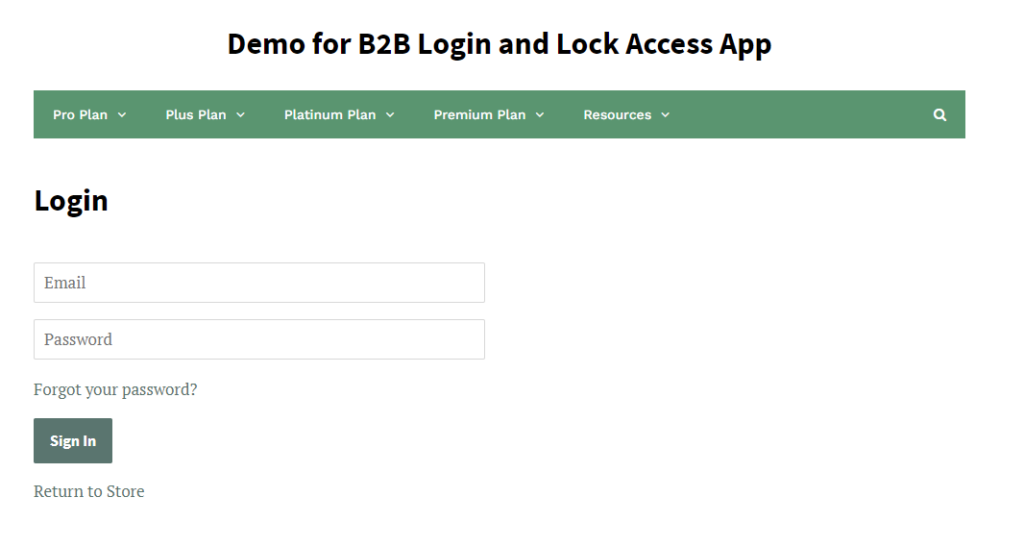
Set the function to Yes and the Create an Account will be hidden under the Login form:
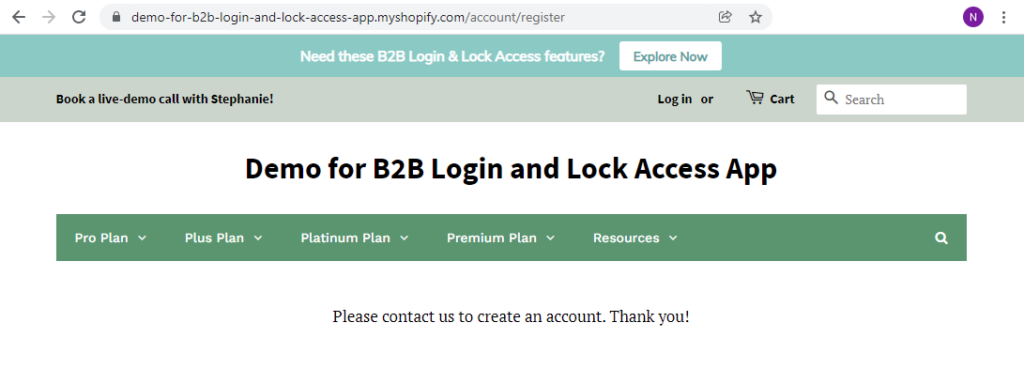
And when visitors go directly to the Registration Page /account/register they will see the message.
2.3. Passcode Rule

Instead of requiring customers to create an account, you can quickly send them passcodes. That way, you can decide who to send the passcode to access the pages.
On the left panel, choose Passcode > PC Rules > Create rule.
The setting is extremely easy to follow:
2.3.1. Enable the rule

The priority will be considered when there are duplicated rules. 0 is the highest priority.
2.3.2. Set Rule setup

Enter the passcode and message to inform visitors about the passcode requirement.
Multiple passcodes are allowed in this plan.
Read more:
2.3.3. Choose Customers To Require The Passcodes

- Restrict all visitors: All customers will have to enter the passcode to see the pages.
- Allow customer by tag(s): Customers with the tags can see the pages without entering the passwords.
- Restrict customers by tag(s): Customers with the tags and non-logged-in customers will have to enter the passwords to see the pages.
- Restrict specific customers: Specific customers will have to enter the passwords to see the pages.
2.3.4. Choose Specific Pages to Lock
Multiple selections are allowed.

2.3.5. ADVANCED Settings

- Also, you can set up a period to automatically enable or disable the rule.
- Hide Header and Footer if you do not want non-targetted customers to access links on Header, Menu, and Footer.
2.3.6. Frontend Display

2.4. Login to See Prices
2.4.1. Install the function
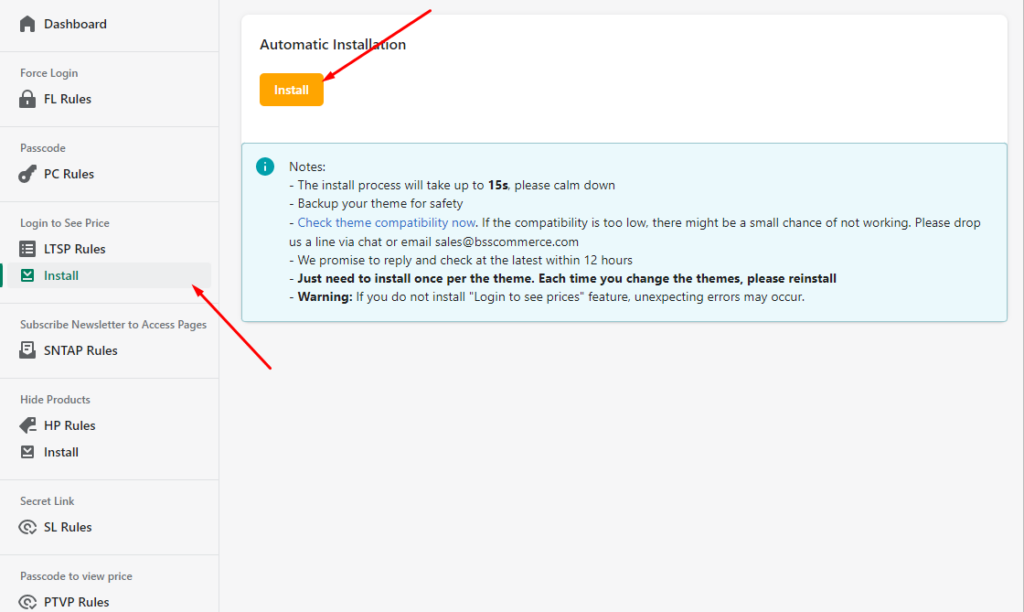
You have to install the function into your current theme to make sure that all settings work well.
If you change your theme, kindly re-install the function in the new theme.
Contact us at sales@bsscommerce.com if you already install the function and set up the rules correctly but the prices are still showing.
2.4.2. Enable The Rule
Create the rule

You should go to Login to See Price > LTSP Rules > Create rule

The priority will be considered when there are duplicated rules. 0 is the highest priority.
2.4.3. Set Up The Rule Type

Under rule setup, choose:
- Hide Prices and Hide Add to Cart button
- Show Prices and Hide Add to Cart button
Show the message in the place of Price or Add to Cart button.
Contact us at sales@bsscommerce.com if you want to add the style to the message.
2.4.4. Choose The Customers to See Prices

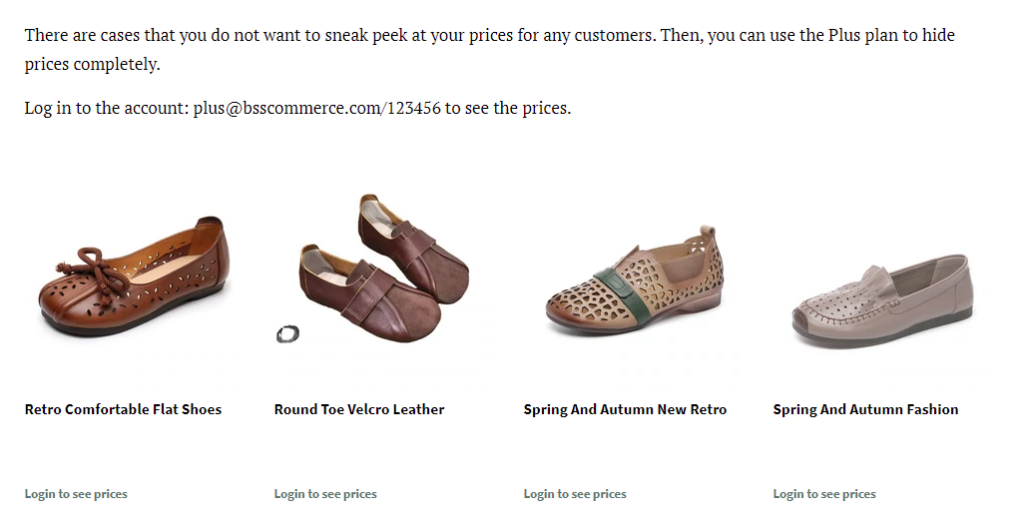
In the Plus plan, you can only hide the prices from all customers or from non-logged-in customers.
Update to the Platinum Plan to:
- Allow customer by tag(s): Customers with the tags can login and see prices/Add to Cart button
- Restrict customers by tag(s): Customers with the tags and non-logged-in customers cannot see the prices/Add to Cart butcannot see the prices/Add to Cart button
2.4.5. Hide Prices/Add To Cart from aLL nON-lOGGED-IN cUSTOMERS

In the Plus plan, you can only hide prices/add to cart button of all products.
Upgrade to the Platinum Plan ($25/mon) if you want to hide prices from specific products based on titles/collections/tags.
2.4.6. ADVANCED Settings

- Also, you can set up a period to automatically enable or disable the rule.
2.4.7. Frontend Display
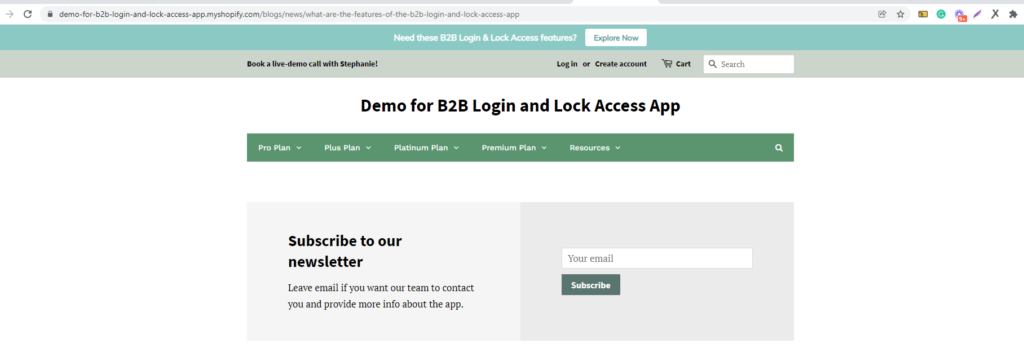
2.5. Subscribe Newsletter To Access Pages
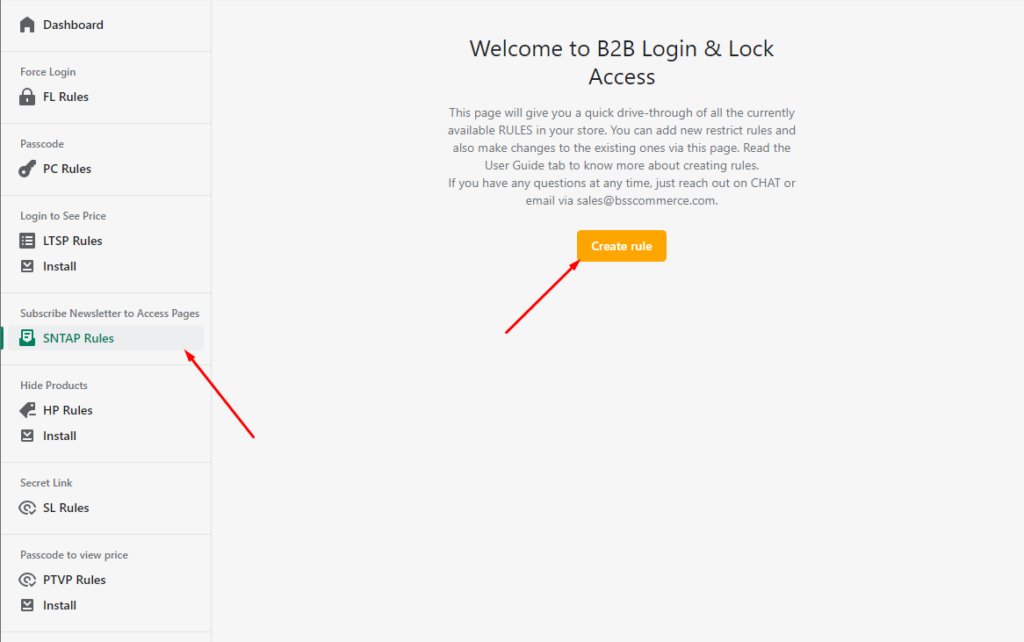
This rule is recommended if you want to collect email for marketing strategies and early access.
2.5.1. Enable the rule

The priority will be considered when there are duplicated rules. 0 is the highest priority.
2.5.2. ChooSe Customers To See Pages

- All visitors must subscribe to see content: Every visitor has to enter the email to see pages.
- All not-logged-in visitors must subscribe to see content: Only non-logged-in customers have to enter the email to see pages
- All visitors except for these Customers Tags must subscribe to see content: Only customers with specific tags have to enter the email to see pages.
2.5.3. Choose Specific Pages to Lock
Multiple selections are allowed.

2.5.4. ADVANCED Settings

- Also, you can set up a period to automatically enable or disable the rule.
2.5.5 Frontend Display
3. How to Uninstall The PLUS B2B Login Access Management app?
Read this for more information: How to uninstall the app properly without leftover code? - BSS Commerce Wiki
Need help? Please email us at sales@bsscommerce.com or send a message via Live Chat.
In case you plan o build a Shopify website with all of the B2B features, our experts are here to support you. Our Shopify B2B Login Access Management App is also included in our service. Let's see what we can do!

