
1. Overview
Social Login for Magento 2 Extension allows customers to sign through social media accounts like Facebook, Twitter, Google Plus... quickly via Ajax pop-up. They can sign up or login on a site quickly within a few clicks instead of wasting time filling in register or login form. Ajax pop-up is also a method to save up time customers might spend on loading new pages.
2. How Does It Work?
Please go to Store ⇒ Configuration ⇒ BSS COMMERCE ⇒ Ajax Social Login.
2.1. General
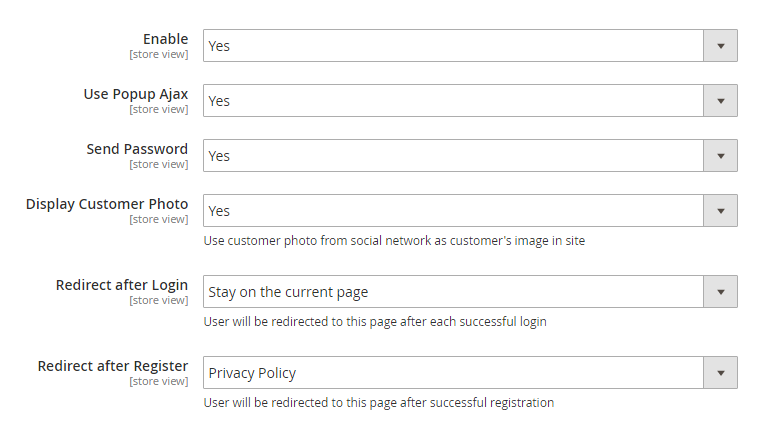
In Enable, choose Yes to enable the extension or No to disable it.
In Use Popup Ajax, choose Yes to enable popup for login and register. Otherwise, choose No to disable it.
In Send Password, choose Yes to send customers an email that contains the password after they login using a social account. The customer then can use their email and password to log in to your site. Choose No to disable it.
In Display Customer Photo, choose Yes to display the customer’s profile photo from the social account they used for signup, or choose No to not display customer’s social photo.
In Redirect after Login, select the page on site or any particular URL you want to redirect after customer login successfully.
In Redirect after Register, select the page on site or any particular URL you want to redirect after customer completed register process.
2.2. Social Button Block
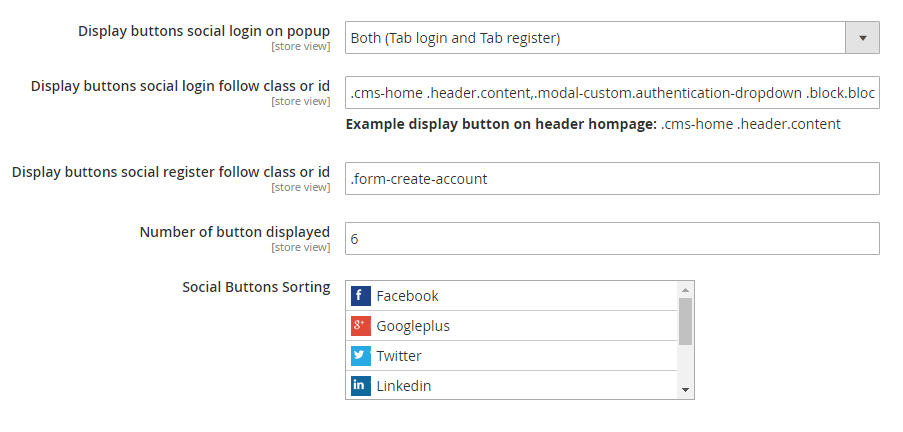
In Display buttons social login on popup, decide to display social buttons on Login tab or Register tab of popup, or place it on both tabs.
In Display buttons social follow class or id, enter class/id to place social button social login on.
In Display buttons social register follow class or id, enter class/id to place social button social register on.
In Number of button displayed, set the restriction of number of buttons to display on social login block.
In Social Button Sorting, decide the arrangement of buttons in social login block.
2.3. ReCaptcha
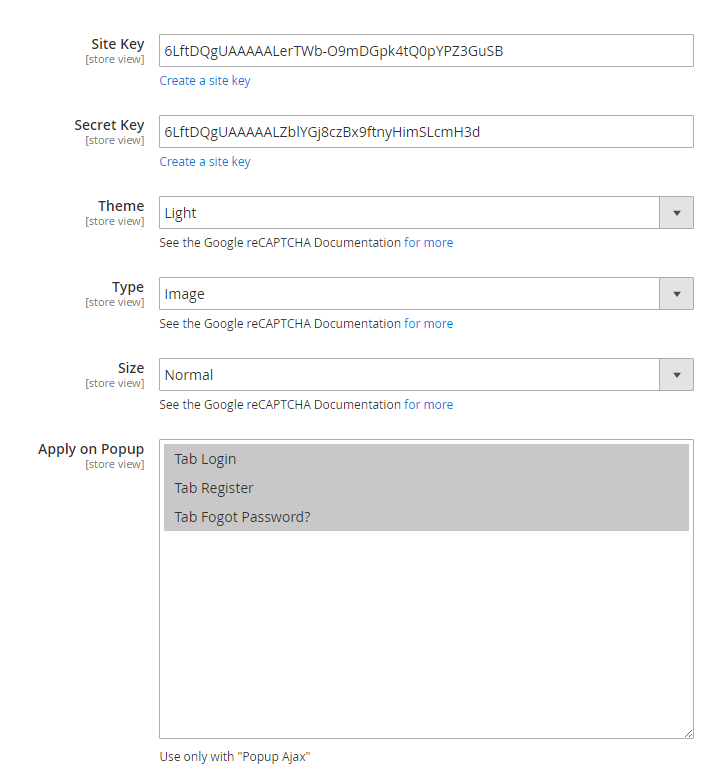
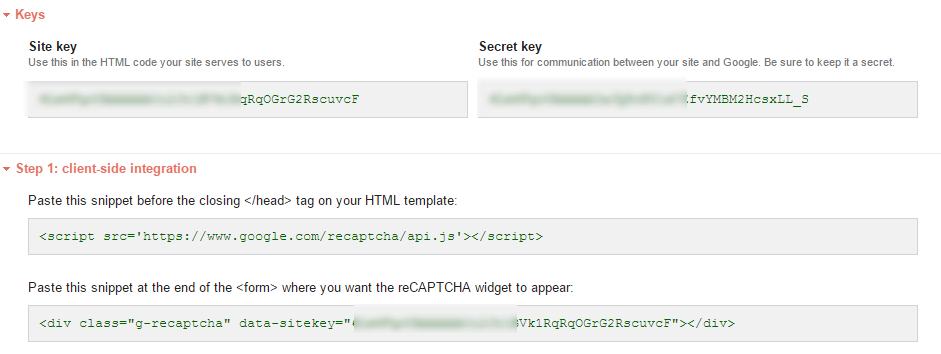
In Site Key and Secret Key, click “Create a site key” and register reCaptcha.
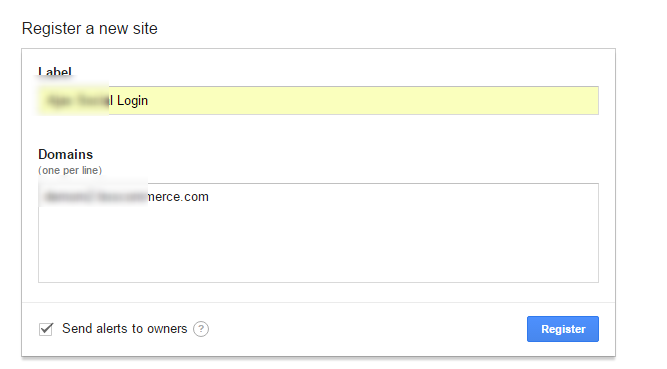
After registering, you will get the Site key and Secret key as below:
In Theme, choose the theme of reCaptcha between:
Light: 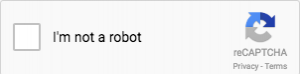
Dark: 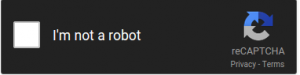
In Type: Choose the type of robot checking between Image and Audio
In Size: Choose the size of reCaptcha widget between Normal and Compact.
In Popup Form: Choose the form(s) of popup on site to place the reCaptcha widget. A form of popup includes Login, Register and Forgot Password?
2.4. Configure specific social account
2.4.1. Facebook
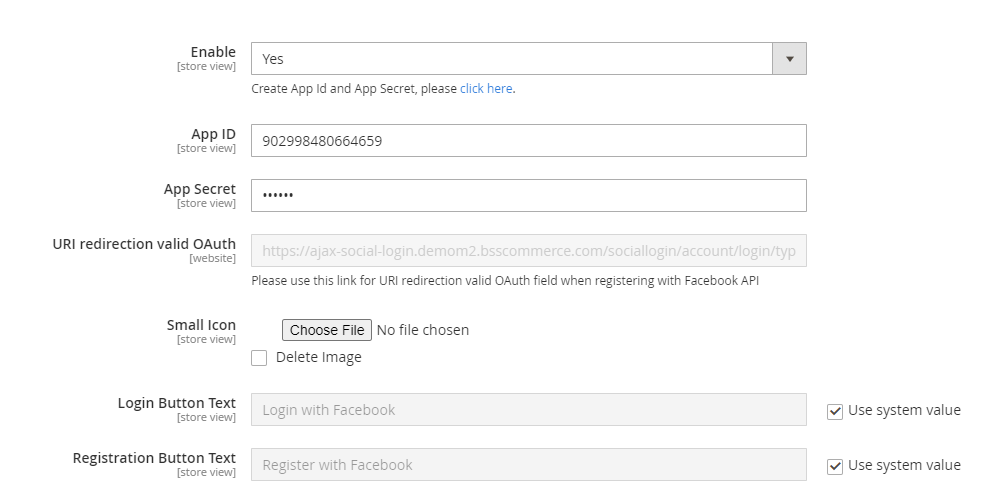
In Enable, choose Yes to enable Facebook account for login and register on the site, or choose No to disable it.
In App ID and App Secret, click on “click here” below Enable dropdown box, you will be redirected to the Meta for developers page.
Log in to your Meta developer account, then follow the steps below:
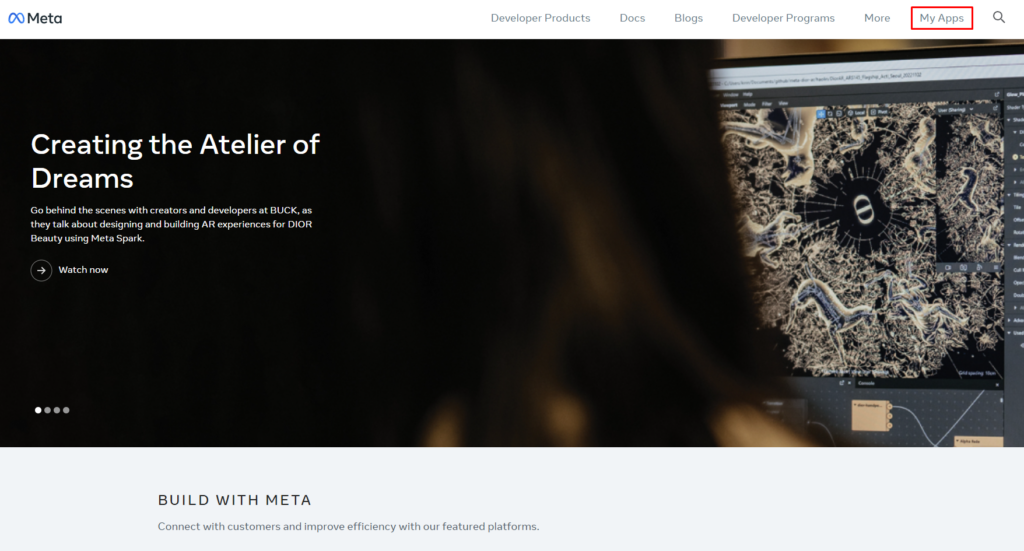
+ Create New App:
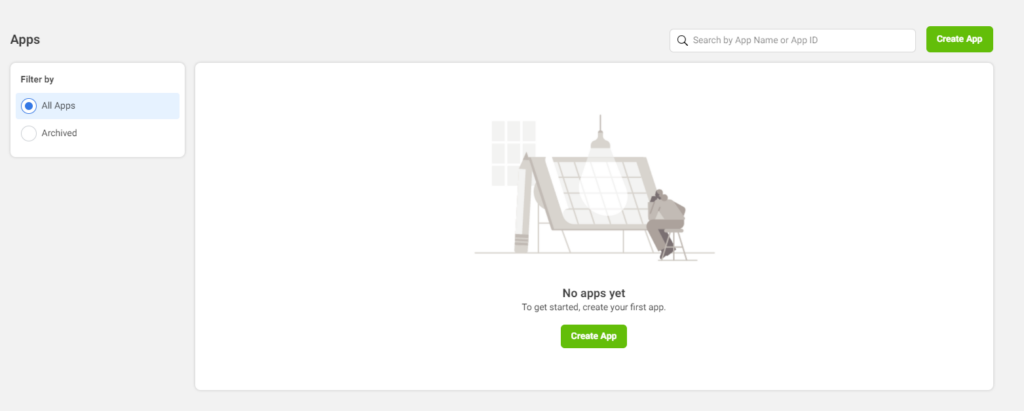
Click on My App (you will only see this option after login).
In the Apps page, click the Create App button.
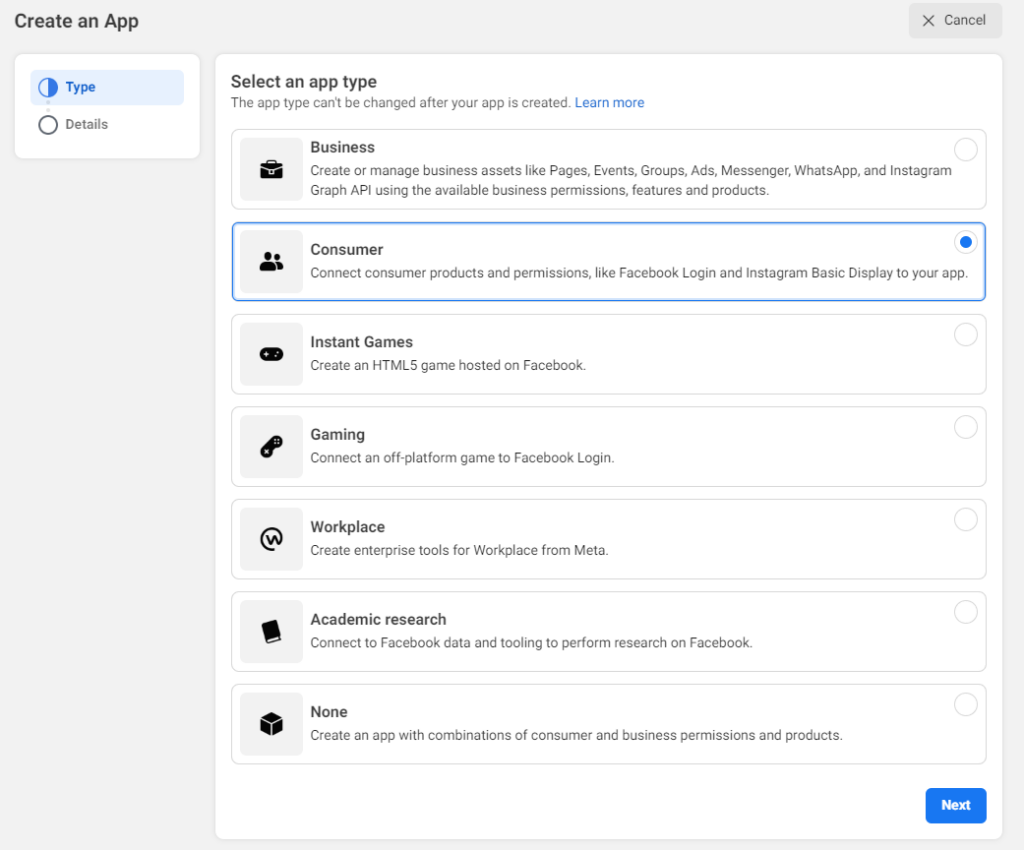
Select the app type as Consumer or None then click Next.
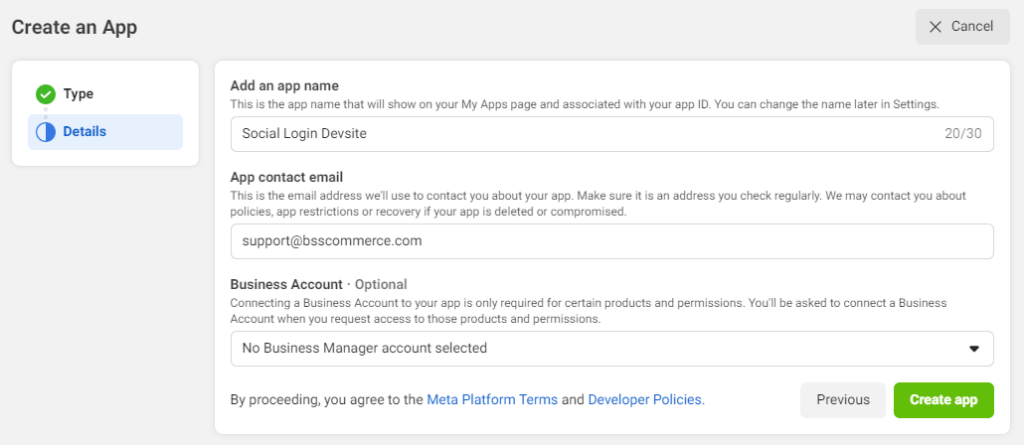
Fill the details of your app then click Create App.
Once you have created the app and are in the App Dashboard, navigate to Settings > Basic.
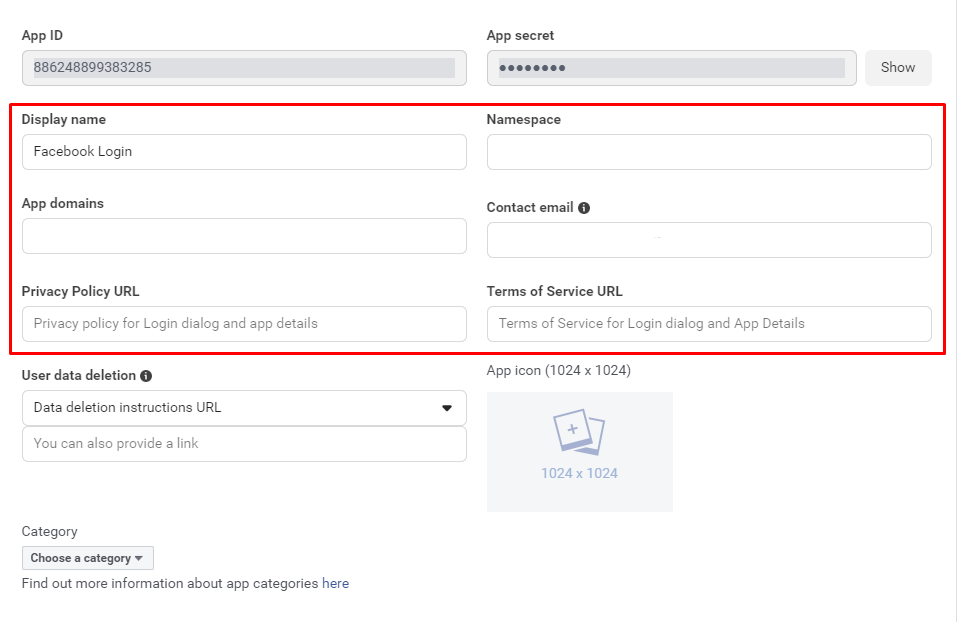
First, fill all 6 fields that we noted in the photo above.
*Note: The Privacy Policy URL field is required to transfer permission of public_profile. In this field, fill the URL of your homepage.
Then, right on top, you will see the App ID and App secret to copy. Go to the module backend tab, copy and paste them then click Save Config.

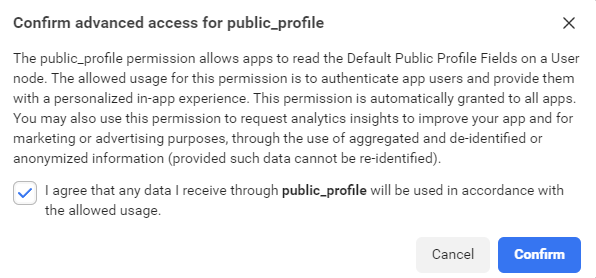
Next, navigate to App Review> Permissions and Features. Then scroll down to the public_profile section and click Get advanced access.

A popup window will appeared. Check the box "I agree" and click Confirm.
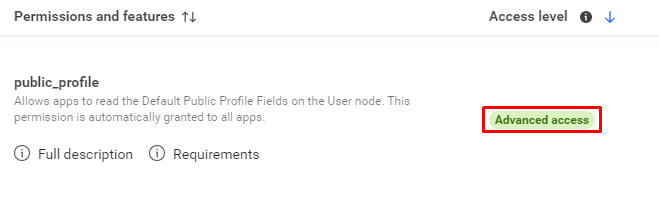
After finish, in the public_profile section, the Access level will shown as Advanced access.
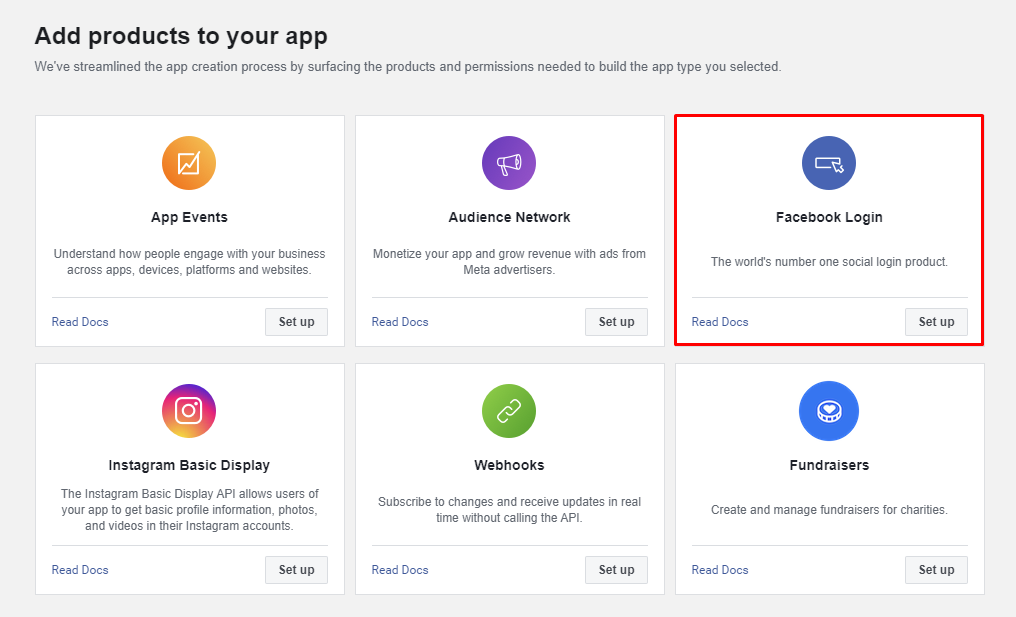
+ Configure Facebook Login:
In the App Dashboard, scroll down to Add products to your app section, locate the Facebook Login product, and click Set Up to add it to your app.
Navigate to Facebook Login > Settings.
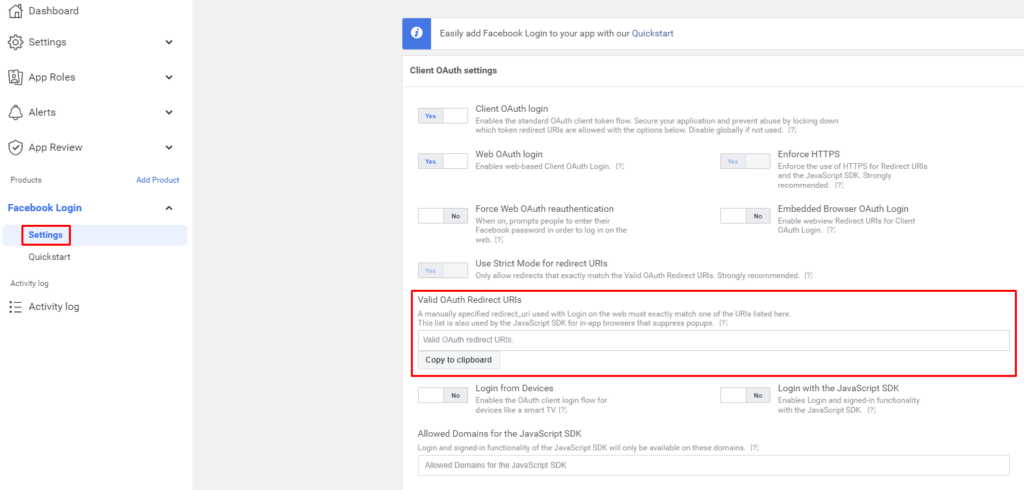
To fill the Valid OAuth Redirect URIs field, copy the URL we provided in the URI redirection valid OAuth field in the module backend.
*Note: Currently, Facebook only supports https URL, they no longer support http URL.

+ Put App Into Public Status:
On the top bar, switch App Mode to Live.

2.4.2. Twitter
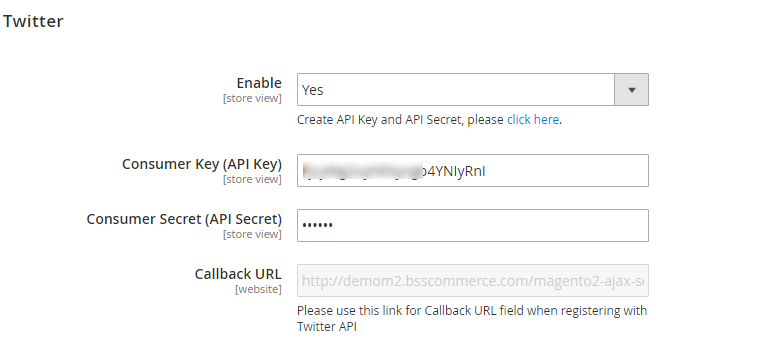
In Enable, choose Yes to enable Twitter account for login and register on the site, or choose No to disable it.
In Consumer Key (API Key) and Consumer Secret (API Secret), click on “click here” below Enable dropdown box, you will be redirected to the Twitter Developer Portal page.
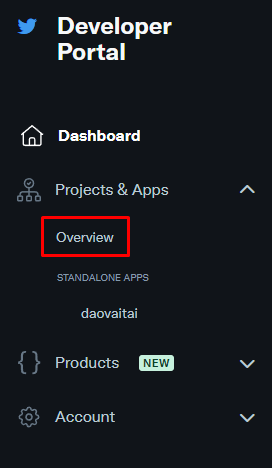
Under Project & App, click on Overview.
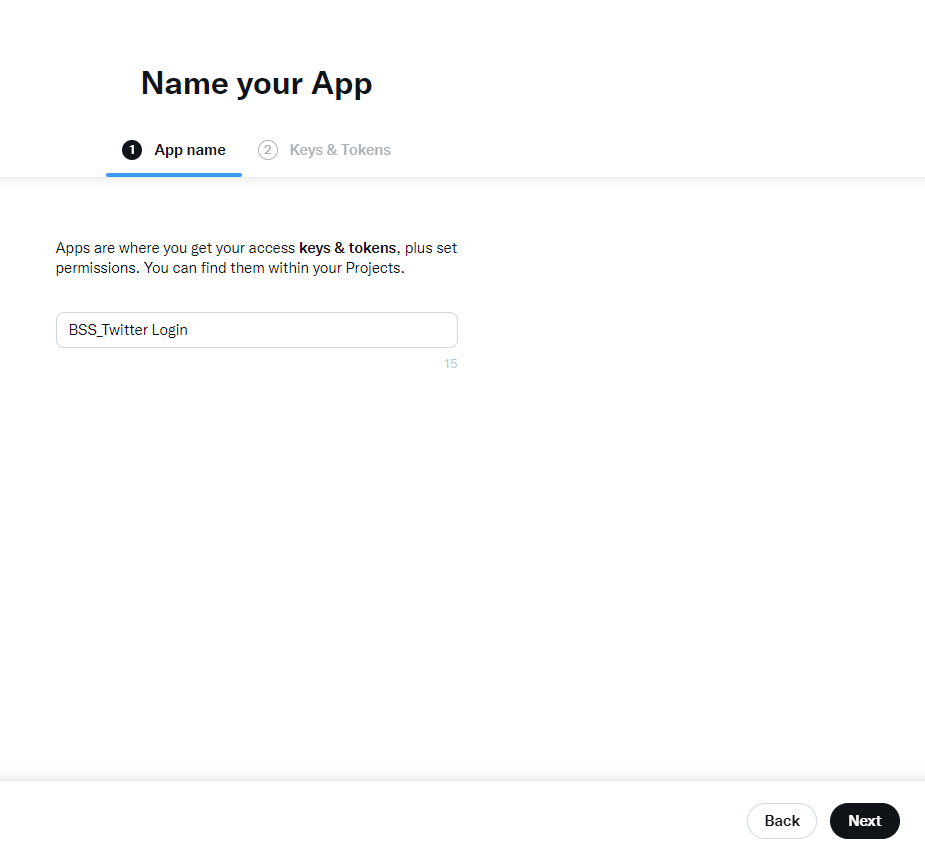
In the Overview page, click Create App.
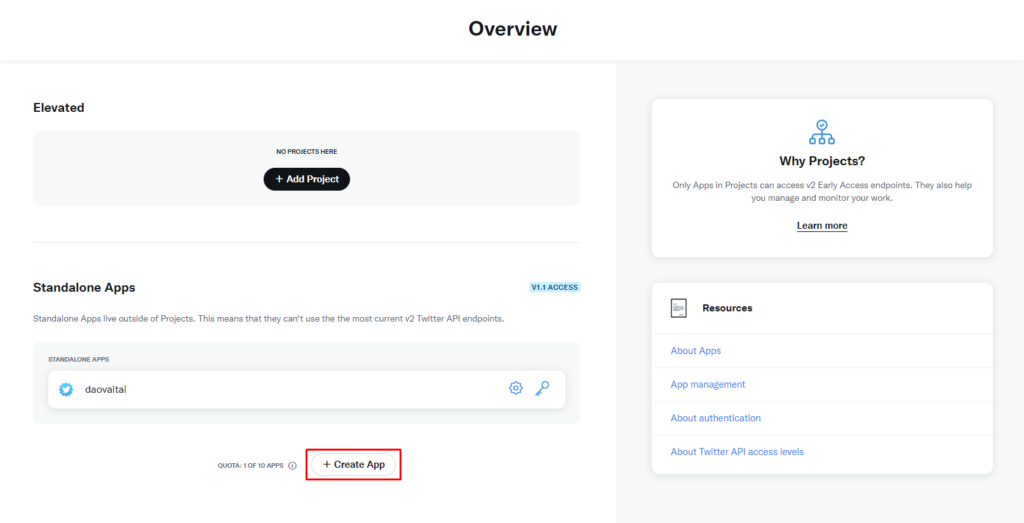
Enter the name of your app.
*Note: Your app's name must be unique.
Then click Next.
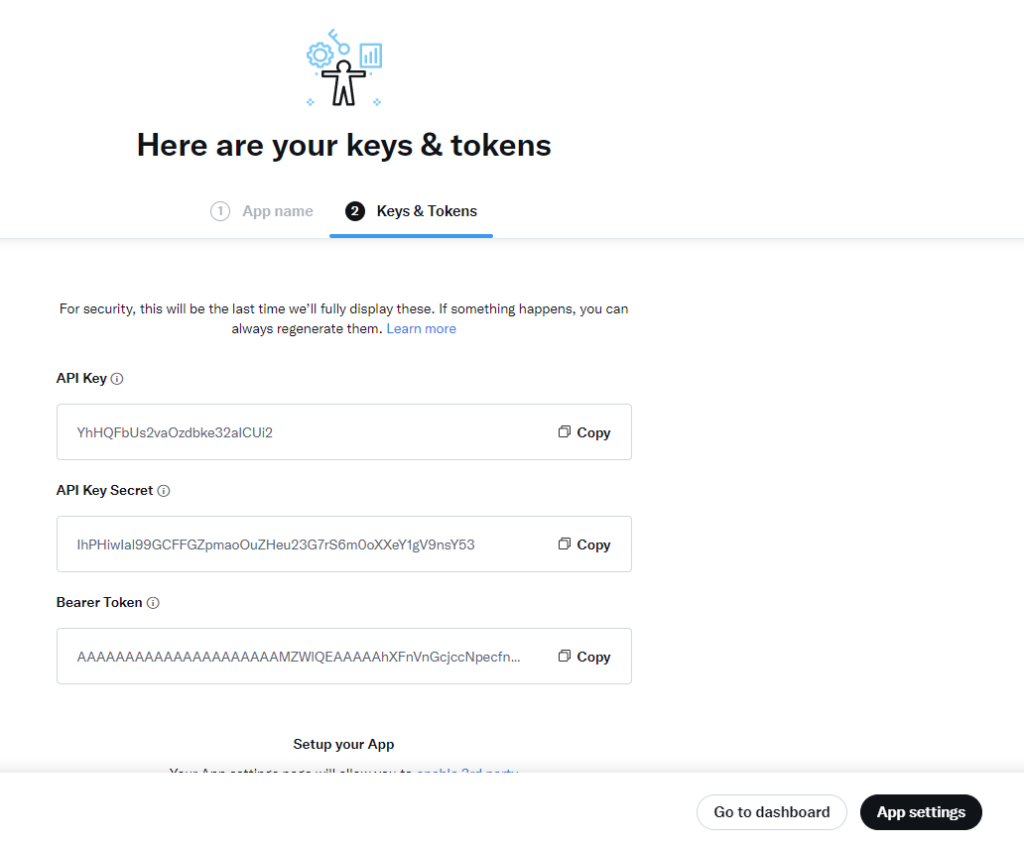
You should save the API Key, API Secret and Bearer Token code somewhere safe.
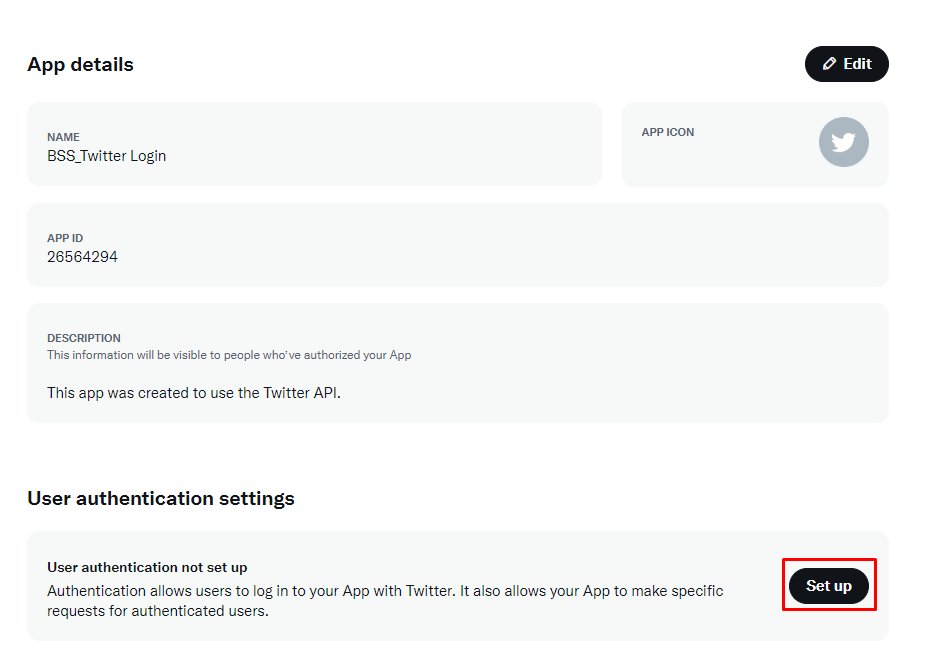
Next, click App Settings.
Under User authentication settings, click Set up.
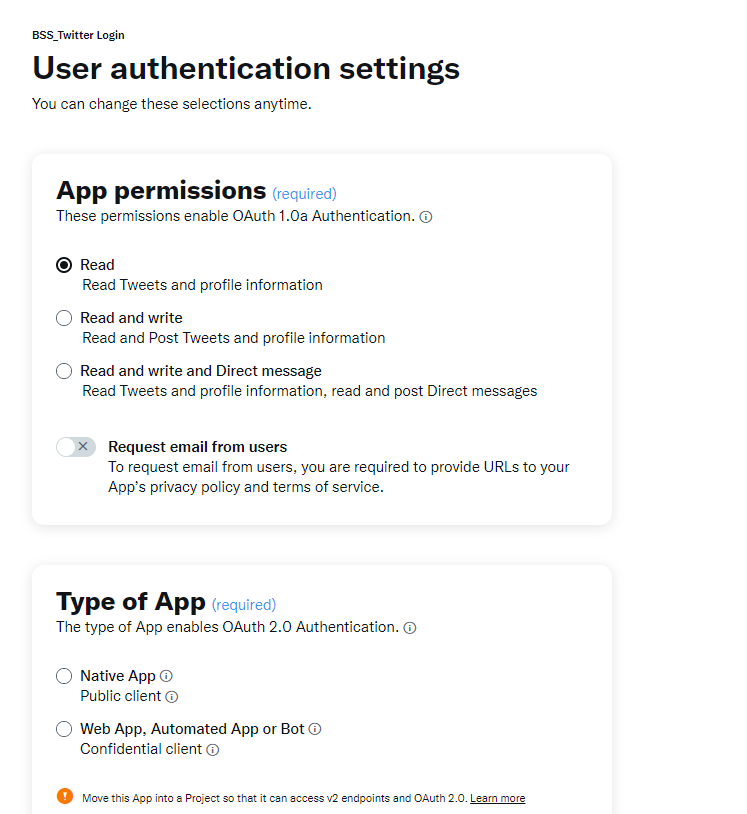
Choose the App permisstions as you want and set Type of App as Web App, Automated App or Bot.
Next, in the App info section.
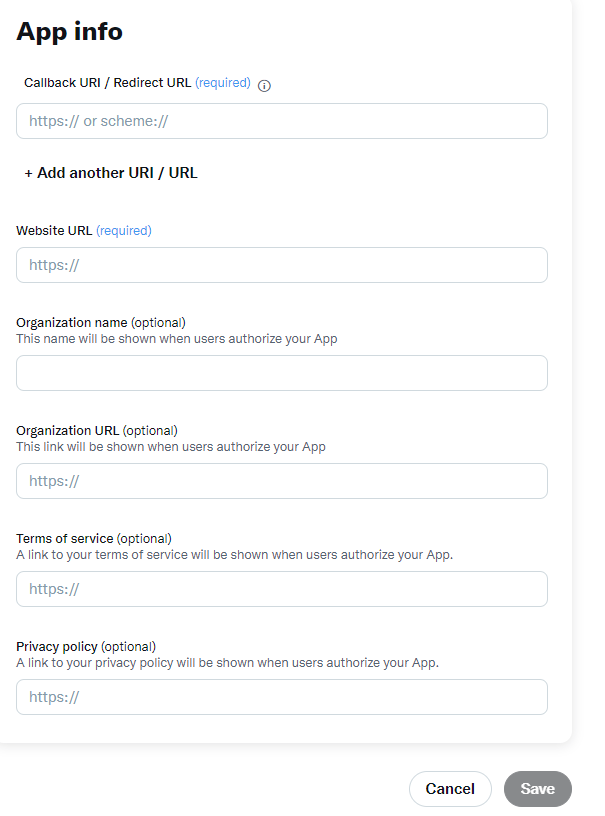
- In Callback URI / Redirect URL: Copy the Callback URL in the module configuration.
- In Website URL: Enter your website URL.
- Other fields are optional, you can fill them or not.
Finally, click Save.
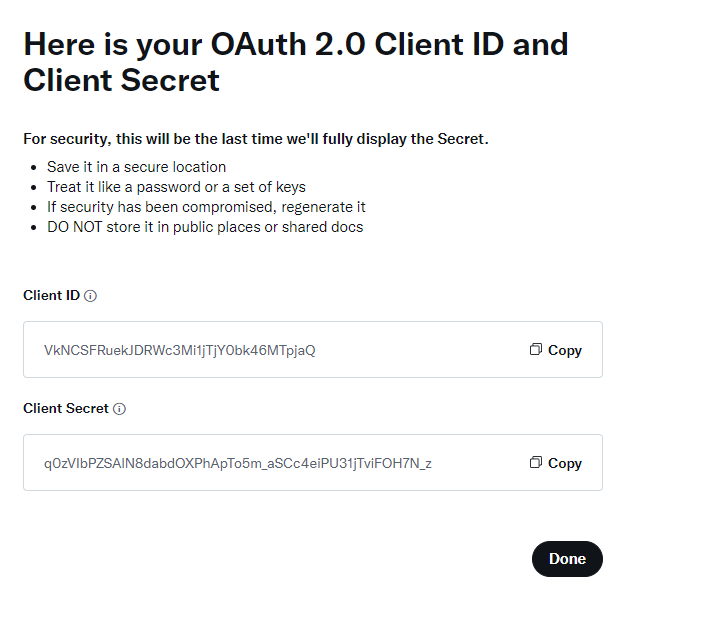
Copy the OAuth 2.0 Client ID on the screen to Consumer Key (API Key) and OAuth 2.0 Client Secret as Consumer Secret (API Secret) in module configuration.
2.4.3. Google
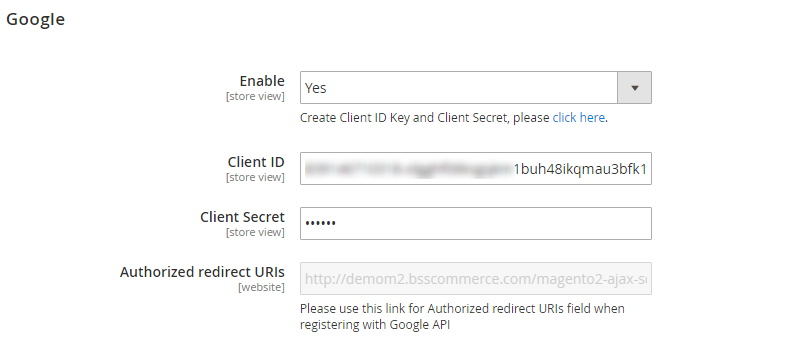
In Enable, choose Yes to enable Google account for login and register on the site, or choose No to disable it.
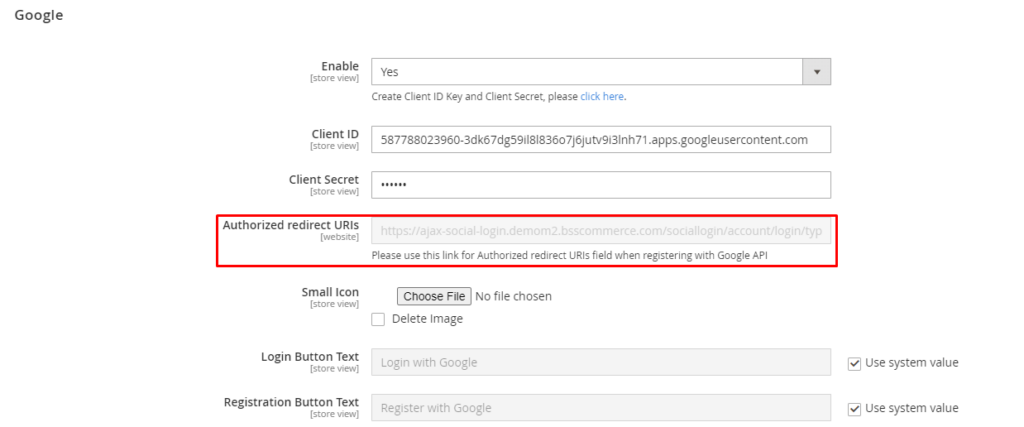
In Client ID and Client Secret, click on “click here” below Enable dropdown box, you will be redirected to the Google Identity page.
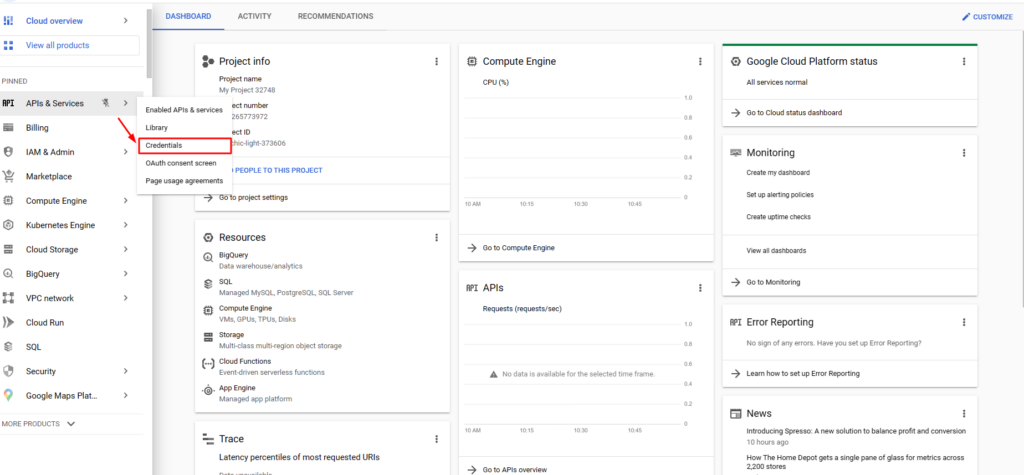
Navigate to APIs & Services > Credentials.
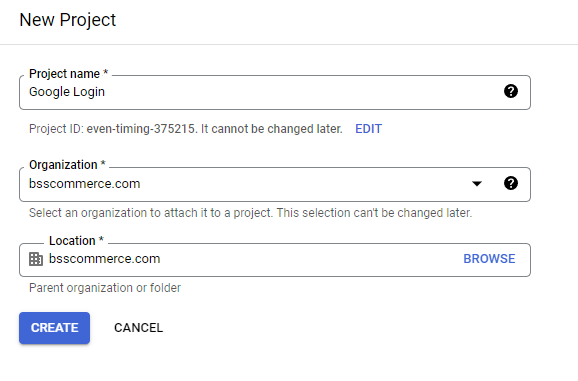
First of all, you need to Create Project.
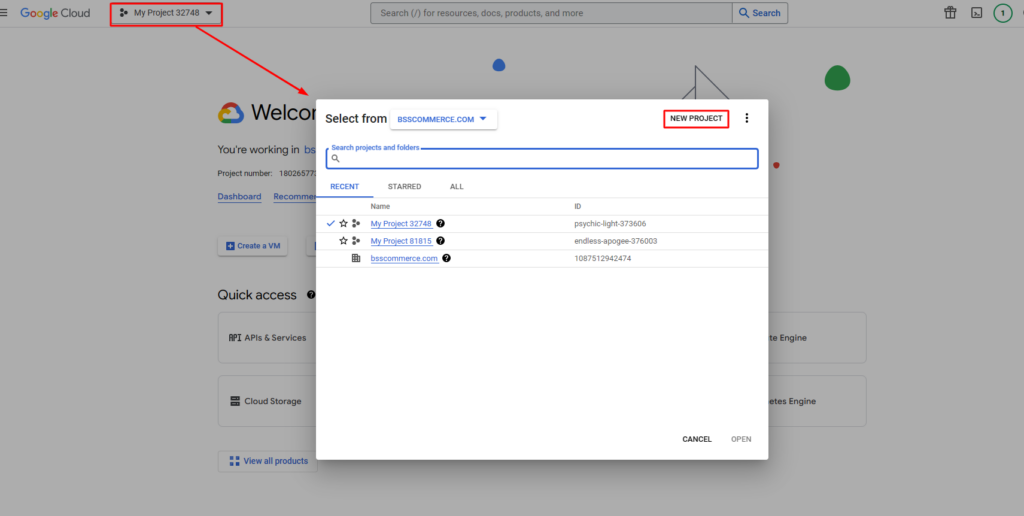
Enter the name of the project, then click Create.
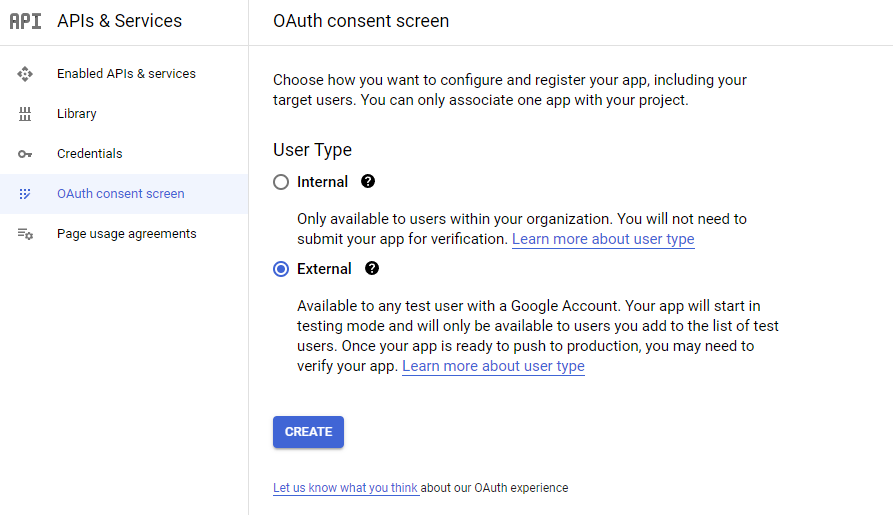
Back to the APIs and Services section, click on OAuth consent screen, choose External and click Next.
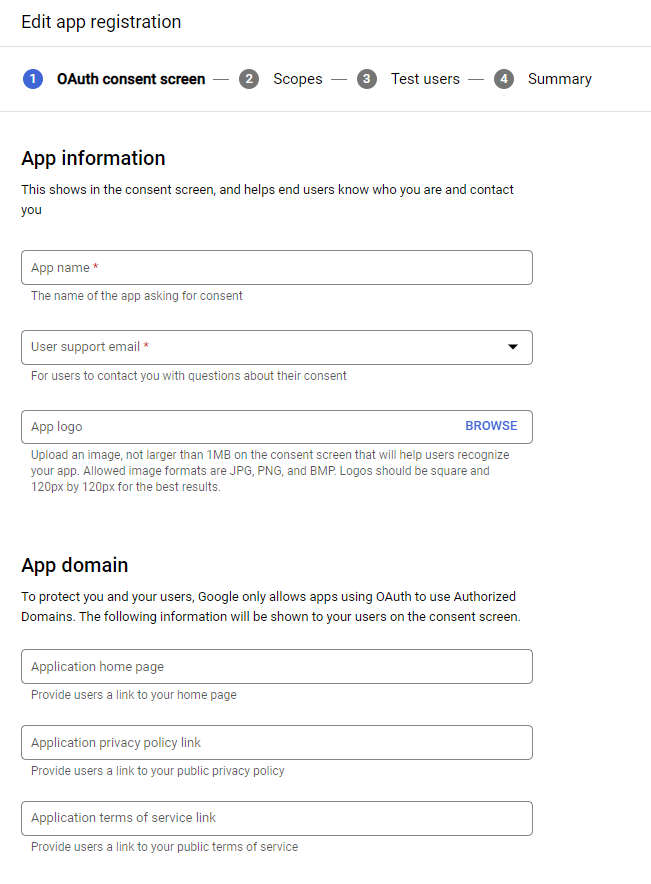
Complete all required fields, then scroll down and click Save and Continue.
Then back to the Credentials section, click Create Credentials > OAuth client ID.
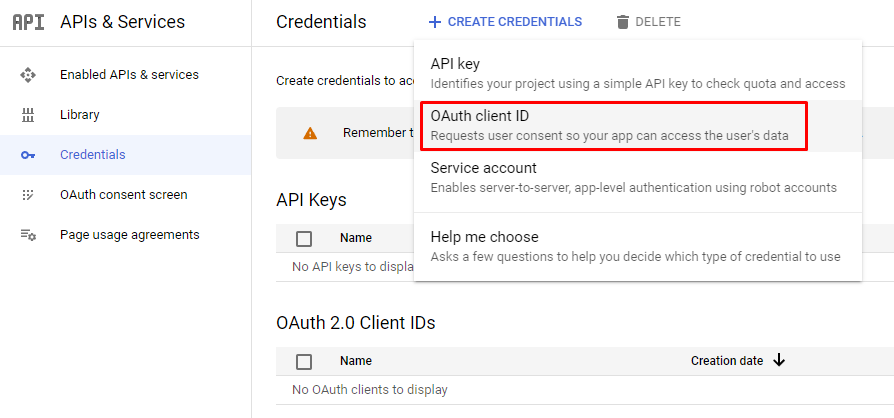
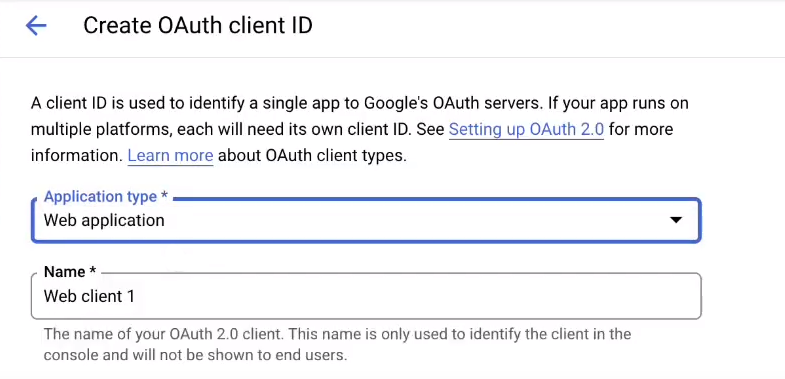
Select the Web application in application type and name your OAuth 2.0 client.
Scroll down and in the Authorized redirect URIs field, copy the Authorized redirect URIs in the module configuration.
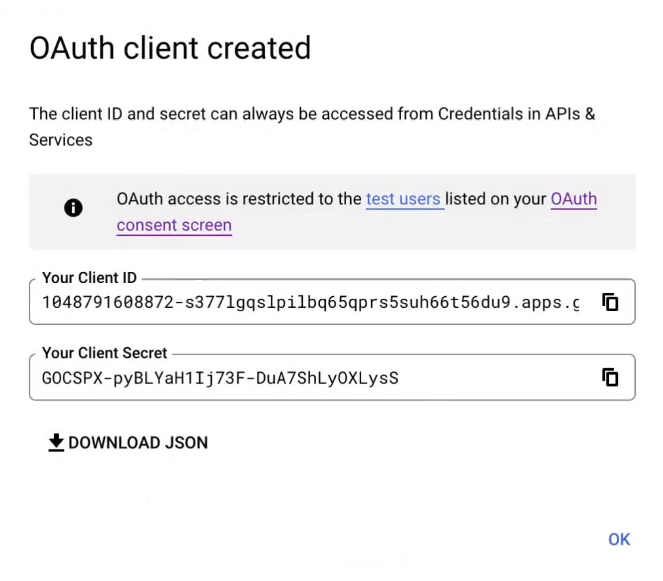
After configuration is complete, you can see the Client ID and Client Secret to copy.
2.4.4. LinkedIn
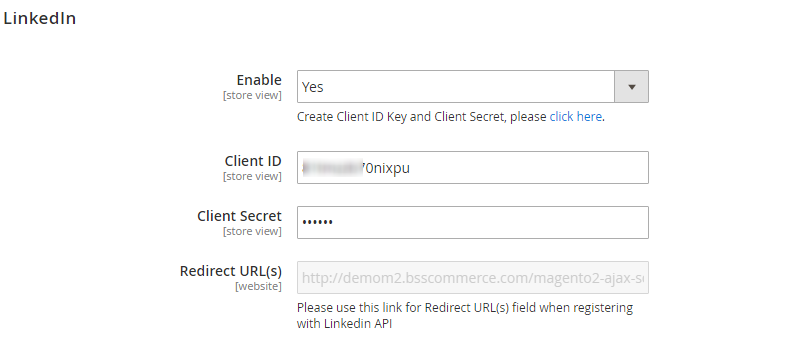
To get Client ID, Client Secret and Redirect URL, please click on "click here" link and follow steps as below:
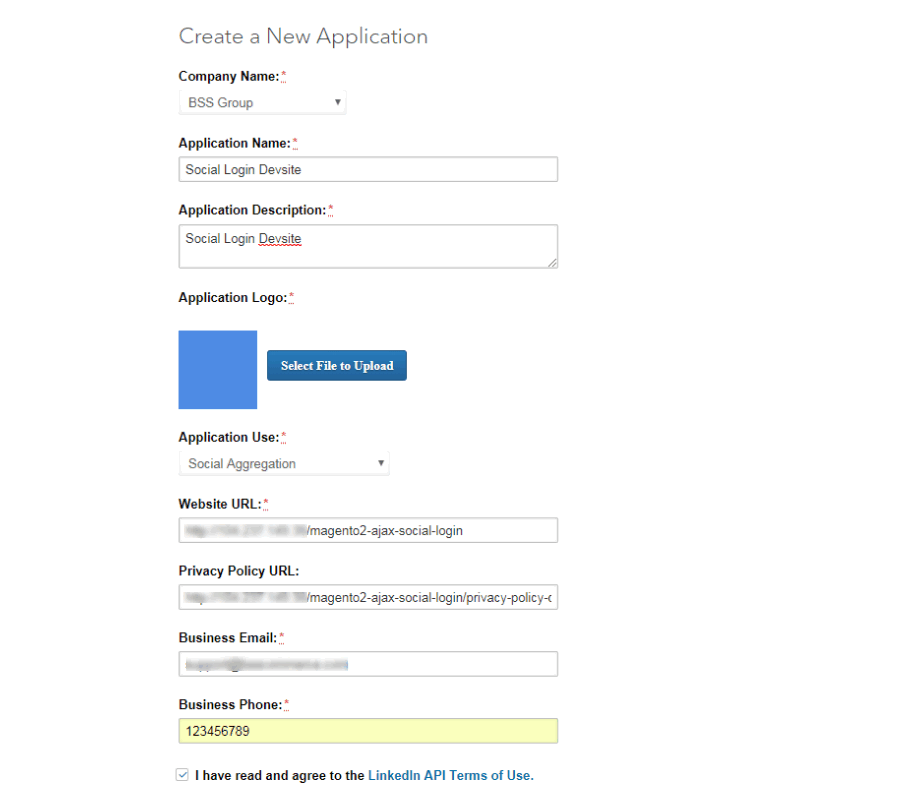
+ Create new application:
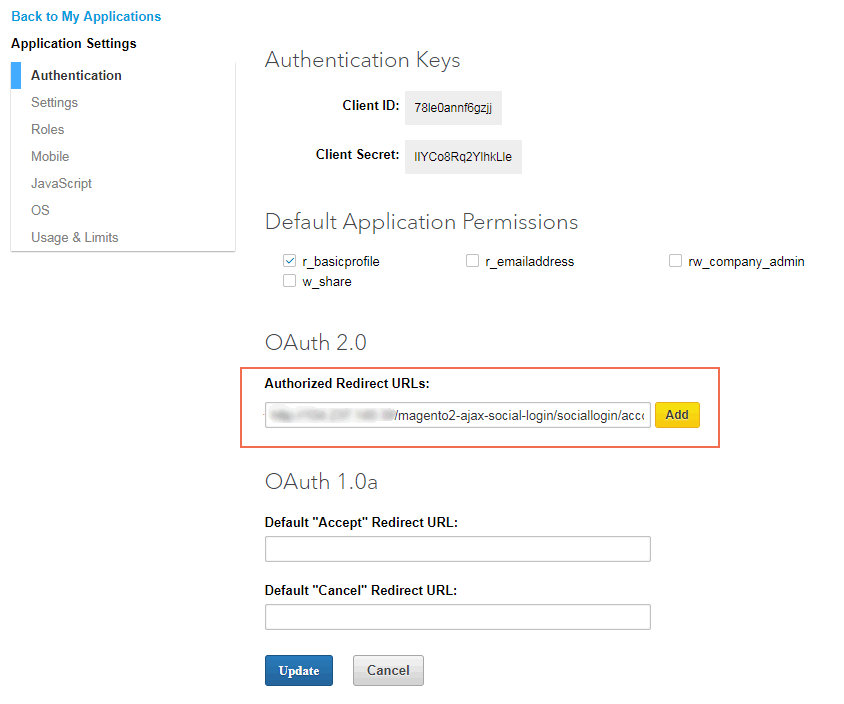
+ Set up Authentication for application: You get Redirect URLs in this step:
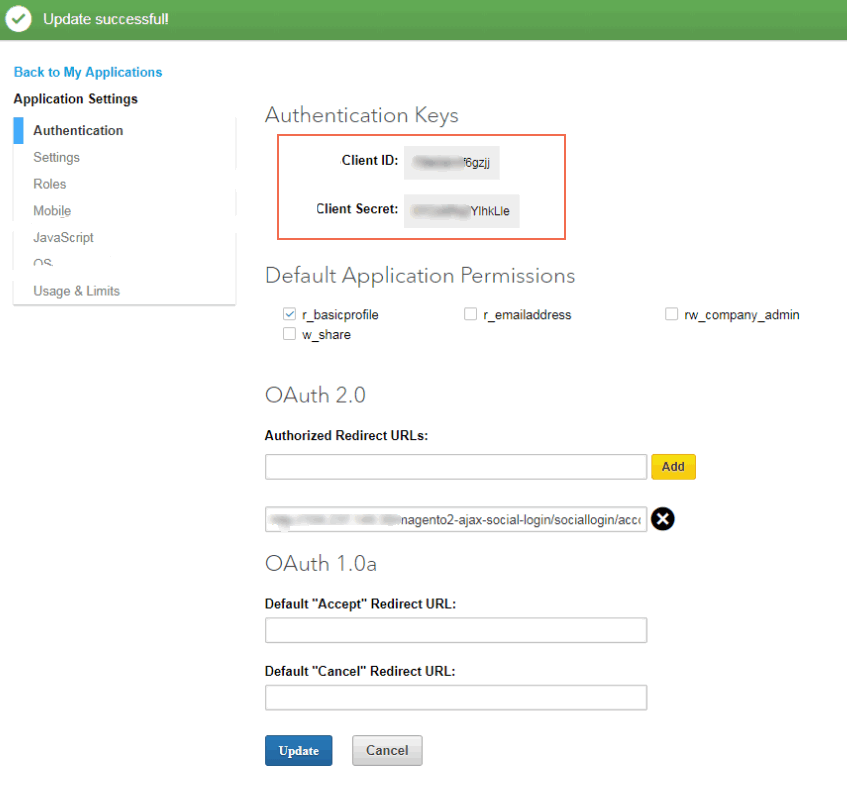
+ Copy Client ID and Client Secret to the configuration:
2.4.5. Window-Live
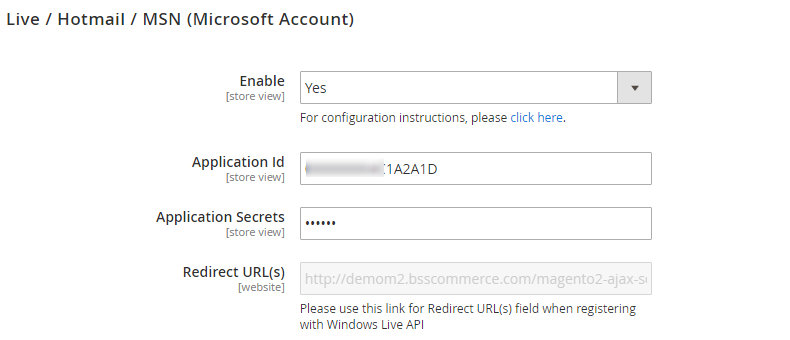
To get Application ID, Application Secret and Redirect URL, please click on "click here" link and follow steps as below:
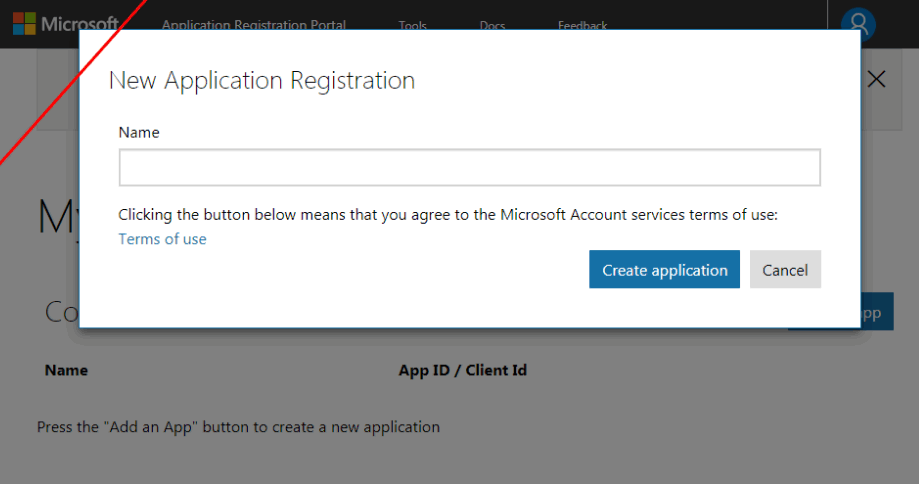
+ Click on "click here" link to be redirected to Microsoft App register page:
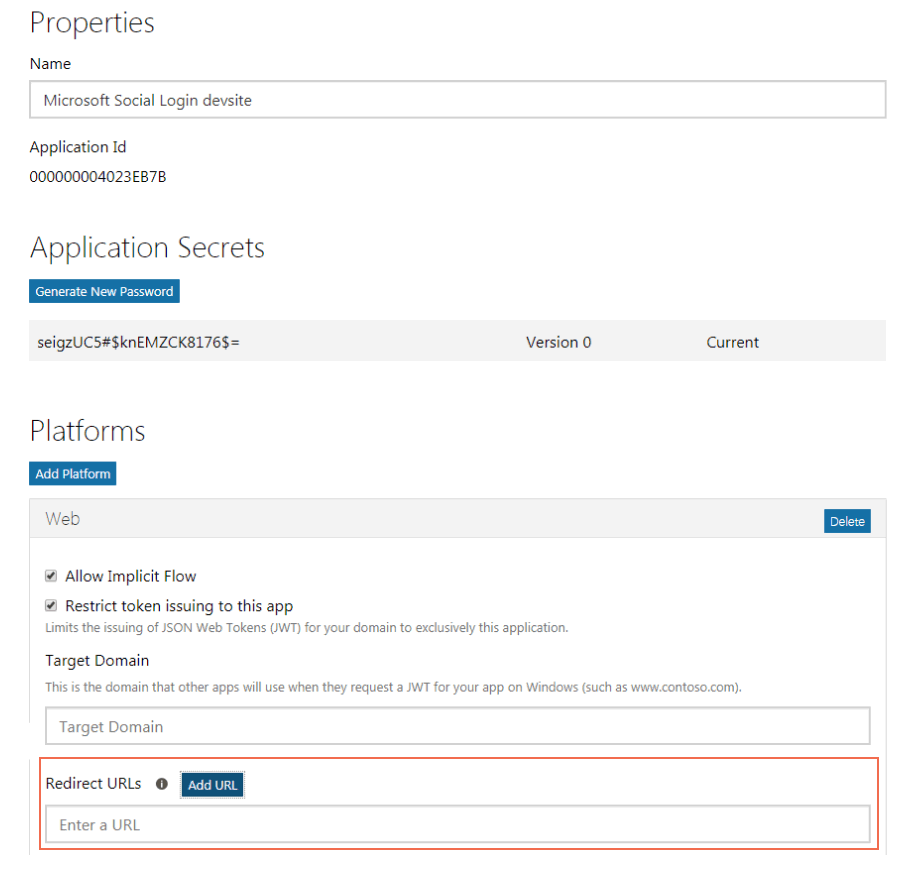
+ Copy & Paste Redirect URL(s) to the app detail page:
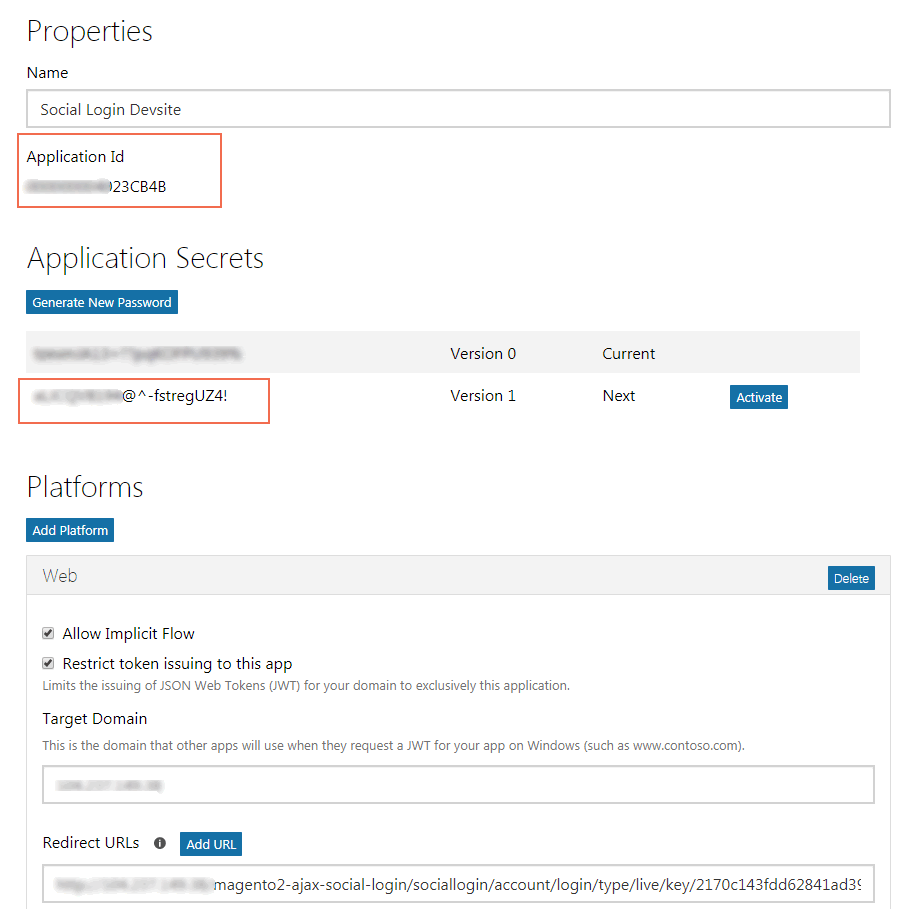
+ Copy & Paste Application Id and Secret to Social Login configuration:
2.4.6. Instagram
In App ID and App Secret, click on “click here” below Enable dropdown box, you will be redirected to the Meta for developers page.
Log in to your Meta developer account, then follow the steps below:
+ Create New App:
Click on My App (you will only see this option after login).
In the Apps page, click the Create App button.
Select the app type as Consumer or None then click Next.
Fill the details of your app then click Create App.
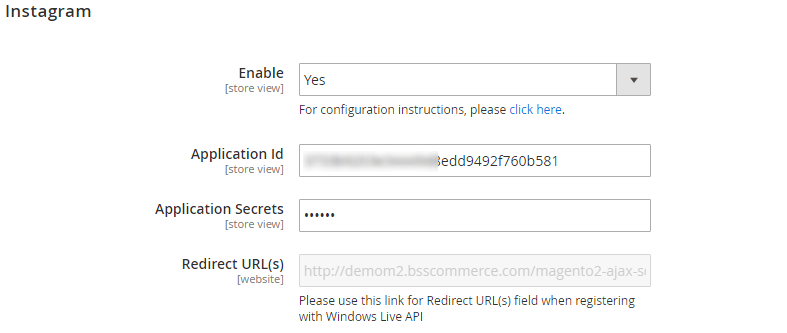
Once you have created the app and are in the App Dashboard, navigate to Settings > Basic. Then fill 6 fields that we noted in the photo below.
*Note: You need to fill all the fields to avoid the 400 error when your customers login with Instagram.

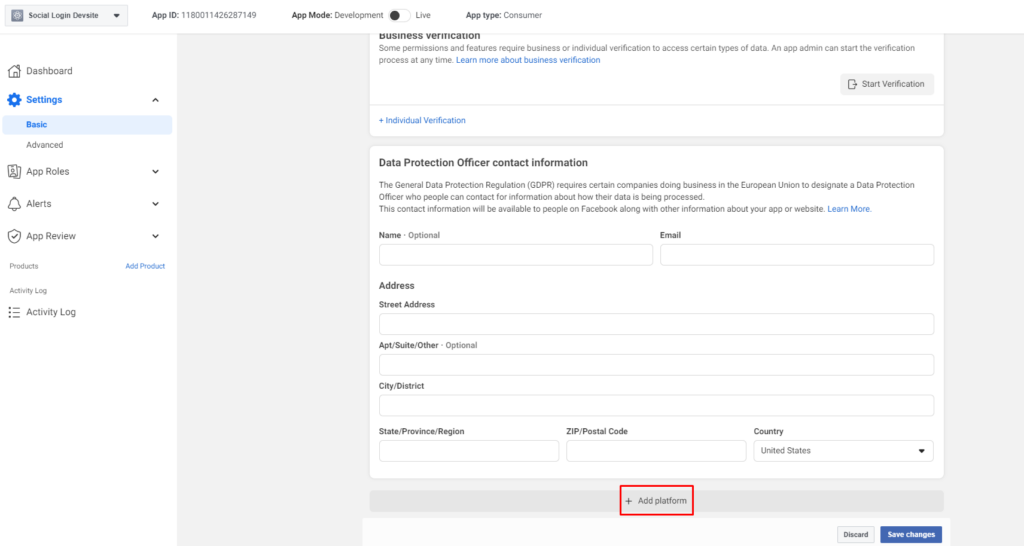
Then scroll to the bottom of page, and click Add Platform.
Choose Website then click Next.
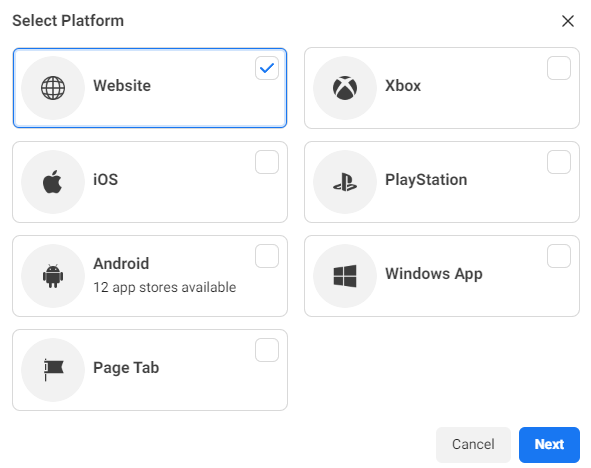
Add your website’s URL and click Save.

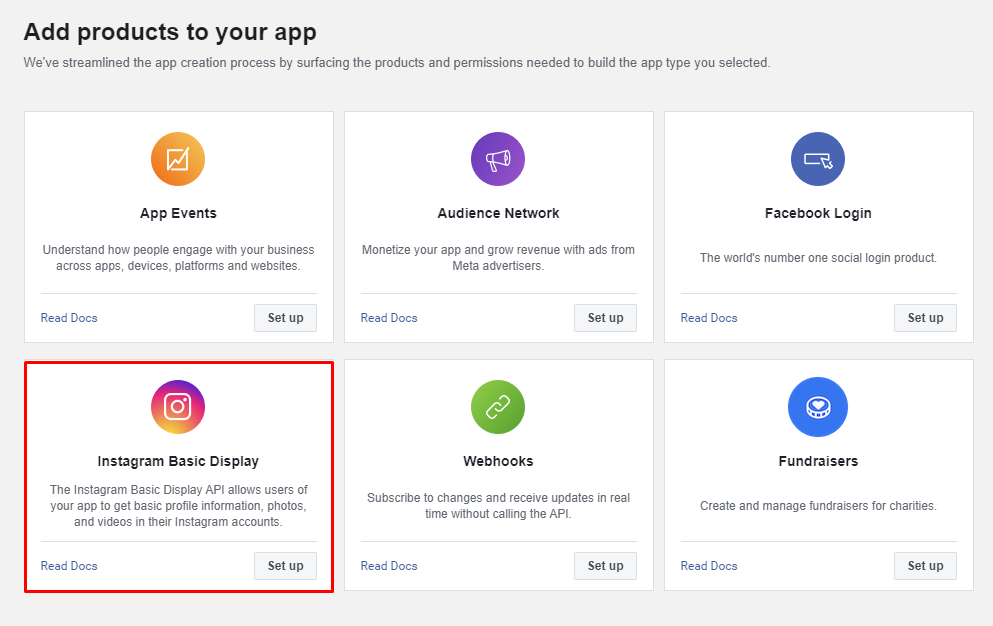
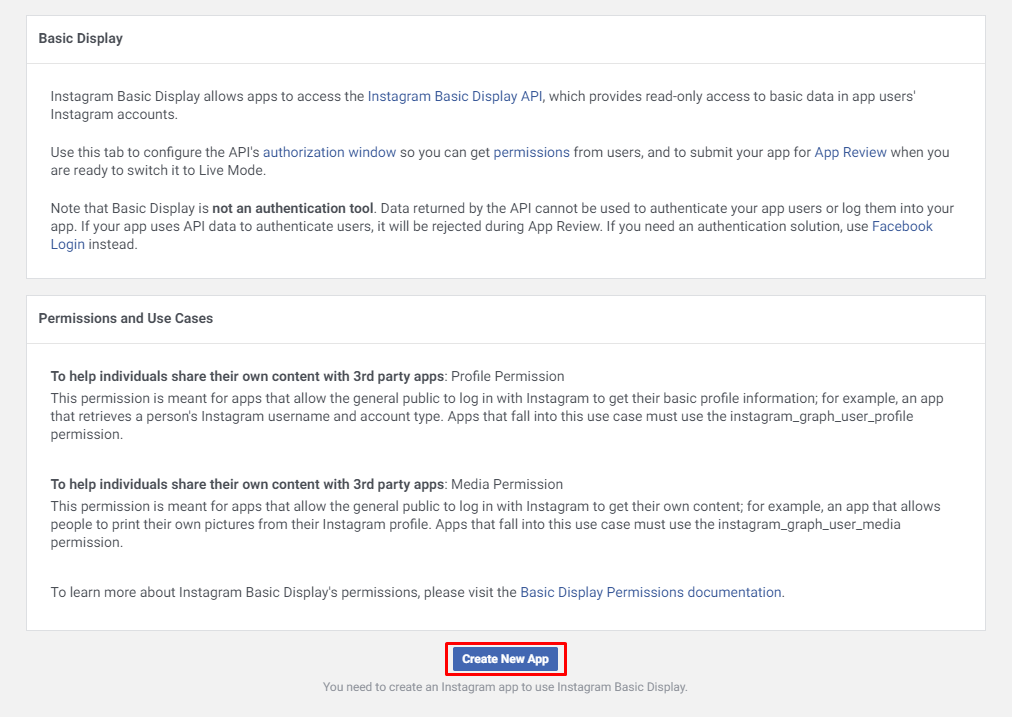
+ Configure Instagram Basic Display:
In the App Dashboard, scroll down to Add products to your app section, locate the Instagram Basic Display product, and click Set Up to add it to your app.
At the bottom of the page, click Create New App.
A confirm window will appear, click Create App.
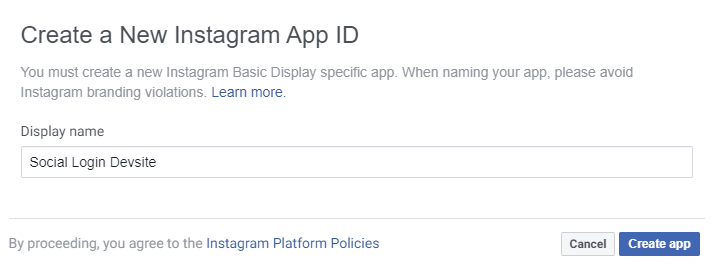
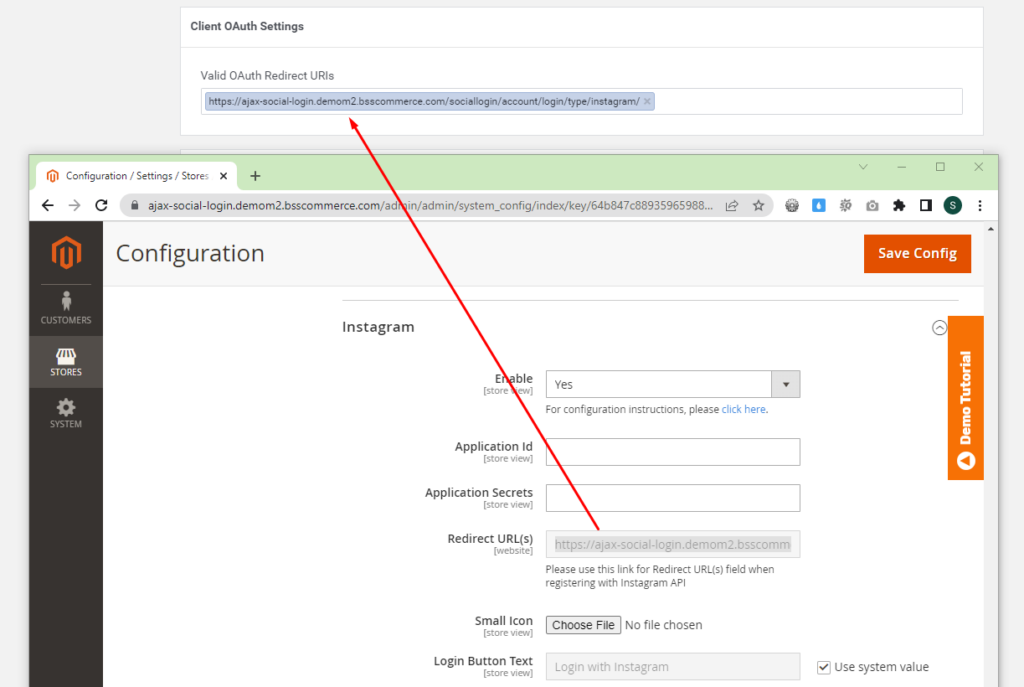
Fill the Valid OAuth Redirect URIs field with the Redirect URL(s) we provided in the module backend.
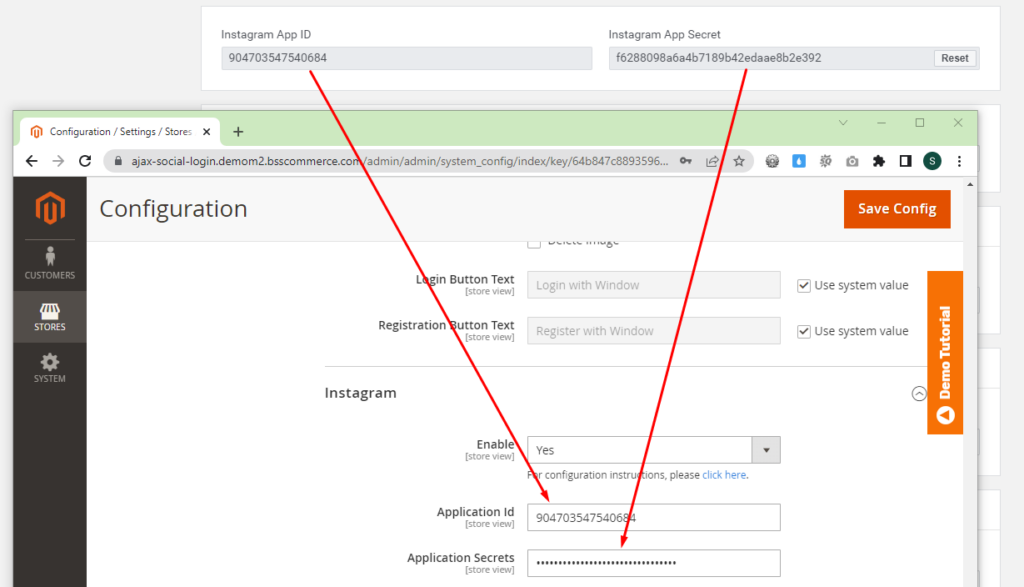
Then copy the Instagram App ID and Instagram App Secret . Go to the module backend tab, copy and paste them in the Application Id and Application Secrets field then click Save Config.
*Note: Your account's client status must be Authorized to get real Instagram accounts. In case your account is in sandbox mode, you can only accept sandbox account.
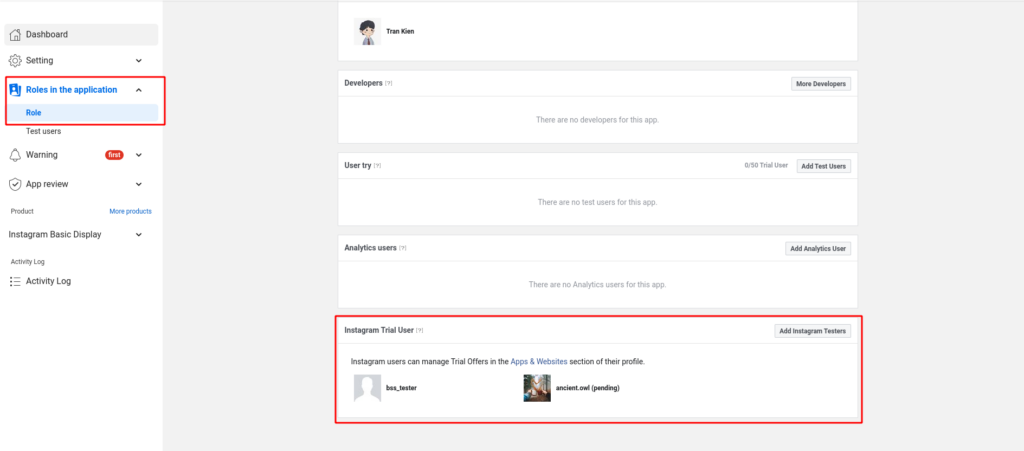
To test, you need to add test user and accept it in Instagram account.
+ Put App Into Public Status:
On the top bar, switch App Mode to Live.
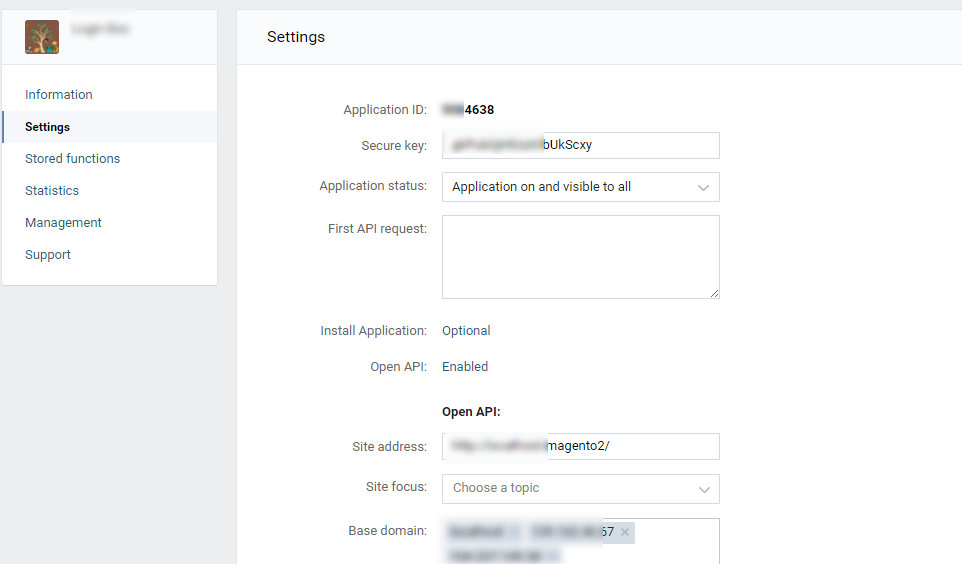
2.4.8. Vkontakte
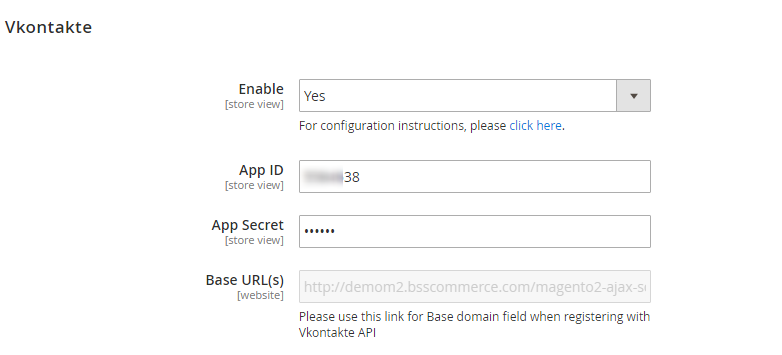
Finally, click Save Config and to complete setting process.