
1. Overview
Magento 2 ChatGPT extension enables you to integrate ChatGPT into your store to automatically generate high-quality & SEO-friendly content for all your pages.
2. How Does It Work?
Magento 2 ChatGPT module only helps integrate ChatGPT into Magento site. To use the ChatGPT service, you need an OpenAI account.
In your OpenAI account, on Billing overview, you will see what type of account (Free trial or Paid account), and Credit remaining.
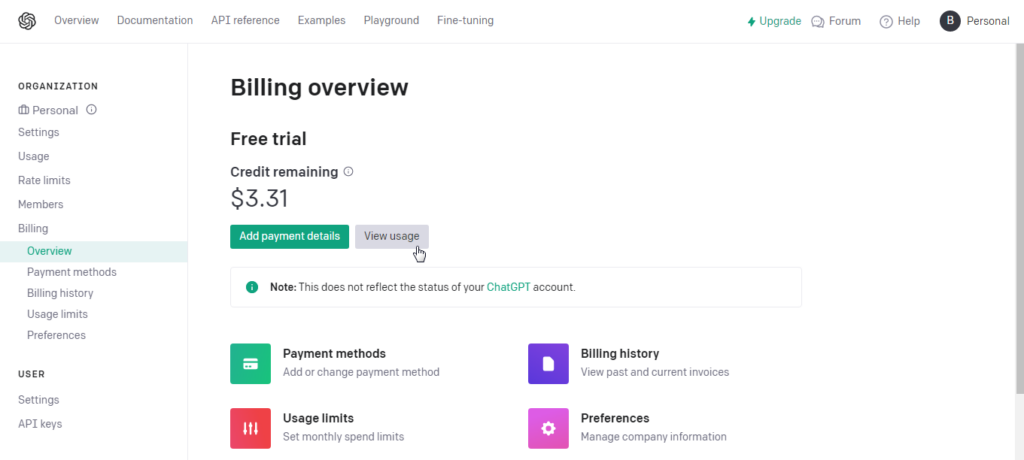
To set up a paid account, click Add payment details and set the appropriate payment information.
2.1. Enable the extension
Please go to Stores ⇒ Configuration ⇒ BSS COMMERCE ⇒ ChatGPT ⇒ ChatGPT Configuration.

- Enable: Choose Yes to enable the module or No to disable it.
- API Key: Enter the API key provided by ChatGPT. To get the API key, please follow the ChatGPT API guide.
- Model Type: Choose the model type of the ChatGPT (ChatGPT-3.5 Turbo or ChatGPT-4). For more details, please follow the ChatGPT Model guide.
- Max Tokens (Store view): Enter the token limitation of the model. Only an integer greater than 0 is valid. For more details, please follow the ChatGPT Tokens guide.
*Note:
- You should enter an integer number greater than 1000 and less than the max tokens provided by ChatGPT.
- The value in this field will automatically change to the default value of the respective ChatGPT model.
- If the language you use is not English, you should input a lower number of Max Tokens because ChatGPT may not be able to tokenize your words in a standard way. You can test the token length of your prompt here.
- Learn more about how to set Max Tokens value for Languages Other Than English (LOTE) here. - Temperature: Enter a real number: 0 <= x <= 2. For more details, please follow the ChatGPT Temperature guide.
*Note:
Higher values like 0.8 will make the output more random, while lower values like 0.2 will make it more focused and deterministic. See: ChatGPT Temperature in FAQs. - Call ChatGPT: Click the button to check the configurations after editing them.
*Note: When you click the button, it will use the current configurations on the page to check. You don't need to save configs before calling it.
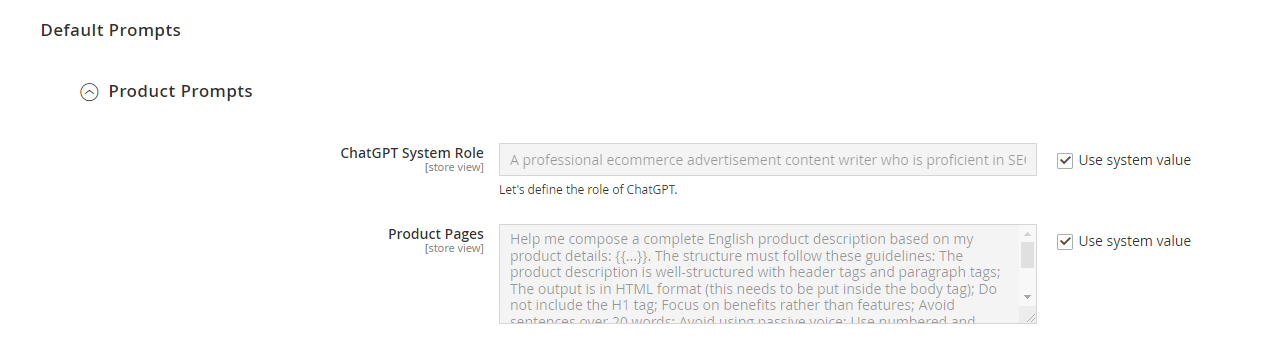
2.2. Default prompts
Default prompts appear when you use the Get Default Prompt config, which acts like the query to send to the ChatGPT system to command the AI to write content for you.
Go to Stores ⇒ Configuration ⇒ BSS COMMERCE ⇒ ChatGPT ⇒ Default Prompts.
Default Prompts are divided into smaller sections: Product Prompts, Category Prompts, CMS Prompts, and SEO Prompts.
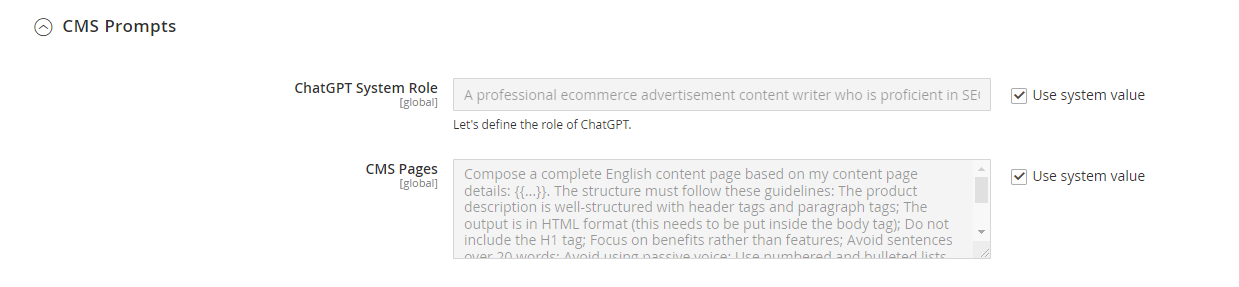
- ChatGPT System role: Each of these prompts will include the ChatGPT System role section to define the role of ChatGPT when generating answers for the section below. Example: A professional eCommerce advertisement content writer who is proficient in SEO, A professional SEO expert in eCommerce, ….
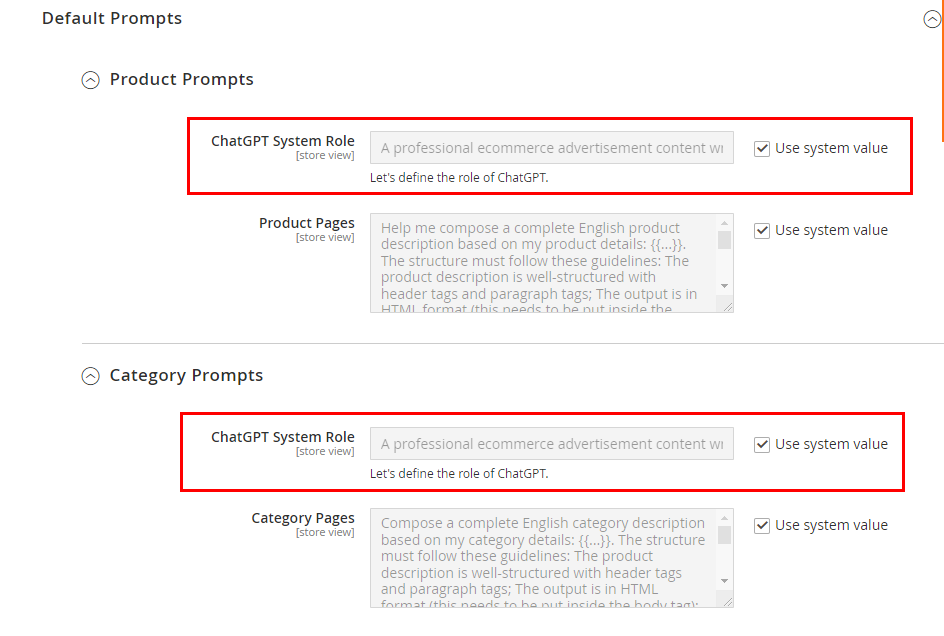
- Product Prompts: The default prompt to write content for long and short product descriptions.
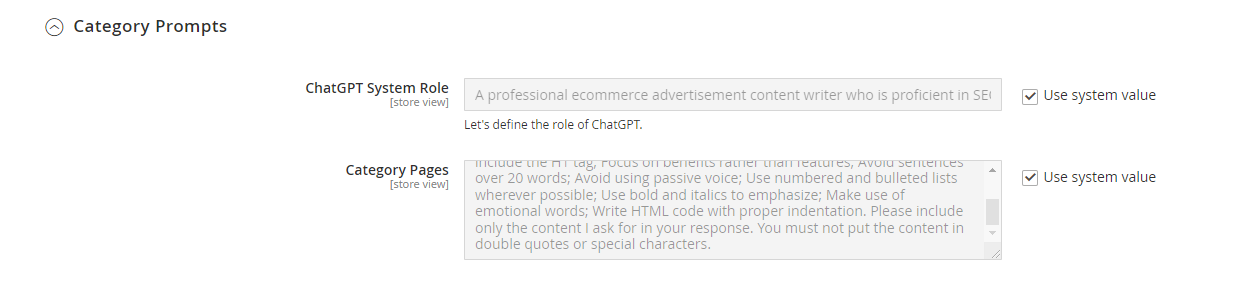
- Category Prompts: The default prompt to write content for category descriptions.
- CMS Prompts: The default prompt to write content for CMS pages.
- SEO Prompts: The default prompt to write content for SEO elements, including:
-
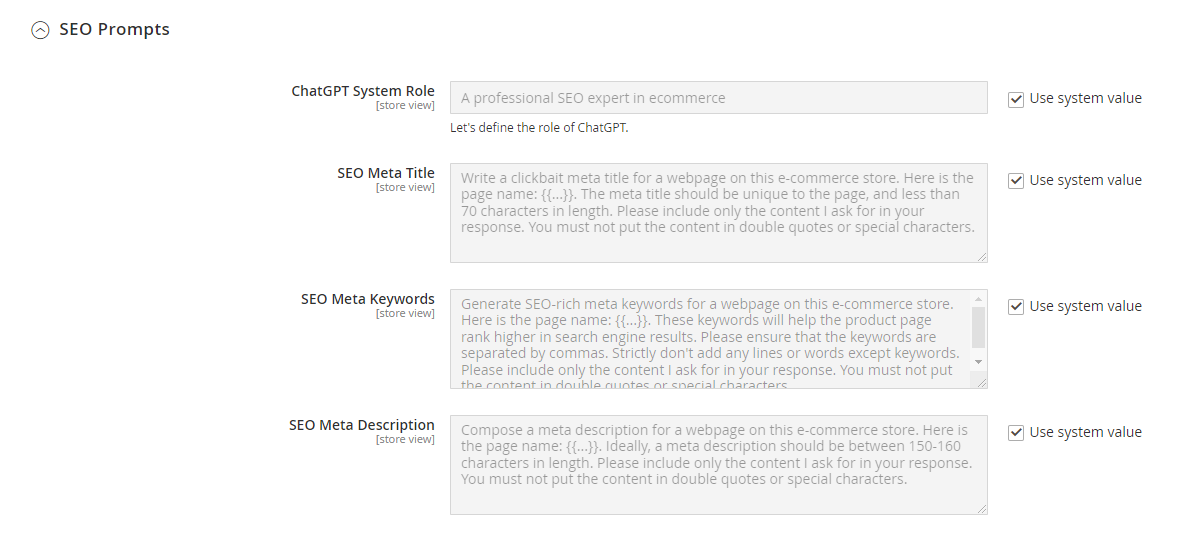 SEO Meta Title: The default prompt to write content for meta titles.
- SEO Meta Keywords: The default prompt to write content for meta keywords
- SEO Meta Description: The default prompt to write content for meta description.
-
To use custom prompts as the default prompts, uncheck the Use system value checkbox and enter your prompts.
2.3. Generate content
>> Watch the tutorial video here!
2.3.1. Generate content for product pages
Navigate to Catalog ⇒ Products. Choose to edit an existing product or create a new one.
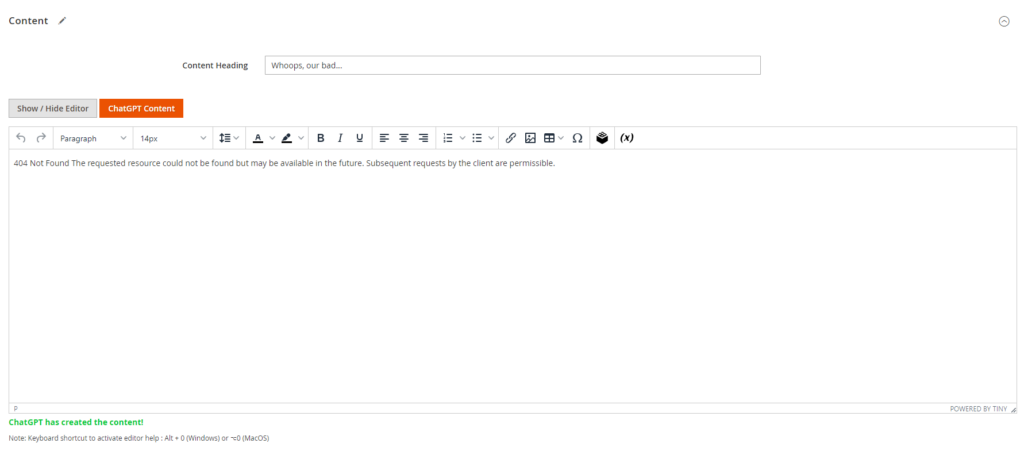
Then scroll down to the Content section and expand it.
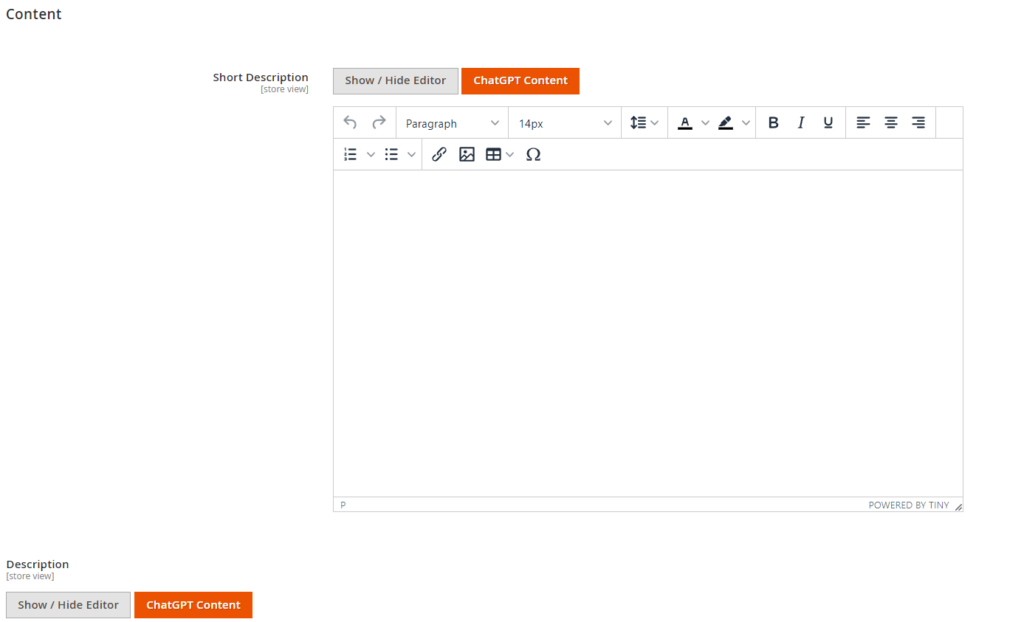
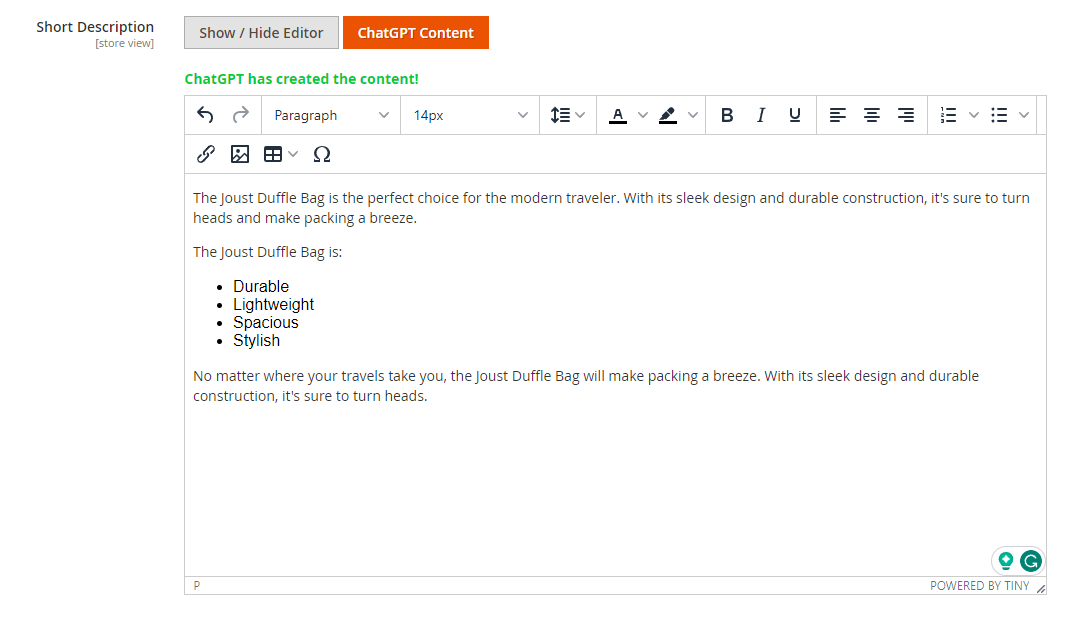
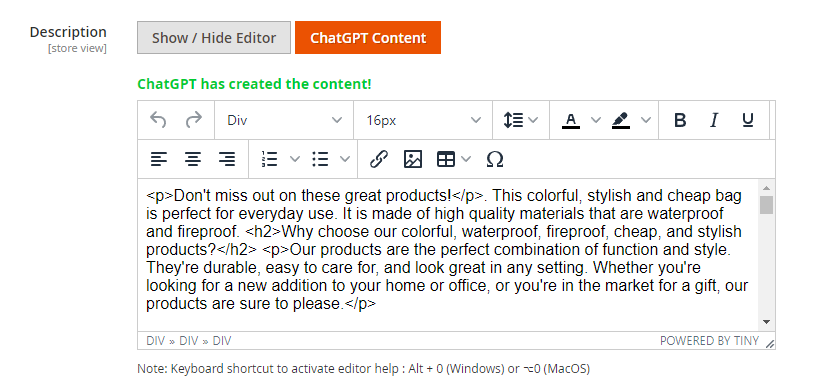
Click the ChatGPT Content button in the short description or long description section. A popup window will show up.
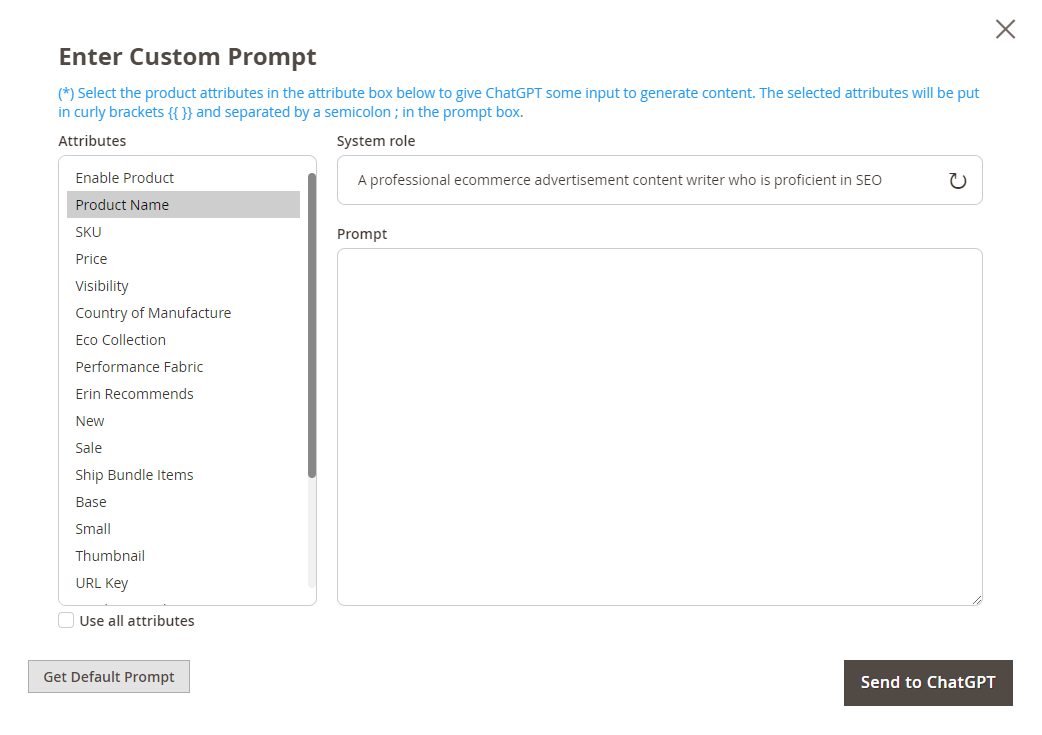
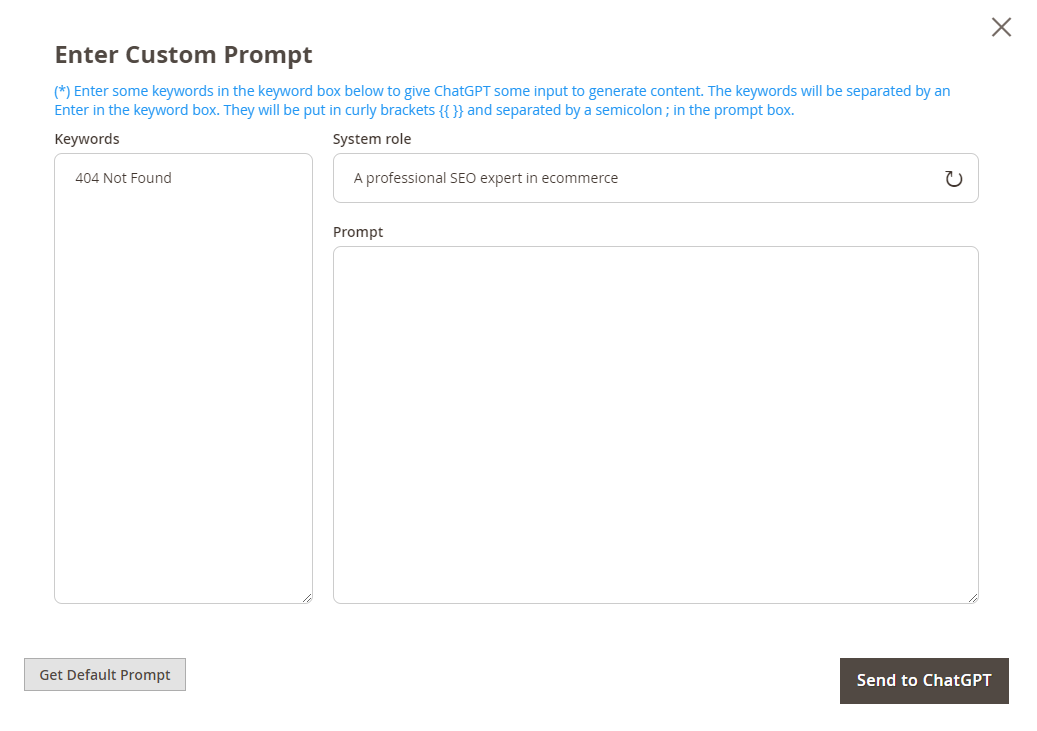
- ChatGPT System role: Enter the system role to define the role of Chat GPT when generating answers for this section.
-
-
- If you delete the default role and then want to recover it, you can click on the refresh icon
- If this configuration is left blank, ChatGPT will generate answers with its default role
-
-
- Prompt: Enter your custom prompt to generate content. If this box is left empty, the default prompt will be used.
- Get Default Prompt: Click the button to get the default prompt in the prompt field. You can edit it in the prompt field.
- Attribute Box: Choose one or multiple product attributes in the attributes box to give ChatGPT some input to generate content.
- Send to ChatGPT: Click the button to send your prompt to ChatGPT to get the result.
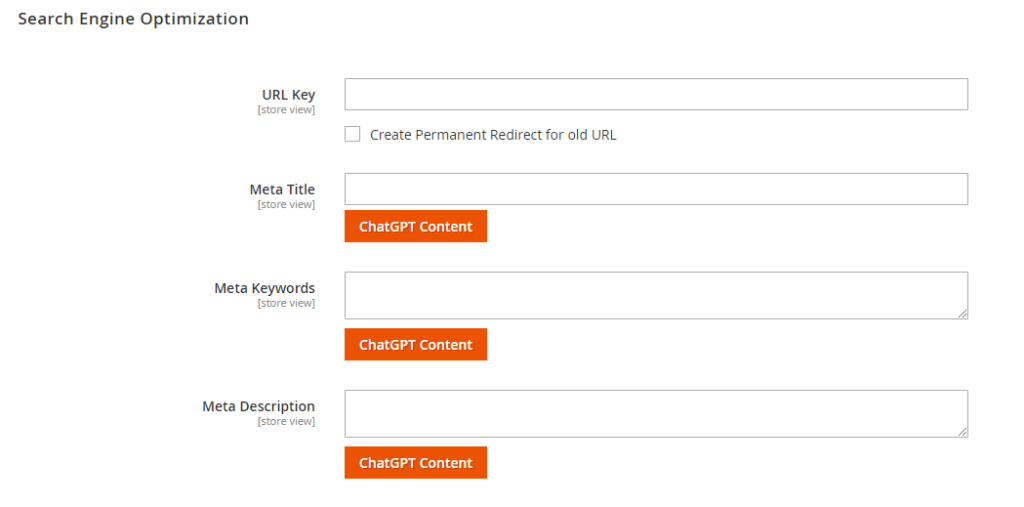
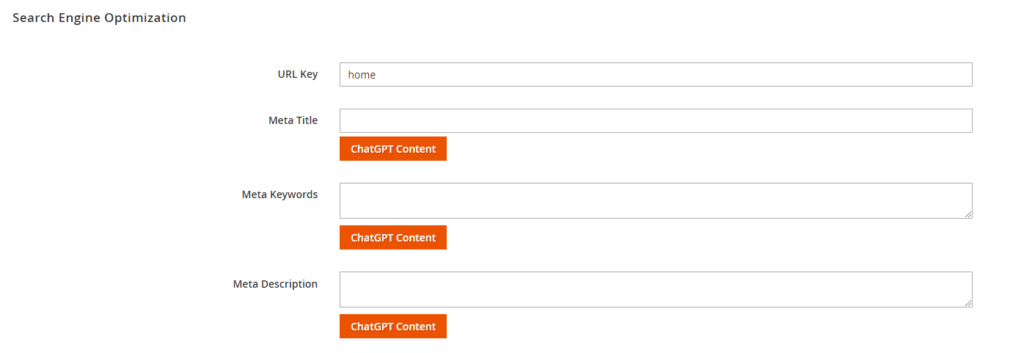
Next, scroll down to the Search Engine Optimization section and expand it.
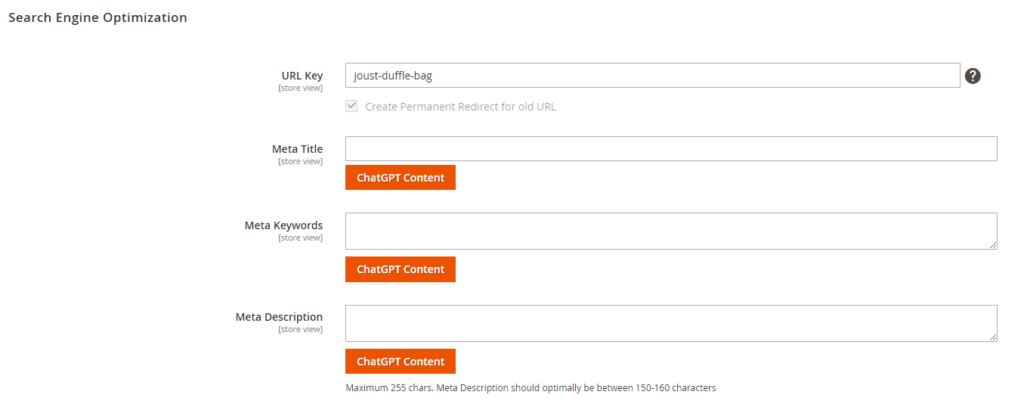
Click the ChatGPT Content button to generate content for meta title, meta keywords and meta description.
*Note: On the product edit page, if you edit any product attribute, the Magento ChatGPT module can update the attribute in realtime to generate content accordingly without you having to save the product first.
2.3.2. Generate content for Category pages
Navigate to Catalog ⇒ Categories. Choose to edit an existing category or create a new one.
Then scroll down to the Content section and expand it.
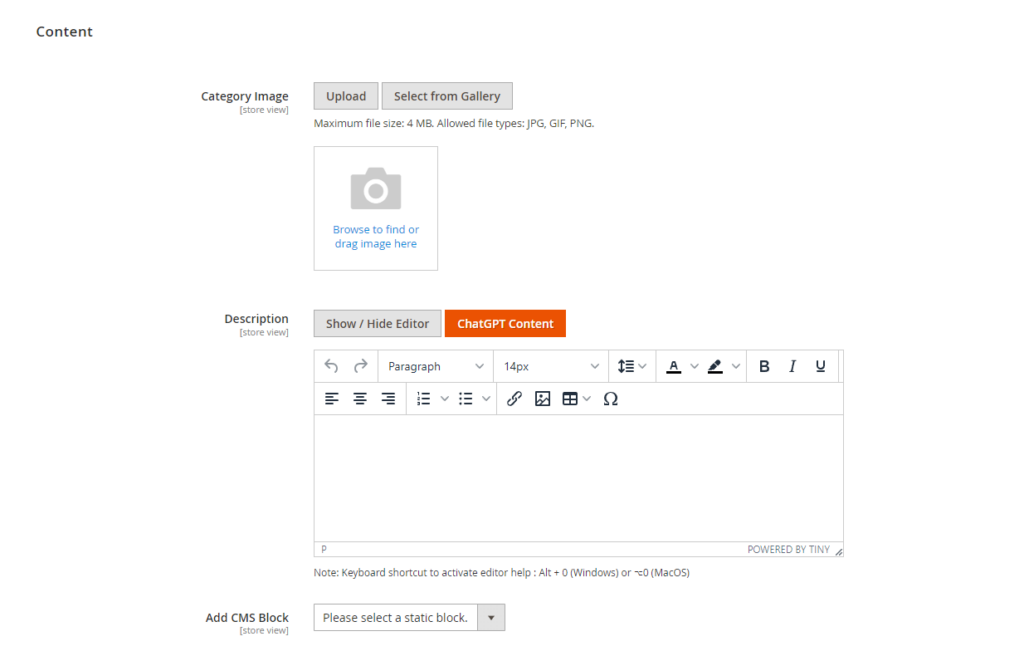
Click the ChatGPT Content button in the description section. A popup window will show up.

- ChatGPT System role: Enter the system role to define the role of Chat GPT when generating answers for this section.
-
-
- If you delete the default role and then want to recover it, you can click on the refresh icon
- If this configuration is left blank, ChatGPT will generate answers with its default role
-
-
- Prompt: Enter your custom prompt to generate content. If this box is left empty, the default prompt will be used.
- Get Default Prompt: Click the button to get the default prompt in the prompt field. You can edit it in the prompt field.
- Keywords box: Enter some keywords in the keywords box to give ChatGPT some input to generate content.
- Send to ChatGPT: Click the button to send your prompt to ChatGPT to get the result.
Next, scroll down to the Search Engine Optimization section and expand it.
Click the ChatGPT Content button to generate content for meta title, meta keywords and meta description.
2.3.3. Generate content for CMS pages
Navigate to Content ⇒ Pages. Choose to edit an existing page or create a new one.
Then scroll down to the Content section and expand it.
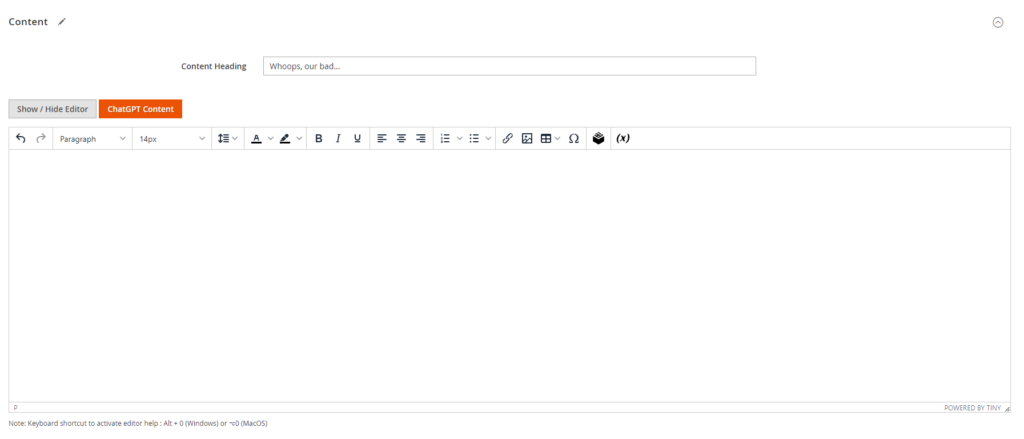
Click the ChatGPT Content button in the description section. A popup window will show up.
- ChatGPT System role: Enter the system role to define the role of Chat GPT when generating answers for this section.
-
-
- If you delete the default role and then want to recover it, you can click on the refresh icon
- If this configuration is left blank, ChatGPT will generate answers with its default role
-
-
- Prompt: Enter your custom prompt to generate content. If left empty, default prompt will be used.
- Keywords box: Enter some keywords in the keywords box to give ChatGPT some input to generate content.
- Get Default Prompt: Click the button to get the default prompt in the prompt field. You can edit it in the prompt field.
- Send to ChatGPT: Click the button to send your prompt to ChatGPT to get the result.
Next, scroll down to the Search Engine Optimization section and expand it.
Click the ChatGPT Content button to generate content for meta title, meta keywords and meta description.
2.4. Generate SEO metadata
This tutorial shows you how to generate SEO metadata for all pages (product, category, CMS).
First, on the edit page, scroll down to the Search Engine Optimization section and expand it.
Click the ChatGPT Content button to generate content for meta title, meta keywords and meta description.
After clicking the button, a popup window will show up with similar configs (Keywords box/Attributes box, Prompt, Get Default Prompt, Send to ChatGPT). Follow the tutorial for generating content to get SEO metadata.
2.5. Mass Generate Content
Now you can select multiple products and perform mass action - generating content for descriptions & metadata, just by a few simple clicks.
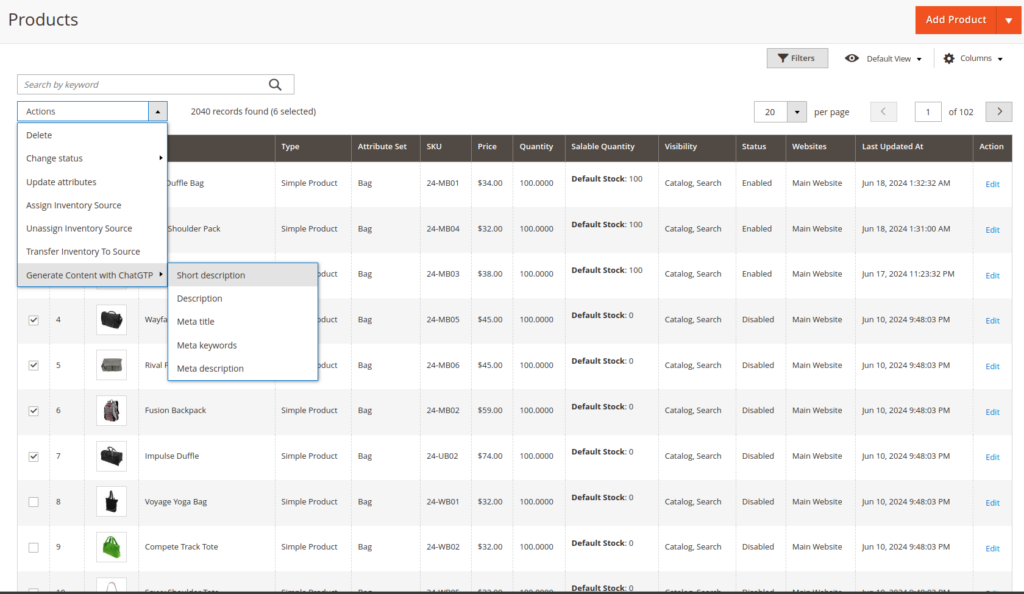
Go to Catalog > Products. Here, select the products that you want to mass generate content.
At Action dropdown, choose Generate Content with ChatGPT.
Then choose which kinds of content you want the module to generate. There're Short Description, Description, Meta Title, Meta Keywords & Meta Description.
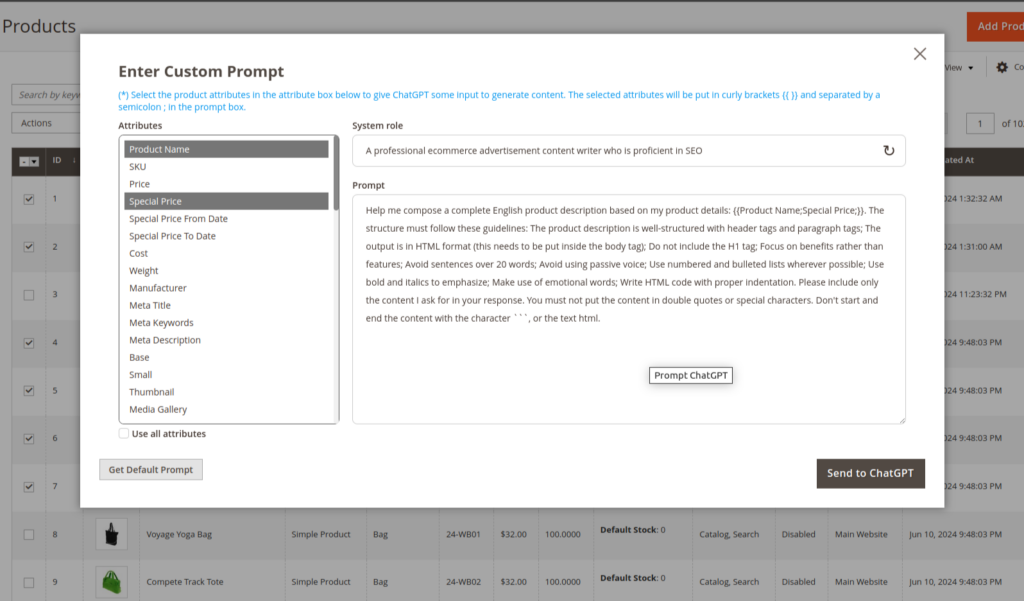
Then the Prompt settings popup will show up. Follow the same guide above for product content generation to continue.
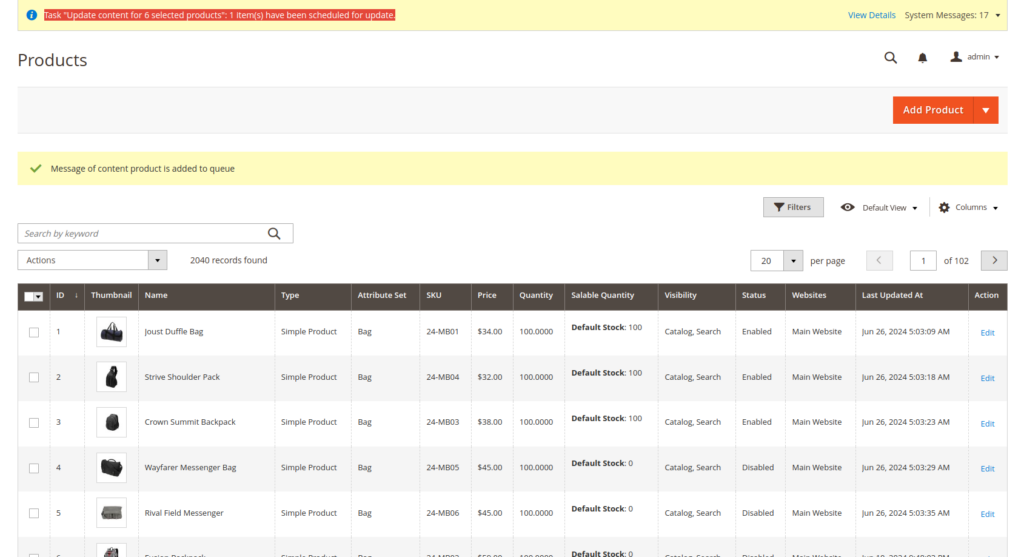
After clicking Send to ChatGPT button, the module will do the work for you. And you will see a message to confirm your action.
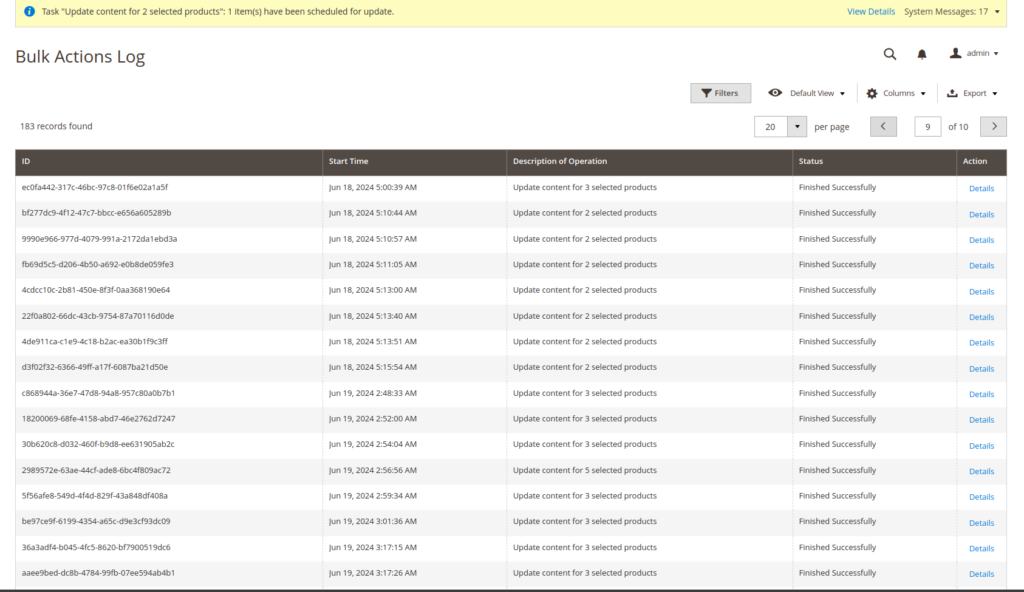
To check if the action for certain product is successfully done, check in the Buik Actions Log by navigating: System > Action Logs > Bulk Actions.
The generated content will added right after the old content.
3. Set Max Tokens value for non-English language
Our module uses ChatGPT's fixed formula to calculate the max token for the answer (completion).
According to the ChatGPT's doc: A helpful rule of thumb is that one token corresponds generally to 4 characters of text for common English text. This translates to roughly ¾ of a word (so 100 tokens = 75 words).
For example: You're using Chinese (a non-English language).
Given that the max token input in ChatGPT configuration is 4097 tokens.
If your prompt has 260 characters, the module calculates that:
- The token number of the prompt is 260/4 = 65 tokens.
- The max tokens for the answer that the module request ChatGPT to generate is approximately 4097 - 65 = 4032 tokens.
However, because you're using Chinese, ChatGPT calculates the token number of the prompt as 434 tokens (test it here). The reason is that it takes a lot of tokens to tokenize figurative language (Chinese in this case) for ChatGPT to understand, increasing the prompt token significantly.
So after you use that prompt and call ChatGPT, ChatGPT will automatically generate an answer according to the max token value the module request sent (in this case, 3931 tokens), and then compare it with the model's max token.
An error occurred due to: 434 (prompt) + 3931 (completion) = 4365 tokens => Exceeded max token of the module => The module will report the error and did not print that completion in the Magento text field.
Thus, if the language is not English, you should input a lower number of Max Tokens.