1. Overview
Magento 2 Custom Order Number extension allows you to change the order number, invoice number, shipment and credit memo number. You can customize these numbers to make them meaningful and easy to manage.
2. How Does It Work?
Please go to Stores ⇒ Configuration ⇒ BSSCommerce ⇒ Custom Order Number
2.1 Custom order number configuration
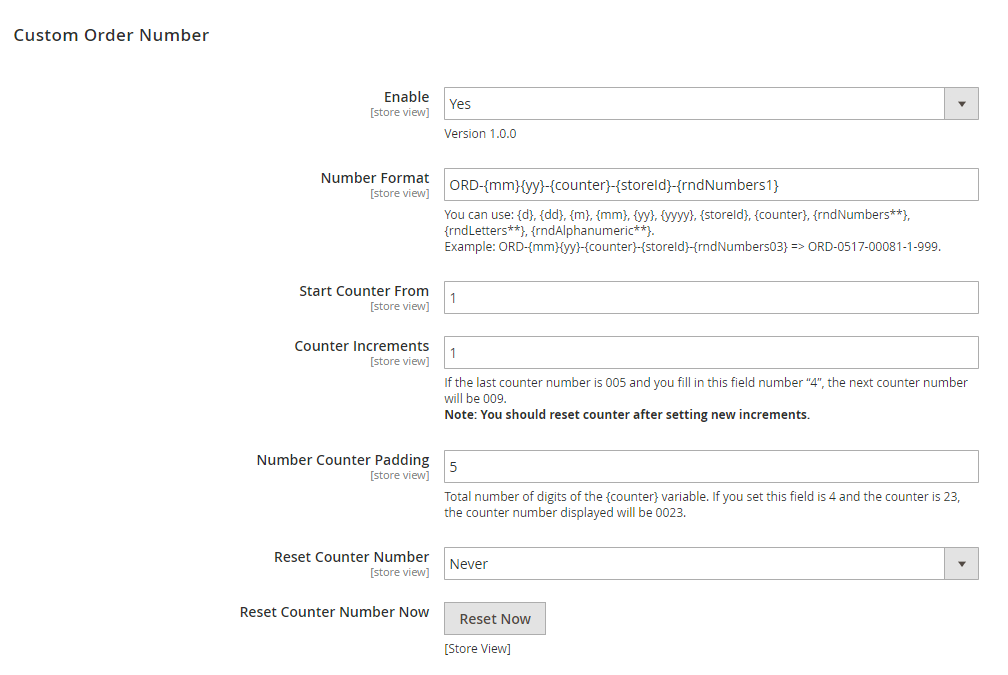
In Enable: choose Yes to enable customized order number, or No to disable it (the order number is default order number).
In Number Format: enter a format containing letters, numbers as well as variables for the order number.
+ The variables that you can add to the order number format:
- {counter}: an incrementing number, is set up in the below configs.
- {d}: date with no 0 leading.
- {dd}: date, always has 2 digits
- {m}: month with no 0 leading
- {mm}: month, always has 2 digits
- {yy}: year with 2 digits
- {yyyy}: year with 4 digits
- {storeID}: ID of the Store that customer placed the order in. It should be used in case your website has multiple stores.
- {rndNumbers**}: random a number, replace ** by a number to set the padding for a random number. For example, you enter {rndNumber01}: the output of this variable will be the one-digit number, {rndNumber02}: the output of this variable will be the two-digit number...
- {rndLetters**}: random letters, replace ** by a number to set the padding of this variable. For example, you enter {rndLetter01}: the output of this variable will be one letter (a, b, c...), {rndNumber02}: the output of this variable will be two letters (ab, mn...)
- {rndAlphanumberic**}: random both number and letters, replace ** by a number to set the padding of this variable.
- Configuration of {counter} variable:
- In Start Counter From: enter a number to set which number the {counter} variable begins counting.
- In Counter Increments: enter a number to set the {counter} variable increases by for every new order made. For example, if you set the increments to 5 and the last counter number is 004, the next counter number will be 009.
Note: After setting the new increments, you should reset the counter to be not confused when managing the order document.
- In Number Counter Padding: enter a number to set the total of digits for the counter number. For example, if the counter is at 9 and you set padding is 6, it would output 000009 (there are 5 numbers “0” added into the front of the counter number).
- In Reset Counter Number: choose an option to reset counter numbers automatically daily (By Day), weekly (By Week), monthly (By Month), yearly (By Year) or choose Never to never reset the counter.
Note: This module will reset counter depending on the time of sever and please make sure that cron job in your website always operates (refer Configure and run cron in MagentoDev Docs).
- In Reset Counter Number Now: click on the Reset Now button to reset the {counter} variable immediately. It is just reset for the next increment number.
Note: If your website has multiple store views, you can customize the order number for each store view.
In Configuration Store View, please select a store view. The config “Use Different Counter Numbers for Different Store Views” will appear.
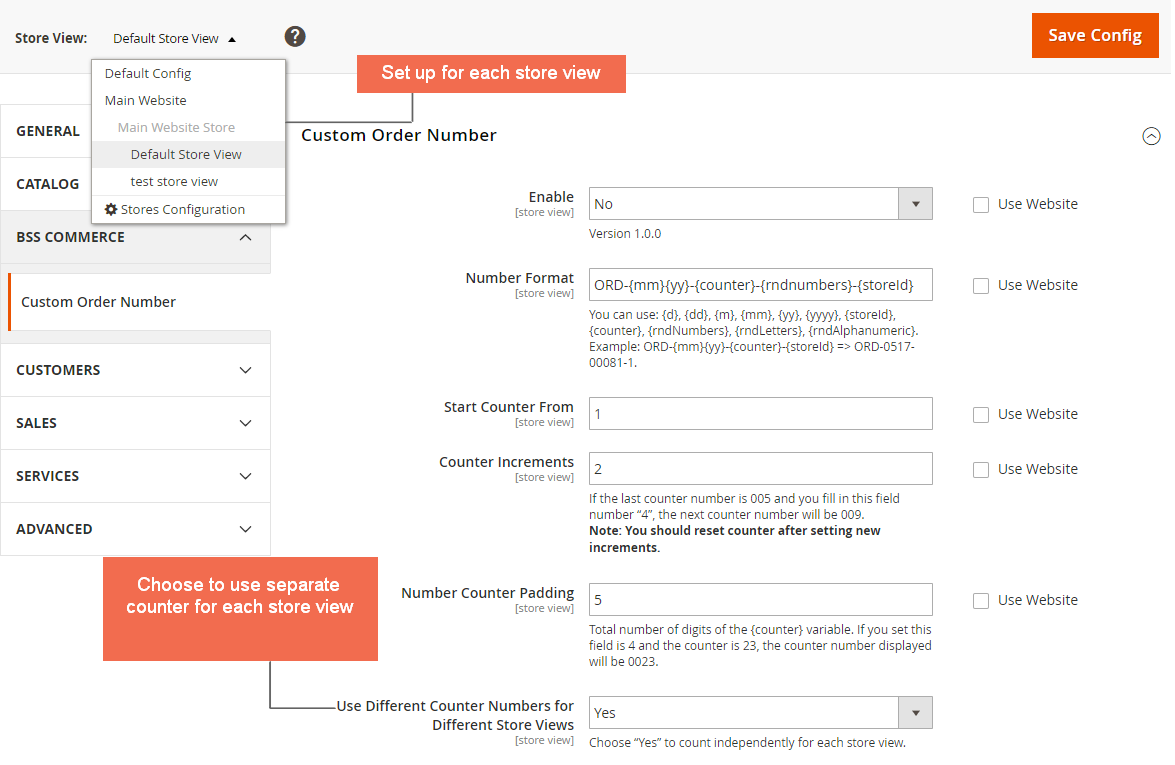
In Use Different Counter Numbers for Different Store Views:
+ Choose Yes to use an individual sequence of the counter for each store view, which means each store view has own sequence. For example, your website has 2 store views A and B.The first order is placed in store A and the sequence of {counter} variable of order number in this store is 1. After that, an order is placed in store B and the sequence of {counter} variable also is 1, because it is not depended on the store A.
+ Choose No to use the sequence of the counter for all store views (like default). In case the below example, the sequence of {counter} of order number in store B is 2, not 1.
Note: If the order number is duplicated, a random number will be added to this number.
2.2 Custom invoice number configuration
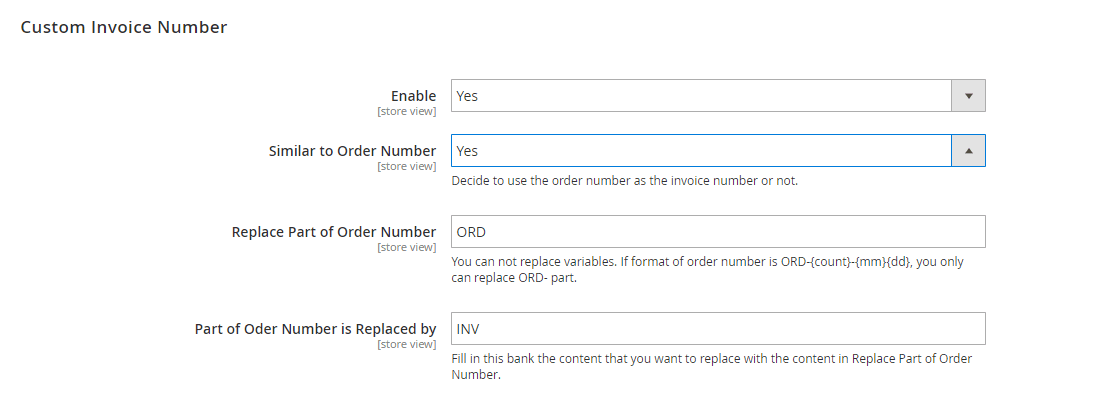
In Enable: choose Yes to enable the customized invoice number, or No to disable it (use the default invoice number).
In Similar to Order Number:
+ Choose Yes to use the invoice number same as the order number, which means that the invoice number will use the transaction the order number belongs to. You can replace letters part in order number format by other letters that are more suitable (you can’t replace the variable in order number format:
- In Replace Part of Order Number: enter a letters part of order number format that you want to replace it
- In Part of Order Number is Replace by: enter the letters that replace with the above part.
+ Choose No to not use the invoice number same as the order number. You can customize an individual invoice number like customizing order number above.
 2.3 Custom shipment number configuration
It is the same as the Custom Invoice Number Configuration.
2.4 Custom credit memo number configuration
It is the same as the Custom Invoice Number Configuration.
Note:
- Because the scope of the module configuration is store view, you can customize the numbers for each store view.
- After setting, you need to save your configuration then flush cache to start using the module.
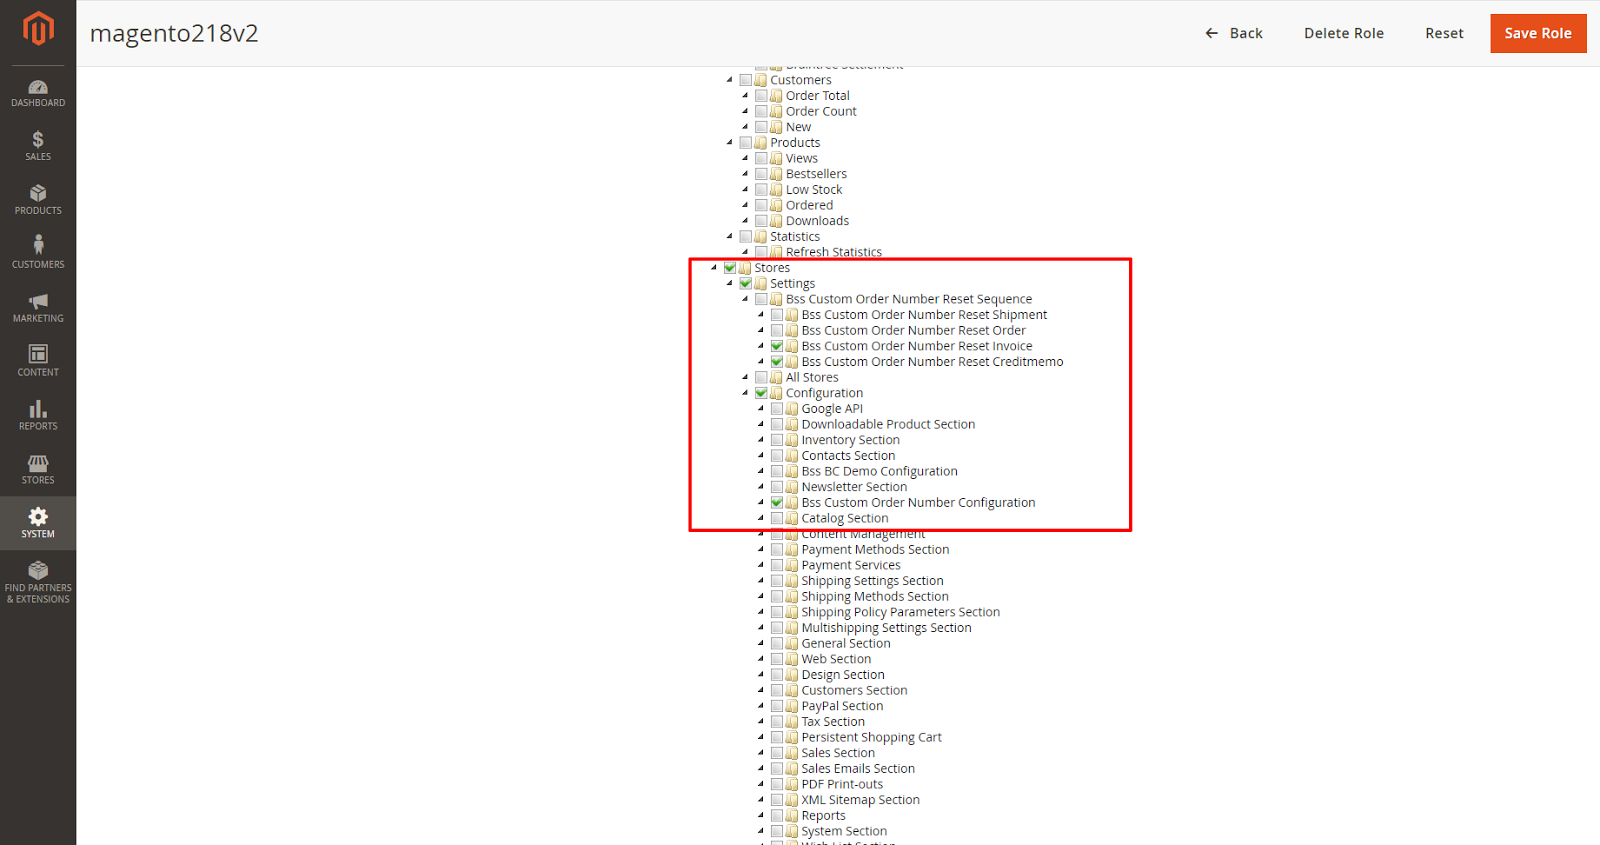
2.5 Set User Role to manage the module
Please go to System ⇒ Permissions ⇒ User Roles ⇒ Role Resources.