All built-in functions of the theme work seamlessly as you install it, but if you want to have more advanced features, such as customized upsell products, you can add meta fields into the store following the guides below.
Product custom data
Cart upsell metafield
To add upsell products for a product, you need to create a metafield.
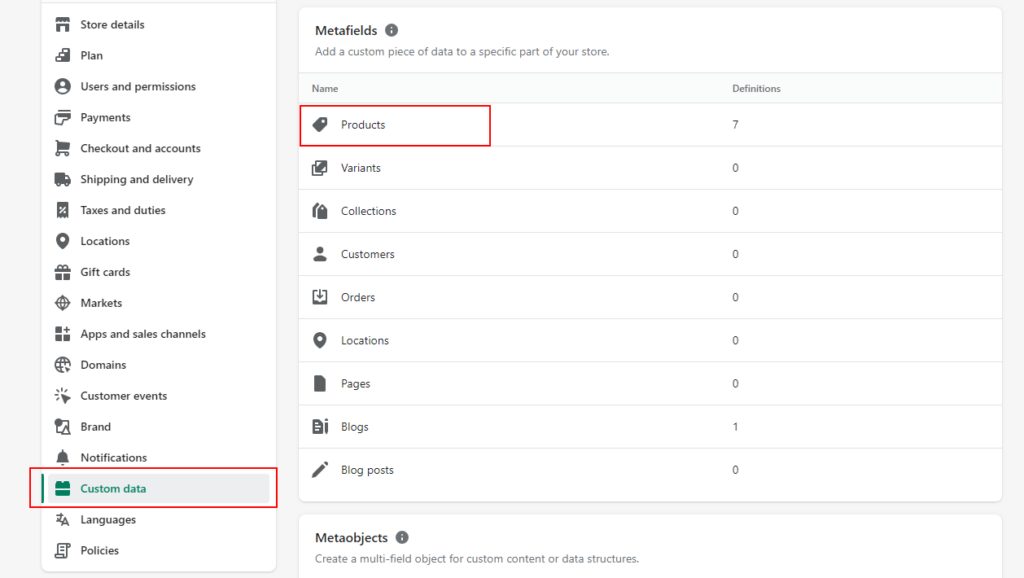
- From you store backend, go to Settings > Custom data > Metafields > Choose Products to create metafields for products:
- Create a metafield by clicking onto Add definition button in the right corner:

- Fill in the following information:
-
- Name: Fill in the name of the metafield. This name will show up in product detail page in backend for you to see. We recommend you fill in the name "Cart upsell" to avoid misunderstanding when you edit other fields in products.
- Namespace and key: the key to identify the metafield in the database, and will be used to display upsell products in the frontend. The key MUST BE "cart.upsell" for the metafield to work.
-

-
-
- Description: this is optional field, you can add text here to help describe the purpose of the field.
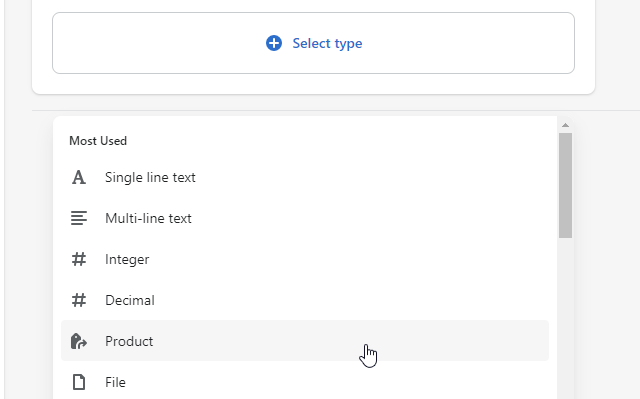
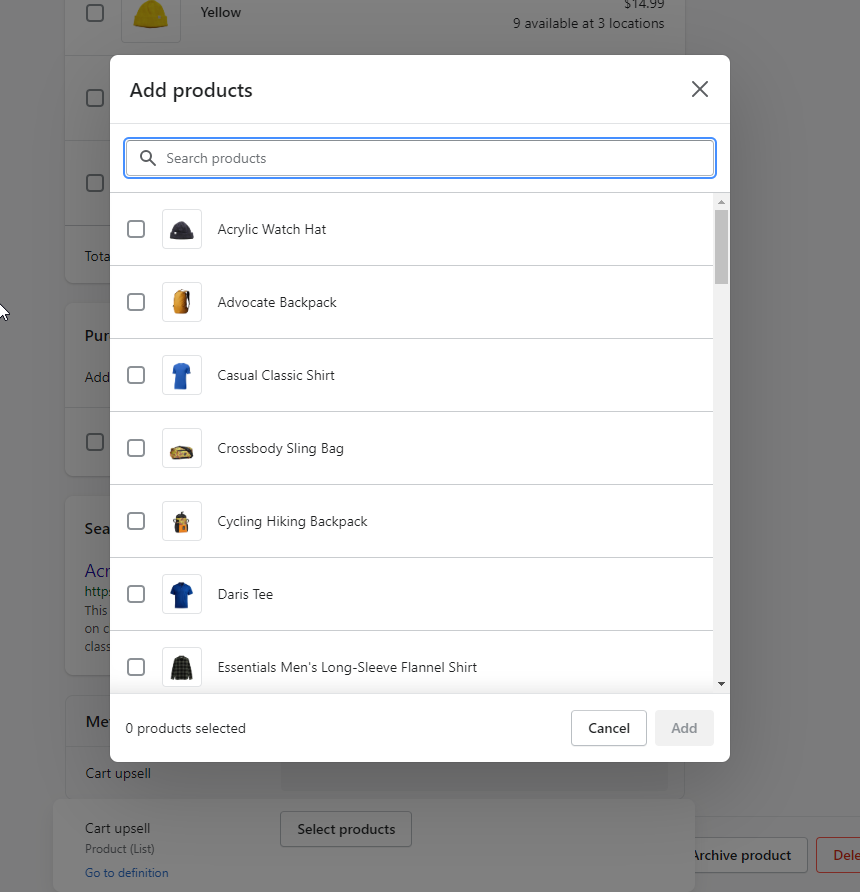
- In Select type field, choose Product, and then choose List of products, so you can add as many products to be upsell products as you wish.
-
-
-
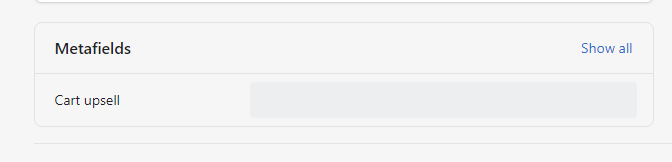
- After that, you can go to each product page in backend and scroll down to the bottom of the page. Click onto Metafield > Cart upsell and select a list of products to be the upsell products:
-
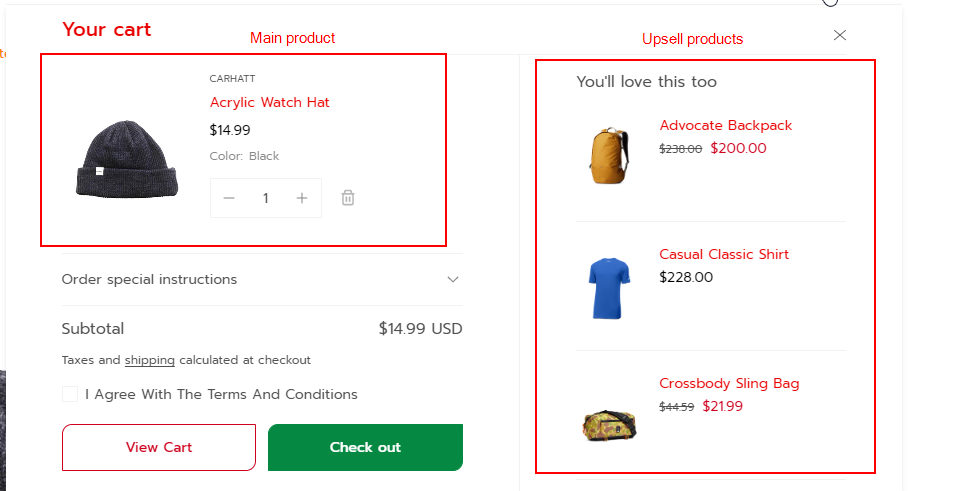
For example, if you add product B, C and D to be the upsell products of product A, whenver you add product A to cart, product B, C and D will show up in the Cart upsell section
Blog custom data
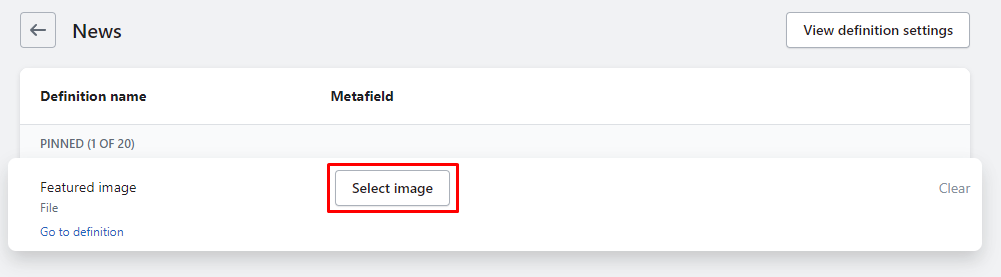
Blog featured image
If you wish to add the banner image for blog page, you can add a metafield to Blogs.
- From you store backend, go to Settings > Custom data > Metafields > Choose Blogs to create metafields for blogs.
- Create a metafield by clicking onto Add definition button in the right corner
- Fill in the following information:
-
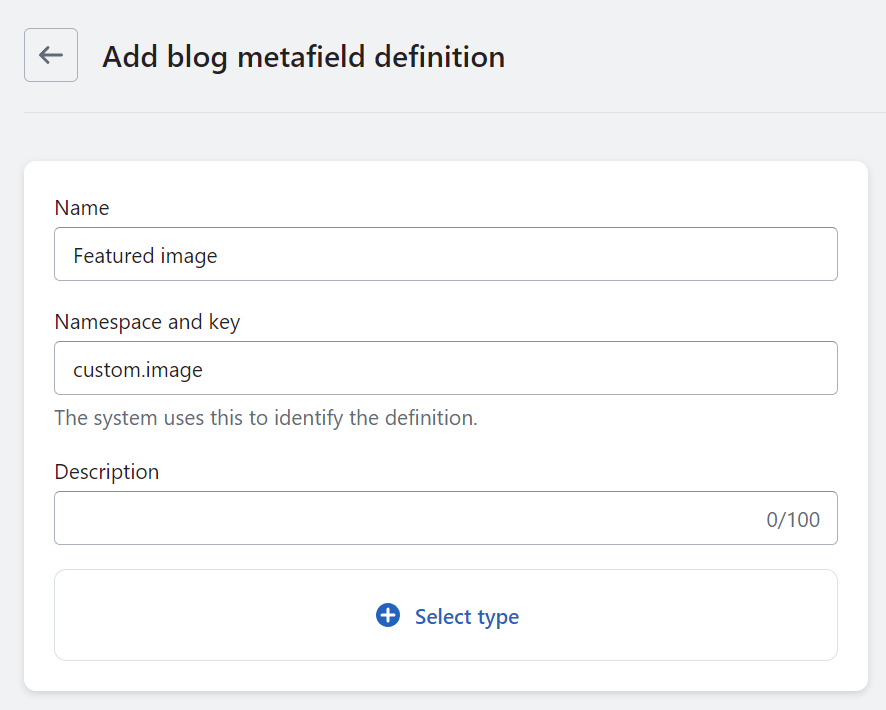
- Name: Fill in the name of the metafield. We recommend you fill in the name "Featured image" to avoid misunderstanding when you edit other fields in blogs.
- Namespace and key: the key to identify the metafield in the database, and will be used to display blog featured image in the frontend. The key MUST BE "custom.image" for the metafield to work.
-
-
-
- Description: this is optional field, you can add text here to help describe the purpose of the field.
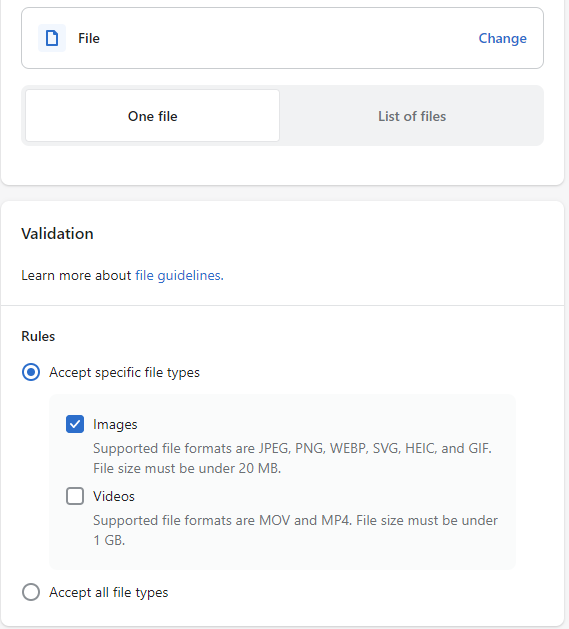
- In Select type field, choose File, and then choose One file and set up the rules that only accept Images:
-
- After that, you can go to each blog settings in backend and scroll down to the bottom of the page. Click onto Metafield > Featured image and select image to be the banner image of the blog page: