
Our app provides a system where you can store customer information and manage their access to your website. This feature is available on Essential plan ($25/mon) and Advanced plan ($50/mon).
General Settings
When customers complete the registration form, the data is automatically added to a grid in the Registration Management tab with all default and custom fields. However, you have the option of having customers' accounts auto-approved or manually approved. More specifically, as follows:
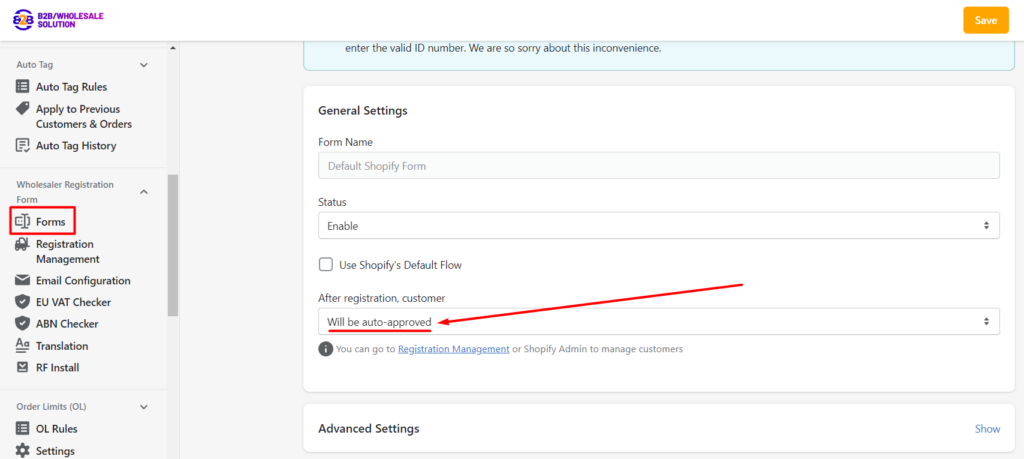
Customer account is auto-approved
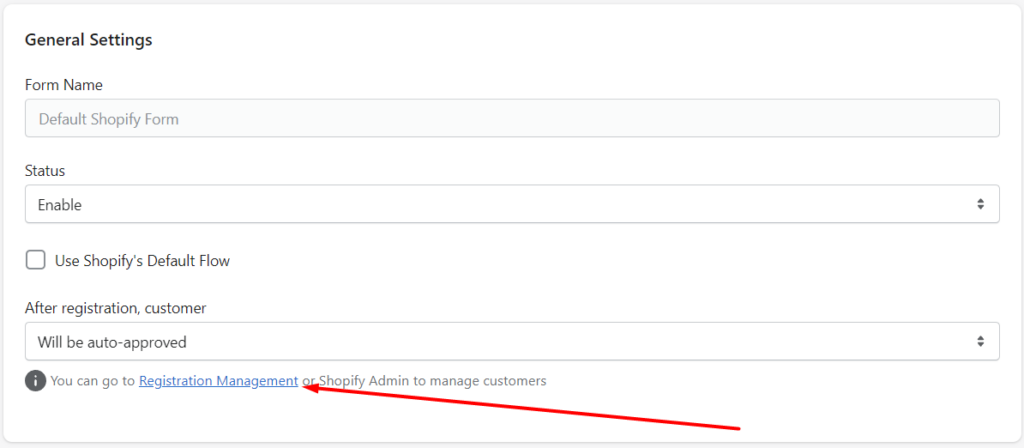
If you select Will be auto-approved in the form's General Settings, customers' accounts will be approved automatically.
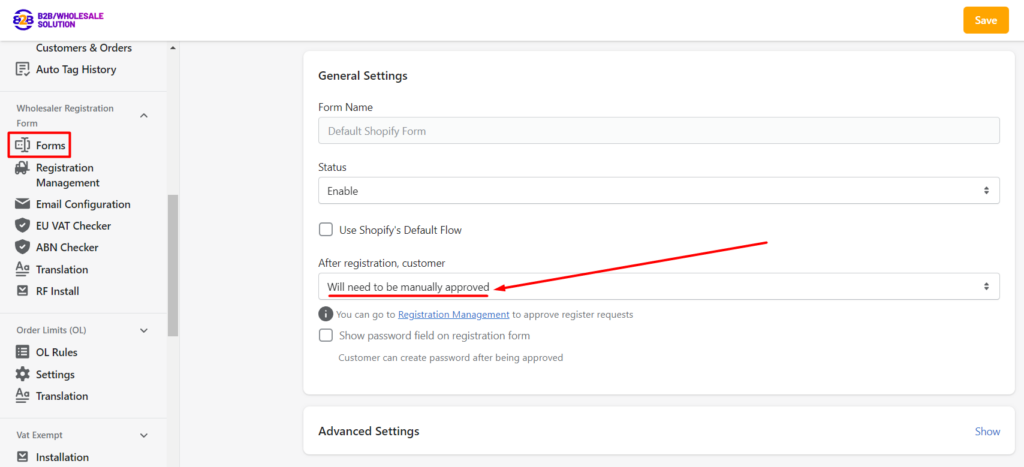
Admin can approve/reject customer account when
In the form's General Settings, by selecting Will need to be manually approved, now you can view, approve/decline, and edit all details of their registrations.
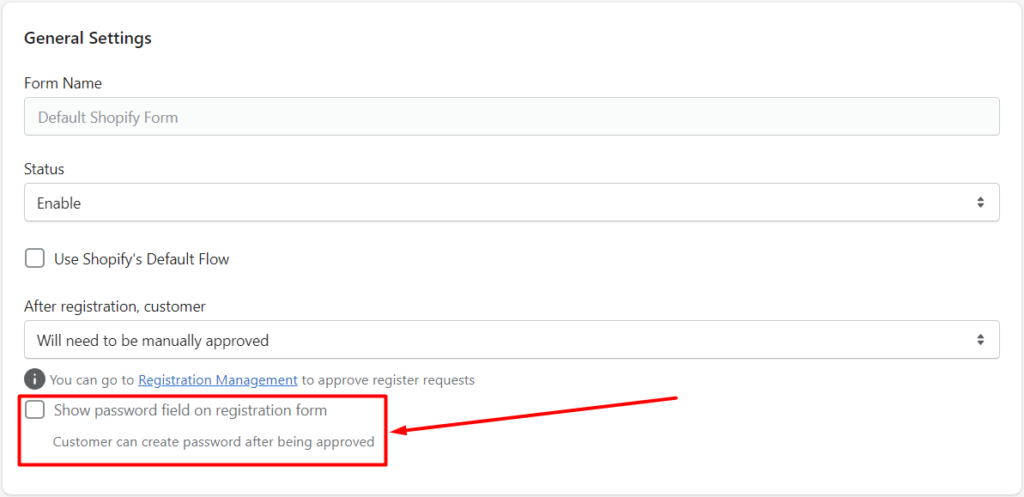
There is an option if you want your customers to be able to create passwords after their accounts are approved, make sure to check the box that says Show password field on registration form. Otherwise, leave the box unchecked.
How to view, approve/reject, and manage customer registrations information
There are two ways to access the table that contains all of the data from customers who have completed the registration form for you to view, approve/reject, and manage.
Under the After registration, customer field, when clicking on the link text Registration Management of the tooltip, it will redirect you to the customer accounts management table.
Otherwise, go to Apps > B2B/Wholesale Solution > Wholesale Registration Forms > Registration Management.
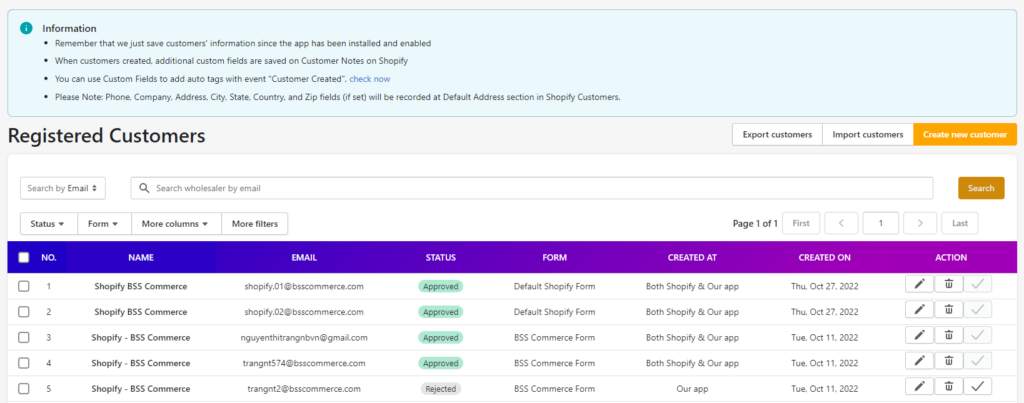
- The grid shows sections: No./Name/Email/Status/Form/Created At/ Created On/Action.
- No.: The Order number of your registered customers. Your newest registration will be marked as number 1.
- Name: Your registered customers' names.
- Status: The registered accounts will have three status: Approved, Rejected, and Pending.
- Form: The registration form your customer registered with. The edit fields will also change depends on which form your customer registered with.
- Created At: This show where the customer's information is currently saving in.
- Created On: The column shows which date did your customers first created the registries with our B2B registration forms.
- Action: Include the Pen, Bin and Approval icon
- Click on the Pen icon if you want to edit this account registration.
- Click on the Bin icon if you want to disable or delete this account registration. Once a customer has been approved, you can choose to disable this customer, delete this customer on Shopify, delete this customer on our app server, delete this customer on both.
- Click on the Approval icon if you want to approve this account to wholesaler account.
- The status will change from Approved to Rejected if you delete your registered customer solely on Shopify.
After clicking on the Pen icon, you will be redirected to a page that has customer information of questions that you created in the form. Click on Approve if you grant access to this registration or Reject if you don’t want this account to be created.
Note: If you cannot see any notification to Approve/Reject as in the image below, it could result from the registered email address already has an account. Please go to Shopify admin > Customers to check again.

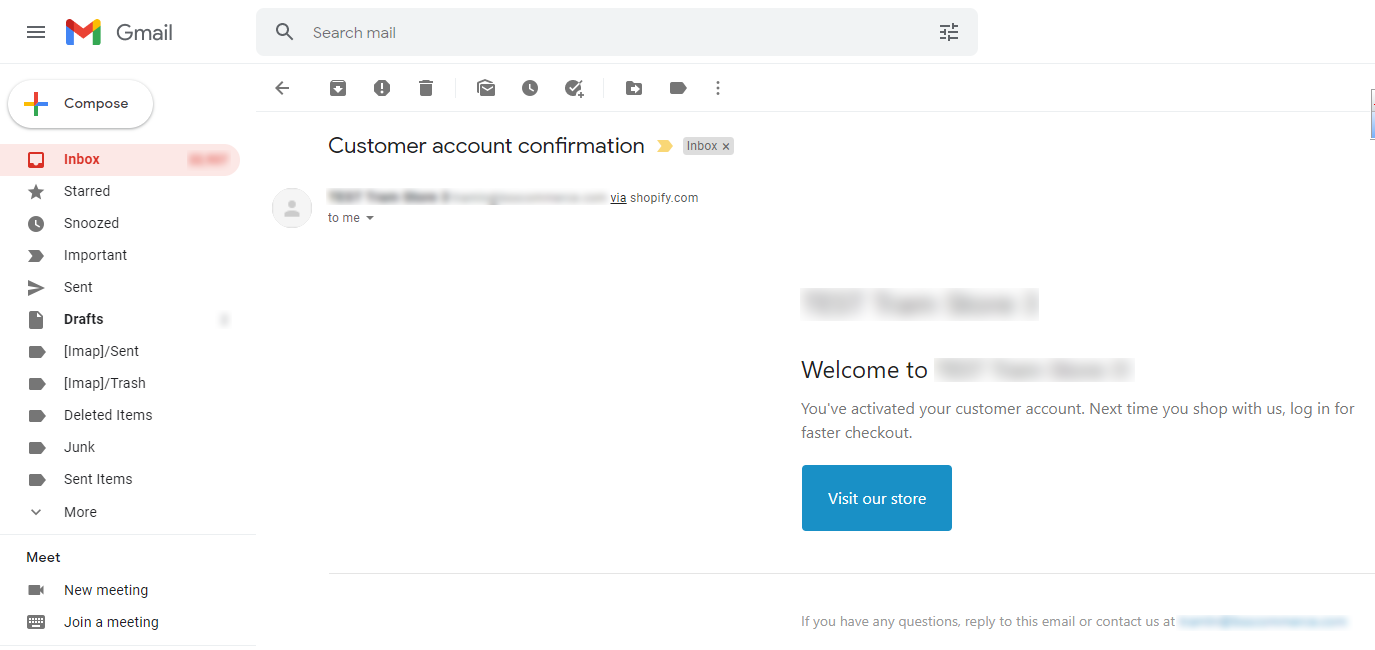
If you accept a customer registration, a confirmation email will be sent to the email address and they can set up their account from there.
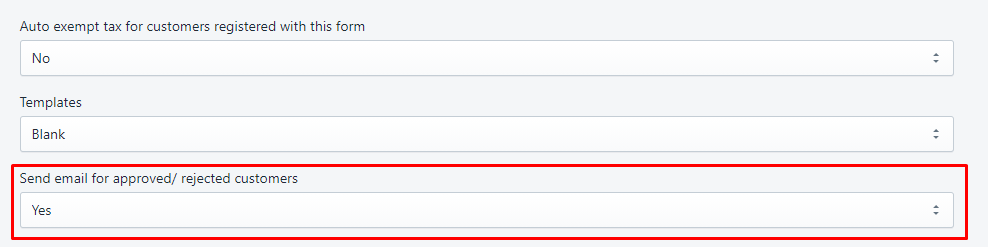
You can set if the customer will receive the rejected/approved emails or not within the registration form settings.
Go to Apps > B2B/Wholesale Solution > Wholesale Registration Forms > Forms. Create or Edit the rules > click Advanced Settings > set Send email for approved/rejected customers options.
Here is an example of our approved email. Of course, you can change the template of your email to suit your business needs, and we will show you how in the later sections:
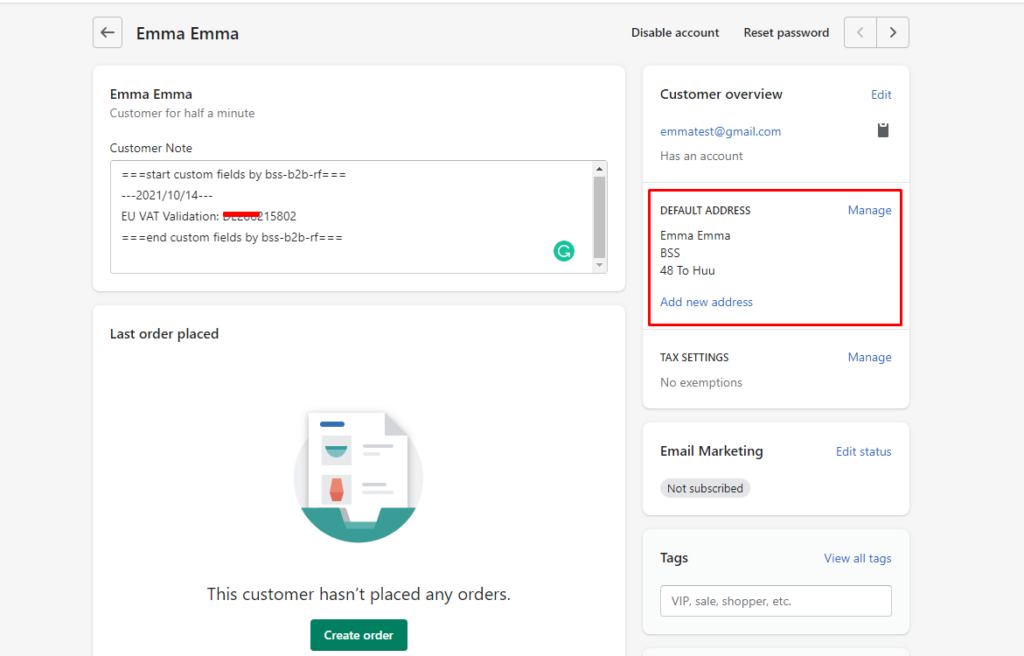
Our app allows when customers are created, additional custom fields are saved on Customer Notes to collaborate effectively with the Shopify Customers section.
When the admin clicks the Pen icon and change customer's registration details, Shopify's Customer Notes will also be updated and you can check them in Shopify admin > Customers.
Remember that we just save customers' information after the app has been installed and enabled, therefore, subscribe to our B2B/Wholesale Solution app as soon as possible!
Email notifications about new registrations
You can set up an email to your store email address to send notifications about new registrations. This email can help you act faster on managing your customers’ accounts and boost sales to your store.
You can also set the approved/rejected email to send to your registered wholesalers.
Under Email Configuration,
Enable the rule that you wish to set custom between You have a new register, Your account is approved, and Your account is rejected.
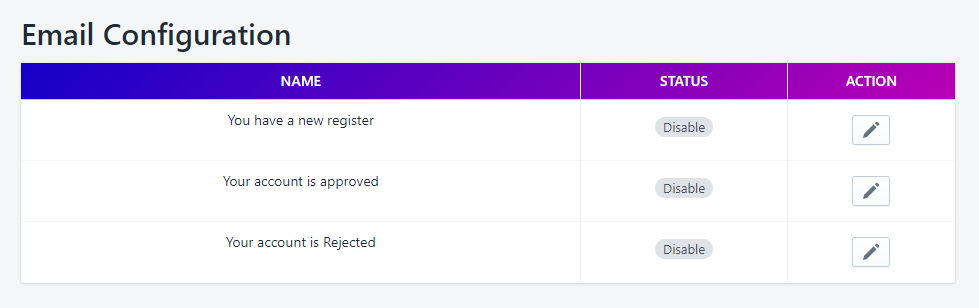
Under Send to, type in your email address to receive notifications of new registrations. The Send to field is only applicable to the new register email rule.
Under Email Subject and Email body (HTML), you can customize the message as you wish or keep our default message for each rule.
Click Save to activate the rules.
If you have any questions, please contact us via sales@bsscommerce.com for further assistance.