1. Overview
FREE Magento Social Login extension allows customers to quickly log in and
register on sites using their existing social accounts, such as Facebook,
Google, Twitter, LinkedIn, Yahoo and so on. They no longer have to fill in
a long registration form to create a new account and can now sign in on sites within a click.
2. How Does It Work?
2.1. General
Please go to System ⇒ Configuration ⇒ BSS EXTENSION ⇒ Social Connect.
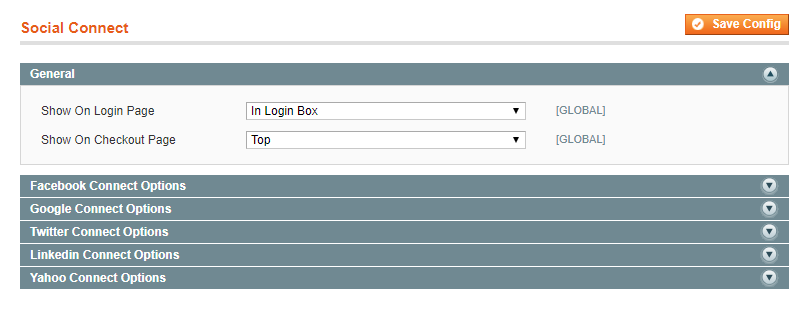
In Show On Login Page, choose a position of the social block on the login page: Top, or Bottom.
In Login Box, choose Disable if you don’t want to place the social block on the login page.
In Show On Checkout Page, choose a position of the social block on the checkout page: Top, Bottom. Choose Disable if you don’t want to place the social block on the checkout page.
2.2. Facebook Connect Options

In Enabled, choose Yes to enable Facebook login, or No to disable it.
In Application ID, enter Facebook application ID.
In Application Secret, enter Facebook application secret.
* Note: How to get Facebook APP ID & App Secret in 9 steps:
1. Access link https://developers.facebook.com/apps/?action=create
2. Add a new app

3. Click on Add a Product and set up Facebook Login
4. On the left, go to Settings tab under Product ⇒ Facebook Login.
- In Client OAuth Settings, set as follow:
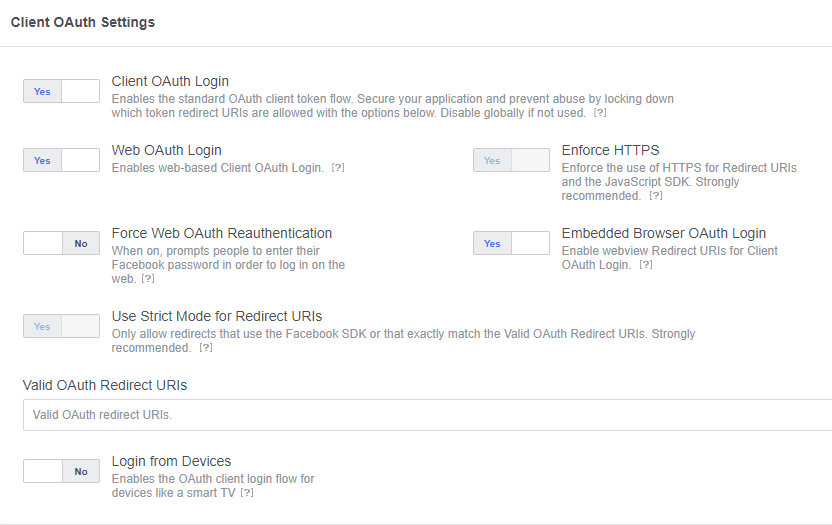
- In Valid OAuth Redirect URIs, fill in with website URL and Save
Changes.
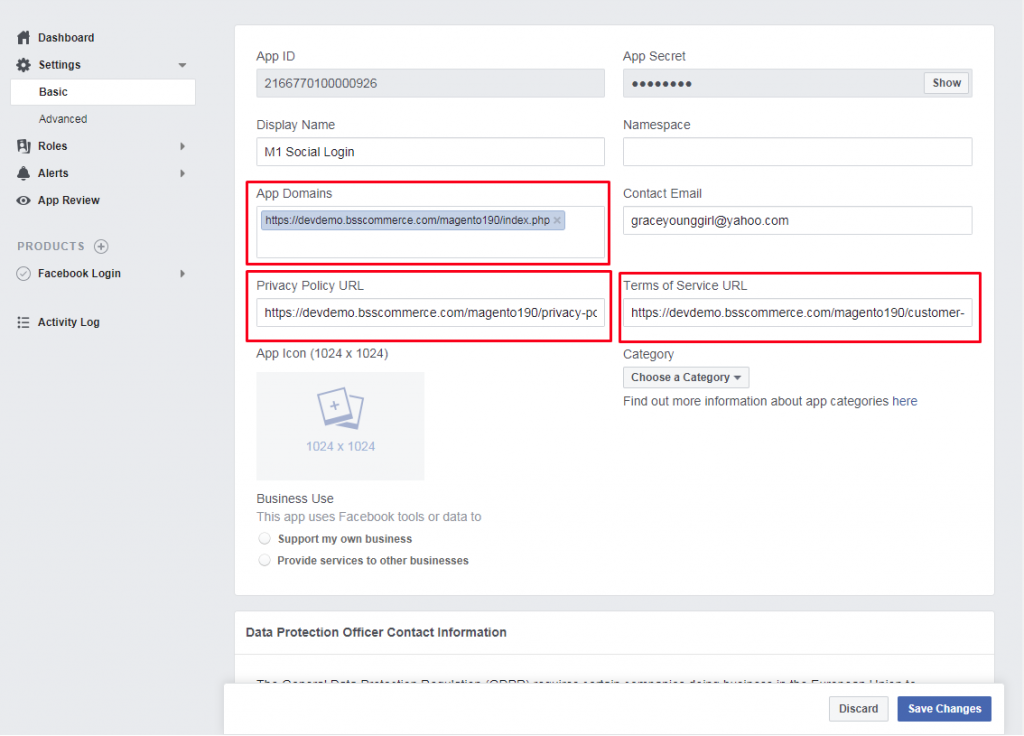
5. Go to Settings ⇒ Basic and fill in the field
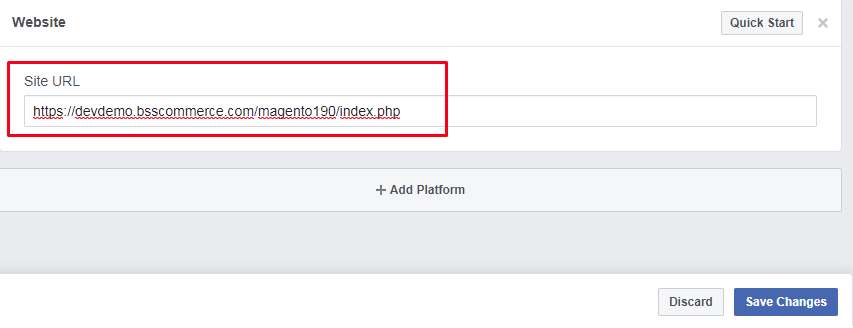
Scroll down to Add platform, please choose Website.
Fill in your Site URL and Save Changes.
6. Turn your app into Public Status:
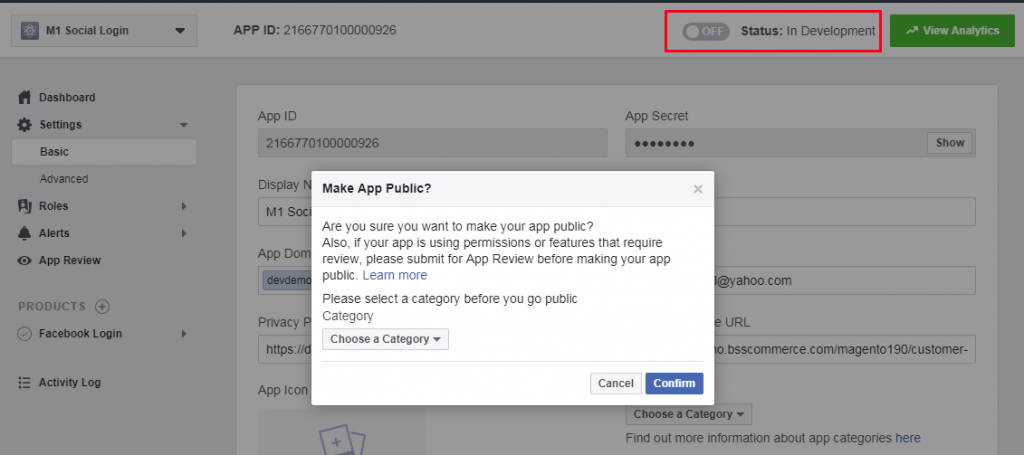
7. Copy App ID and App Secret and paste to Facebook Connect Options config as above.

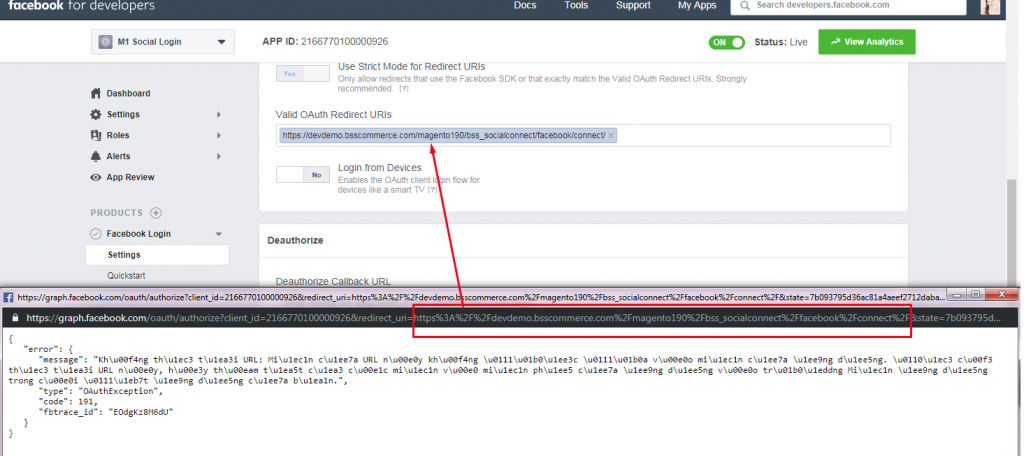
8. In case your Facebook popup display error; please use Redirect URI from this popup and paste this link into Valid OAuth Redirect URIs field at app set up:
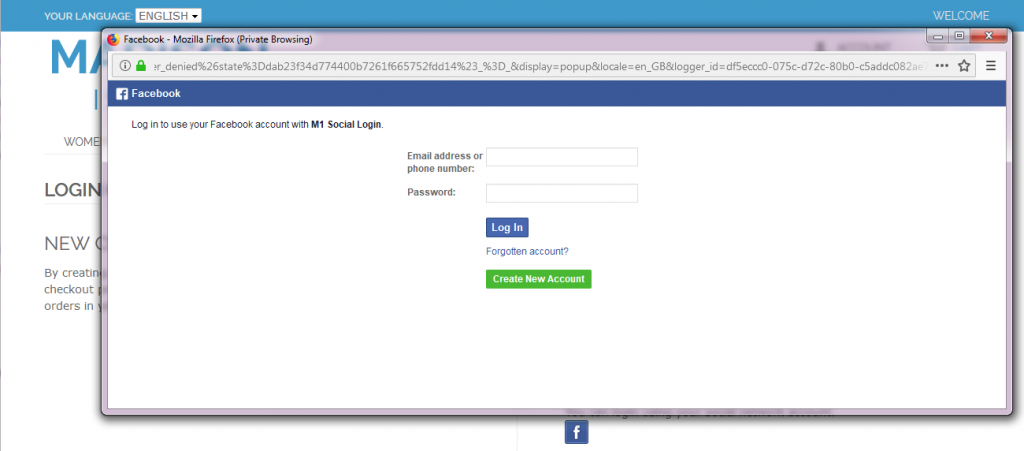
9. Check result from frontend
2.3. Google Connect Option

In Enabled, choose Yes to enable Google login, or No to disable it.
In Client ID, enter Google Client ID.
In Client Secret, enter Google Client Secret.
* Note: How to create Google Client ID & Client Secret in 8 steps:
1. Access link: https://cloud.google.com/console
2. Add New Project
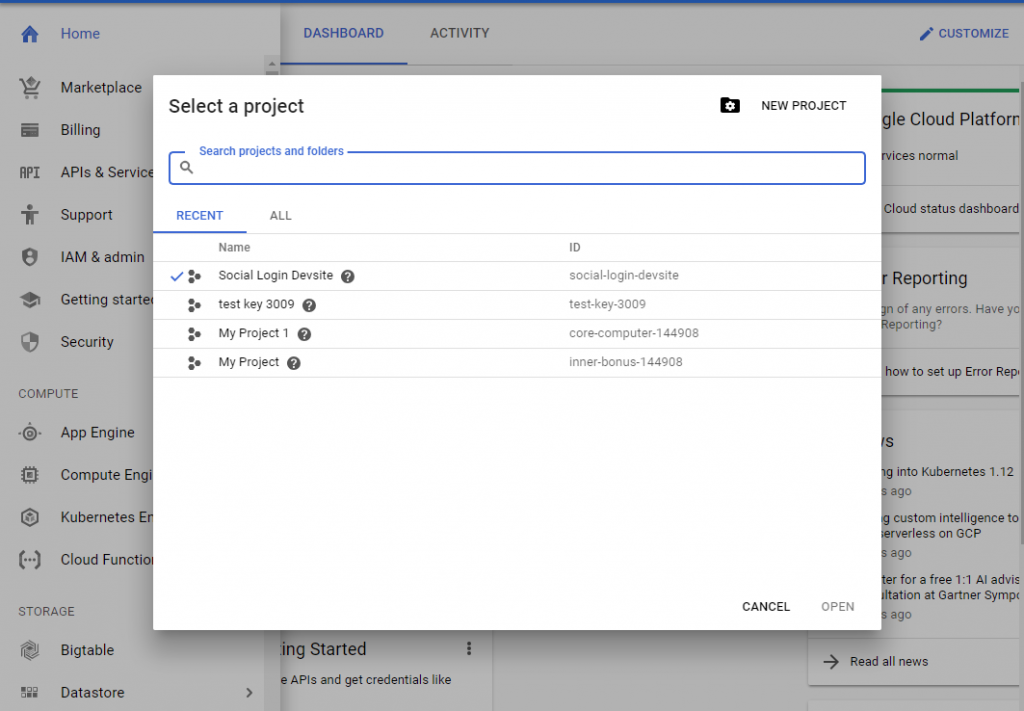
3. Open your Project
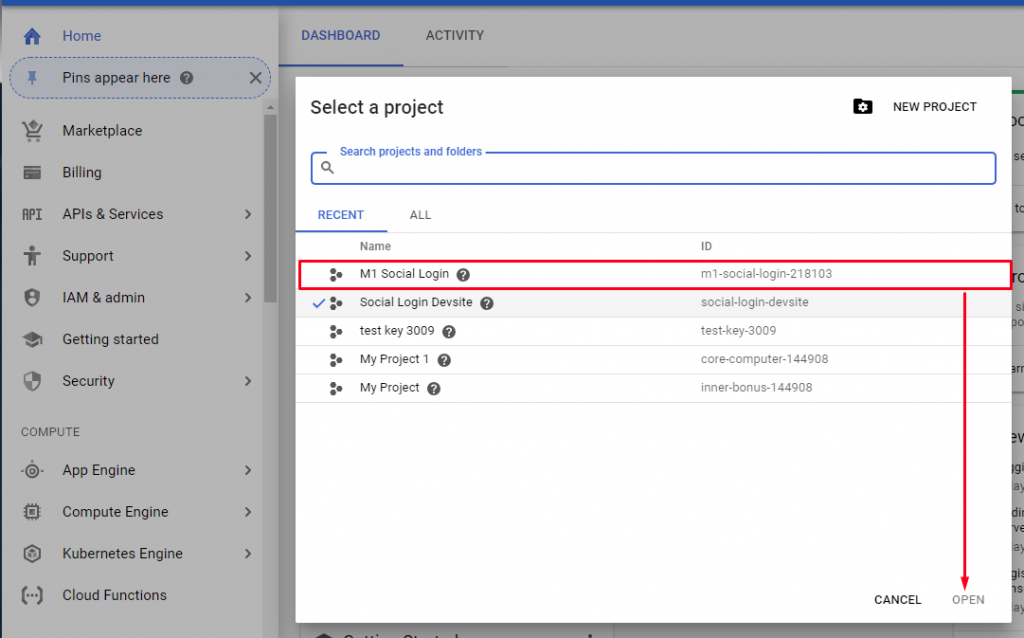
4. At the left panel, select Homes. Under APIs, click on Go to API overview.

5. Go to Credential tab under APIs & Services.
Navigate to OAuth consent screen and fill in the fields as below:
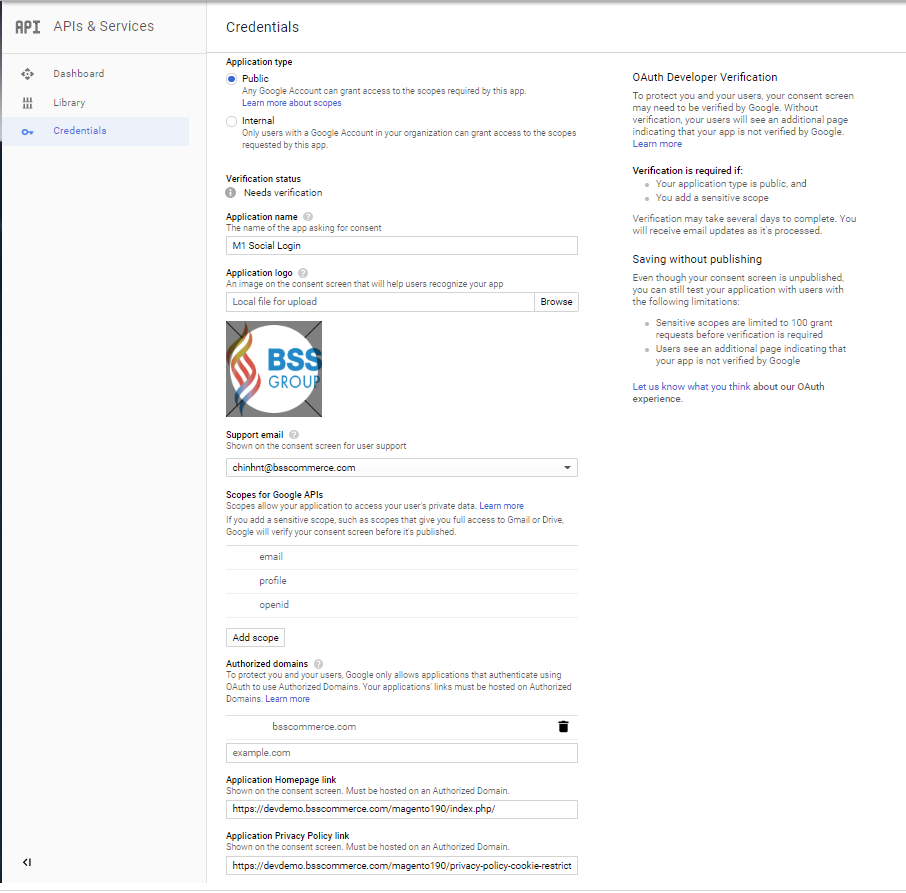
Turn to Credentials ⇒ Create credentials ⇒ OAuth client ID and
Create.
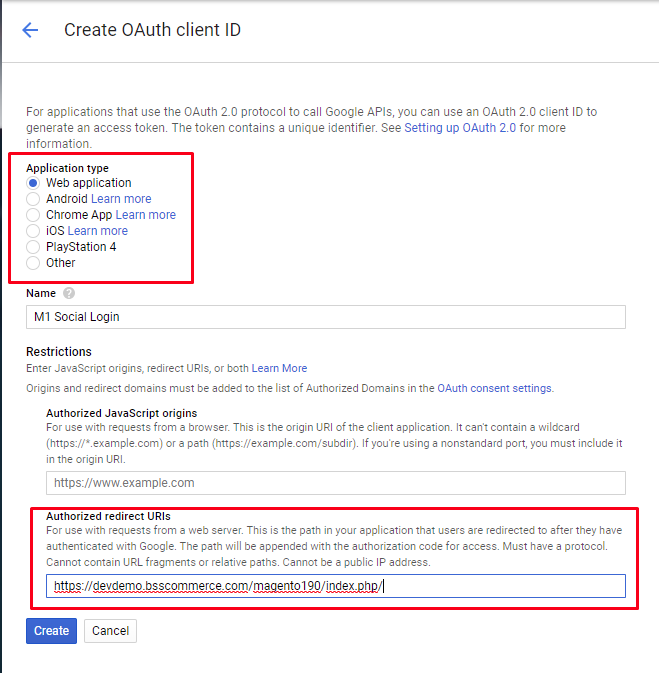
6. Copy and paste Client ID and Client Secret to Google Connect Options config

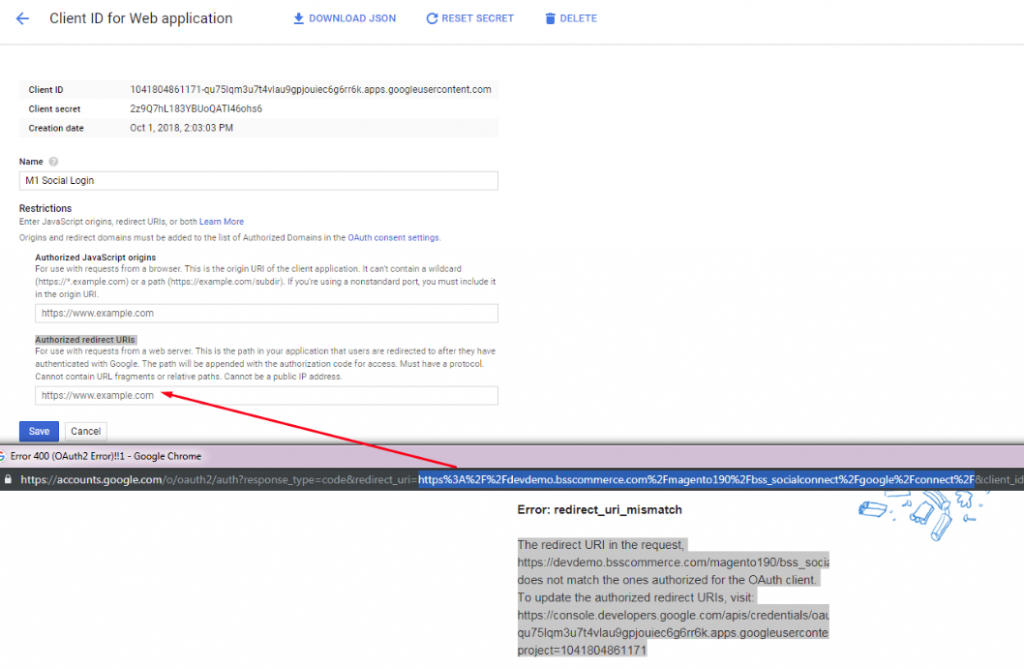
7. In case your Google popup display error, please use Redirect URI from this popup and paste this link into Authorized redirect URIs field at app set up:
8. Check result from frontend
2.4. Twitter Connect Options

In Enabled, choose Yes to enable Twitter login, or No to disable it.
In Consumer Key, enter Twitter Consumer Key.
In Consumer Secret, enter Twitter Consumer Secret.
2.5. LinkedIn Connect Options

In Enabled, choose Yes to enable LinkedIn login, or No to disable it.
In API Key, enter LinkedIn API Key.
In Secret Key, enter LinkedIn Secret Key.
2.6. Yahoo Connect Options

In Enabled, choose Yes to enable Yahoo login, or No to disable it.
In Consumer Key, enter Yahoo Consumer Key.
In Consumer Secret, enter Yahoo Consumer Secret.
